2019 MASERATI LEVANTE Liftgate
[x] Cancel search: LiftgatePage 151 of 436
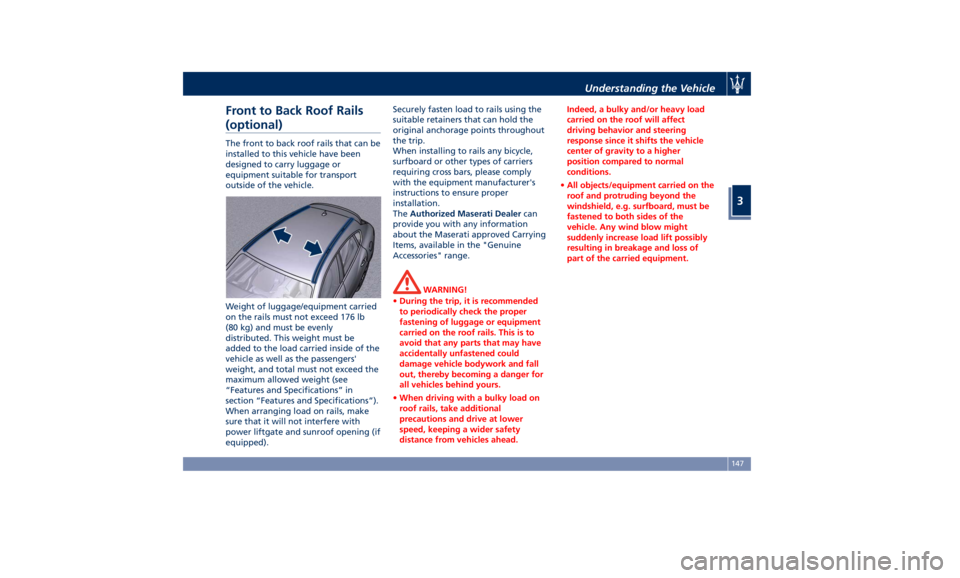
Front to Back Roof Rails
(optional) The front to back roof rails that can be
installed to this vehicle have been
designed to carry luggage or
equipment suitable for transport
outside of the vehicle.
Weight of luggage/equipment carried
on the rails must not exceed 176 lb
(80 kg) and must be evenly
distributed. This weight must be
added to the load carried inside of the
vehicle as well as the passengers'
weight, and total must not exceed the
maximum allowed weight (see
“Features and Specifications” in
section “Features and Specifications”).
When arranging load on rails, make
sure that it will not interfere with
power liftgate and sunroof opening (if
equipped). Securely fasten load to rails using the
suitable retainers that can hold the
original anchorage points throughout
the trip.
When installing to rails any bicycle,
surfboard or other types of carriers
requiring cross bars, please comply
with the equipment manufacturer's
instructions to ensure proper
installation.
The Authorized Maserati Dealer can
provide you with any information
about the Maserati approved Carrying
Items, available in the "Genuine
Accessories" range.
WARNING!
• During the trip, it is recommended
to periodically check the proper
fastening of luggage or equipment
carried on the roof rails. This is to
avoid that any parts that may have
accidentally unfastened could
damage vehicle bodywork and fall
out, thereby becoming a danger for
all vehicles behind yours.
• When driving with a bulky load on
roof rails, take additional
precautions and drive at lower
speed, keeping a wider safety
distance from vehicles ahead. Indeed, a bulky and/or heavy load
carried on the roof will affect
driving behavior and steering
response since it shifts the vehicle
center of gravity to a higher
position compared to normal
conditions.
• All objects/equipment carried on the
roof and protruding beyond the
windshield, e.g. surfboard, must be
fastened to both sides of the
vehicle. Any wind blow might
suddenly increase load lift possibly
resulting in breakage and loss of
part of the carried equipment.Understanding the Vehicle
3
147
Page 184 of 436

the hood (see “Maintenance
Procedures” in section “Maintenance
and Care”).
Electric Power Steering Failure
Warning Light
This warning light, and the
related message, illuminate
when the electric power
steering is not operating and
needs service.
If the warning light is on, steering
assistance may be not available.
WARNING!
After battery disconnection event, the
warning light may be on. In this case,
start the engine and perform a
steering wheel stroke end to end.
If the problem persists, contact an
Authorized
Maserati Dealer .
Catalyst Over Temperature Warning
Light
This warning light, and the
related message, light up if
the engine runs irregularly
with consequent high
temperature in the exhaust system. WARNING!
• If the warning light is accompanied
by the message “Catalyst Temp
Getting Hot Reduce Speed”: the
temperature of the catalytic
converters is too high. The driver
must slow down immediately until
the warning light turns off.
• If the message “Catalyst Temp Hot
Stop Safely Wait To Cool” appears
after decelerating: the temperature
in the catalytic converters has
reached a dangerous level and the
catalytic converters could be
damaged. Drive slowly to the
nearest Authorized Maserati Dealer.
• Maserati declines all responsibility
for whatever damage deriving from
non-compliance with the above
mentioned warnings.
Door Ajar Indicator
This
indicator illuminates
when one
or more doors are
ajar. The indicator will show
which door is ajar. When one
or more doors are open, a related
message will be displayed if the vehicle
is running at a speed of 5 mph (8
km/h) or faster. Liftgate and Hood Ajar Indicators
These light indicators will
illuminate to indicate that the
liftgate and/or the hood are
ajar.
When the liftgate or the hood
is open, a related message will
be displayed besides the light
if the vehicle is running at a speed of
5 mph (8 km/h) or faster.
Electronic Throttle Control (ETC)
Indicator
This indicator light indicates a
failure of the Electronic
Throttle Control (ETC) system.
If the indicator turns on while
driving (a torque decrease is possible),
have the system checked by an
Authorized Maserati Dealer .
When detecting a failure, the light
indicator will illuminate while the
engine is running.
If the indicator remains lit with the
engine running, you can still drive your
vehicle. However, contact an
Authorized Maserati Dealer as soon as
possible.
If the indicator is flashing while the
engine is running, immediate service is
required. You may experience reduced
performance, an elevated/rough idleDashboard Instruments and Controls
4
180
Page 207 of 436
D (Drive), front parking sensors are
NOT activated.
• Front ParkSense Volume
When this feature is selected, the
chime volume of front park assist
sensors can be set to “Low”,
“Medium” or “High” level.
“Medium” is the default setting.
The system will retain its last known
configuration state through ignition
cycles.
• Rear ParkSense Volume
When this feature is selected, the
chime volume of rear park assist
sensors can be set to “Low”,
“Medium” or “High” level.
“Medium” is the default setting.
The system will retain its last known
configuration state through ignition
cycles.
• Tilt Side Mirrors In Reverse
By selecting this feature the outside
side-view mirrors will tilt downward
when the ignition is in RUN position
and the transmission shift lever is in
R (Reverse) position. The mirrors will
move back to their previous
position when the transmission is
shifted out of R (Reverse). The
feature can be set to “On” or “Off”. • Auto Folding Side Mirrors
By selecting this feature the
rear-view mirrors automatically fold
when the vehicle is locked by the
key fob and when the power
liftgate (if equipped) is closed and
locked by pressing the
button on
the outer ledge of the left boot
compartment lining. When the
vehicle and the liftgate will be
unlocked and the ignition device is
set in RUN position, the rear-view
mirrors will automatically open in
the position they had before the
lock.
If the mirrors were manually folded
by the switch on the driver's door
panel, before a lock action, they will
need to be manually unfold to
reactivate the automatic behave.
• ParkView Backup Camera Delay
By selecting this feature, when the
shift lever is moved out of R
(Reverse), the rear view image with
dynamic grid lines will be displayed
for up to 10 seconds after shifting
unless the forward vehicle speed
exceeds 8 mph (12 km/h), or the
transmission is shifted into P (Park)
or the ignition device is switched to
the OFF position. The feature can be
set to “On” or “Off”. • Rain Sensing Auto Wipers
By selecting this feature, the system
will automatically activate the
windshield wipers if the rain sensor
senses moisture on the windshield.
The feature can be set to “On” or
“Off”.
• Hill Start Assist
This feature allows you to disable
the HSA system. The feature can be
set to “On” or “Off”. See “Brake
and Stability Control System” in
section “Driving” for further details.
Lights Press the “Lights” soft-key to set the
following modes.
• Headlight Off Delay
By selecting this feature, the driver
can choose to have the headlight
off or lit for 30, 60, or 90 seconds
when the engine is shut off. To
change the current headlight off
delay status, touch and release the
“0”, “30”, “60” or “90” soft-key to
select the desired time range.Dashboard Instruments and Controls
4
203
Page 209 of 436
horn will sound when the doors are
locked with the key fob RKE
transmitter. You can choose from
the following options: “Off” (no
sound), “1st Press” (sound on the
first press of the
button) and
“2nd Press” (sound on the second
press of the
button).
• Sound Horn with Remote Start
When this feature is selected, the
horn will sound when you use the
key fob RKE transmitter to start the
engine. The feature can be set to
“On” or “Off”. See “Remote Start
System” in section “Before Starting”
for further details.
• Remote Unlock Sequence
By selecting this feature you may set
up only the driver's door or all
doors mode will unlock on the first
press of the key fob RKE transmitter
button. When “Driver Door” is
selected, you must press the key fob
RKE transmitter
button twice to
unlock also the passenger's doors.
When unlocking “All Doors” by first
press selection mode, all doors will unlock on the first press of the key
fob RKE transmitter
button.
If the vehicle is programmed on “1st
Press of Key Fob Unlocks”:
• all doors will unlock no matter
which “Passive Entry” equipped
door handle is grasped;
• only the driver’s door will unlock
when the driver’s door is grasped;
• with “Passive Entry”, touching the
handle more than once will only
result in the driver’s door opening.
If driver door first is selected, once
the driver door is opened, the
interior door lock/unlock switch can
be used to unlock all doors (or use
key fob RKE transmitter).
• Passive Entry
This feature allows you to lock and
unlock the vehicle door(s) without
having to push the key fob RKE
transmitter
or buttons. By
selecting this feature, “Passive
Entry” may be set to “On” or “Off”.
The default status is “On”. With
“Passive Entry” deactivated, also the
“Pre-Short Drop” function is
disabled (for further information,
refer to “Bodywork Maintenance
and Care” in section “Maintenance
and Care”). • Personal Settings Linked to Key Fob
This selected mode enables to
combine the key fob to personal
driver’s position settings. These
settings will be implemented when
pressing the
button on the key
fob RKE transmitter with ignition
device in RUN position.
• Power Liftgate Alert
When this feature is available, if it
selected, further to turn indicators
flashing, an acoustic warning will
also be triggered when opening
and closing the liftgate and also
when the fully open position of the
liftgate is set by the user. The
feature can be set to “On” or “Off”.
• Hands Free Power Liftgate
To prevent the accidental opening
of the power liftgate/Hand free
(optional) with the movement of
the foot, it is possible to disable the
“Hand Free” function. The feature
can be set to “On” or “Off”. This
operation is recommended when
you have to wash the car (for
further information, refer to
“Power Liftgate Operation” in
section “Before Starting”).Dashboard Instruments and Controls
4
205
Page 263 of 436
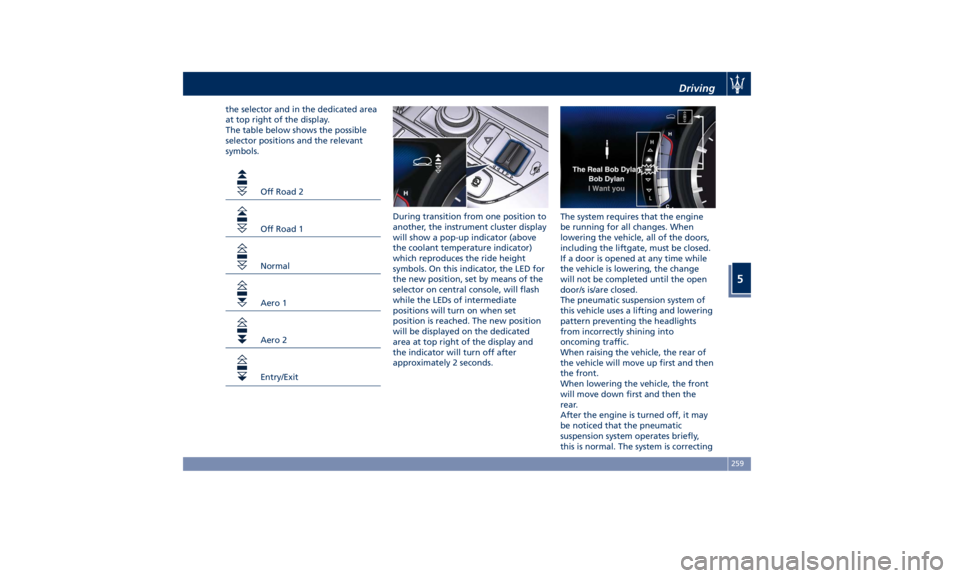
the selector and in the dedicated area
at top right of the display.
The table below shows the possible
selector positions and the relevant
symbols.
Off Road 2
Off Road 1
Normal
Aero 1
Aero 2
Entry/Exit During transition from one position to
another, the instrument cluster display
will show a pop-up indicator (above
the coolant temperature indicator)
which reproduces the ride height
symbols. On this indicator, the LED for
the new position, set by means of the
selector on central console, will flash
while the LEDs of intermediate
positions will turn on when set
position is reached. The new position
will be displayed on the dedicated
area at top right of the display and
the indicator will turn off after
approximately 2 seconds. The system requires that the engine
be running for all changes. When
lowering the vehicle, all of the doors,
including the liftgate, must be closed.
If a door is opened at any time while
the vehicle is lowering, the change
will not be completed until the open
door/s is/are closed.
The pneumatic suspension system of
this vehicle uses a lifting and lowering
pattern preventing the headlights
from incorrectly shining into
oncoming traffic.
When raising the vehicle, the rear of
the vehicle will move up first and then
the front.
When lowering the vehicle, the front
will move down first and then the
rear.
After the engine is turned off, it may
be noticed that the pneumatic
suspension system operates briefly,
this is normal. The system is correctingDriving
5
259
Page 264 of 436
the position of the vehicle with little
suspension movements to ensure a
proper appearance.
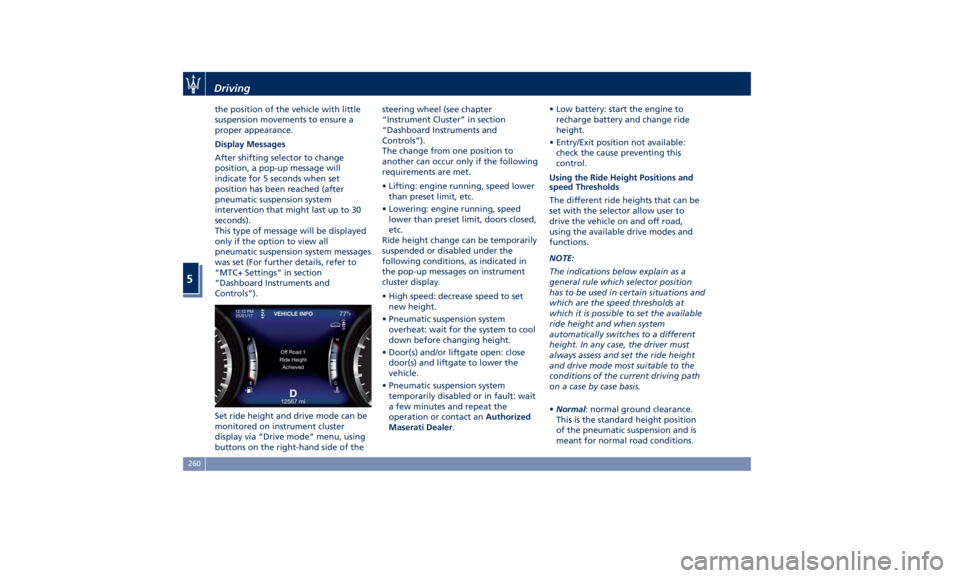
Display Messages
After shifting selector to change
position, a pop-up message will
indicate for 5 seconds when set
position has been reached (after
pneumatic suspension system
intervention that might last up to 30
seconds).
This type of message will be displayed
only if the option to view all
pneumatic suspension system messages
was set (For further details, refer to
“MTC+ Settings” in section
“Dashboard Instruments and
Controls”).
Set ride height and drive mode can be
monitored on instrument cluster
display via “Drive mode” menu, using
buttons on the right-hand side of the steering wheel (see chapter
“Instrument Cluster” in section
“Dashboard Instruments and
Controls”).
The change from one position to
another can occur only if the following
requirements are met.
• Lifting: engine running, speed lower
than preset limit, etc.
• Lowering: engine running, speed
lower than preset limit, doors closed,
etc.
Ride height change can be temporarily
suspended or disabled under the
following conditions, as indicated in
the pop-up messages on instrument
cluster display.
• High speed: decrease speed to set
new height.
• Pneumatic suspension system
overheat: wait for the system to cool
down before changing height.
• Door(s) and/or liftgate open: close
door(s) and liftgate to lower the
vehicle.
• Pneumatic suspension system
temporarily disabled or in fault: wait
a few minutes and repeat the
operation or contact an Authorized
Maserati Dealer . • Low battery: start the engine to
recharge battery and change ride
height.
• Entry/Exit position not available:
check the cause preventing this
control.
Using the Ride Height Positions and
speed Thresholds
The different ride heights that can be
set with the selector allow user to
drive the vehicle on and off road,
using the available drive modes and
functions.
NOTE:
The indications below explain as a
general rule which selector position
has to be used in certain situations and
which are the speed thresholds at
which it is possible to set the available
ride height and when system
automatically switches to a different
height. In any case, the driver must
always assess and set the ride height
and drive mode most suitable to the
conditions of the current driving path
on a case by case basis.
• Normal : normal ground clearance.
This is the standard height position
of the pneumatic suspension and is
meant for normal road conditions.Driving
5
260
Page 266 of 436

“NORMAL”, “SPORT ”, “
(Suspension)“ or “I.C.E.” After
selecting this height, once the vehicle
speed goes below 15 mph (24 km/h),
the vehicle height will begin to
lower. To exit “Entry/Exit” mode,
move selector to another position or
drive the vehicle over 15 mph (24
km/h). Automatic lowering of the
vehicle into “Entry/Exit” mode can be
enabled through the MTC+ (refer to
“MTC+ Settings” in section
“Dashboard Instruments and
Controls”). If this feature is enabled,
the vehicle will only lower if the
gearshift lever is in P (Park), the
engine is running, doors and liftgate
are closed and the Pneumatic
Suspension System should be either
in “NORMAL” or “Aero”. The Vehicle
will not automatically lower if the
pneumatic suspension system is in
“Off Road 2” or “Off Road 1” mode.
The lowering will be suppressed
when the ignition is switched off and
a door is opened to prevent setting
the alarm off.
Lowering Vehicle Height for Inactivity
Lowering of vehicle ground clearance
after a long period of inactivity should
be considered normal since it is due to a drop of pressure in the pneumatic
suspension system.
Approximately, after one week of
inactivity, vehicle ground clearance will
lower by 0.4 in (10 mm). To set off the
drop of pressure due to inactivity, it is
necessary to start the engine and allow
some time until system reaches
operating pressure and lifts the vehicle
to set ride height. A message on
instrument cluster display will warn
driver when set ride height is reached.
Driving vehicle before the set riding
height is reached is not safe and could
damage suspension components.
WARNING!
After a long period of vehicle
inactivity, drive only when vehicle
reaches set ride height to prevent any
problems of the pneumatic suspension system from limiting occupants'
safety.
"Launch Control" Mode
(TROFEO version only) "Launch Control" mode is a
performance start procedure.
By activating this procedure you get
the best possible acceleration from
standstill of the car.
This mode allows you to ground the
torque necessary to prevent the
wheels from slipping during
acceleration performance.
To make a performance start in
"Launch Control" mode, the following
conditions must be met:
• Water and transmission temperature
in proper range.
• No engine, AWD and on board
systems faults.
• The vehicle must be traveled at least
440 mi (700 km).
• "CORSA" drive mode on.
• Shift lever in "D" or"M +/-" position.
• The vehicle must be stationary on a
level road surface.
• The driver door closed and the safety
belt fastened.Driving
5
262
Page 342 of 436
Fuel Filler Cap Open Warning
Light After refueling the car
performs a check of the fuel
filler cap and the amber
warning light on the TFT
display comes on if it is not correctly
closed, after approximately 10 minutes
also depending on driving conditions.
If the problem is in the fuel system, the
Malfunction Indicator Light
also
comes on.
If the fuel filler cap is locked and the
issue remains in the system, at the next
engine start only the Malfunction
Indicator Light
comes on. In this
case, contact an Authorized Maserati
Dealer .
Emergency Fuel Filler Door
Release If you are unable to unlock the fuel
filler door using the key fob RKE
transmitter, use the fuel filler door
emergency release located in the
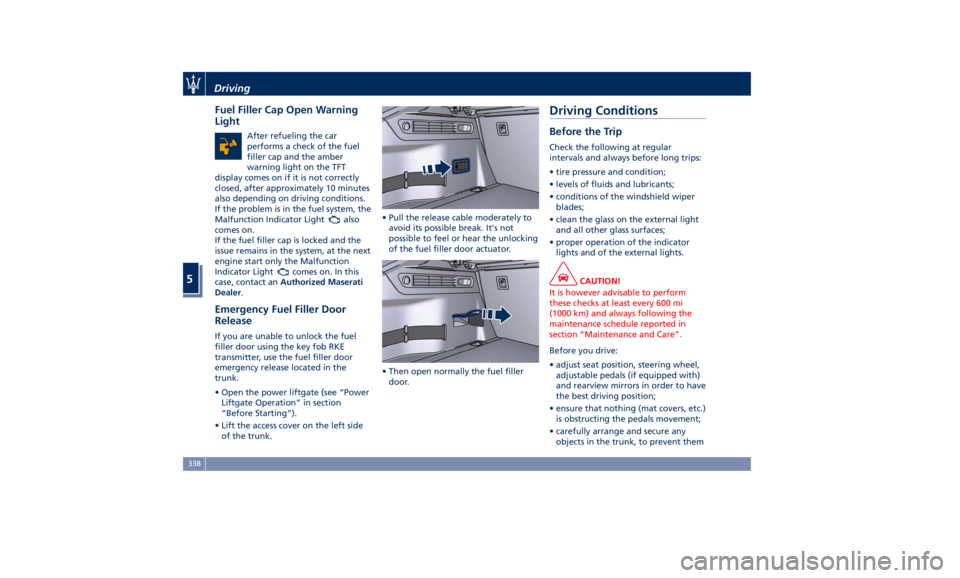
trunk.
• Open the power liftgate (see “Power
Liftgate Operation” in section
“Before Starting”).
• Lift the access cover on the left side
of the trunk. • Pull the release cable moderately to
avoid its possible break. It's not
possible to feel or hear the unlocking
of the fuel filler door actuator.
• Then open normally the fuel filler
door.Driving Conditions Before the Trip Check the following at regular
intervals and always before long trips:
• tire pressure and condition;
• levels of fluids and lubricants;
• conditions of the windshield wiper
blades;
• clean the glass on the external light
and all other glass surfaces;
• proper operation of the indicator
lights and of the external lights.
CAUTION!
It is however advisable to perform
these checks at least every 600 mi
(1000 km) and always following the
maintenance schedule reported in
section “Maintenance and Care”.
Before you drive:
•
adjust seat position, steering wheel,
adjustable pedals (if equipped with)
and rearview mirrors in order to have
the best driving position;
• ensure that nothing (mat covers, etc.)
is obstructing the pedals movement;
• carefully arrange and secure any
objects in the trunk, to prevent themDriving
5
338