2019 MASERATI LEVANTE warning
[x] Cancel search: warningPage 42 of 436

The message on the instrument cluster
stays active as long as the ignition
switch is in RUN position.
To enter Remote Start Mode NOTE:
On some versions, the remote start
button on the key fob RKE
transmitter is replaced by the
button.
Press and release the button
on the
key fob RKE transmitter twice within
five seconds. The vehicle doors will
lock, position lights will flash and the
horn will ring twice (if this function is
set using the MTC+ System, refer to
“MTC+ Settings” in section
“Dashboard Instruments and
Controls”). Then, the engine will start
and the vehicle will remain in the
“Remote Start” mode for a 15-minute
cycle.
WARNING!
California Proposition 65
Operating, servicing and maintaining
a passenger vehicle or off-road vehicle
can expose you to chemicals including
such as, engine exhaust, carbon
monoxide, phthalates and lead, that which are known to the State of
California to cause cancer and birth
defects or other reproductive harm. To
minimize exposure, avoid breathing
exhaust, do not idle the engine except
as necessary, service your vehicle in a
well-ventilated area and wear gloves
or wash your hands frequently when
servicing your vehicle. For more
information go to:
www.P65Warnings.ca.gov/passenger-
vehicle
NOTE:
• In
case of an engine fault or low fuel
level, the vehicle will start and then
shut down in 10 seconds.
• The position lights will turn on and
remain lighted up during “Remote
Start” mode.
• For security reasons, power window
and power sunroof operation (if equipped) are disabled when the
vehicle is in the “Remote Start”
mode.
• The engine can be started two
consecutive times (two 15-minute
cycles) with the key fob RKE
transmitter. However, the ignition
must be cycled to the RUN position
before you can repeat the start
sequence for a third cycle.
To exit Remote Start Mode
without Driving the Vehicle Press and release the button one
time or allow the engine to run for the
entire 15-minute cycle.
NOTE:
To avoid unintentional shutdowns, the
system will disable the one time press
of the button
for two seconds after
receiving a valid “Remote Start”
request.
To exit Remote Start Mode and
Drive the Vehicle Before the end of the 15-minute cycle,
press and release the button
on the
key fob RKE transmitter to unlock the
doors and disarm the vehicle security
alarm. Then, prior to the end of theBefore Starting
2
38
Page 43 of 436

15-minute cycle, press and release the
START/STOP button.
NOTE:
The message “Remote Start Active
Push Start Button” will display in the
instrument cluster until you push the
START/STOP button.
Auto-On Comfort with Remote
Start The driver's heated and ventilated
seat and the heated steering wheel (if
equipped) can be programmed to
come on during a remote start. Refer
to “Auto-On Comfort & Remote Start”
function in chapter “MTC+ Settings”,
section “Dashboard Instruments and
Controls”, for further information.
Radio Frequency RKE
Transmitter - Regulatory
Information The “Regulatory Information” for all
the radio frequency and radar devices
can be consulted by accessing the
"Services" section on the website
www.maserati.com. Doors Locking WARNING!
• For personal security and safety lock
the vehicle doors before you drive
as well as when parking and leaving
the vehicle unattended.
• When leaving the vehicle, always
remove the key fob RKE transmitter
and lock your vehicle.
• Never leave children alone in a
vehicle, or with access to an
unlocked vehicle.
• Do not allow children to be in a
vehicle unattended. A child or
others could be seriously or fatally
injured. Children must not touch the
parking brake trigger, brake pedal or
the shift lever.
• Do not leave the key fob in or near
the vehicle, and do not leave
ignition switch in the ACC or RUN
mode.
Doors Manual Lock To lock each door, push the door lock
knob on each door trim panel
downward. To unlock the front doors, pull the
inside door handle to the first detent.
To unlock the rear doors, pull the door
lock knob on the door trim panel
upward.
If the door lock knob is down when
you shut the door, the door will lock.
Therefore, make sure the key fob RKE
transmitter is not inside the vehicle
before closing the door.Before Starting
2
39
Page 45 of 436

Child-Protection Door Lock
System — Rear Doors To provide a safer environment for
small children sitting in the rear seats,
the rear doors are equipped with a
child-protection door lock system.
Engage or Disengage the
Child-Protection Door Lock
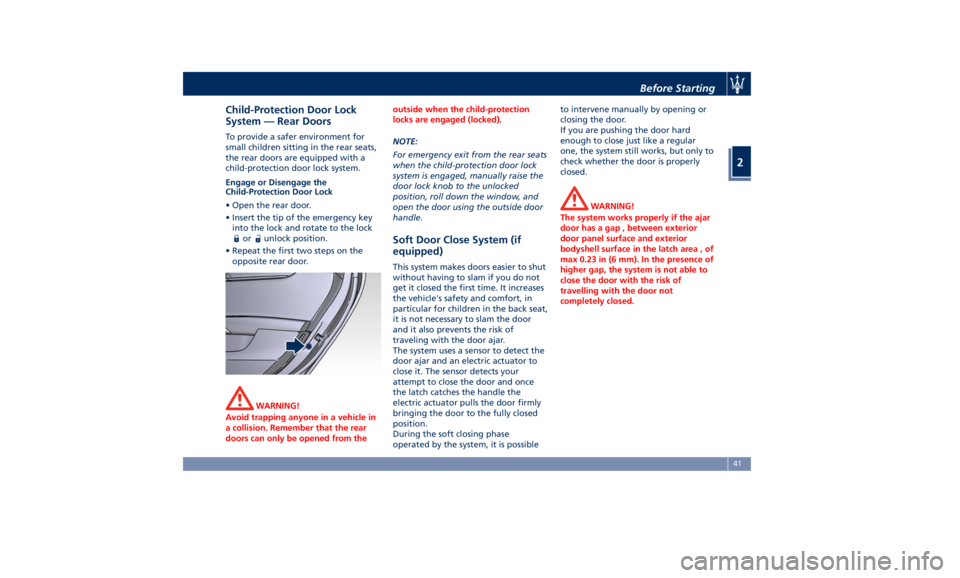
• Open the rear door.
• Insert the tip of the emergency key
into the lock and rotate to the lock
or unlock position.
• Repeat the first two steps on the
opposite rear door.
WARNING!
Avoid trapping anyone in a vehicle in
a collision. Remember that the rear
doors can only be opened from the outside when the child-protection
locks are engaged (locked).
NOTE:
For
emergency exit from the rear seats
when the child-protection door lock
system is engaged, manually raise the
door lock knob to the unlocked
position, roll down the window, and
open the door using the outside door
handle.
Soft Door Close System (if
equipped) This system makes doors easier to shut
without having to slam if you do not
get it closed the first time. It increases
the vehicle's safety and comfort, in
particular for children in the back seat,
it is not necessary to slam the door
and it also prevents the risk of
traveling with the door ajar.
The system uses a sensor to detect the
door ajar and an electric actuator to
close it. The sensor detects your
attempt to close the door and once
the latch catches the handle the
electric actuator pulls the door firmly
bringing the door to the fully closed
position.
During the soft closing phase
operated by the system, it is possible to intervene manually by opening or
closing the door.
If you are pushing the door hard
enough to close just like a regular
one, the system still works, but only to
check whether the door is properly
closed.
WARNING!
The system works properly if the ajar
door has a gap , between exterior
door panel surface and exterior
bodyshell surface in the latch area , of
max 0.23 in (6 mm). In the presence of
higher gap, the system is not able to
close the door with the risk of
travelling with the door not
completely closed.Before Starting
2
41
Page 50 of 436

Power Windows The window controls on the driver's
door panel govern all the door
windows.
There are single window controls on
each passenger door trim panel, which
operate the corresponding window.
The window controls will operate only
when the ignition switch is in the ACC
or RUN position. NOTE:
• The power window switches will
remain active for up to 10 minutes
after the ignition switch is turned to
the OFF position. Opening either
front door will cancel this feature.
The time lapse can be set. See “MTC+
Settings” in section “Dashboard
Instruments and Controls” for
further information.
• Frequent activations of the power
windows could result in a temporary
lock out of the motors. In this case,
wait a moment before a new
activation.
WARNING!
Improper use of the power windows
and the sunroof (if equipped) can
however be dangerous, even with the
anti-pinch prevention system. Before
and during activation of the power
window, always check that the
passengers are not exposed to the risk
of injury both by the moving window
and by personal objects that could be
dragged or hit by it. Do not leave
unattended children in a vehicle with
a key fob RKE transmitter inside.
When getting out the vehicle, always
remove the key fob RKE transmitter to prevent the windows being
accidentally activated, posing a risk to
passengers remaining onboard.
Auto-Down Feature The driver door power window switch
and some model passenger door
power window switches have an
auto-down feature.
Press the window switch to the second
detent, release, and the window will
go completely down automatically.
To open the window part way, press
the window switch to the first detent
and release it when you want the
window to stop.
To stop the window from going all the
way down during the auto-down
operation, pull up on the switch
briefly.
Auto-Up Feature with
Anti-Pinch Protection Lift the window switch to the second
detent, release, and the window will
go all the way up automatically.
To stop the window from going all the
way up during the auto-up operation,
push down on the switch briefly.
To close the window part way, lift the
window switch to the first detent andBefore Starting
2
46
Page 51 of 436

release it when you want the window
to stop.
NOTE:
• If the window runs into any obstacle
during auto-closure, it will reverse
direction and then go back down.
Remove the obstacle and use the
window switch again to close the
window.
• Any impact due to rough road
conditions may trigger the auto
reverse function unexpectedly
during auto-closure. If this happens,
pull the switch lightly to the first
detent and hold to close the window
manually.
• Frequent activations of the
anti-pinch function could disable the
auto-down and auto-up function of
the windows. In order to re-activate
this function proceed with a reset
cycle as described in the next
paragraph.
WARNING!
There is no anti-pinch protection
when the window is almost closed. Be
sure to clear all objects from the area
before closing the window. Reset Auto-Up/Down Should the auto-up/down feature stop
working, the window probably needs
to be reset.
To reset auto-up/down, pull the
window switch up to close the
window completely and push the
window switch down to open the
window completely.
Open the Windows with RKE
Transmitter and Ignition Off When the ignition switch is in OFF
position, windows can be opened by
pressing the
button on the RKE
transmitter.
• Press the button and release it;
• Press a second time the
button
and keep it pressed until complete
opening of the windows, if they
were closed.
Rear Window and Sunshade
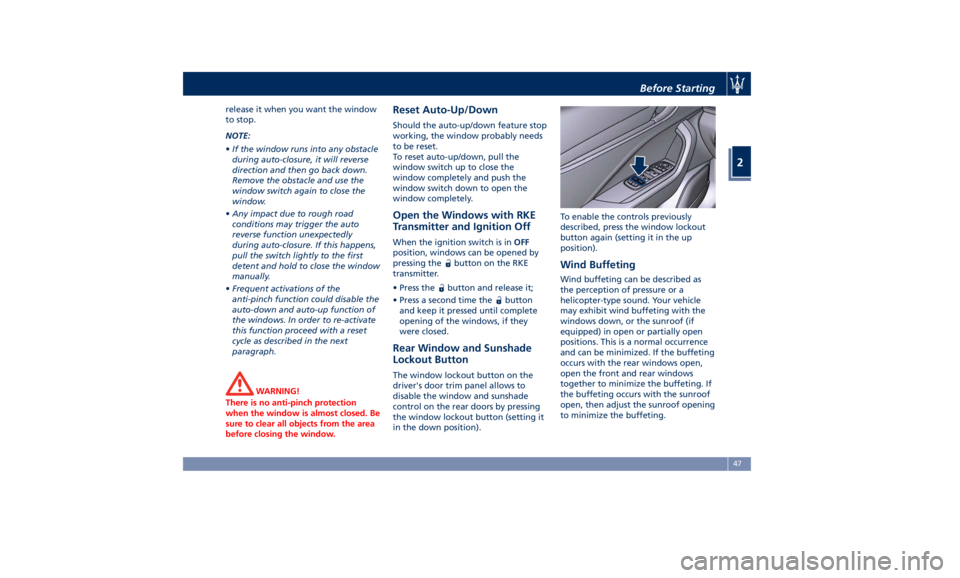
Lockout Button The window lockout button on the
driver's door trim panel allows to
disable the window and sunshade
control on the rear doors by pressing
the window lockout button (setting it
in the down position). To enable the controls previously
described, press the window lockout
button again (setting it in the up
position).
Wind Buffeting Wind buffeting can be described as
the perception of pressure or a
helicopter-type sound. Your vehicle
may exhibit wind buffeting with the
windows down, or the sunroof (if
equipped) in open or partially open
positions. This is a normal occurrence
and can be minimized. If the buffeting
occurs with the rear windows open,
open the front and rear windows
together to minimize the buffeting. If
the buffeting occurs with the sunroof
open, then adjust the sunroof opening
to minimize the buffeting.Before Starting
2
47
Page 52 of 436

Power Sunshades on Rear
Door Windows (for
versions/markets, where
provided) NOTE:
• On vehicles provided with power
sunshades on the rear windows, the
window switches also operate the
sunshades.
• The rear windows lock button
operates the rear power sunshades
as well.
• The window and sunshades controls
will operate only if the ignition
switch is in ACC or RUN position.
Operation of the rear windows and
related sunshades is done by pressing
or pulling the window switch and
depends on the position of the
windows prior to the command
operation.
As described for the opening and
closing functions of the power
windows (see chapter “Power
Windows” in this section), the
windows switch has two functioning
modes: press and release the switch to
the first detent to partially move the
window; press and release the switch to the second detent to move the
window all the way up or down.
Operations WARNING!
Rear seat passengers must be careful
when operating the sunshades, since
there is the risk of being pinched
between the top of the sunshade and
the head lining, during raising, and
between the top edge of the
sunshade and the door panel, during
lowering.
CAUTION!
Before activating the sunshade, make
sure that no objects can interfere with
its travel.
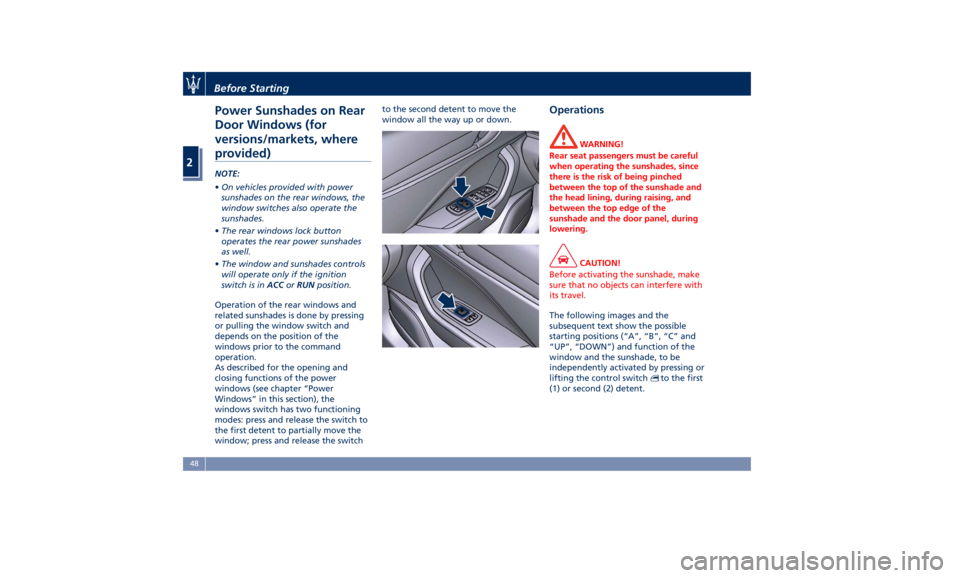
The following images and the
subsequent
text show the
possible
starting positions (“A”, “B”, “C” and
“UP”, “DOWN”) and function of the
window and the sunshade, to be
independently activated by pressing or
lifting the control switch
to the first
(1) or second (2) detent.Before Starting
2
48
Page 57 of 436

• The power liftgate does not work
with temperatures lower than −22°F
(−30°C) or higher than 150°F (65°C).
• If the opening buttons or the
handles are operated while the
power liftgate is closing, the stroke
of liftgate stops. Pressing another
time the same command it reverses
movement and fully open.
• If the opening buttons or the
handles are operated while the
power liftgate is opening, the motor
of the liftgate is disabled to allow
manual operation.
• If the power liftgate finds several
obstacles during the same operating
cycle, it will stop automatically and
must be opened or closed manually.
• If the power liftgate is closing and a
gear is engaged, the liftgate will
continue closing. In this condition, it
is possible that, during the closing
stroke, it may find an obstacle and
stop.
WARNING!
If, for any reason, the power liftgate
must remain open while driving, close
all the windows and activate the
blower of the air conditioning control at the maximum speed. Do not
activate recirculation.
Set the Position of Maximum Power
Liftgate
Opening
The maximum opening
position of the
liftgate can be modified using the
previously described buttons on the
outer left edge of the trunk
compartment.
1. Activate the liftgate and stop it in
the new maximum opening
position to be set, by pressing the
upper
button.
2. Press the upper
or lower
buttons and keep it pressed for 3
seconds.
3. Release the button (pressed in the
previous point). Upon the following
opening controls, the liftgate will
stop in the stored position.
If you want to reset the maximum
possible opening position of the
liftgate, proceed as described below
starting from the previously set
opening position.
1. Manually push the liftgate to the
maximum possible opening
position.
2. Repeat the previously performed
steps 2 and 3. Power Liftgate Automatic Safe
Movement
Power liftgate safe opening and
closing is ensured by a protection
system able to stop its movement
when an obstacle is detected along
the path: when opening or closing, it
stops automatically and then slightly
moves back.
Along the upper outer edges, the
vehicle is equipped with anti-pinch
protection sensors. These sensors stop
the automatic closing stroke and
partly open the power liftgate when a
pressure is carried out, also slight,
within their range shown in the
figure.
After the closing command, when
power liftgate starts closing, all the
indicators will blink to warn anyone
within range.Before Starting
2
53
Page 58 of 436

Apart from activating indicators
blinking when power liftgate is
operated, it is also possible to activate
a sound warning by selecting the
relevant function within MTC+ user
settings (see “MTC+ Settings” in
section “Dashboard Instruments and
Controls”).
When power liftgate edge reaches the
car body, the motor locking the latch is
activated automatically.
If necessary, the power liftgate can
also be opened or closed manually
using the handles indicated in the
picture. This operation could be
required when the liftgate remains
open for a long period of time. NOTE:
Frequent activations of the anti-pinch
protection function may disable the
automatic movement of the power
liftgate. To reactivate this function,
perform a reset cycle by carrying out a
complete opening/closing sequence,
after manually closing the power
liftgate.
WARNING!
• Activate power liftgate only when
vehicle is at a standstill.
• Always pay utmost attention when
opening and closing the tailgate. If
for any reason the protection system
might fail to respond, it could cause
injury to anyone within the
operating area.
• After the closing command, always
make sure that power liftgate is
completely closed.
CAUTION!
• Under extreme weather conditions,
liftgate seal could freeze and
compromise power liftgate
automatic opening and closing. • Before opening power liftgate, make
sure that no objects or snow are set
on liftgate or might jam or prevent
its opening.
Hands Free Power Liftgate Release
and Closing
This mode is
controlled by the “Passive
Entry” system (see paragraph “Passive
Entry System” in this section), which
automatically releases and closes the
power liftgate when you place your
foot in the area under the rear
bumper.
The system will only operate if the
system acknowledges the presence of
the key fob RKE transmitter within 3.3
ft (1 m) of the power liftgate.
The range of the sensors that detect
your foot movement extends along
and underneath the central portion of
the rear bumper.
To activate the power liftgate, stand
behind the vehicle, near the liftgate,
and move your foot under the bumper
as if to kick something. Do not place
your foot too close to the bumper or
touch the underbody.
WARNING!
• Pay careful attention to the exhaustBefore Starting
2
54