2019 MASERATI LEVANTE sunroof
[x] Cancel search: sunroofPage 29 of 436

Key fob This vehicle is provided with two
programmed key fobs.
The key fob contains a Remote Keyless
Entry (RKE) transmitter and an
emergency key.
The emergency key allows you to
open the vehicle by inserting into the
lock of the opening handle on the
driver's door, in case the battery of the
vehicle or the key fob go dead. You can keep the emergency key with
you when using valet parking.
To remove the emergency key:
• hold the mechanical latch on the
back of the key fob sideways;
• simultaneously remove the
emergency key by sliding laterally
towards the end of the key fob.
NOTE:
You can insert either side of the
emergency key into the lock cylinder.
Shift Ignition Device to OFF
Alert Opening the driver's door to exit the
vehicle when the ignition device is set
in ACC or RUN (engine not running), a
beep will remind you to cycle the
ignition to OFF . In addition to the acoustic signal a
dedicated message is displayed on the
instrument cluster.
If the ignition device is left in the ACC
or RUN position, when vehicle is
locked the system will turn off the
instrument cluster and automatically
set ignition device to OFF .
With the MTC+ System, the power
window switches, radio, power
sunroof (optional), and power outlets
will remain active for up to 10 minutes
after the ignition switch is cycled to
the OFF position. Opening either front
door will cancel this feature, it is
possible to set the timing of this
feature.
NOTE:
Refer to “MTC+ Settings” in Section
“Dashboard Instruments and
Controls” for further information.
WARNING!
• When leaving the vehicle, always
remove the key fob and lock your
vehicle.
• Do not allow children to be in a
vehicle unattended or with access to
an unlocked vehicle. A child or
(Continued)Before Starting
2
25
Page 42 of 436

The message on the instrument cluster
stays active as long as the ignition
switch is in RUN position.
To enter Remote Start Mode NOTE:
On some versions, the remote start
button on the key fob RKE
transmitter is replaced by the
button.
Press and release the button
on the
key fob RKE transmitter twice within
five seconds. The vehicle doors will
lock, position lights will flash and the
horn will ring twice (if this function is
set using the MTC+ System, refer to
“MTC+ Settings” in section
“Dashboard Instruments and
Controls”). Then, the engine will start
and the vehicle will remain in the
“Remote Start” mode for a 15-minute
cycle.
WARNING!
California Proposition 65
Operating, servicing and maintaining
a passenger vehicle or off-road vehicle
can expose you to chemicals including
such as, engine exhaust, carbon
monoxide, phthalates and lead, that which are known to the State of
California to cause cancer and birth
defects or other reproductive harm. To
minimize exposure, avoid breathing
exhaust, do not idle the engine except
as necessary, service your vehicle in a
well-ventilated area and wear gloves
or wash your hands frequently when
servicing your vehicle. For more
information go to:
www.P65Warnings.ca.gov/passenger-
vehicle
NOTE:
• In
case of an engine fault or low fuel
level, the vehicle will start and then
shut down in 10 seconds.
• The position lights will turn on and
remain lighted up during “Remote
Start” mode.
• For security reasons, power window
and power sunroof operation (if equipped) are disabled when the
vehicle is in the “Remote Start”
mode.
• The engine can be started two
consecutive times (two 15-minute
cycles) with the key fob RKE
transmitter. However, the ignition
must be cycled to the RUN position
before you can repeat the start
sequence for a third cycle.
To exit Remote Start Mode
without Driving the Vehicle Press and release the button one
time or allow the engine to run for the
entire 15-minute cycle.
NOTE:
To avoid unintentional shutdowns, the
system will disable the one time press
of the button
for two seconds after
receiving a valid “Remote Start”
request.
To exit Remote Start Mode and
Drive the Vehicle Before the end of the 15-minute cycle,
press and release the button
on the
key fob RKE transmitter to unlock the
doors and disarm the vehicle security
alarm. Then, prior to the end of theBefore Starting
2
38
Page 50 of 436

Power Windows The window controls on the driver's
door panel govern all the door
windows.
There are single window controls on
each passenger door trim panel, which
operate the corresponding window.
The window controls will operate only
when the ignition switch is in the ACC
or RUN position. NOTE:
• The power window switches will
remain active for up to 10 minutes
after the ignition switch is turned to
the OFF position. Opening either
front door will cancel this feature.
The time lapse can be set. See “MTC+
Settings” in section “Dashboard
Instruments and Controls” for
further information.
• Frequent activations of the power
windows could result in a temporary
lock out of the motors. In this case,
wait a moment before a new
activation.
WARNING!
Improper use of the power windows
and the sunroof (if equipped) can
however be dangerous, even with the
anti-pinch prevention system. Before
and during activation of the power
window, always check that the
passengers are not exposed to the risk
of injury both by the moving window
and by personal objects that could be
dragged or hit by it. Do not leave
unattended children in a vehicle with
a key fob RKE transmitter inside.
When getting out the vehicle, always
remove the key fob RKE transmitter to prevent the windows being
accidentally activated, posing a risk to
passengers remaining onboard.
Auto-Down Feature The driver door power window switch
and some model passenger door
power window switches have an
auto-down feature.
Press the window switch to the second
detent, release, and the window will
go completely down automatically.
To open the window part way, press
the window switch to the first detent
and release it when you want the
window to stop.
To stop the window from going all the
way down during the auto-down
operation, pull up on the switch
briefly.
Auto-Up Feature with
Anti-Pinch Protection Lift the window switch to the second
detent, release, and the window will
go all the way up automatically.
To stop the window from going all the
way up during the auto-up operation,
push down on the switch briefly.
To close the window part way, lift the
window switch to the first detent andBefore Starting
2
46
Page 51 of 436

release it when you want the window
to stop.
NOTE:
• If the window runs into any obstacle
during auto-closure, it will reverse
direction and then go back down.
Remove the obstacle and use the
window switch again to close the
window.
• Any impact due to rough road
conditions may trigger the auto
reverse function unexpectedly
during auto-closure. If this happens,
pull the switch lightly to the first
detent and hold to close the window
manually.
• Frequent activations of the
anti-pinch function could disable the
auto-down and auto-up function of
the windows. In order to re-activate
this function proceed with a reset
cycle as described in the next
paragraph.
WARNING!
There is no anti-pinch protection
when the window is almost closed. Be
sure to clear all objects from the area
before closing the window. Reset Auto-Up/Down Should the auto-up/down feature stop
working, the window probably needs
to be reset.
To reset auto-up/down, pull the
window switch up to close the
window completely and push the
window switch down to open the
window completely.
Open the Windows with RKE
Transmitter and Ignition Off When the ignition switch is in OFF
position, windows can be opened by
pressing the
button on the RKE
transmitter.
• Press the button and release it;
• Press a second time the
button
and keep it pressed until complete
opening of the windows, if they
were closed.
Rear Window and Sunshade
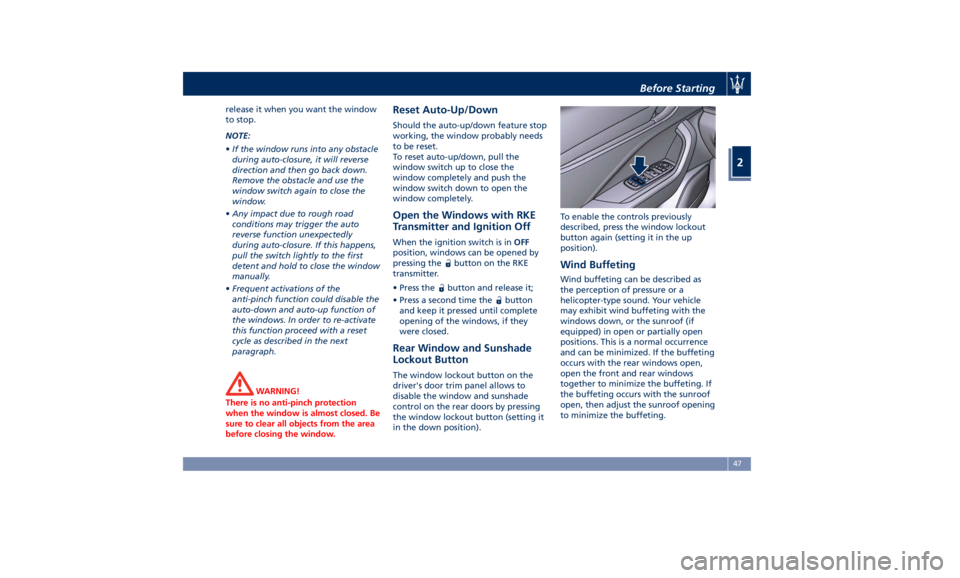
Lockout Button The window lockout button on the
driver's door trim panel allows to
disable the window and sunshade
control on the rear doors by pressing
the window lockout button (setting it
in the down position). To enable the controls previously
described, press the window lockout
button again (setting it in the up
position).
Wind Buffeting Wind buffeting can be described as
the perception of pressure or a
helicopter-type sound. Your vehicle
may exhibit wind buffeting with the
windows down, or the sunroof (if
equipped) in open or partially open
positions. This is a normal occurrence
and can be minimized. If the buffeting
occurs with the rear windows open,
open the front and rear windows
together to minimize the buffeting. If
the buffeting occurs with the sunroof
open, then adjust the sunroof opening
to minimize the buffeting.Before Starting
2
47
Page 97 of 436

3 – Understanding the Vehicle Interior Components ..................................... 94
Front Power Seats ....................................... 97
Driver Memory Seat ..................................... 101
Rear Seats ............................................ 103
Head Restraints ........................................ 105
Steering Wheel Adjustment ............................... 108
Adjustable Pedals (if equipped) ............................ 110
Rearview Mirrors ....................................... 110
Lights ................................................ 113
Wipers and Washers .................................... 129
Interior Features ....................................... 133
Cargo Area ........................................... 139
Front to Back Roof Rails (optional) .......................... 147
Power Sunroof with Sunshade (optional) ..................... 148
HomeLink (optional) .................................... 150
Air Conditioning Distribution ............................. 154
93
Page 100 of 436

9 Unlock button for central
console compartment with
cupholder and power outlet.
10 Central console covers with
armrest function.
11 Adjustable air outlets.
12 Cover for power outlet and USB
slots compartment.
13 Four-zone climate controls for
rear passengers (optional).
Front Dome Console
Components
1 Reading lights control button.
2 Central light control button.
3 Reading lights.
4 Central light. 5 HomeLink controls.
6 Button to switch off passenger
compartment lights.
7 Button to open fully/partially
the power liftgate.
8 Button to enable/disable front
sensors of the Park Assist system.
9 Sunroof controls (optional).
Front Doors Components 1 Inside door handle.
2 Driver’s seat, steering wheel,
adjustable pedals and rear
mirrors memory switch (if
equipped).
3 External rearview mirrors
switches.
4 Power window switches.
5 Power door unlocks/locks.
6 Rear windows and sunshade
lockout button.
7 Loudspeakers.
8 Storage compartment.
9 Internal door lock/unlock knob.
10 Door panel grip.
11 Reflex reflector.
12 Outside door handle.Driver door Passenger doorUnderstanding the Vehicle
3
96
Page 131 of 436

facilitate the use of the transmission
lever and the central console.
If one or more doors are opened, the
front and rear dome lights will turn on
for 27 seconds. If the door is closed
before this time, the lights will dim
and subsequently switch off after
about 3 seconds.
NOTE:
The dome lights will also turn on by
pressing the
or button for
centralized doors unlock and lock on
the key fob RKE transmitter. See
“Illuminated Entry/Exit” section
“Before Starting” for further
information.
In the event of a collision causing
automatic interruption of fuel supply,
the dome lights switch on
automatically and remain lit for
approx. 15 minutes. NOTE:
The controls of the sunroof and the
HomeLink and the button to switch
off Park Assist system can be found on
the front dome console.
A light is available on the roof, under
the sun visors; it turns on when user
moves the courtesy mirror cover,
which is built in the back of sun visor.
Apart the lights on the front dome
console, there is a light with relevant
on/off switch located next to the
passenger handholds for the external
rear seats. These lights will operate
only when the ignition device is in the
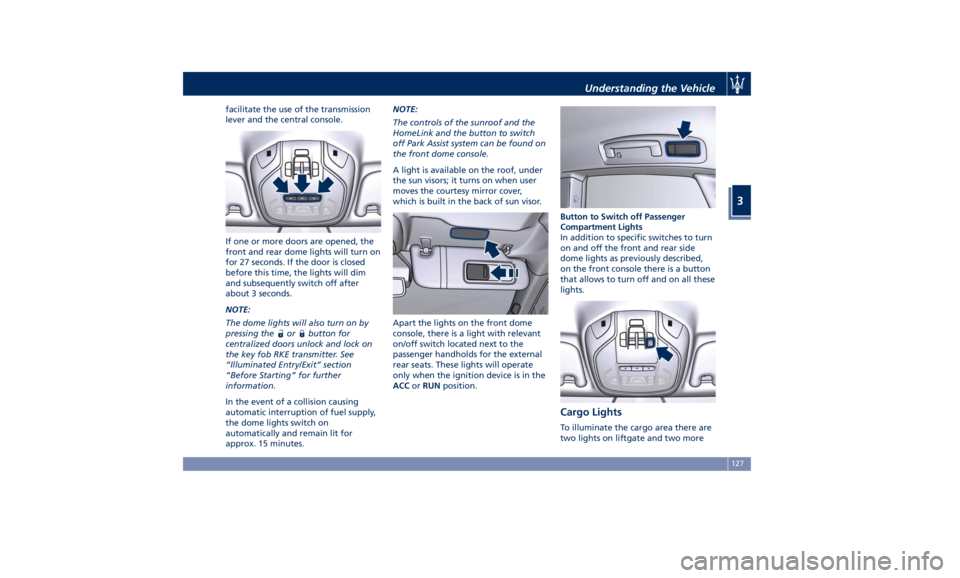
ACC or RUN position. Button to Switch off Passenger
Compartment Lights
In addition to specific switches to turn
on and off the front and rear side
dome lights as previously described,
on the front console there is a button
that allows to turn off and on all these
lights.
Cargo Lights To illuminate the cargo area there are
two lights on liftgate and two moreUnderstanding the Vehicle
3
127
Page 151 of 436

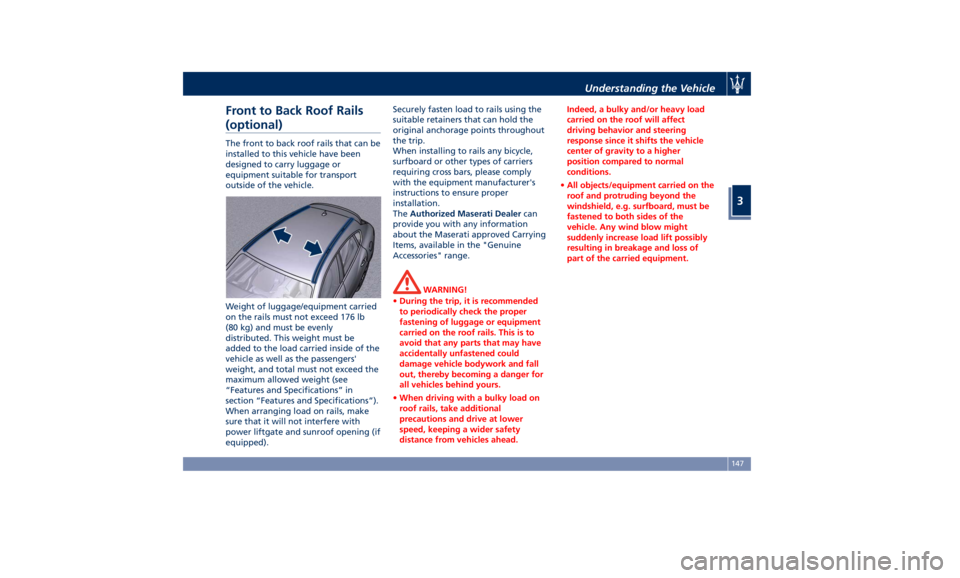
Front to Back Roof Rails
(optional) The front to back roof rails that can be
installed to this vehicle have been
designed to carry luggage or
equipment suitable for transport
outside of the vehicle.
Weight of luggage/equipment carried
on the rails must not exceed 176 lb
(80 kg) and must be evenly
distributed. This weight must be
added to the load carried inside of the
vehicle as well as the passengers'
weight, and total must not exceed the
maximum allowed weight (see
“Features and Specifications” in
section “Features and Specifications”).
When arranging load on rails, make
sure that it will not interfere with
power liftgate and sunroof opening (if
equipped). Securely fasten load to rails using the
suitable retainers that can hold the
original anchorage points throughout
the trip.
When installing to rails any bicycle,
surfboard or other types of carriers
requiring cross bars, please comply
with the equipment manufacturer's
instructions to ensure proper
installation.
The Authorized Maserati Dealer can
provide you with any information
about the Maserati approved Carrying
Items, available in the "Genuine
Accessories" range.
WARNING!
• During the trip, it is recommended
to periodically check the proper
fastening of luggage or equipment
carried on the roof rails. This is to
avoid that any parts that may have
accidentally unfastened could
damage vehicle bodywork and fall
out, thereby becoming a danger for
all vehicles behind yours.
• When driving with a bulky load on
roof rails, take additional
precautions and drive at lower
speed, keeping a wider safety
distance from vehicles ahead. Indeed, a bulky and/or heavy load
carried on the roof will affect
driving behavior and steering
response since it shifts the vehicle
center of gravity to a higher
position compared to normal
conditions.
• All objects/equipment carried on the
roof and protruding beyond the
windshield, e.g. surfboard, must be
fastened to both sides of the
vehicle. Any wind blow might
suddenly increase load lift possibly
resulting in breakage and loss of
part of the carried equipment.Understanding the Vehicle
3
147