2019 MASERATI LEVANTE ESP
[x] Cancel search: ESPPage 88 of 436

Cleaning the Park Assist
Sensors When cleaning the sensors, take
special care not to scratch or damage
them; therefore, do not use dry, rough
or hard cloths.
The sensors must be washed with clean
water, possibly adding car shampoo.
Should you need to repaint the
bumper or in case of paint touch-ups
in the sensor area, please contact
exclusively the Authorized Maserati
Dealer . Incorrect paint application
could affect the parking sensors
operation.
Park Assist System Usage
Precautions NOTE:
• Jackhammers, large trucks, and other
vibrations could affect the
performance of Park Assist.
• Objects such as bicycle carriers, trailer
hitches, etc., must not be placed
within 12 in (30 cm) from the rear
bumper while driving the vehicle.
Failure to do so can result in the
system misinterpreting a close object
as a sensor problem, causing the
service Park Assist message to be
displayed in the instrument cluster. CAUTION!
• Park Assist is only a parking aid and
it is unable to recognize every
obstacle, including small obstacles.
Parking curbs might only be
temporarily detected or not detected
at all. Obstacles located above or
below the sensors will not be
detected when they are in close
proximity.
• The vehicle must be driven slowly
when using Park Assist in order to be
able to stop in time when an
obstacle is detected. When backing
up, it is recommended that the driver
looks over his/her shoulder when
using Park Assist.
WARNING!
Drivers must be careful when backing
up even when using the Park Assist
system. Always check carefully behind
your vehicle, look behind you, and be
sure to check for pedestrians, animals,
other vehicles, obstructions, and blind
spots before backing up. You are
responsible for safety and must
continue to pay attention to your surroundings. Failure to do so can
result in serious injury or death.
Park Assist Volume The volume of the acoustic signal
emitted by the front and rear parking
sensors is set to the medium level.
Three different levels of volume can be
selected via the submenu “Safety &
Driving Assistant” from the MTC+
System.
Low level is useful in certain conditions
when the parking sensor acoustic
signal keeps coming on although there
is no actual collision hazard. This may
typically occur when driving in a queue
or when the vehicle is overtaken by
motorcycles or other vehicles on one
or both sides in a queue of traffic.
When you set the volume, only the
parking sensor acoustic signal will be
affected. The radio or any other
devices connected to the vehicle sound
system will not be affected.
Refer to chapter “MTC+ Settings” in
section “Dashboard Instruments and
Controls” for further information.
Operation with a Trailer The operation of the rear sensors is
automatically deactivated when the
trailer's electric plug is inserted in theBefore Starting
2
84
Page 90 of 436
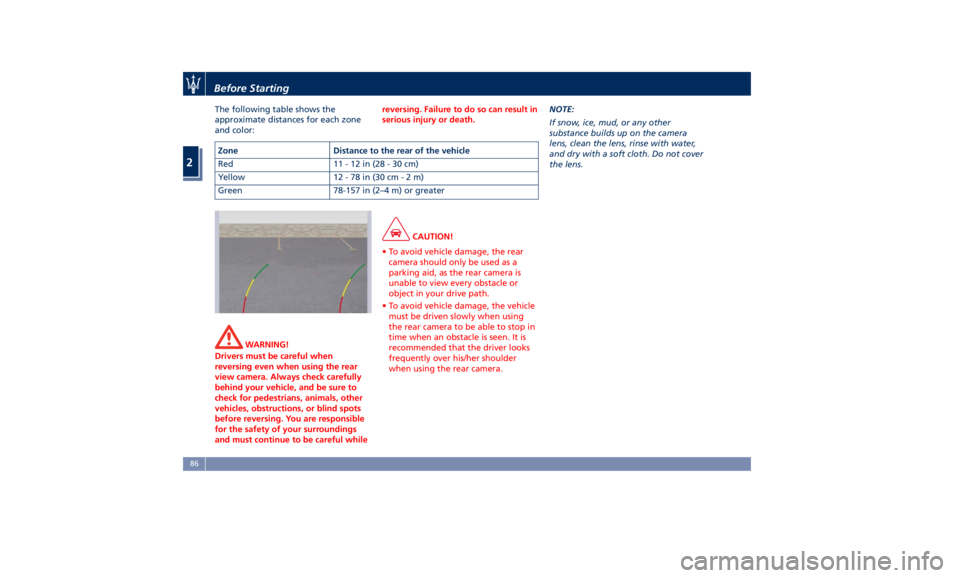
The following table shows the
approximate distances for each zone
and color:
WARNING!
Drivers must be careful when
reversing even when using the rear
view camera. Always check carefully
behind your vehicle, and be sure to
check for pedestrians, animals, other
vehicles, obstructions, or blind spots
before reversing. You are responsible
for the safety of your surroundings
and must continue to be careful while reversing. Failure to do so can result in
serious injury or death.
CAUTION!
• To avoid vehicle damage, the rear
camera should only be used as a
parking aid, as the rear camera is
unable to view every obstacle or
object in your drive path.
• To avoid vehicle damage, the vehicle
must be driven slowly when using
the rear camera to be able to stop in
time when an obstacle is seen. It is
recommended that the driver looks
frequently over his/her shoulder
when using the rear camera. NOTE:
If
snow, ice,
mud, or any other
substance builds up on the camera
lens, clean the lens, rinse with water,
and dry with a soft cloth. Do not cover
the lens.Zone Distance to the rear of the vehicle
Red 11-12in(28-30cm)
Yellow 12 - 78 in (30 c m-2m)
Green 78-157 in (2–4 m) or greaterBefore Starting
2
86
Page 102 of 436
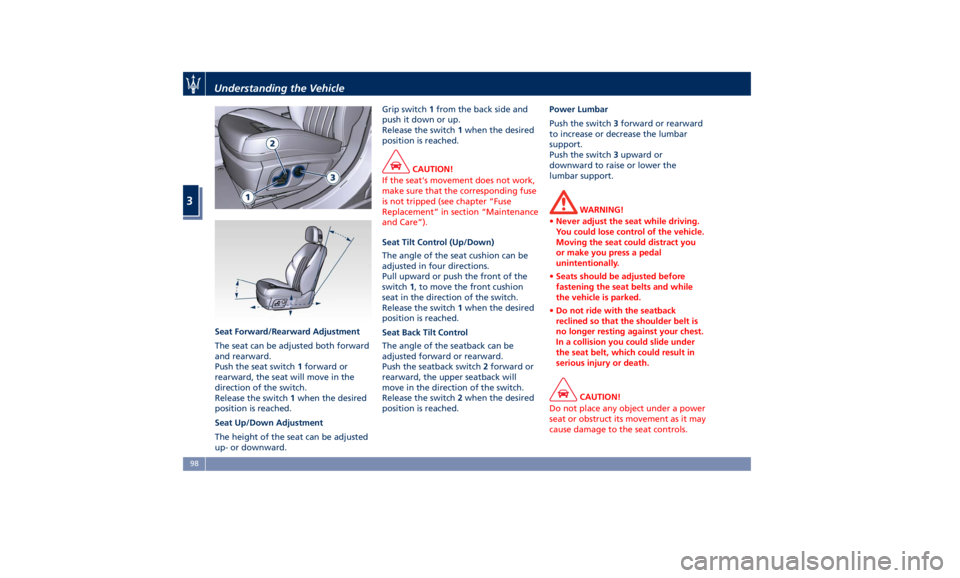
Seat Forward/Rearward Adjustment
The seat can be adjusted both forward
and rearward.
Push the seat switch 1 forward or
rearward, the seat will move in the
direction of the switch.
Release the switch 1 when the desired
position is reached.
Seat Up/Down Adjustment
The height of the seat can be adjusted
up- or downward. Grip switch 1 from the back side and
push it down or up.
Release the switch 1 when the desired
position is reached.
CAUTION!
If the seat's movement does not work,
make sure that the corresponding fuse
is not tripped (see chapter “Fuse
Replacement” in section “Maintenance
and Care”).
Seat Tilt Control (Up/Down)
The
angle of the seat cushion can be
adjusted in four directions.
Pull upward or push the front of the
switch 1 , to move the front cushion
seat in the direction of the switch.
Release the switch 1 when the desired
position is reached.
Seat Back Tilt Control
The angle of the seatback can be
adjusted forward or rearward.
Push the seatback switch 2 forward or
rearward, the upper seatback will
move in the direction of the switch.
Release the switch 2 when the desired
position is reached. Power Lumbar
Push the switch 3 forward or rearward
to increase or decrease the lumbar
support.
Push the switch 3 upward or
downward to raise or lower the
lumbar support.
WARNING!
• Never adjust the seat while driving.
You could lose control of the vehicle.
Moving the seat could distract you
or make you press a pedal
unintentionally.
• Seats should be adjusted before
fastening the seat belts and while
the vehicle is parked.
• Do not ride with the seatback
reclined so that the shoulder belt is
no longer resting against your chest.
In a collision you could slide under
the seat belt, which could result in
serious injury or death.
CAUTION!
Do not place any object under a power
seat or obstruct its movement as it may
cause damage to the seat controls.Understanding the Vehicle
3
98
Page 103 of 436
Seat movement may become limited if
there is an obstruction in the way.
Front Heated Seats The front seats are equipped with
heaters in both seat cushions and
seatbacks.
The seats comfort commands are in
the “Climate” screen of the MTC+.
They are present in the "Climate"
screen even when the A/C is off. See
“Air Conditioning Controls” in section
“Dashboard Instruments and
Controls” for further details.
When the MTC+ System is in any mode
other than “Climate” (Radio”,
“Media”, “Controls”, etc.) the icons of
the active front seats comfort
functions will be indicated on the
upper part of the display.
WARNING!
• Persons with low skin sensitivity
because of advanced age, chronic
illness, diabetes, spinal cord injury,
medication, alcohol use, exhaustion
or other physical conditions must be
careful when using the seat heater.
It may cause irritation even at low
temperatures, especially if used for
long periods of time. • Do not place anything on the seat
that insulates against heat, such as a
blanket or cushion. This may cause
the seat heater to overheat.
Front Seats Heat Function
NOTE:
The
engine must be
running for the
heated seats to operate.
• Touch the “Climate” softkey on the
lower part of the MTC+ display.
• Starting from the state “OFF”,
indicated below the respective icon,
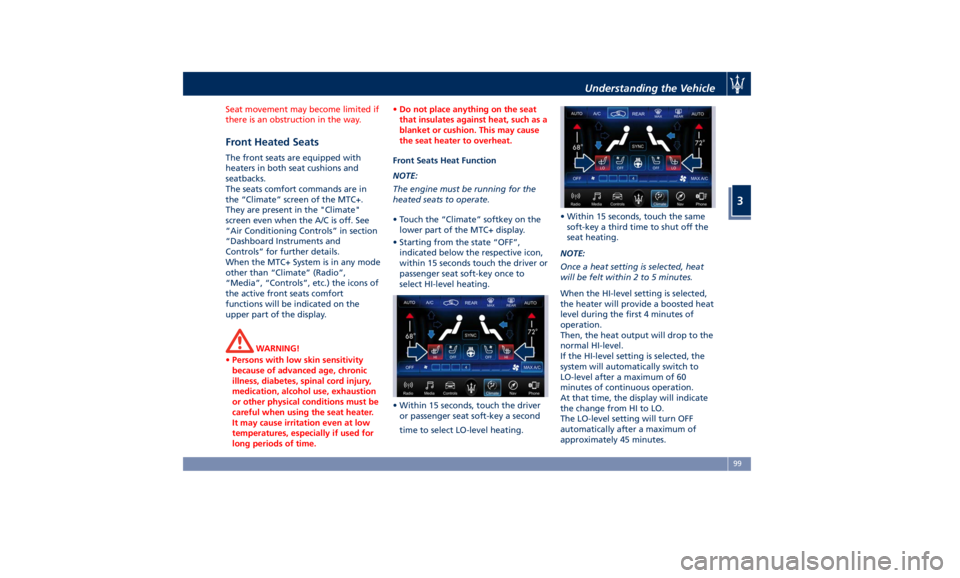
within 15 seconds touch the driver or
passenger seat soft-key once to
select HI-level heating.
• Within 15 seconds, touch the driver
or passenger seat soft-key a second
time to select LO-level heating. • Within 15 seconds, touch the same
soft-key a third time to shut off the
seat heating.
NOTE:
Once a heat setting is selected, heat
will be felt within 2 to 5 minutes.
When the HI-level setting is selected,
the heater will provide a boosted heat
level during the first 4 minutes of
operation.
Then, the heat output will drop to the
normal HI-level.
If the HI-level setting is selected, the
system will automatically switch to
LO-level after a maximum of 60
minutes of continuous operation.
At that time, the display will indicate
the change from HI to LO.
The LO-level setting will turn OFF
automatically after a maximum of
approximately 45 minutes.Understanding the Vehicle
3
99
Page 104 of 436
Front Ventilated Seats
(optional) To enhance occupants comfort by high
external temperatures, both the driver
and passenger seats, on request, can
be ventilated.
Small fans are located in the seat
cushion and seatback, they draw air
from the seat surface through fine
perforations in the seat cover to help
keep the driver and front passenger
cooler when the temperature is high.
The seats comfort commands are in
the “Climate” screen of the MTC+.
They are present in the “Climate”
screen even when the A/C is off. See
“Air Conditioning Controls” in section
“Dashboard Instruments and Controls”
for further details.
When the MTC+ System is in any mode
other than “Climate” (Radio”,
“Media”, “Controls”, etc.) the icons of
the active front seats comfort
functions will be indicated on the
upper part of the display.
Front Ventilated Seats Function
NOTE:
The engine must be running for the
ventilated seats to operate. • Touch the “Climate” softkey on the
lower part of the MTC+ display.
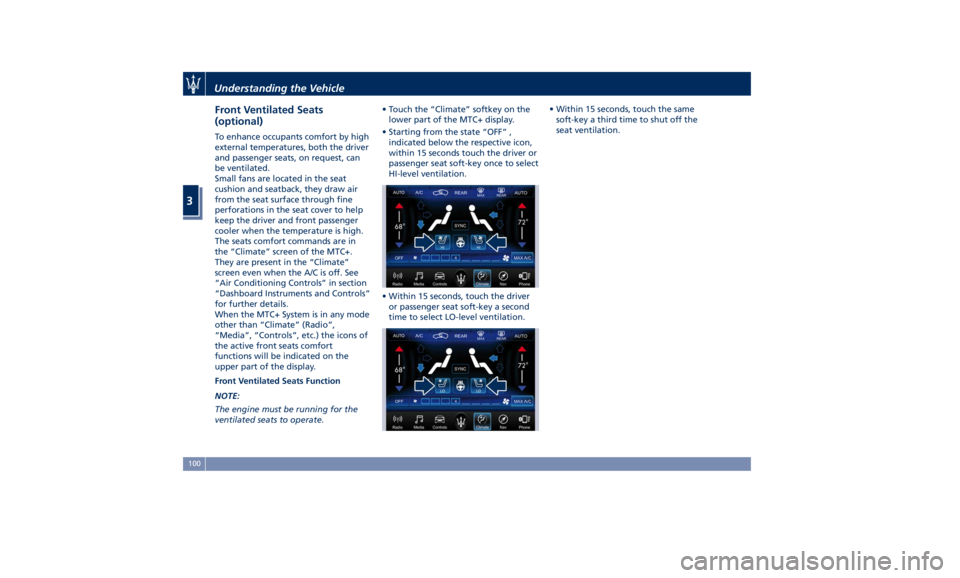
• Starting from the state “OFF” ,
indicated below the respective icon,
within 15 seconds touch the driver or
passenger seat soft-key once to select
HI-level ventilation.
• Within 15 seconds, touch the driver
or passenger seat soft-key a second
time to select LO-level ventilation. • Within 15 seconds, touch the same
soft-key a third time to shut off the
seat ventilation.
Understanding the Vehicle
3
100
Page 105 of 436
Driver Memory Seat This feature allows the driver to store
up to two different memory profiles
for easy recall through a memory
switch. Each memory profile contains
desired position settings for the driver
seat, external side mirrors, adjustable
pedals (optional), and power tilt and
telescopic steering column and a set of
programmed radio stations.
Your key fob RKE transmitter can also
be set to recall the same positions by
pressing the
button.
NOTE:
• Only one key fob RKE transmitter
can be linked to each of the memory
positions.
• “Passive Entry” door handles cannot
be linked to the memory function.
Use either the memory recall switch
or the key fob RKE transmitter (if
linked to the memory feature) to
recall memory positions 1 or 2.
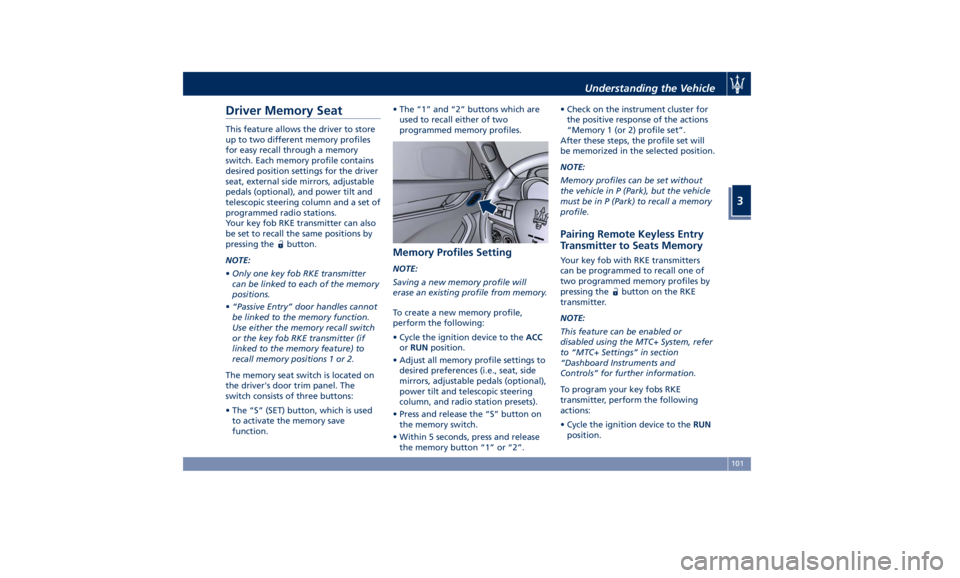
The memory seat switch is located on
the driver's door trim panel. The
switch consists of three buttons:
• The “S” (SET) button, which is used
to activate the memory save
function. • The “1” and “2” buttons which are
used to recall either of two
programmed memory profiles.
Memory Profiles Setting NOTE:
Saving a new memory profile will
erase an existing profile from memory.
To create a new memory profile,
perform the following:
• Cycle the ignition device to the ACC
or RUN position.
• Adjust all memory profile settings to
desired preferences (i.e., seat, side
mirrors, adjustable pedals (optional),
power tilt and telescopic steering
column, and radio station presets).
• Press and release the “S” button on
the memory switch.
• Within 5 seconds, press and release
the memory button “1” or “2”. • Check on the instrument cluster for
the positive response of the actions
“Memory 1 (or 2) profile set”.
After these steps, the profile set will
be memorized in the selected position.
NOTE:
Memory profiles can be set without
the vehicle in P (Park), but the vehicle
must be in P (Park) to recall a memory
profile.
Pairing Remote Keyless Entry
Transmitter to Seats Memory Your key fob with RKE transmitters
can be programmed to recall one of
two programmed memory profiles by
pressing the
button on the RKE
transmitter.
NOTE:
This feature can be enabled or
disabled using the MTC+ System, refer
to “MTC+ Settings” in section
“Dashboard Instruments and
Controls” for further information.
To program your key fobs RKE
transmitter, perform the following
actions:
• Cycle the ignition device to the RUN
position.Understanding the Vehicle
3
101
Page 106 of 436
• Move the seat and/or the other
adjustable devices in the position
that you wish to memorize, or recall
a previously memorized profile,
pressing the corresponding memory
button “1” or “2”.
• Cycle the ignition device to the OFF
position.
• Press and release the “S” button.
• Within 5 seconds, press and release
the memory button “1” or “2”.
• Press and release the
button on
key fob RKE transmitter.
• Within 3 seconds, press and release
the
button on the key fob RKE
transmitter.
To check if the system has memorized
the correct profile, you can move the
seat and press the
button: the seat
will move to the memorized position.
NOTE:
Your key fobs RKE transmitter can be
unlinked to your memory settings by
pressing the “S” button followed by
the
button on the key fob RKE
transmitter. Memory Position Recall NOTE:
The vehicle must be in P (Park) to recall
memory positions. If a recall is
attempted when the vehicle is not in P
(Park), a message will display in the
instrument cluster.
To recall the memory settings for
driver, press memory button number
“1” or “2” on the driver's door trim
panel or the
button on the RKE
transmitter linked to memory position
“1” or “2” with ignition device in the
RUN position.
A recall can be canceled by pressing
any of the buttons (“S”, “1”, or “2”)
during a recall. When a recall is
canceled, the driver seat, external side
mirrors, adjustable pedals (optional),
and power tilt and telescopic steering
column stop moving.
A delay of at least one second will
occur before selecting a new recall. Easy Entry/Exit Driver Seat This feature provides automatic driver
seat positioning to enhance driver
mobility when entering and exiting
the vehicle.
The distance the driver seat moves
depends on where you have the driver
seat positioned when you place the
ignition device to the OFF position.
• When you cycle the ignition device
to the OFF position the driver seat:
• will move about 2.36 in (60 mm)
rearward if the driver seat position
is greater than or equal to ca. 5.51
in (140 mm) forward of the rear
stop;
• will move to a position of ca. 3.15
in (80 mm) rearward of the rear
stop if the driver seat position is
between 5.51 in (140 mm) and 3.15
in (80 mm) forward of the rear
stop.
• The seat will return to its previously
set position when you place the
ignition device into the ACC or RUN
position.
• The Easy Entry/Exit feature is
disabled when the driver seat
position is less than 3.15 in (80 mm)
forward of the rear stop. In this
position, there would be no benefitUnderstanding the Vehicle
3
102
Page 108 of 436
(Continued)
unlocked seatback cannot ensure the
necessary stability for passengers
and/or for child seats. An unlocked
seatback could cause severe injuries
in case of accident.
• When fastening a child seat on
external rear seats, ensure that the
corresponding seatback is in the full
upright position.
• Always check that the head restraint
of the rear seats that must be
occupied by a passenger is correctly
adjusted (see chapter “Head
Restraints” in this section).
NOTE:
Rear
seat backrest can
be fully folded
to increase luggage space. See “Cargo
Area” in this section for further
details.
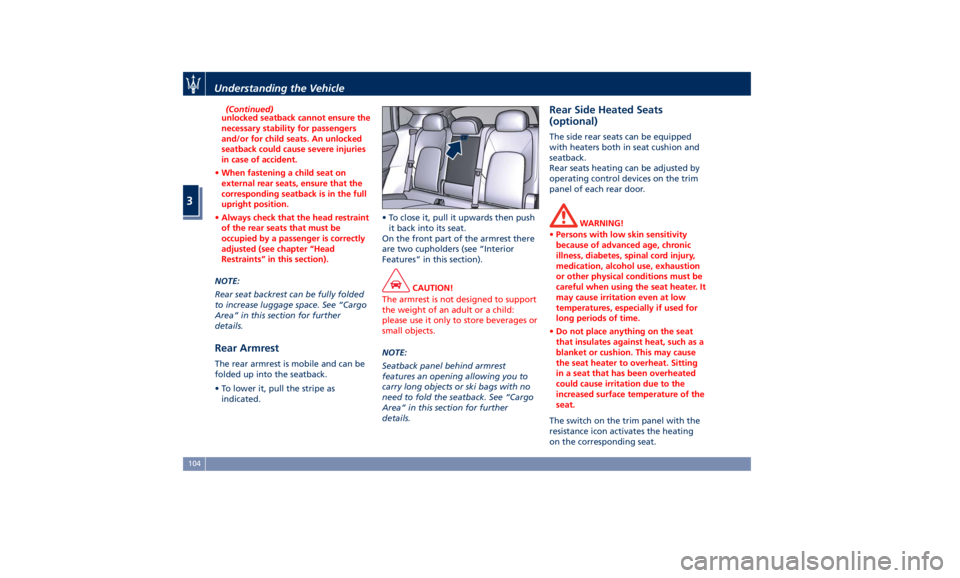
Rear Armrest The rear armrest is mobile and can be
folded up into the seatback.
• To lower it, pull the stripe as
indicated. • To close it, pull it upwards then push
it back into its seat.
On the front part of the armrest there
are two cupholders (see “Interior
Features” in this section).
CAUTION!
The armrest is not designed to support
the weight of an adult or a child:
please use it only to store beverages or
small objects.
NOTE:
Seatback
panel behind armrest
features an opening allowing you to
carry long objects or ski bags with no
need to fold the seatback. See “Cargo
Area” in this section for further
details. Rear Side Heated Seats
(optional) The side rear seats can be equipped
with heaters both in seat cushion and
seatback.
Rear seats heating can be adjusted by
operating control devices on the trim
panel of each rear door.
WARNING!
• Persons with low skin sensitivity
because of advanced age, chronic
illness, diabetes, spinal cord injury,
medication, alcohol use, exhaustion
or other physical conditions must be
careful when using the seat heater. It
may cause irritation even at low
temperatures, especially if used for
long periods of time.
• Do not place anything on the seat
that insulates against heat, such as a
blanket or cushion. This may cause
the seat heater to overheat. Sitting
in a seat that has been overheated
could cause irritation due to the
increased surface temperature of the
seat.
The switch on the trim panel with the
resistance
icon activates the heating
on the corresponding seat.Understanding the Vehicle
3
104