2019 MASERATI LEVANTE heating
[x] Cancel search: heatingPage 183 of 436

reaching the set threshold an acoustic
signal will be heard.
If the warning light switches on while
driving, safely pull over and stop the
vehicle. If the A/C system is on, turn it
off. Also, shift the transmission into N
(Neutral) and idle the vehicle. If the
temperature does not return to
normal, immediately turn the engine
off and contact an Authorized
Maserati Dealer . Check “Engine Overheating” in
section “In an Emergency” for more
information.
Low Oil Pressure Warning Light
Under normal conditions, the
warning light illuminates
when the ignition device is
turned to RUN and goes off as
soon as the engine is started.
If the warning light stays or turns on
while driving, the engine oil pressure is too low. The warning light is
combined with a displayed message
and an acoustic signal that will last 4
minutes. In this case, turn the engine
off immediately and carry out the
necessary checks.
Do not operate the vehicle until the
problem has been corrected. This light
does not indicate the oil level. The
engine oil level must be checked with
the dipstick located under the hood
(see “Maintenance Procedures” in
section “Maintenance and Care”).
If the problem persists, contact an
Authorized Maserati Dealer .
Engine Oil Temperature Warning Light
This light indicates that the
engine oil is overheated. The
warning light is combined
with the related displayed
message. In this case, drive carefully
until the temperature drops back to
normal level and the light warning
light turns off.
If the problem persists, contact an
Authorized Maserati Dealer .
Low Engine Oil Level Warning Light
This warning light and the
related displayed message,
indicate a low engine oil level.
The engine oil level must be
checked with the dipstick fitted underDashboard Instruments and Controls
4
179
Page 187 of 436
that a system fault requiring servicing
at an Authorized Maserati Dealer .Itis
nevertheless possible to drive the
vehicle without using this function
(for further details, refer to “Forward
Collision Warning - FCW” in section
“Driving”).
General Fault for Driving with a Trailer
(NOT for TROFEO version)
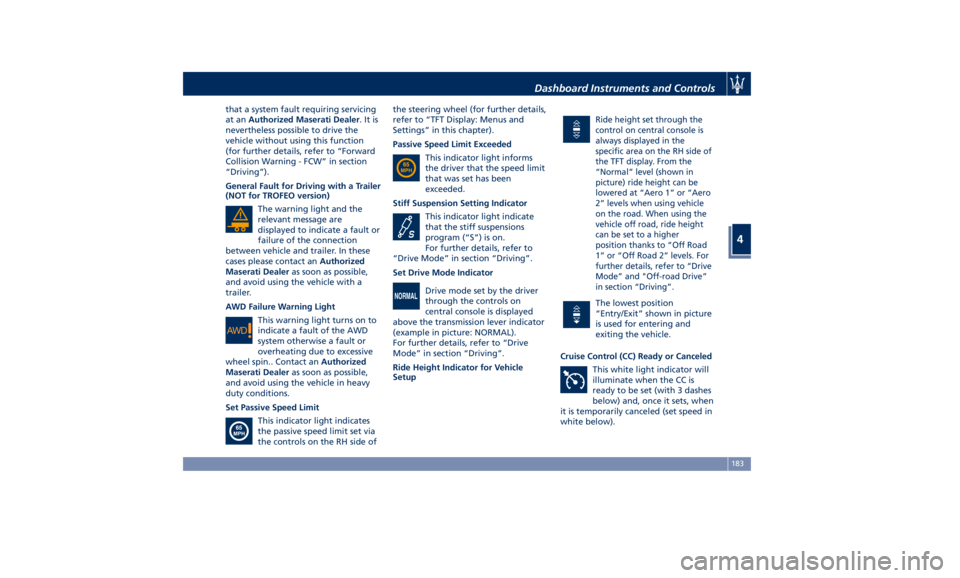
The warning light and the
relevant message are
displayed to indicate a fault or
failure of the connection
between vehicle and trailer. In these
cases please contact an Authorized
Maserati Dealer as soon as possible,
and avoid using the vehicle with a
trailer.
AWD Failure Warning Light
This warning light turns on to
indicate a fault of the AWD
system otherwise a fault or
overheating due to excessive
wheel spin.. Contact an Authorized
Maserati Dealer as soon as possible,
and avoid using the vehicle in heavy
duty conditions.
Set Passive Speed Limit
This indicator light indicates
the passive speed limit set via
the controls on the RH side of the steering wheel (for further details,
refer to “TFT Display: Menus and
Settings” in this chapter).
Passive Speed Limit Exceeded
This indicator light informs
the driver that the speed limit
that was set has been
exceeded.
Stiff Suspension Setting Indicator
This indicator light indicate
that the stiff suspensions
program (“S”) is on.
For further details, refer to
“Drive Mode” in section “Driving”.
Set Drive Mode Indicator
Drive mode set by the driver
through the controls on
central console is displayed
above the transmission lever indicator
(example in picture: NORMAL).
For further details, refer to “Drive
Mode” in section “Driving”.
Ride Height Indicator for Vehicle
Setup Ride height set through the
control on central console is
always displayed in the
specific area on the RH side of
the TFT display. From the
“Normal” level (shown in
picture) ride height can be
lowered at “Aero 1” or “Aero
2” levels when using vehicle
on the road. When using the
vehicle off road, ride height
can be set to a higher
position thanks to “Off Road
1” or “Off Road 2” levels. For
further details, refer to “Drive
Mode” and "Off-road Drive”
in section “Driving”.
The lowest position
“Entry/Exit” shown in picture
is used for entering and
exiting the vehicle.
Cruise Control (CC) Ready or Canceled
This white light indicator will
illuminate when the CC is
ready to be set (with 3 dashes
below) and, once it sets, when
it is temporarily canceled (set speed in
white below).Dashboard Instruments and Controls
4
183
Page 221 of 436
the air flow rate and the air
distribution respectively on the driver
and on the passenger zone. Press
“AUTO” to switch the ATC between
manual and automatic mode. The LED
on the button and the “AUTO”
soft-key illuminates when the “AUTO”
function is activated. See “Automatic
Temperature Control (ATC)” in this
chapter for more information.
9. MAX defrosting/demisting
Press the
button or the MTC+
soft-key to switch the airflow setting
to the windshield and the front side
windows to get quick defrosting/
defogging. The LED on the button and
the MTC+ soft-key illuminates when
this feature is activated. Operating
this function will cause the ATC to
switch into manual mode: so the
“AUTO” LED on the button and the
MTC+ soft-key will turn off. With
engine off, the blower will run at
minimum speed (1) and can be
increased manually: with engine on,
the blower speed will gradually
increase to the higher speed (8). MAX
defrosting/demisting shall also involve
REAR defrosting/demisting function. If
this function is turned off the climate
system will return to the previous
setting, switching on the A/C (“A/C” LED on the button and the MTC+
soft-key illuminated).
10. REAR defrosting/demisting
Press the
button or the MTC+
soft-key to turn on the rear window
defroster and the heated outside
mirrors. The LED on the button and
the MTC+ soft-key will illuminate
when the rear window defroster and
the heated external mirrors are on.
The rear window defroster and the
heated external mirrors automatically
turn off after 10 minutes.
CAUTION!
Failure to observe the following
cautions may cause damage to the
rear windows defroster:
• Use care when washing the inside of
the rear window. Do not use
abrasive window cleaners on the
interior surface of the window. Use a
soft cloth and a mild washing
solution, wiping parallel to the
heating elements. Labels can be
peeled off after soaking with warm
water.
• Do not use scrapers, sharp
instruments, or abrasive window
cleaners on the interior surface of
the window. • Keep all objects inside the vehicle at
a safe distance from the window.
11. MAX A/C
By
pressing the “MAX
A/C” button ot
the MTC+ soft-key, the system
automatically switches to get the
maximum cold air flow in both zones.
12-13 Air flow distribution modes
The airflow distribution mode,
respectively on the driver and on the
passenger zone, can be adjusted so air
comes from the dashboard vents,
vents under the dashboard in
direction of the floor, vents under the
front seats and demist/defrost vents.
The MTC+ display contains the
relevant soft-keys used to set these
modes for each zone. The climate
control panel features a single button
for each zone: press it several times to
select and set the required airflow
distribution mode.
Available settings are as follows:
• “Floor” mode
Air for each zone comes from the
front vents, located under the
dashboard and under the front
seats. A small portion of the airflow
is directed through the
defrost/demist vents to prevent
windows fogging.Dashboard Instruments and Controls
4
217
Page 227 of 436
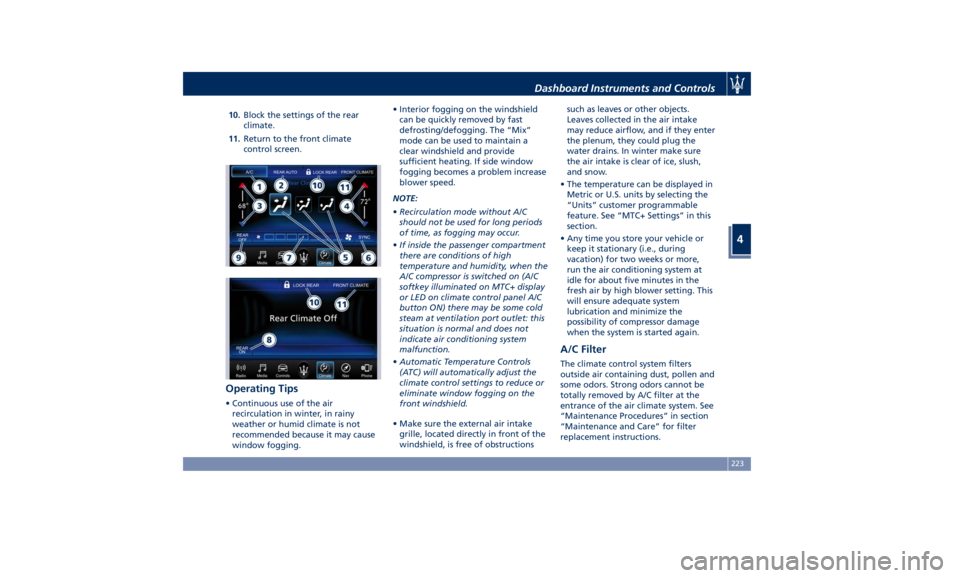
10. Block the settings of the rear
climate.
11. Return to the front climate
control screen.
Operating Tips • Continuous use of the air
recirculation in winter, in rainy
weather or humid climate is not
recommended because it may cause
window fogging. • Interior fogging on the windshield
can be quickly removed by fast
defrosting/defogging. The “Mix”
mode can be used to maintain a
clear windshield and provide
sufficient heating. If side window
fogging becomes a problem increase
blower speed.
NOTE:
• Recirculation mode without A/C
should not be used for long periods
of time, as fogging may occur.
• If inside the passenger compartment
there are conditions of high
temperature and humidity, when the
A/C compressor is switched on (A/C
softkey illuminated on MTC+ display
or LED on climate control panel A/C
button ON) there may be some cold
steam at ventilation port outlet: this
situation is normal and does not
indicate air conditioning system
malfunction.
• Automatic Temperature Controls
(ATC) will automatically adjust the
climate control settings to reduce or
eliminate window fogging on the
front windshield.
• Make sure the external air intake
grille, located directly in front of the
windshield, is free of obstructions such as leaves or other objects.
Leaves collected in the air intake
may reduce airflow, and if they enter
the plenum, they could plug the
water drains. In winter make sure
the air intake is clear of ice, slush,
and snow.
• The temperature can be displayed in
Metric or U.S. units by selecting the
“Units” customer programmable
feature. See “MTC+ Settings” in this
section.
• Any time you store your vehicle or
keep it stationary (i.e., during
vacation) for two weeks or more,
run the air conditioning system at
idle for about five minutes in the
fresh air by high blower setting. This
will ensure adequate system
lubrication and minimize the
possibility of compressor damage
when the system is started again.
A/C Filter The climate control system filters
outside air containing dust, pollen and
some odors. Strong odors cannot be
totally removed by A/C filter at the
entrance of the air climate system. See
“Maintenance Procedures” in section
“Maintenance and Care” for filter
replacement instructions.Dashboard Instruments and Controls
4
223
Page 232 of 436
Normal Starting of the
Engine WARNING!
It is dangerous to run the engine in an
enclosed area. The engine consumes
oxygen and discharges carbon
dioxide, carbon monoxide and other
toxic gases in the atmosphere.
WARNING!
California Proposition 65
Operating, servicing and maintaining
a passenger vehicle or off-road vehicle
can expose you to chemicals including
such as, engine exhaust, carbon
monoxide, phthalates and lead, that
which are known to the State of
California to cause cancer and birth
defects or other reproductive harm. To
minimize exposure, avoid breathing
exhaust, do not idle the engine except
as necessary, service your vehicle in a
well-ventilated area and wear gloves
or wash your hands frequently when
servicing your vehicle. For more
information go to: www.P65Warnings.ca.gov/passenger-
vehicle
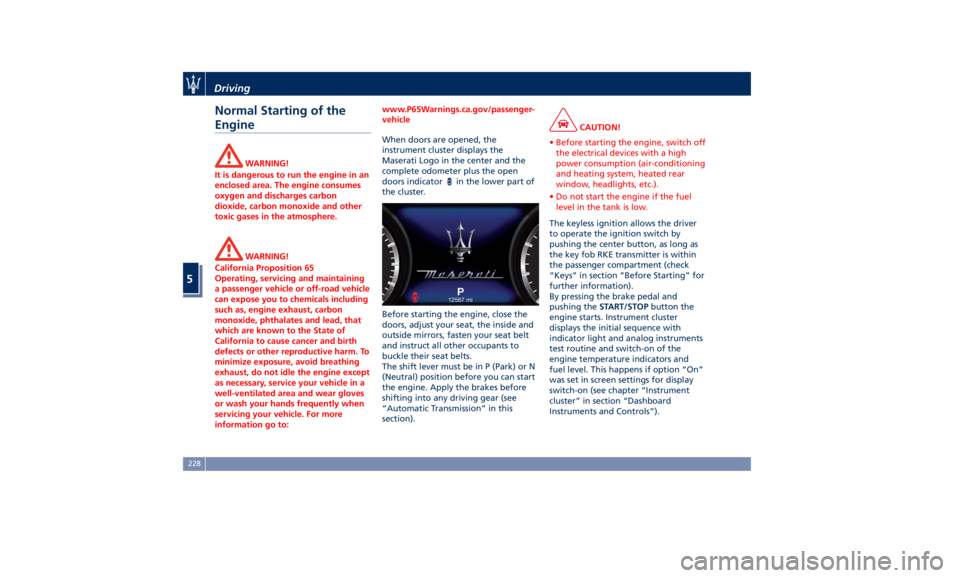
When doors are opened, the
instrument
cluster displays the
Maserati
Logo in the center and the
complete odometer plus the open
doors indicator
in the lower part of
the cluster.
Before starting the engine, close the
doors, adjust your seat, the inside and
outside mirrors, fasten your seat belt
and instruct all other occupants to
buckle their seat belts.
The shift lever must be in P (Park) or N
(Neutral) position before you can start
the engine. Apply the brakes before
shifting into any driving gear (see
“Automatic Transmission” in this
section). CAUTION!
• Before starting the engine, switch off
the electrical devices with a high
power consumption (air-conditioning
and heating system, heated rear
window, headlights, etc.).
• Do not start the engine if the fuel
level in the tank is low.
The keyless ignition allows the driver
to
operate the ignition
switch by
pushing the center button, as long as
the key fob RKE transmitter is within
the passenger compartment (check
“Keys” in section “Before Starting” for
further information).
By pressing the brake pedal and
pushing the START/STOP button the
engine starts. Instrument cluster
displays the initial sequence with
indicator light and analog instruments
test routine and switch-on of the
engine temperature indicators and
fuel level. This happens if option “On”
was set in screen settings for display
switch-on (see chapter “Instrument
cluster” in section “Dashboard
Instruments and Controls”).Driving
5
228
Page 246 of 436
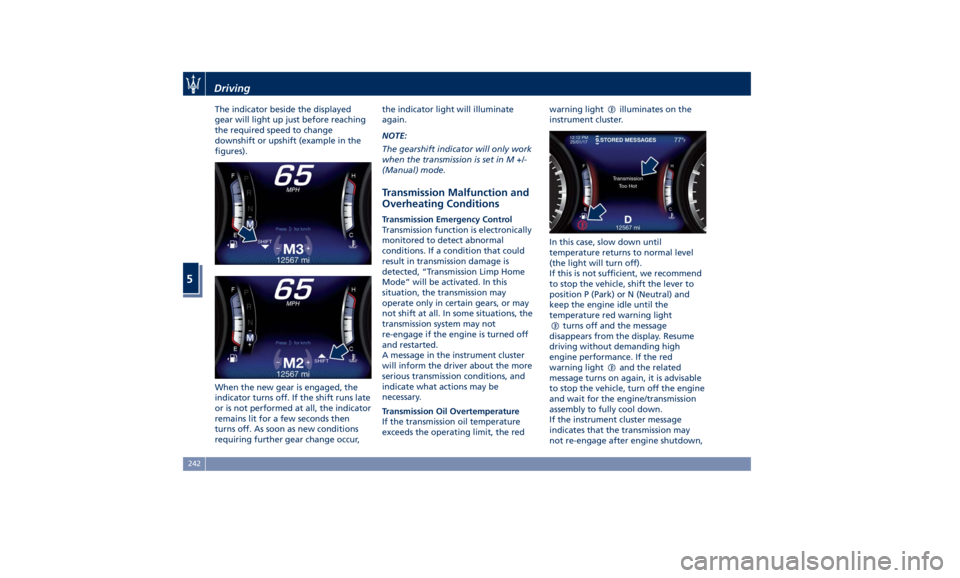
The indicator beside the displayed
gear will light up just before reaching
the required speed to change
downshift or upshift (example in the
figures).
When the new gear is engaged, the
indicator turns off. If the shift runs late
or is not performed at all, the indicator
remains lit for a few seconds then
turns off. As soon as new conditions
requiring further gear change occur, the indicator light will illuminate
again.
NOTE:
The gearshift indicator will only work
when the transmission is set in M +/-
(Manual) mode.
Transmission Malfunction and
Overheating Conditions Transmission Emergency Control
Transmission function is electronically
monitored to detect abnormal
conditions. If a condition that could
result in transmission damage is
detected, “Transmission Limp Home
Mode” will be activated. In this
situation, the transmission may
operate only in certain gears, or may
not shift at all. In some situations, the
transmission system may not
re-engage if the engine is turned off
and restarted.
A message in the instrument cluster
will inform the driver about the more
serious transmission conditions, and
indicate what actions may be
necessary.
Transmission Oil Overtemperature
If the transmission oil temperature
exceeds the operating limit, the red warning light
illuminates on the
instrument cluster.
In this case, slow down until
temperature returns to normal level
(the light will turn off).
If this is not sufficient, we recommend
to stop the vehicle, shift the lever to
position P (Park) or N (Neutral) and
keep the engine idle until the
temperature red warning light
turns off and the message
disappears from the display. Resume
driving without demanding high
engine performance. If the red
warning light
and the related
message turns on again, it is advisable
to stop the vehicle, turn off the engine
and wait for the engine/transmission
assembly to fully cool down.
If the instrument cluster message
indicates that the transmission may
not re-engage after engine shutdown,Driving
5
242
Page 247 of 436

perform the following procedure
preferably at an Authorized Maserati
Dealer .
In the event of a momentary problem,
the transmission can be reset to regain
all forward gears by performing the
following steps.
• Stop the vehicle.
• Shift the transmission into P (Park), if
possible.
• Turn the engine off.
• Wait approximately 30 seconds.
• Restart the engine.
• Shift the transmission into D (Drive)
and then into the desired gear
range. If the problem is no longer
detected, the transmission will
return to normal operation.
NOTE:
Even if the transmission can be reset,
we recommend that you visit an
Authorized Maserati Dealer at your
earliest possible convenience, which
has diagnostic equipment to
determine if the problem could recur.
Transmission Manual Release of P
(Park) Position
See chapter “Transmission Manual
Release of P (Park) Position” in section
“In an Emergency”. All-Wheel Drive The active on-demand All-Wheel Drive
(AWD) system provides available
optimum traction for a wide variety of
road and off-road surface and driving
conditions. The system minimizes
wheel slip by automatically redirecting
torque to the front and rear wheels as
necessary.
To maximize fuel economy, the AWD
system automatically disengages
torque distribution on front axle when
road and environmental conditions
are such that wheel slip is unlikely to
occur. When specific road and
environmental conditions require
increased levels of road traction, the
AWD system automatically distributes
the torque between front and rear
axle in order to grant the best driving
experience. Torque distribution is
displayed on the TFT in the “Drive
Mode” main menu. Refer to
paragraph “TFT Display: Menus and
Settings” in chapter “Instrument
Cluster” of section “Dashboard
Instruments and Controls” for further
information. WARNING!
There may be a slight delay for AWD
engagement after a wheel slip
condition occurs.
NOTE:
If the A WD
system service warning
light and message appears after
engine start up, or during driving, it
means that the AWD system is not
functioning properly or is in recovery
mode due to overheating caused by
the excessive wheel spin. In this
condition the vehicle can continue
driving but only rear wheel drive is
working. If the warning light and
message are often activated, it is
recommended to have the vehicle
serviced at an Authorized Maserati
Dealer .Driving
5
243
Page 269 of 436
“Off Road 2” ride height is limited
instead up to a max speed of 25 mph
(40 km/h). In case the vehicle speed
should exceed this limit, ride height
will be put automatically to “Off Road
1” while driving mode will remain
“OFF ROAD”.
An advantage of the higher ground
clearance is a better view of the road,
allowing you to anticipate problems.
A higher clearance and the longer
travel of the suspension might allow
the vehicle to overcome some
obstacles.
A higher ground clearance means a
higher center of gravity. If at all
possible, avoid sharp turns or abrupt
maneuvers. Failure to operate this
vehicle correctly may result in loss of
control or vehicle rollover .
Although the pneumatic suspension
system contributes to limiting these
risks by setting precautionary speed
thresholds, the driver must always pay
utmost attention and drive carefully.
WARNING!
“Off Road 2” ride height must always
be selected in case of water fording.
Please remember water fording limits:
max depth of the water must be lower than 19 in (50 cm) and crossing
speed lower than 5 mph (8 km/h).
In “OFF ROAD” drive mode, also
engine,
transmission settings are
changed in order to provide the most
suitable level of torque and selected
gear to improve traction on
low-adherence condition and uphill
climbing.
WARNING!
In case of downhill, the use of the Hill
Descent Control (HDC) is
recommended, especially for relevant
slope and in case of low-adherence
conditions.
Also suspensions (Skyhook Continuous
Damping
Control) are set
to a specific
calibration in “OFF ROAD” drive
mode, in order to obtain the right
damping force provided by the shock
absorbers, combined with the
increased ride heights “Off Road 1”
and “Off Road 2”.
Driving Through Water Set maximum ride height “Off Road
2” before driving through water.
Although your vehicle is capable of
driving through water, a number precautions must be considered
before entering the water.
NOTE:
Your vehicle is capable of water
fording to a maximum of 19 in (50 cm)
of water. To maintain optimal
performance of your vehicle’s heating
and ventilation system it is
recommended to switch the system
into recirculation mode during water
fording.
CAUTION!
When driving through water, do not
exceed 5 mph (8 km/h). Always check
water depth before entering, as a
precaution. Check all fluids
afterwards: driving through water
may cause damage to engine and
driveline that may not be covered by
the new vehicle limited warranty.
Driving through water more than a
few
inches/centimeters deep will
require extra caution to ensure safety
and prevent damage to your vehicle. If
you must drive through water, try to
determine the depth and the bottom
condition (and location of any
obstacles) prior to entering. Proceed
with caution and maintain a steadyDriving
5
265