2019 MASERATI LEVANTE change wheel
[x] Cancel search: change wheelPage 229 of 436
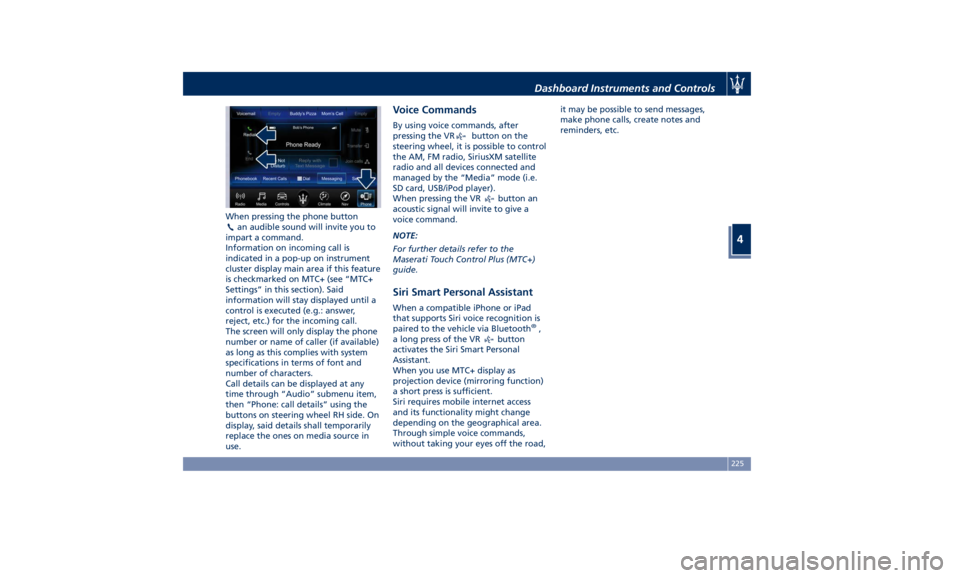
When pressing the phone button
an audible sound will invite you to
impart a command.
Information on incoming call is
indicated in a pop-up on instrument
cluster display main area if this feature
is checkmarked on MTC+ (see “MTC+
Settings” in this section). Said
information will stay displayed until a
control is executed (e.g.: answer,
reject, etc.) for the incoming call.
The screen will only display the phone
number or name of caller (if available)
as long as this complies with system
specifications in terms of font and
number of characters.
Call details can be displayed at any
time through “Audio” submenu item,
then “Phone: call details” using the
buttons on steering wheel RH side. On
display, said details shall temporarily
replace the ones on media source in
use. Voice Commands By using voice commands, after
pressing the VR
button on the
steering wheel, it is possible to control
the AM, FM radio, SiriusXM satellite
radio and all devices connected and
managed by the “Media” mode (i.e.
SD card, USB/iPod player).
When pressing the VR
button an
acoustic signal will invite to give a
voice command.
NOTE:
For further details refer to the
Maserati Touch Control Plus (MTC+)
guide.
Siri Smart Personal Assistant When a compatible iPhone or iPad
that supports Siri voice recognition is
paired to the vehicle via Bluetooth ®
,
a long press of the VR
button
activates the Siri Smart Personal
Assistant.
When you use MTC+ display as
projection device (mirroring function)
a short press is sufficient.
Siri requires mobile internet access
and its functionality might change
depending on the geographical area.
Through simple voice commands,
without taking your eyes off the road, it may be possible to send messages,
make phone calls, create notes and
reminders, etc.
Dashboard Instruments and Controls
4
225
Page 237 of 436
possible to turn off the Start&Stop
function.
Use the controls located on the right
side of the steering wheel (see
instructions in chapter “Instrument
Cluster” in section “Dashboard
Instruments and Controls”) and select
“Start & Stop” main menu item which
displays the status of the function:
Start & Stop enabled is the default
status.
Hold the switch (
) to change the
status of the function.
When the Start&Stop function is
turned off, in addition to the related
message the amber indicator
indicated in the picture will turn
on.
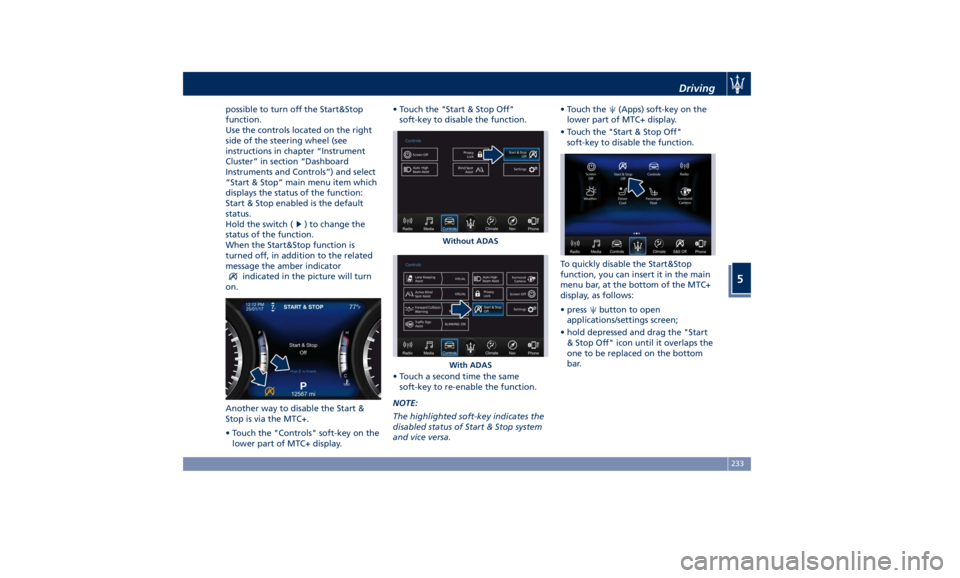
Another way to disable the Start &
Stop is via the MTC+.
• Touch the "Controls" soft-key on the
lower part of MTC+ display. • Touch the "Start & Stop Off"
soft-key to disable the function.
• Touch a second time the same
soft-key to re-enable the function.
NOTE:
The highlighted soft-key indicates the
disabled status of Start & Stop system
and vice versa. • Touch the
(Apps) soft-key on the
lower part of MTC+ display.
• Touch the "Start & Stop Off"
soft-key to disable the function.
To quickly disable the Start&Stop
function, you can insert it in the main
menu bar, at the bottom of the MTC+
display, as follows:
• press
button to open
applications/settings screen;
• hold depressed and drag the "Start
& Stop Off" icon until it overlaps the
one to be replaced on the bottom
bar.Without ADAS
With ADAS Driving
5
233
Page 245 of 436
automatic operation. The
transmission will also upshift
automatically once maximum engine
speed is reached.
• If in SPORT mode, the transmission
will remain in the selected gear even
when maximum engine speed is
reached. The transmission will
upshift only if enabled by the driver.
Manual upshift or downshift will be
maintained as long as SPORT mode is
selected, even by full stroke pedal
press.
• If in “M +/-“ or in SPORT mode, the
transmission will automatically
downshift as the vehicle slows to
halt (to prevent engine lugging) and
the current gear will display on the
instrument cluster. Shifting the shift
lever backward “+” or moving the
right shift paddle “+” towards the
steering wheel when stationary, will
cause the vehicle to start in second
gear. If the vehicle speed is too low,
the system will ignore further
upshifts. Avoid using speed control
when the M +/- (Manual) mode is
engaged.
When the car stops in M +/- (Manual)
mode, the transmission automatically
moves the shift lever and inserts P
(Park). If you enter the I.C.E. drive mode
when the gearshift is in “M +/-”
position, the system activates the
automatic return of the shift lever in D
(Drive) mode.
Shift Paddles (if equipped)
The driver can change gears with the
shift paddles behind the steering
wheel when in D (Drive) and M +/-
(Manual) mode.
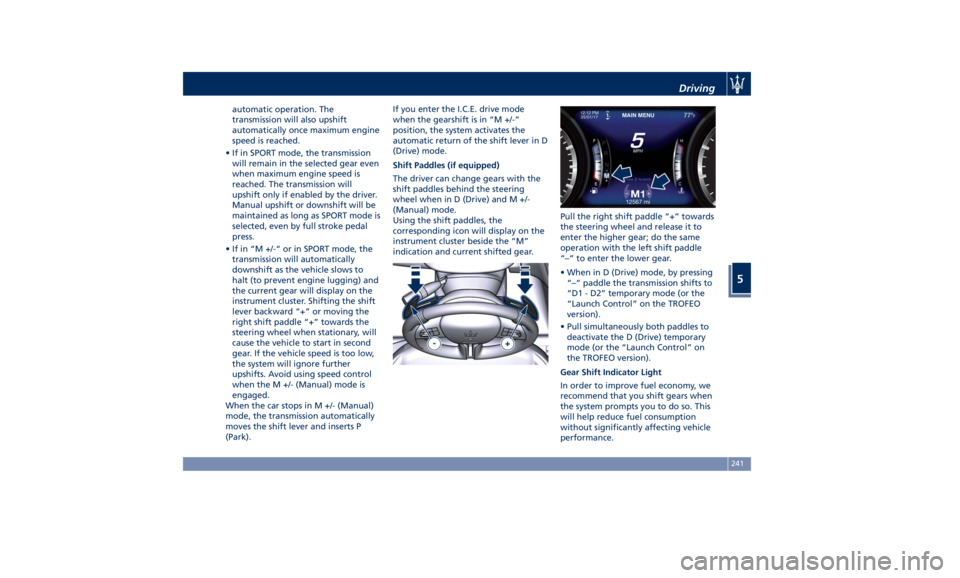
Using the shift paddles, the
corresponding icon will display on the
instrument cluster beside the “M”
indication and current shifted gear. Pull the right shift paddle “+” towards
the steering wheel and release it to
enter the higher gear; do the same
operation with the left shift paddle
“–“ to enter the lower gear.
• When in D (Drive) mode, by pressing
“–“ paddle the transmission shifts to
“D1 - D2” temporary mode (or the
“Launch Control” on the TROFEO
version).
• Pull simultaneously both paddles to
deactivate the D (Drive) temporary
mode (or the “Launch Control” on
the TROFEO version).
Gear Shift Indicator Light
In order to improve fuel economy, we
recommend that you shift gears when
the system prompts you to do so. This
will help reduce fuel consumption
without significantly affecting vehicle
performance.Driving
5
241
Page 249 of 436
• SPORT (NOT for TROFEO version): to
activate/deactivate a sportier drive
mode. In this mode, the vehicle has a
faster throttle response and ESC
sport calibration (not recommended
on wet/slippery surfaces). Activating
this drive mode, will also change the
EPS setting.
• SPORT and CORSA (TROFEO version
only): to activate/deactivate the
sportier and the race drive mode.
When in "SPORT" drive mode, the
vehicle has a faster throttle response
and ESC sport calibration (not
recommended on wet/slippery
surfaces). Activating this drive mode,
will also change the EPS setting.
When in "CORSA" drive mode, in
addition to what indicated for the
sposts mode, the transmission use a
specific gear shift pattern and the
traction is shifted more on the rear
wheels with increased oversteering
behavior. Traction control with
dedicated calibration to maximize
traction vs stability and "Launch
Control" start mode.
•
(Suspension): to switch between
the two suspension setting modes:
soft (LED light off) and hard ("S" on
the cluster and LED light on).
By selecting one of these drive modes,
the yellow or white LED on the button illuminates and, for some of these, the
vehicle configuration obtained is
graphically displayed on instrument
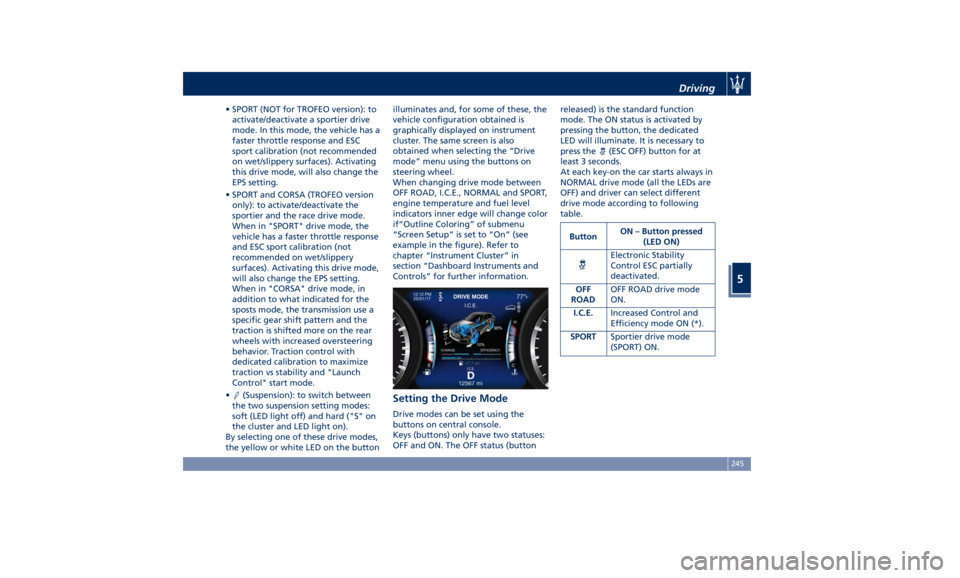
cluster. The same screen is also
obtained when selecting the “Drive
mode” menu using the buttons on
steering wheel.
When changing drive mode between
OFF ROAD, I.C.E., NORMAL and SPORT,
engine temperature and fuel level
indicators inner edge will change color
if“Outline Coloring” of submenu
“Screen Setup” is set to “On” (see
example in the figure). Refer to
chapter “Instrument Cluster” in
section “Dashboard Instruments and
Controls” for further information.
Setting the Drive Mode Drive modes can be set using the
buttons on central console.
Keys (buttons) only have two statuses:
OFF and ON. The OFF status (button released) is the standard function
mode. The ON status is activated by
pressing the button, the dedicated
LED will illuminate. It is necessary to
press the
(ESC OFF) button for at
least 3 seconds.
At each key-on the car starts always in
NORMAL drive mode (all the LEDs are
OFF) and driver can select different
drive mode according to following
table.
Button ON – Button pressed
(LED ON)
Electronic Stability
Control ESC partially
deactivated.
OFF
ROAD OFF ROAD drive mode
ON.
I.C.E. Increased Control and
Efficiency mode ON (*).
SPORT Sportier drive mode
(SPORT) ON.Driving
5
245
Page 264 of 436
the position of the vehicle with little
suspension movements to ensure a
proper appearance.
Display Messages
After shifting selector to change
position, a pop-up message will
indicate for 5 seconds when set
position has been reached (after
pneumatic suspension system
intervention that might last up to 30
seconds).
This type of message will be displayed
only if the option to view all
pneumatic suspension system messages
was set (For further details, refer to
“MTC+ Settings” in section
“Dashboard Instruments and
Controls”).
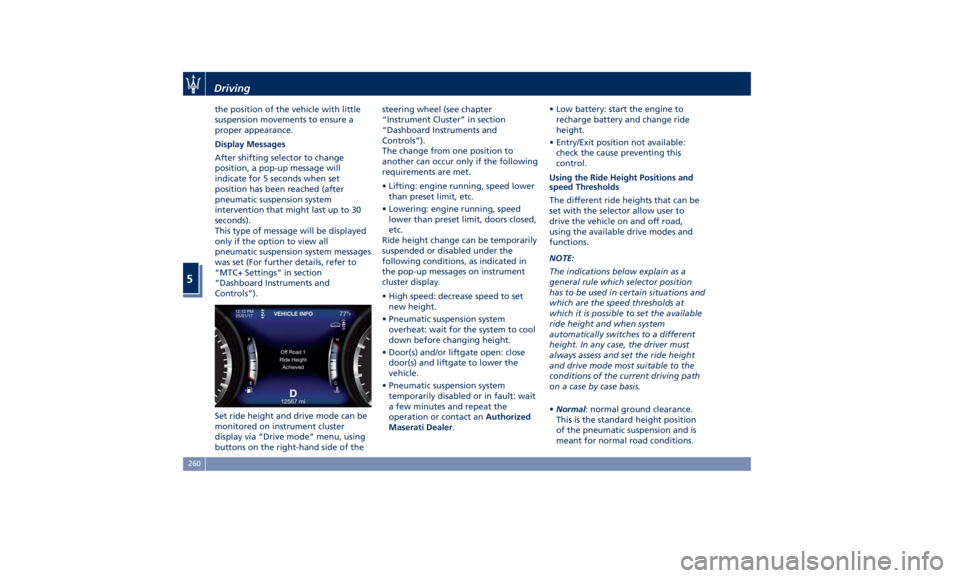
Set ride height and drive mode can be
monitored on instrument cluster
display via “Drive mode” menu, using
buttons on the right-hand side of the steering wheel (see chapter
“Instrument Cluster” in section
“Dashboard Instruments and
Controls”).
The change from one position to
another can occur only if the following
requirements are met.
• Lifting: engine running, speed lower
than preset limit, etc.
• Lowering: engine running, speed
lower than preset limit, doors closed,
etc.
Ride height change can be temporarily
suspended or disabled under the
following conditions, as indicated in
the pop-up messages on instrument
cluster display.
• High speed: decrease speed to set
new height.
• Pneumatic suspension system
overheat: wait for the system to cool
down before changing height.
• Door(s) and/or liftgate open: close
door(s) and liftgate to lower the
vehicle.
• Pneumatic suspension system
temporarily disabled or in fault: wait
a few minutes and repeat the
operation or contact an Authorized
Maserati Dealer . • Low battery: start the engine to
recharge battery and change ride
height.
• Entry/Exit position not available:
check the cause preventing this
control.
Using the Ride Height Positions and
speed Thresholds
The different ride heights that can be
set with the selector allow user to
drive the vehicle on and off road,
using the available drive modes and
functions.
NOTE:
The indications below explain as a
general rule which selector position
has to be used in certain situations and
which are the speed thresholds at
which it is possible to set the available
ride height and when system
automatically switches to a different
height. In any case, the driver must
always assess and set the ride height
and drive mode most suitable to the
conditions of the current driving path
on a case by case basis.
• Normal : normal ground clearance.
This is the standard height position
of the pneumatic suspension and is
meant for normal road conditions.Driving
5
260
Page 280 of 436

exits from this strategy when the
accelerator pedal is completely
unstuck.
Hill Start Assist (HSA) The HSA system is designed to assist
the driver when starting a vehicle
uphill. HSA will maintain the level of
brake pressure applied for a short
period of time also after releasing the
brake pedal.
If the driver does not apply the
throttle during this short period of
time, the system will release brake
pressure and the vehicle will start
sloping down. The system will release
brake pressure proportionally to the
amount of throttle/torque applied as
the vehicle starts to move in the
chosen direction.
HSA Activation Criteria
The following criteria must be met in
order for HSA to activate:
• vehicle is stationary;
• gear selection matches vehicle uphill
direction (i.e., vehicle facing uphill is
in forward gear; vehicle backing
uphill is in reverse gear).
HSA will work in R (Reverse) and all
forward gears when the activation
criteria have been met. The system will not activate if the
transmission is placed in N (Neutral) or
P (Park).
Roll-Over Mitigation (ROM) This system anticipates the potential
for wheel lift by monitoring the
driver's steering wheel input and the
speed of the vehicle. When ROM
determines that the rate of change of
the steering wheel angle and vehicle's
speed are sufficient to potentially
cause wheel lift, it then applies the
appropriate brake and may also
reduce engine power to lessen the
chance that wheel lift will occur.
ROM will only intervene during very
severe or evasive driving maneuvers.
ROM can only reduce the chance of
wheel lift occurring during severe or
evasive driving maneuvers. It cannot
prevent wheel lift due to other factors,
such as road and off-road conditions,
leaving the roadway, or striking
objects or other vehicles.
WARNING!
Many factors, such as vehicle loading,
road and off-road conditions, and
driving conditions, influence the
chance that wheel lift or rollover may occur. ROM cannot prevent all wheel
lift or roll-overs, especially those that
involve leaving the roadway or
striking objects or other vehicles. The
capabilities of a ROM-equipped
vehicle must never be exploited in a
reckless or dangerous manner, which
could jeopardize the user’s safety or
the safety of others.
Trailer Sway Mitigation (TSM) TSM uses sensors in the vehicle to
recognize an excessively swaying
trailer and will take the appropriate
actions to attempt to stop the sway.
The system may reduce engine power
and apply the brake of the
appropriate wheel(s) to counteract the
sway of the trailer. TSM will become
active automatically once an
excessively swaying trailer is
recognized.
TSM cannot stop all trailers from
swaying. Always use caution when
towing a trailer and follow the trailer
tongue weight recommendations.
Refer to “Trailer Towing” in this
section for further information. When
TSM is functioning, the “ESC
Activation/Malfunction Indicator
Light” will flash (see “Instrument
Cluster” in section “DashboardDriving
5
276
Page 281 of 436
Instruments and Controls”), the
engine power may be reduced and
you may feel the brakes being applied
to individual wheels to attempt to
stop the trailer from swaying.
TSM is disabled when the ESC system is
partially deactivated (button
pressed, LED on).
WARNING!
If TSM activates while driving, slow
the vehicle down, stop at the nearest
safe location, and adjust the trailer
load to eliminate trailer sway.
Hill Descent Control (HDC) HDC maintains vehicle speed while
descending hills during various driving
situations, by actively controlling the
brakes.
HDC is part of the ESC system and has
three possible states:
• Off: feature is not enabled and will
not activate.
• Enabled: feature is enabled and
ready but activation conditions are
not met, or driver is actively
overriding with brake or throttle
application. • Active: feature is enabled and
actively controlling vehicle speed.
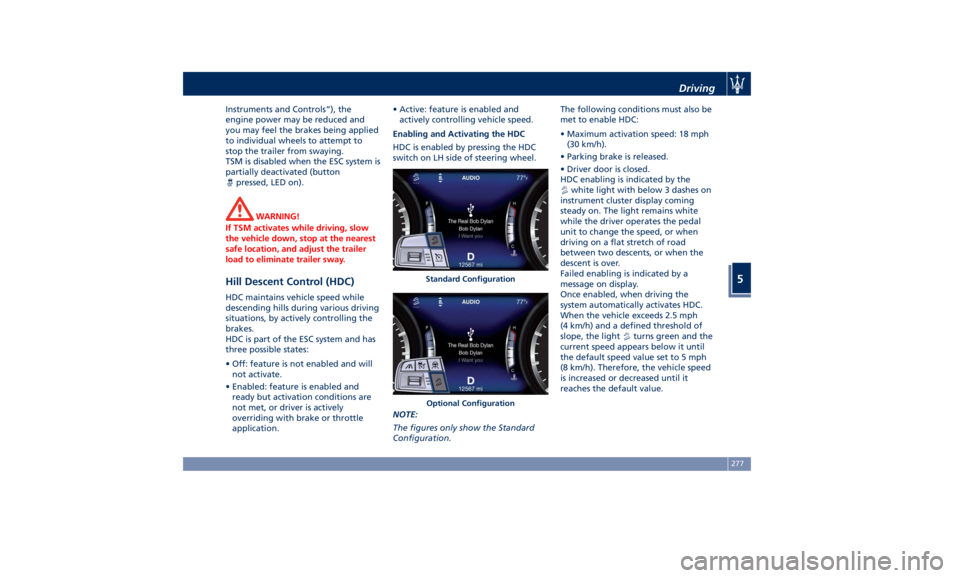
Enabling and Activating the HDC
HDC is enabled by pressing the HDC
switch on LH side of steering wheel.
NOTE:
The figures only show the Standard
Configuration. The following conditions must also be
met to enable HDC:
• Maximum activation speed: 18 mph
(30 km/h).
• Parking brake is released.
• Driver door is closed.
HDC enabling is indicated by the
white light with below 3 dashes on
instrument cluster display coming
steady on. The light remains white
while the driver operates the pedal
unit to change the speed, or when
driving on a flat stretch of road
between two descents, or when the
descent is over.
Failed enabling is indicated by a
message on display.
Once enabled, when driving the
system automatically activates HDC.
When the vehicle exceeds 2.5 mph
(4 km/h) and a defined threshold of
slope, the light
turns green and the
current speed appears below it until
the default speed value set to 5 mph
(8 km/h). Therefore, the vehicle speed
is increased or decreased until it
reaches the default value.Standard Configuration
Optional Configuration Driving
5
277
Page 292 of 436

Apart from the image at the center of
the display, CC, ACC, HDC, LKA and
HAS systems status is represented by
icons at the top left and right. These
icons remain displayed even when
exiting the “Driver Assist” screen.
The vehicle(s) and horizontal bars
represent the ACC status as ready
(white) or with sensed vehicle ahead
(green); the white, grey or yellow lines
represent the LKA and HAS systems.
The ACC screen can be displayed any
time driver changes system status or
settings. After 5 seconds of ACC
inactivity, the display goes back to last
screen.
ACC Controls and Activation
Conditions The buttons on the LH side of the
steering wheel control the ACC
operations and the other
functions/driver assist systems installed
to this vehicle. 1 Multifunction control shared by all
driver assist functions/systems:
• Press up (indication “RES +”):
increase speed, set current speed
or resume previously set speed
when system is in “cancelled”
status.
• Pushed (indication “CANC”):
cancel the function if it was in
“set” status, going in a ready
condition but remembering the
previous set speed.
• Press down (indication “SET -”):
set speed/decrease speed. 2 Two functions button with ACC
activated:
• ACC Gap: pressed and released;
set the distance to sensed vehicle
ahead as horizontal bars (setting
cycle starts to 3 bars).
• CC On: pressed for 2 seconds
activates the CC system.
• Press it to switch from CC to
ACC.
3 ACC ON/OFF button. If enabled,
pressing this button will disable CC.
4 HAS ON/OFF button with ACC set
only . See "Highway Assist - HAS" in
this section for further details.
NOTE:
Any change made to tire dimensions
affects performance of Adaptive Cruise
Control and Front Collision Warning
(FCW), if equipped.
The ACC is not activated in the
following conditions:
• When braking.
• When parking brake is activated.
• When automatic transmission is in P
(Park), R (Reverse) or N (Neutral).
• When vehicle speed is out of preset
speed range.
• When brakes are overheated.Driving
5
288