2019 MASERATI GRANTURISMO CONVERTIBLE light
[x] Cancel search: lightPage 145 of 296

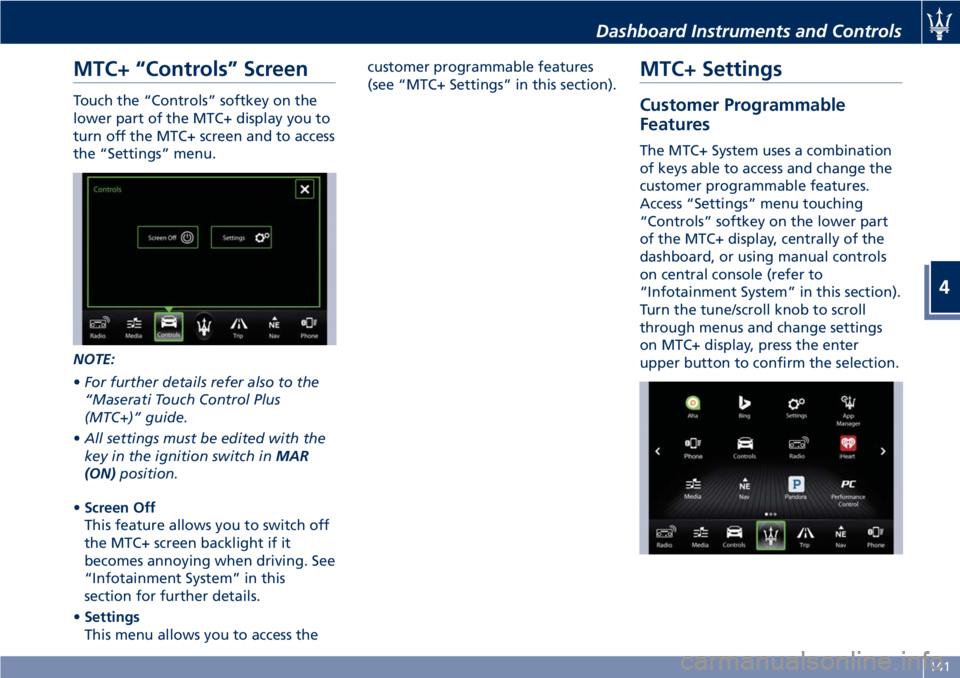
MTC+ “Controls” Screen Touch the “Controls” softkey on the
lower part of the MTC+ display you to
turn off the MTC+ screen and to access
the “Settings” menu.
NOTE:
• For further details refer also to the
“Maserati Touch Control Plus
(MTC+)” guide.
• All settings must be edited with the
key in the ignition switch in MAR
(ON) position.
• Screen Off
This feature allows you to switch off
the MTC+ screen backlight if it
becomes annoying when driving. See
“Infotainment System” in this
section for further details.
• Settings
This menu allows you to access the customer programmable features
(see “MTC+ Settings” in this section).
MTC+ Settings Customer Programmable
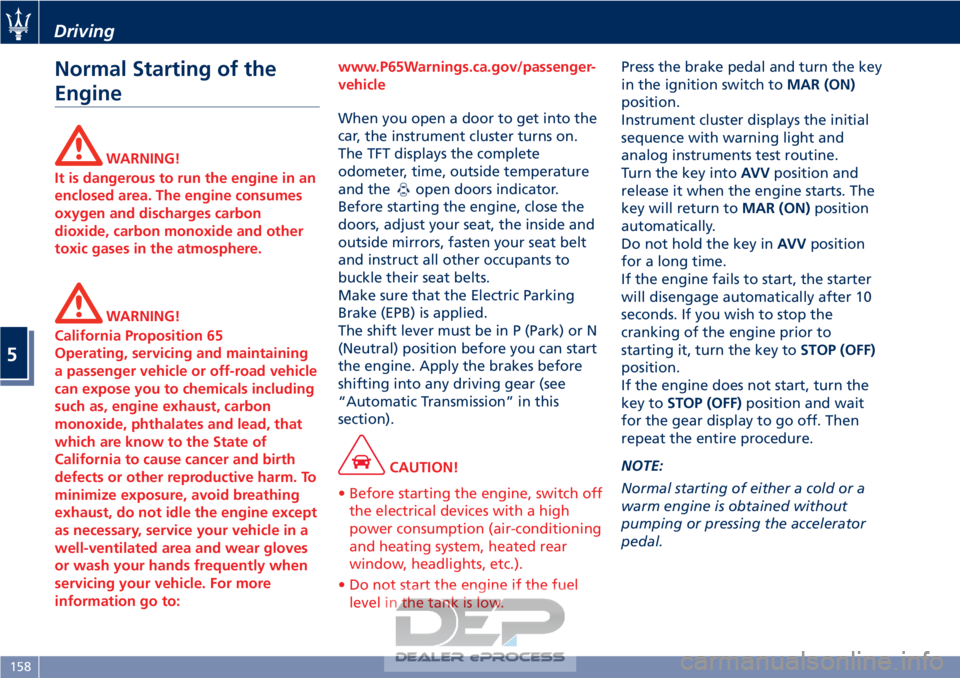
Features The MTC+ System uses a combination
of keys able to access and change the
customer programmable features.
Access “Settings” menu touching
“Controls” softkey on the lower part
of the MTC+ display, centrally of the
dashboard, or using manual controls
on central console (refer to
“Infotainment System” in this section).
Turn the tune/scroll knob to scroll
through menus and change settings
on MTC+ display, press the enter
upper button to confirm the selection.Dashboard Instruments and Controls
4
141
Page 146 of 296

NOTE:
• For further details refer to the
“Maserati Touch Control Plus
(MTC+)” guide.
• All settings must be edited with key
in the ignition switch in MAR (ON)
position.
To display the programmable features
menu on MTC+ touch the “Settings”
softkey on “Controls” screen.
In this mode the MTC+ System allows
you to access the following
programmable features (some of them
are optional and may not be available
on your vehicle): Display, Units, Voice
Commands, Clock, Safety & Driving
Assistant, Lights, Doors & Locks, Audio,
Phone/Bluetooth, SiriusXM Setup,
Restore Settings, Clear Personal Data
and System Information. NOTE:
• Only one touchscreen area/softkey
may be selected at a time.
• Menu navigation indications refer to
the use of softkeys on MTC+ display:
the same operations can be
performed using the manual controls
on central console.
To make a selection, and enter the
desired feature, touch the
corresponding softkey on the menu
(the picture shown is “Clock”).
To scroll through the features, move
the cursor up or down, or touch the
arrow ▼ or ▲ . Once the desired mode
is entered, press and release the
touchscreen area of the setting that
you wish to modify. The new setting
will be highlighted with one or more
boxes to indicate status or possible
variants of the feature status. A check mark in a box indicates the current
status of the feature. Touch the check
mark to cancel, or the empty box to
insert the check mark, and change the
status of the feature.
Once the procedure is completed (for
example, Display mode) touch the
back arrow softkey to return to the
previous menu or touch the upper
right “X” softkey, to close the settings
screen. Touching the ▲ or ▼ softkeys
and the cursor on the right side of the
screen will allow you to scroll up or
down through the available settings.Dashboard Instruments and Controls
4
142
Page 147 of 296

Display After pressing the “Display” softkey
the following mode settings will be
available.
• Display Mode
When in this display you can select
one of the auto display settings. To
change mode status, checkmark
"Night", “Day” or “Auto”.
• Display Brightness Night
When in this display, you can select
the brightness with the headlights
on. Adjust the brightness from level
0 to 10 with the “+” and “–” setting
softkeys or by selecting any point
on the scale between the “+” and
“–” softkeys. • Display Brightness Day
When in this display, you can select
the brightness with the headlights
off. Adjust the brightness as
previously explained for "Night"
setting.
• Set Language
When in this display, you can select
one language for all display
descriptions, including the trip
features and the navigation system.
The available languages are specific
to the target markets.
• Keyboard
Selecting this feature, the display
shows the alphanumeric keyboard
to enter address, stations, etc..
• Touch screen Beep
When in this display, you can turn
on or shut off the sound activated by pressure of a touch screen
softkey.
• Controls Screen Time-Out
When this mode is selected, the
“Controls” screen will remain
displayed for 5 seconds. If this mode
is not selected, the screen will
remain displayed until closed
manually.
• Nav Next Turn Pop-ups in Cluster
By selecting this feature, the next
turn direction will appear on the
instrument cluster along a
programmed route until the desired
destination is reached (see picture).
• Phone Pop-ups Displayed In Cluster
When this mode is selected, the
display will show the pop-ups
messages with the number and
state of the call in progress.Dashboard Instruments and Controls
4
143
Page 150 of 296

and rearview mirror position
storage).
The volume can be set to 7 levels
identified by numbers from "1" to
"7" by pressing the "+" or "–"
softkey.
• Light Sensor
This feature allows to adjust the
sensitivity of the twilight sensor for
turning on the lights.
The feature can be set to 3 levels:
"Low", "Medium" (default setting)
and "High".
• Speed Limit
This feature allows to set a speed
limit and activate an alarm signal
which will sound when the maximum speed limit set is
exceeded.
Checkmarked the softkey to enable
the feature.
Press then the "+" or "–" softkey to
increase or decrease the speed limit.
Each touch increases/decreases the
value by 5 units.
Lights
Press the “Lights” softkey to set the
following modes.
•
Daytime Lights (DRL, for
versions/markets where provided)
If activated, this feature allows the
automatic switching on of the DRL
upon switching off of the position
lights and vice versa. When the
position lights switch on, the DRL
switch off.
See “Lights” in section
“Understanding the Vehicle” for
further information.
Doors & Locks
Press the “Doors & Locks” softkey to
set the following modes.
• Auto Door Locks (Autoclose)
When this feature is selected, all
doors will automatically lock when the vehicle is in motion. The feature
can be set to “On” or “Off”.
• Independent Trunk Lid Unlocking
When this feature is selected and
checkmarked, only the trunk
compartment lid remains unlocked
and can be opened by pressing the
button between the license plate
lights.
When there is not checkmark, the
trunk lid unlocking follows the logic
of the doors.
• Key Fob Unlocks
By selecting this feature you may set
up only the driver's door or all doors
mode will unlock on the first press
of the
button on the radio
control case (key fob). When "Driver
Door" is selected, you must press the
key fob
button twice to unlock
also the passenger’s door. When
Dashboard Instruments and Controls
4
146
Page 154 of 296

The compartment is illuminated by a
courtesy light when open (the light
will automatically switch off when the
compartment is closed).
Glove Compartment inside
Central Console
To access this compartment, lift the
cover with armrest function pressing
the inside handle.
In addition to the multimedia ports
and the power outlet, in thiscompartment it is possible to house a
half-liter bottle or a smartphone.
NOTE:
To prevent to damage the smartphone
put it into its housing shown in figure
below (see also the label applied
under the cover with armrest
function).
Analog Clock
To adjust the analog clock located on
the center of the dashboard above the
MTC+ display, use the MTC+ System
(see “MTC+ Settings” in this section).
The time can be visualized also on the
MTC+ status bar and on the
instrument cluster display (see “MTC+
Settings” in this section).
Clock lighting is aligned with the
backlighting status of the MTC+
display (refer to “MTC + Settings” in
section “Dashboard Instruments and
Controls”).
Dashboard Instruments and Controls
4
150
Page 162 of 296

Normal Starting of the
Engine
WARNING!
It is dangerous to run the engine in an
enclosed area. The engine consumes
oxygen and discharges carbon
dioxide, carbon monoxide and other
toxic gases in the atmosphere.
WARNING!
California Proposition 65
Operating, servicing and maintaining
a passenger vehicle or off-road vehicle
can expose you to chemicals including
such as, engine exhaust, carbon
monoxide, phthalates and lead, that
which are know to the State of
California to cause cancer and birth
defects or other reproductive harm. To
minimize exposure, avoid breathing
exhaust, do not idle the engine except
as necessary, service your vehicle in a
well-ventilated area and wear gloves
or wash your hands frequently when
servicing your vehicle. For more
information go to: www.P65Warnings.ca.gov/passenger-
vehicle
When you open a door to get into the
car
, the instrument cluster turns on.
The TFT displays the complete
odometer, time, outside temperature
and the
open doors indicator.
Before starting the engine, close the
doors, adjust your seat, the inside and
outside mirrors, fasten your seat belt
and instruct all other occupants to
buckle their seat belts.
Make sure that the Electric Parking
Brake (EPB) is applied.
The shift lever must be in P (Park) or N
(Neutral) position before you can start
the engine. Apply the brakes before
shifting into any driving gear (see
“Automatic Transmission” in this
section).
CAUTION!
• Before starting the engine, switch off the electrical devices with a high
power consumption (air-conditioning
and heating system, heated rear
window, headlights, etc.).
• Do not start the engine if the fuel level in the tank is low. Press the brake pedal and turn the key
in
the ignition switch to MAR (ON)
position.
Instrument cluster displays the initial
sequence with warning light and
analog instruments test routine.
Turn the key into AVVposition and
release it when the engine starts. The
key will return to MAR (ON)position
automatically.
Do not hold the key in AVVposition
for a long time.
If the engine fails to start, the starter
will disengage automatically after 10
seconds. If you wish to stop the
cranking of the engine prior to
starting it, turn the key to STOP (OFF)
position.
If the engine does not start, turn the
key to STOP (OFF) position and wait
for the gear display to go off. Then
repeat the entire procedure.
NOTE:
Normal starting of either a cold or a
warm engine is obtained without
pumping or pressing the accelerator
pedal.
Driving
5
158
Page 165 of 296

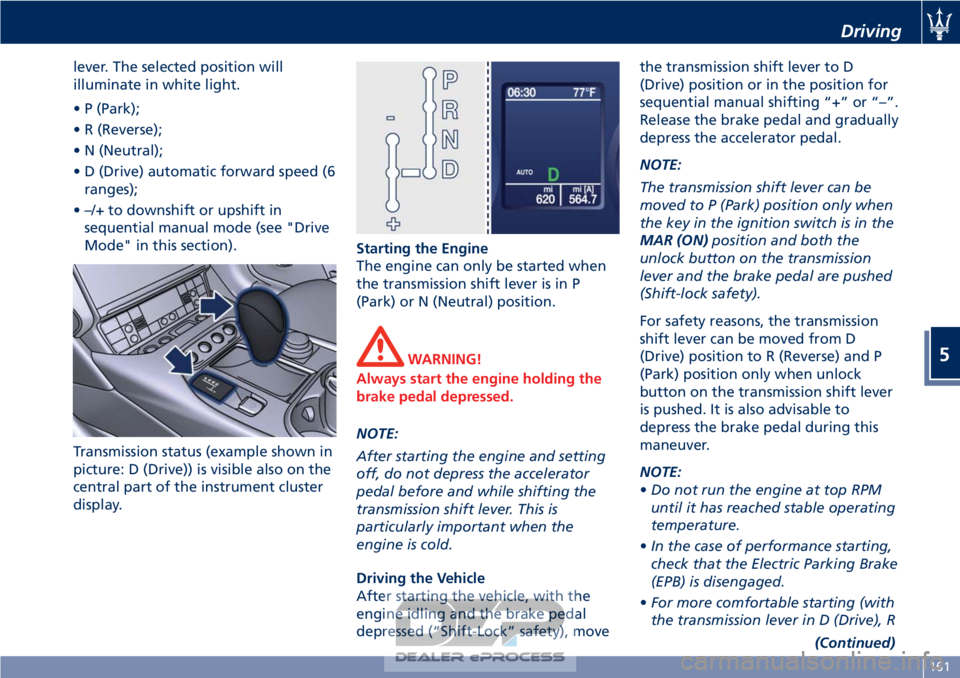
lever. The selected position will
illuminate in white light.
• P (Park);
• R (Reverse);
• N (Neutral);
• D (Drive) automatic forward speed (6ranges);
• –/+ to downshift or upshift in sequential manual mode (see "Drive
Mode" in this section).
Transmission status (example shown in
picture: D (Drive)) is visible also on the
central part of the instrument cluster
display. Starting the Engine
The engine can only be started when
the transmission shift lever is in P
(Park) or N (Neutral) position.
WARNING!
Always start the engine holding the
brake pedal depressed.
NOTE:
After
starting the engine and setting
off, do not depress the accelerator
pedal before and while shifting the
transmission shift lever. This is
particularly important when the
engine is cold.
Driving the Vehicle
After starting the vehicle, with the
engine idling and the brake pedal
depressed (“Shift-Lock” safety), move the transmission shift lever to D
(Drive) position or in the position for
sequential manual shifting “+” or “–”.
Release the brake pedal and gradually
depress the accelerator pedal.
NOTE:
The transmission shift lever can be
moved to P (Park) position only when
the key in the ignition switch is in the
MAR (ON)
position and both the
unlock button on the transmission
lever and the brake pedal are pushed
(Shift-lock safety).
For safety reasons, the transmission
shift lever can be moved from D
(Drive) position to R (Reverse) and P
(Park) position only when unlock
button on the transmission shift lever
is pushed. It is also advisable to
depress the brake pedal during this
maneuver.
NOTE:
• Do not run the engine at top RPM
until it has reached stable operating
temperature.
• In the case of performance starting,
check that the Electric Parking Brake
(EPB) is disengaged.
• For more comfortable starting (with
the transmission lever in D (Drive), R
(Continued)
Driving
5
161
Page 167 of 296

pedal pressed. To move the shift lever
from P (Park) position to any other
position, the engine must be switched
on. The engine can be regularly
started in P (Park) range. Never
attempt to use P (Park) while the
vehicle is in motion.
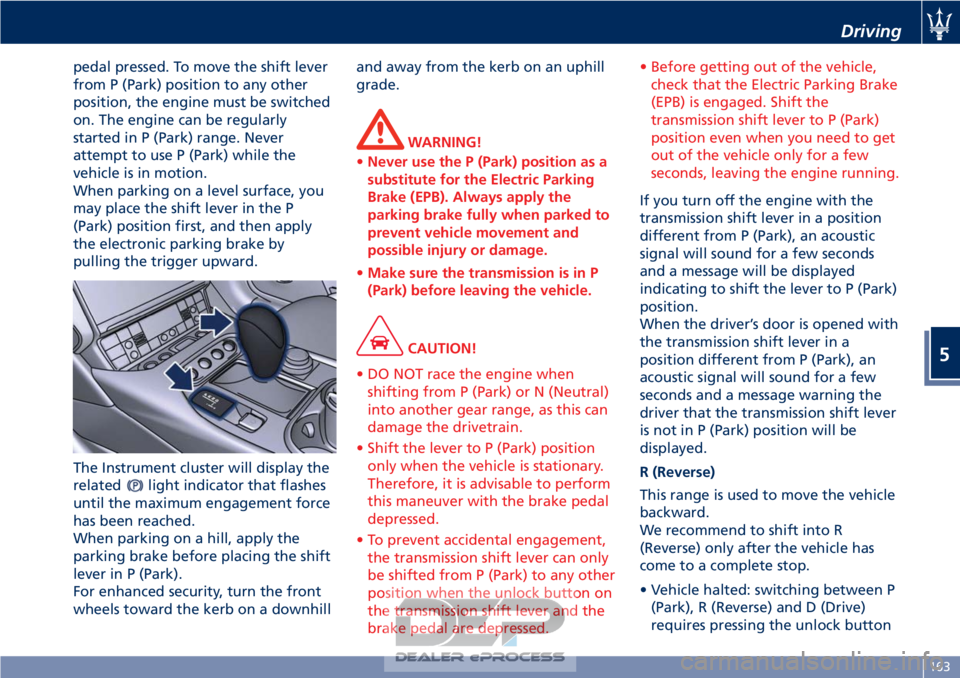
When parking on a level surface, you
may place the shift lever in the P
(Park) position first, and then apply
the electronic parking brake by
pulling the trigger upward.
The Instrument cluster will display the
related
light indicator that flashes
until the maximum engagement force
has been reached.
When parking on a hill, apply the
parking brake before placing the shift
lever in P (Park).
For enhanced security, turn the front
wheels toward the kerb on a downhill and away from the kerb on an uphill
grade.
WARNING!
• Never use the P (Park) position as a
substitute for the Electric Parking
Brake (EPB). Always apply the
parking brake fully when parked to
prevent vehicle movement and
possible injury or damage.
• Make sure the transmission is in P
(Park) before leaving the vehicle.
CAUTION!
• DO NOT race the engine when shifting from P (Park) or N (Neutral)
into another gear range, as this can
damage the drivetrain.
• Shift the lever to P (Park) position only when the vehicle is stationary.
Therefore, it is advisable to perform
this maneuver with the brake pedal
depressed.
• To prevent accidental engagement, the transmission shift lever can only
be shifted from P (Park) to any other
position when the unlock button on
the transmission shift lever and the
brake pedal are depressed. • Before getting out of the vehicle,
check that the Electric Parking Brake
(EPB) is engaged. Shift the
transmission shift lever to P (Park)
position even when you need to get
out of the vehicle only for a few
seconds, leaving the engine running.
If you turn off the engine with the
transmission
shift lever in a position
different from P (Park), an acoustic
signal will sound for a few seconds
and a message will be displayed
indicating to shift the lever to P (Park)
position.
When the driver’s door is opened with
the transmission shift lever in a
position different from P (Park), an
acoustic signal will sound for a few
seconds and a message warning the
driver that the transmission shift lever
is not in P (Park) position will be
displayed.
R (Reverse)
This range is used to move the vehicle
backward.
We recommend to shift into R
(Reverse) only after the vehicle has
come to a complete stop.
• Vehicle halted: switching between P (Park), R (Reverse) and D (Drive)
requires pressing the unlock button
Driving
5
163