2019 MASERATI GRANTURISMO CONVERTIBLE power steering
[x] Cancel search: power steeringPage 169 of 296
(Drive) to R (Reverse), and vice versa,
by pressing the unlock button on the
transmission shift lever.
• Vehicle moving: switching to N (Neutral) from D (Drive) requires the
unlock button on the shift lever
pressed.
• From D (Drive) selected mode it is always possible to switch to
MANUAL mode by shifting the
transmission shift lever to "+" or "–"
position.
The gears will be engaged in relation
to the traveling speed, engine RPM,
accelerator position, speed with which
the pedal is depressed as well as the
traveling conditions (uphill, downhill,
curves).
The system has been programmed to
classify all driving styles, in relation to
the above mentioned parameters, and
to associate them with the various
vehicle settings, which go from
extremely comfortable and economic
driving to racing-style driving. The
setting is selected automatically.
At extremely cold temperatures
(-23°F/-30°C or below), transmission
may be affected by the low
temperature of the engine and
transmission. Normal operation will
resume once the transmission temperature has risen to a normal
level.
Transmission Strategy in
Particular Driving Situations
Downhill Driving
When the accelerator pedal is
released, the transmission system
detects that the vehicle is moving
downhill and deactivates upshifting.
When the accelerator pedal is
depressed, upshifting is reactivated
but will be delayed by a few seconds.
When the brake pedal is depressed,
the transmission system downshifts to
provide enhanced engine braking
power.
In other words, when driving
downhill, the transmission system
operates so as to avoid upshifting and
shifting gears when the accelerator
pedal is released, and delays gear
engagement by a few seconds when
the accelerator pedal is depressed.
In addition, when the brakes are
applied, it engages the lowest gear in
order to provide enhanced engine
braking power.
This strategy is aimed at making
downhill driving safer.
Driving in Curves
The system detects when the vehicle
goes into a curve through the lateral
acceleration and the steering angle.
Detecting this condition, it controls
gearshifting using a specific mode.
This mode is exited when the vehicle
comes out of the curve, at a distance
that varies depending on the vehicle
speed.
Fast-off Strategy
When the accelerator pedal is fully
released, the system deactivates
upshifting.
The next time the pedal is depressed,
upshifting will be reactivated only
after a few seconds.
Upshifting is also deactivated when
the accelerator pedal is partially
released; the system waits the time
necessary to evaluate if the release
action is completed.
Hot-mode Situations
In the event that the engine oil or
coolant temperature is too high or
both, the transmission system reduces
the maximum engine speed to 4000
rpm.
Therefore, upshifting will occur at this
limit.
This strategy does not apply to
downhill driving, so as to always have
Driving
5
165
Page 181 of 296

engage the parking brake, but also to
shift the transmission shift lever to P
(Park) before leaving the vehicle.
When parking on hill roads, it is
important
to turn the front wheels
toward the curb on a downhill grade
and away from the curb on an uphill
grade.
Apply the parking brake before
placing the shift lever in P (Park),
otherwise the load on the
transmission locking mechanism may
make it difficult to move the shift
lever out of P (Park).
In certain conditions, it is however
advisable to disengage the parking
brake manually and slightly apply the
service brake for starting off. This is
advisable when there are obstacles
very close to the vehicle in the
direction in which you intend to move.
Brake and Stability
Control System
The vehicle is equipped with an
Electronic Stability Control (ESC)
anti-yawing system, which helps to
maintain directional control in the
event of loss of grip of the tires. The
system is able to detect potentially
dangerous situations for the stability
of the vehicle and automatically sets
the brakes on all four wheels in a
differentiated manner, in order to
provide a torque settlement of the
vehicle.
ESC includes the following subsystems:
• ASR (Anti-Slip Regulation)
• ABS (Anti-lock Braking System)
• EBD (Electronic Brake-force Distribution)
• HBA (Hydraulic Brake Assistance)
• BOS (Brake Override System)
WARNING!
• These systems cannot prevent the
natural laws of physics from
affecting the vehicle, nor can they
increase traction, braking or steering
efficiency beyond that afforded by
the condition of the vehicle brakes
and tires. •
These systems cannot prevent
collisions, including those resulting
from excessive speed in turns,
following another vehicle too
closely, or hydroplaning.
• The capabilities of a vehicle
equipped with these systems must
never be exploited in a reckless or
dangerous manner that could
jeopardize the driver’s and the
passenger’s safety or the safety of
others.
Electronic Stability Control
(ESC)
This system enhances directional
control and stability of the vehicle
under various driving conditions. The
ESC corrects over steering and under
steering of the vehicle by applying the
brake to the appropriate wheel.
Engine power may also be reduced to
assist in counteracting the conditions
of instability and maintain the right
direction. The system is also able to
reduce the engine power.
Through sensors fitted on the vehicle,
the ESC system detects the driver’s
chosen direction comparing it to the
one maintained while running. In case
of discrepancy between the required
trajectory and the current one, the
Driving
5
177
Page 182 of 296
ESC system brakes the appropriate
wheel to counteract over or under
steering.
• Oversteer - when the vehicle isturning more than appropriate for
the steering wheel position.
• Understeer - when the vehicle is turning less than appropriate for the
steering wheel position.
The ESC system has two available
operating modes:
ESC On
This is the normal ESC operating mode.
At each start-up of the vehicle, the ESC
system is set in this mode and should
be used for most driving conditions.
The ESC should only be turned off for
specific reasons as pointed out in the
following paragraphs.
ESC Off
The “ESC Off” mode is aimed for a
more spirited driving experience but
also purposeful for driving in deep
snow, sand, or gravel. The current
mode disables the traction control
portion of the ESC and raises the
threshold for ESC activation, allowing
higher wheel spin than normally
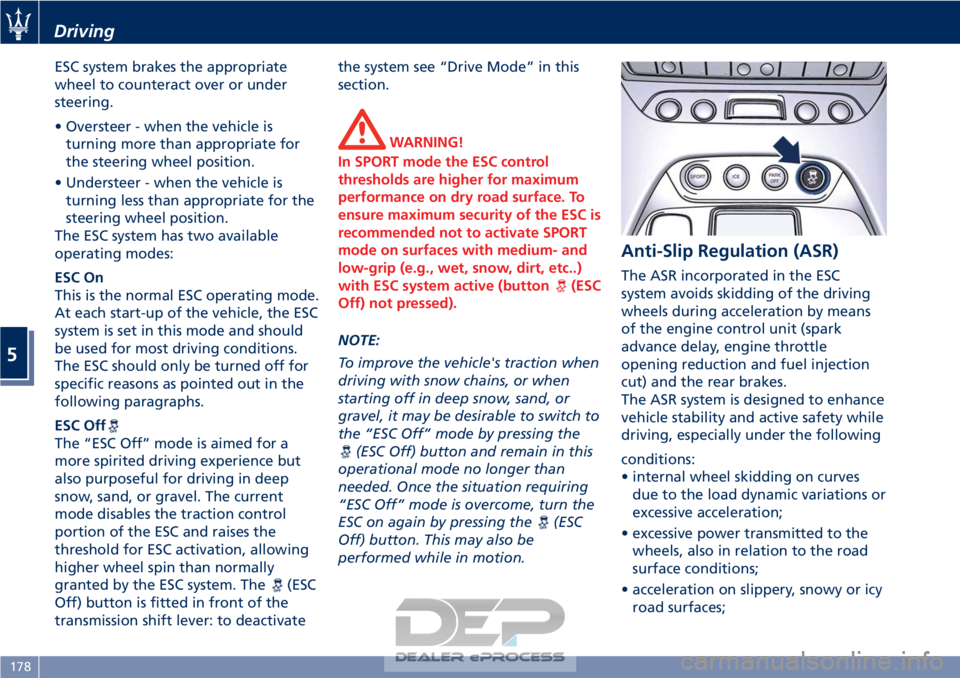
granted by the ESC system. The
(ESC
Off) button is fitted in front of the
transmission shift lever: to deactivate the system see “Drive Mode” in this
section.
WARNING!
In SPORT mode the ESC control
thresholds are higher for maximum
performance on dry road surface. To
ensure maximum security of the ESC is
recommended not to activate SPORT
mode on surfaces with medium- and
low-grip (e.g., wet, snow, dirt, etc..)
with ESC system active (button
(ESC
Off) not pressed).
NOTE:
T
o improve the vehicle's traction when
driving with snow chains, or when
starting off in deep snow, sand, or
gravel, it may be desirable to switch to
the “ESC Off” mode by pressing the
(ESC Off) button and remain in this
operational mode no longer than
needed. Once the situation requiring
“ESC Off” mode is overcome, turn the
ESC on again by pressing the
(ESC
Off) button. This may also be
performed while in motion.
Anti-Slip Regulation (ASR)
The ASR incorporated in the ESC
system avoids skidding of the driving
wheels during acceleration by means
of the engine control unit (spark
advance delay, engine throttle
opening reduction and fuel injection
cut) and the rear brakes.
The ASR system is designed to enhance
vehicle stability and active safety while
driving, especially under the following
conditions:
• internal wheel skidding on curves due to the load dynamic variations or
excessive acceleration;
• excessive power transmitted to the wheels, also in relation to the road
surface conditions;
• acceleration on slippery, snowy or icy road surfaces;
Driving
5
178
Page 187 of 296
Use of the Engine
Breaking-In
Today's most modern production
methods are designed to provide
extremely precise construction and
assembly of components. However,
moving parts do undergo a settling
process, basically in the first hours of
vehicle operation.
Do not drive keeping at a constant
high speed rate for a prolonged time.
While cruising, brief full-throttle
acceleration within the limits of local
traffic laws contributes to a good
break-in. Wide-open throttle
acceleration in low gear can be
detrimental and should be avoided.
The engine oil installed in the engine
at the factory is a high-quality energy
conserving type lubricant. Oil changes
should be consistent with anticipated
climate conditions under which vehicle
operations will occur. For the
recommended viscosity and quality
grades, see “Refillings” in section
“Features and Specifications”.
A new engine may consume some oil
during its first few thousand
kilometers of operation. This should
be considered as a normal part of thebreak-in and not interpreted as an
indication of malfunction.
Avoid exceeding 5000 rpm for the first
620 trip mi (1000 km).
After starting the vehicle, do not
exceed 4000 rpm until the engine has
warmed up sufficiently (coolant
temperature: 149-158°F/65-70°C).
While Driving
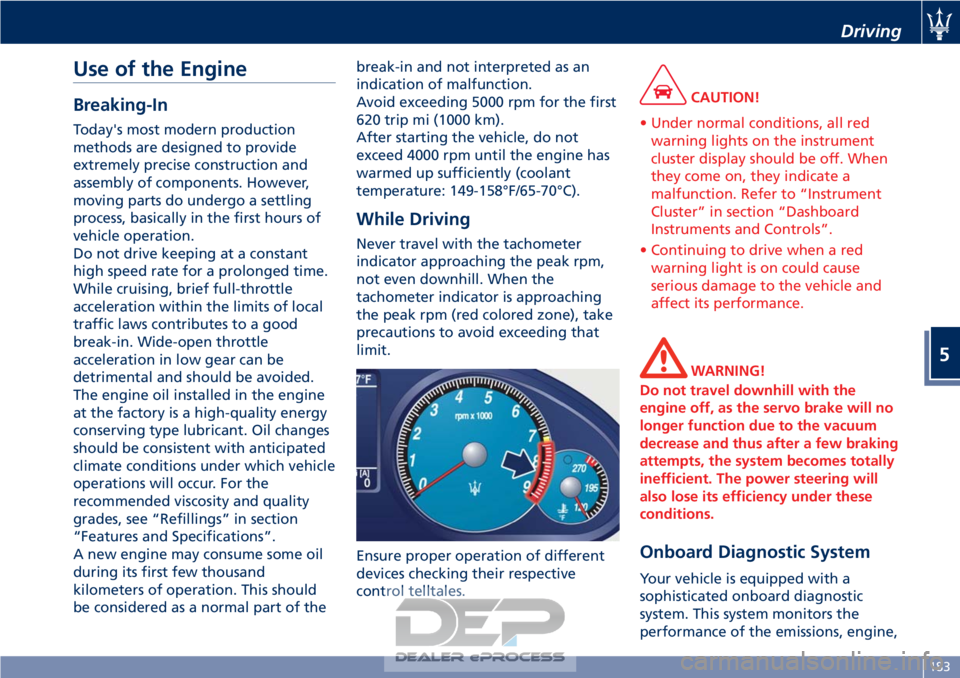
Never travel with the tachometer
indicator approaching the peak rpm,
not even downhill. When the
tachometer indicator is approaching
the peak rpm (red colored zone), take
precautions to avoid exceeding that
limit.
Ensure proper operation of different
devices checking their respective
control telltales.
CAUTION!
• Under normal conditions, all red warning lights on the instrument
cluster display should be off. When
they come on, they indicate a
malfunction. Refer to “Instrument
Cluster” in section “Dashboard
Instruments and Controls”.
• Continuing to drive when a red warning light is on could cause
serious damage to the vehicle and
affect its performance.
WARNING!
Do not travel downhill with the
engine off, as the servo brake will no
longer function due to the vacuum
decrease and thus after a few braking
attempts, the system becomes totally
inefficient. The power steering will
also lose its efficiency under these
conditions.
Onboard Diagnostic System
Your vehicle is equipped with a
sophisticated onboard diagnostic
system. This system monitors the
performance of the emissions, engine,
Driving
5
183
Page 243 of 296
Maintenance Procedures
The following pages contain the
“required” maintenance standards
determined by Maserati engineers.
Besides those maintenance items
specified in the “Scheduled Service
Plan”, there are other components
which may require service or
replacement in the future.
To perform most of the services, it is
necessary to open the hood (see
“Open and Close the Hood” in section
“Before Starting”).
The following images show the
position of all components involved in
the maintenance service.
CAUTION!
• Failure to properly maintain your vehicle or perform repairs and
service when necessary could result
in more costly repairs, damage to
other components or negatively
impact vehicle performance.
Immediately have potential
malfunctions examined by an
Authorized Maserati Dealer or a
qualified repair center.
• Your vehicle has been equipped with improved fluids that protect the
performance and durability of your vehicle and also allow extended
maintenance intervals. Do not use
chemical flushes for washing as the
chemicals can damage your engine,
transmission, power steering or air
conditioning. Such damages are not
covered by the New Vehicle Limited
Warranty. If a flush is needed
because of component malfunction,
use only a specific product for the
flushing procedure.
Maintenance and Care
7
239
Page 244 of 296
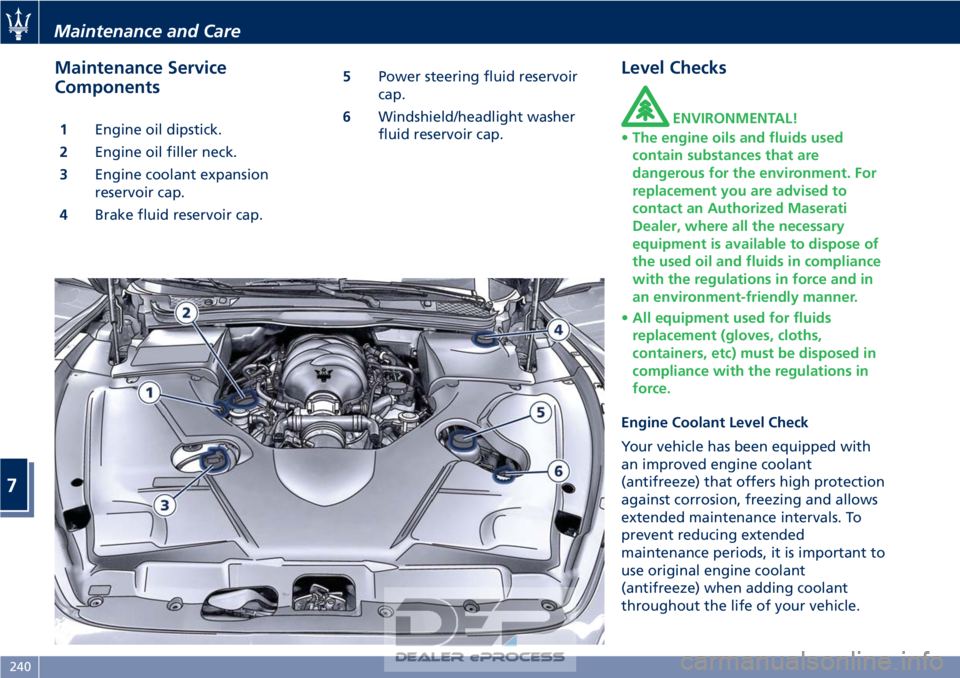
Maintenance Service
Components
1Engine oil dipstick.
2 Engine oil filler neck.
3 Engine coolant expansion
reservoir cap.
4 Brake fluid reservoir cap. 5
Power steering fluid reservoir
cap.
6 Windshield/headlight washer
fluid reservoir cap.
Level Checks
ENVIRONMENTAL!
• The engine oils and fluids used
contain substances that are
dangerous for the environment. For
replacement you are advised to
contact an Authorized Maserati
Dealer, where all the necessary
equipment is available to dispose of
the used oil and fluids in compliance
with the regulations in force and in
an environment-friendly manner.
• All equipment used for fluids
replacement (gloves, cloths,
containers, etc) must be disposed in
compliance with the regulations in
force.
Engine Coolant Level Check
Your vehicle has been equipped with
an improved engine coolant
(antifreeze) that offers high protection
against corrosion, freezing and allows
extended maintenance intervals. To
prevent reducing extended
maintenance periods, it is important to
use original engine coolant
(antifreeze) when adding coolant
throughout the life of your vehicle.
Maintenance and Care
7
240
Page 249 of 296

• Return the cap and dipstick to theirposition and wait for a few minutes
to allow the oil to reach the oil pan.
• Check the level again.
After topping up, the
engine oil
level warning light may not go off for
some time while the system is
performing the necessary checks. This
is normal.
Engine Oil Filter Replacement
The engine oil filter should be
replaced with a new filter at every oil
change.
Contact an Authorized Maserati
Dealer to perform this service.
Automatic Transmission Oil Check
Contact an Authorized Maserati
Dealer for the oil level check.
Power Steering Fluid Level Check
With the vehicle on a level ground
and the engine cold, check the fluid
level of the power steering reservoir.
• To carry out the check, unscrew the cap, clean the dipstick with a dry and
clean cloth.
• Retighten the cap then unscrew it again and check the level: it should
match the “MAX” notch marked on
the dipstick. In hot oil conditions, the level may even exceed the
“MAX” notch.
• If necessary, top up with fluid making sure that it has the same
characteristics as the one already
used in the system (refer to
“Refillings” in section “Features and
Specifications”).
CAUTION!
Make sure that the power steering
fluid does not come in touch with the
engine hot parts as it is flammable.
Engine Air Filter Replacement
Contact an Authorized Maserati
Dealer to have the air filters replaced.
Wiper Maintenance and Blades
Replacement
WARNING!
It is dangerous to operate or service
the wiper blades with the wipers in
an active position (right multifunction
lever in any position different than
“OFF”) and with the key in the
ignition switch in the MAR (ON)
position. The rain sensors may
suddenly activate the wipers.
Windshield Wiper Maintenance
Life
expectancy of wiper blades varies
depending on the geographical area’s
weather conditions where the car is
used and frequency of use. Poor
performance of blades may be present
with chattering, marks, water lines or
wet spots. If any of these conditions
are present, clean the wiper blades or
replace if necessary.
Clean the rubber edges of the wiper
blades and the windshield periodically
with a sponge or soft cloth and a mild
nonabrasive cleaner. This will remove
accumulations of salt or road film.
Operation of the wipers on dry glass
for long periods may cause
deterioration of the wiper blades.
Maintenance and Care
7
245
Page 259 of 296

Pos. Amp. –Color System / Component
F39 15 A – Blue NIM (Inside Roof
Node), NCL (Air
conditioning and
heating system
node), OBD socket,
CSA (Alarm system
siren ECU), CAV
(Motion sensing
alarm ECU), radio,
NAVTRAK
F40 30 A – Green Heated rear window
F41 - Not used
F42 7.5 A – Brown NCL and windshield
wiper control
F43 30 A – Green Windshield
wiper/washer
(Connected Devices
Relay INT/A)
F44 20 A – Yellow Front and rear power
outlets (INT/A device
relay) front seat
heating (passenger
side)
F45 - Not used
F46 20 A – Yellow NPG/NPP locksPos. Amp. –
Color System / Component
F47 30 A – Green NPG (Driver’s door
node)
F48 30 A – Green NPP (Passenger’s
door node)
F49 7.5 A – Brown NVO (Steering wheel
node), CSG (Power
steering ECU), CSP
(Twilight/rain sensor
ECU), NIM (Inside
Roof Node), NCL,
Radio, CEM, CRP,
domelight molding,
NAVTRAK
F50 7.5 A – Brown Air bag system
F51 7.5 A – Brown NCA (Automatic
Gearbox Node)
F52 15 A – Blue Front seat heating
(driver side) (INT/A
device relay)
F53 10 A – Red Rear fog lights
Fuses in Trunk Compartment
• To access the fuses, remove the floor
panel. • Remove the inside covering panel of
the battery compartment.
There are two control boxes.
• To access the fuses inside the control boxes, remove the covers by levering
up the fastening tabs.
Maintenance and Care
7
255