2019 LINCOLN CONTINENTAL display
[x] Cancel search: displayPage 142 of 627

Action
Message
Displays when the brake pedal needs to be depressed to enable the transmission to shift from park.
Depress Brake to Shift from Park
Displays when neutral hold is active. See Automatic Transmission (page 191).
Stay in Neutral Mode Engaged
Displays when the neutral button N needs to be pressed again to enter ne\
utral hold. See Auto-matic Transmission
(page 191).
To Stay in Neutral When Exiting Vehicle
Select N Again
HEAD UP DISPLAY
(IF EQUIPPED)
Head Up Display (HUD)
This is a visual system that shows information
in your field of view as you drive. The
information comes from various vehicle
systems and includes vehicle speed, speed
limit, navigation, and advanced driver
assistance systems (ADAS), such as adaptive
cruise control (ACC) and the lane keeping
system. This system projects the information
off the windshield, and focuses the image near the end of the hood approximately
7 ft
(2 m) in front of the driver. Viewing this
information does not require you to
significantly move your head, allowing you
to keep your eyes on the road while having
quick and easy access to information. Head Up Display Information Signaling and Traffic Indication.
A
Left Information Group.
B
ADAS Display Area.
C
139
Continental (CPL) Canada/United States of America, enUSA, Edition date: 201807, Second-Printing Information DisplaysE228521
Page 143 of 627

Navigation Display Area.
D
Status Bar.
E
Speedometer Display Area.
F
Signaling and Traffic Indication
Displays direction indicators, blind spot
information (if direction indicators are active)
and cross traffic alert.
Left Information Group
Displays incoming call information.
ADAS Display Area
Displays ACC and lane keeping system
status and warnings.
Navigation Display Area
Displays navigation next turn instructions. Status Bar
Displays distance to empty (DTE), time and
outside air temperature. Next to DTE, the
fuel gauge fill color changes to yellow in low
fuel conditions. You can switch off the status
bar in the HUD settings menu.
Speedometer Display Area
Displays current vehicle speed, speed limit
(if available in the map database) and your
transmission gear selection.
Configuring The Head Up Display
You can control the system's options through
the information display by using the HUD,
OK and arrow buttons on the right-hand side
of your steering wheel.
See General
Information (page 112). You can adjust the
display according to your height to make
viewing the content easier. You can also
adjust what content displays and the
brightness of the content. The system's
options appear in the instrument cluster
while the updates happen in the HUD. Note:
If HUD On is unchecked, other options
of the system are hidden.
Note: The HUD menu automatically closes
after a certain period of inactivity.
Note: The HUD image brightness
automatically adjusts to the brightness of
the ambient environment. You have the
ability to adjust the brightness further
according to your preference.
Note: In some instances, sunlight can cause
some reflections in and around the HUD
image.
140
Continental (CPL) Canada/United States of America, enUSA, Edition date: 201807, Second-Printing Information Displays
Page 144 of 627

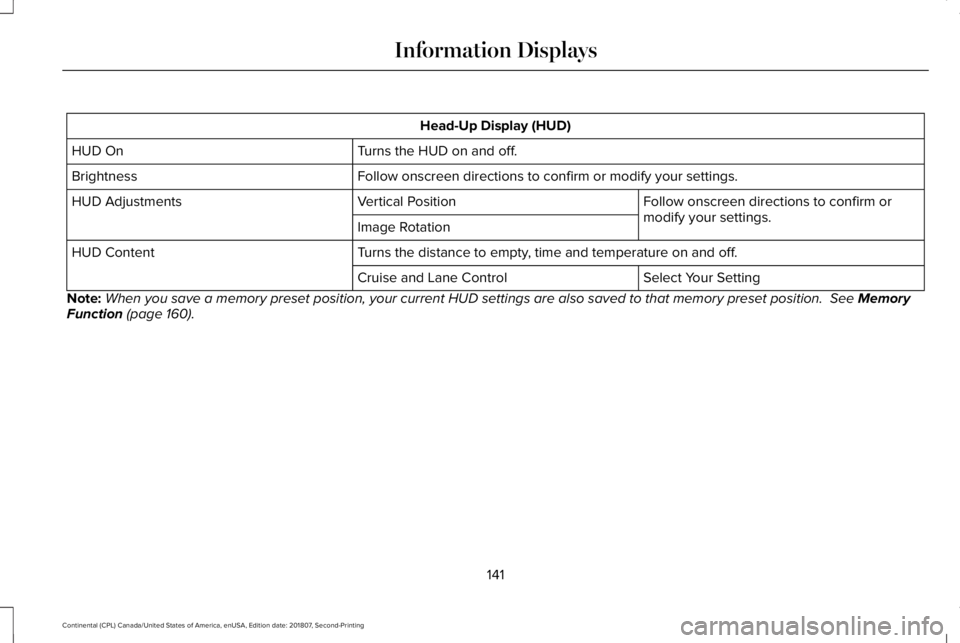
Head-Up Display (HUD)
Turns the HUD on and off.
HUD On
Follow onscreen directions to confirm or modify your settings.
Brightness
Follow onscreen directions to confirm or
modify your settings.
Vertical Position
HUD Adjustments
Image Rotation
Turns the distance to empty, time and temperature on and off.
HUD Content
Select Your Setting
Cruise and Lane Control
Note: When you save a memory preset position, your current HUD settings are al\
so saved to that memory preset position. See Memory
Function (page 160).
141
Continental (CPL) Canada/United States of America, enUSA, Edition date: 201807, Second-Printing Information Displays
Page 145 of 627

Maintaining Your Head Up Display
•
Do not place objects onto the transparent
cover, as they may block you from seeing
portions of the image. These objects
could also damage the cover and affect
the quality of the projected image.
• The system uses a special windshield
designed to provide the optimum image
quality. You must replace the windshield
in a vehicle with this system with a
certified original equipment
manufactured (OEM) head up display
windshield. Replacing this system's
windshield with a non-head up display
windshield causes a double image or
distorted image. Have an authorized
dealer or authorized repair facility replace
the windshield.
• Light conditions such as oncoming
headlamps, sunrise, sunset or reflections
off of wet road surfaces can affect the
driver's ability to see the HUD image.
• Clean the windshield often for optimal
HUD performance. See Cleaning the
Windows and Wiper Blades (page 335).
142
Continental (CPL) Canada/United States of America, enUSA, Edition date: 201807, Second-Printing Information Displays
Page 151 of 627

Note:
Do not use harsh chemicals, razor
blades or other sharp objects to clean or
remove decals from the inside of the heated
rear window. The vehicle warranty may not
cover damage to the heated rear window
grid lines.
HEATED EXTERIOR MIRRORS
When you switch the heated rear window
on, the heated exterior mirrors turn on.
Note: Do not remove ice from the mirrors
with a scraper or adjust the mirror glass
when it is frozen in place.
Note: Do not clean the mirror housing or
glass with harsh abrasives, fuel or other
petroleum-based cleaning products. The
vehicle warranty may not cover damage
caused to the mirror housing or glass. CABIN AIR FILTER
Your vehicle is equipped with a cabin air
filter, which gives you and your passengers
the following benefits:
•
It improves your driving comfort by
reducing particle and odor concentration.
• It improves the interior compartment
cleanliness.
• It protects the climate control
components from particle deposits.
You can locate the cabin air filter behind the
glove box.
Note: Make sure you have a cabin air filter
installed at all times. This prevents foreign
objects from entering the system. Running
the system without a filter in place could
result in degradation or damage to the
system.
Replace the filter at regular intervals. See
Scheduled Maintenance (page 528).
For additional cabin air filter information, or
to replace the filter, see a qualified
technician. REMOTE START
The climate control system adjusts the
interior temperature during remote start.
You can switch this feature on or off and
adjust the settings using the information
display controls.
See Information Displays
(page 112).
You cannot adjust the climate control setting
during remote start operation. Switch the
ignition on to make adjustments.
Based on your remote start settings, the
following vehicle-dependent features may
or may not remain on after remote starting
your vehicle:
• Climate controlled seats.
• Heated steering wheel.
• Heated mirrors.
• Heated rear window.
• Windshield wiper de-icer.
Note: For dual zone climate controlled seats,
the passenger seat setting defaults to match
the driver seat during remote start.
148
Continental (CPL) Canada/United States of America, enUSA, Edition date: 201807, Second-Printing Climate Control
Page 163 of 627

You can also adjust this feature through the
touchscreen.
Press the Menu Settings icon, then
Vehicle. Choose Multi-Contour
Seats.
When switched on, the system displays
directions for you to adjust the lumbar
settings in your seat or to set the massage
function.
To access and make adjustments to the
lumbar setting:
1. Choose the desired seat to adjust.
2. Press the + or - to adjust the lumbar intensity.
To access and make adjustments to the
massage setting:
1. Press the Menu Settings icon, then Vehicle. Choose Multi-Contour Seats.
2. Choose the desired seat to adjust.
3. Press OFF, Low or High. MEMORY FUNCTION WARNING: Before activating the
memory seat, make sure that the area
immediately surrounding the seat is clear
of obstructions and that all occupants are
clear of moving parts. WARNING:
Do not use the memory
function when your vehicle is moving.
This feature automatically recalls the position
of the following:
• Driver seat.
• Power mirrors.
• Power steering column.
The memory control is on the driver door. Saving a Preset Position
1. Switch the ignition on.
2. Adjust the memory features to your
desired position.
3. Press and hold the desired preset button
until you hear a single tone.
160
Continental (CPL) Canada/United States of America, enUSA, Edition date: 201807, Second-Printing SeatsE142607 E222235
Page 164 of 627

You can save up to three preset memory
positions. You can save a memory preset at
any time.
Recalling a Preset Position
Press and release the preset button
associated with your desired driving position.
The memory features move to the position
stored for that preset.
Note:
You can only recall a preset memory
position when the ignition is off, or when the
transmission is in park (P) or neutral (N) (and
your vehicle is not moving) if the ignition is
on.
You can also recall a preset memory position
by:
• Pressing the unlock button on your
intelligent access key fob if it is linked to
a preset position.
• Unlocking the intelligent driver door
handle if a linked key fob is present.
Note: Using a linked key fob to recall your
memory position when the ignition is off
moves the seat to the Easy Entry position. Note:
Pressing any active memory feature
adjustment control, or any memory button
during a memory recall, cancels the
operation.
Linking a Preset Position to your
Remote Control or Intelligent Access
Key Fob
You can save preset memory positions for
up to three remote controls or intelligent
access (IA) keys.
1. With the ignition on, move the memory features to the desired positions.
2. Press and hold the preset button you desire for about five seconds. A tone
sounds after a few seconds. Continue
holding until you hear a second tone.
3. Within three seconds, press the lock button on the remote control you are
linking.
To unlink a remote control, follow the same
procedure – except in step 3, press the
unlock button on the remote control. Note:
If more than one linked remote control
or intelligent access key is in range, the
memory function moves to the settings of
the first key to initiate a memory recall.
Easy Entry and Exit Feature
If you enable the easy entry and exit feature,
it moves the driver seat position rearward up
to 2 in (5 cm) when you switch the ignition
off.
The driver seat returns to its previous
position when you switch the ignition on.
Note: If you press any adjustment or memory
button when in easy exit mode, the system
cancels the operation.
You can enable or disable this feature
through the information display. See General
Information
(page 112).
161
Continental (CPL) Canada/United States of America, enUSA, Edition date: 201807, Second-Printing Seats
Page 168 of 627

Press the heated seat symbol to cycle
through the various heat settings and off.
More indicator lights indicate warmer
settings.
The heated seat module resets at every
ignition run cycle. While the ignition is on,
press the high or low heated seat switch to
enable heating mode. When activated, they
will turn off automatically when you turn the
engine off.
CLIMATE CONTROLLED SEATS (IF
EQUIPPED)
Heated Seats WARNING:
People who are unable
to feel pain to their skin because of
advanced age, chronic illness, diabetes,
spinal cord injury, medication, alcohol use,
exhaustion or other physical conditions,
must use caution when using the heated
seat. The heated seat may cause burns
even at low temperatures, especially if
used for long periods of time. Do not place
anything on the seat that may block the
heat, such as a blanket or cushion. This
can cause the heated seat to overheat. Do
not puncture the seat with pins, needles
or other pointed objects. This damages the
heating element and can cause the heated
seat to overheat. An overheated seat may
cause serious personal injury.
Note: The heated seats switch on during a
remote start if they are enabled through the
information displays.
See General
Information (page 112).
Note: The heated seats may also switch on
when you start your vehicle if they were on
when you previously switched your vehicle
off. Note:
Do not do the following:
• Place heavy objects on the seat.
• Operate the seat heater if water or any
other liquid spills on the seat. Allow the
seat to dry thoroughly. Press this symbol to cycle through the
various heat settings and off. More indicator
lights indicate warmer settings.
Ventilated Seats
Note:
The ventilated seats switch on during
a remote start if they are enabled through
the information displays. See General
Information (page 112).
165
Continental (CPL) Canada/United States of America, enUSA, Edition date: 201807, Second-Printing SeatsE146322 E146322