2019 LINCOLN CONTINENTAL tow
[x] Cancel search: towPage 96 of 627

Windshield Wiper Activated Headlamps
When you switch the autolamps on, the
headlamps turn on within 10 seconds of
switching the wipers on. They turn off
approximately 60 seconds after you switch
the windshield wipers off.
The headlamps do not turn on with the
wipers:
•
During a single wipe.
• When using the windshield washers.
• If the wipers are in intermittent mode.
Note: If you switch the autolamps and the
autowipers on, the headlamps turn on when
the windshield wipers continuously operate.
INSTRUMENT LIGHTING DIMMER
Note: If you disconnect and connect the
battery, or fully discharge and charge the
battery, the illuminated components switch
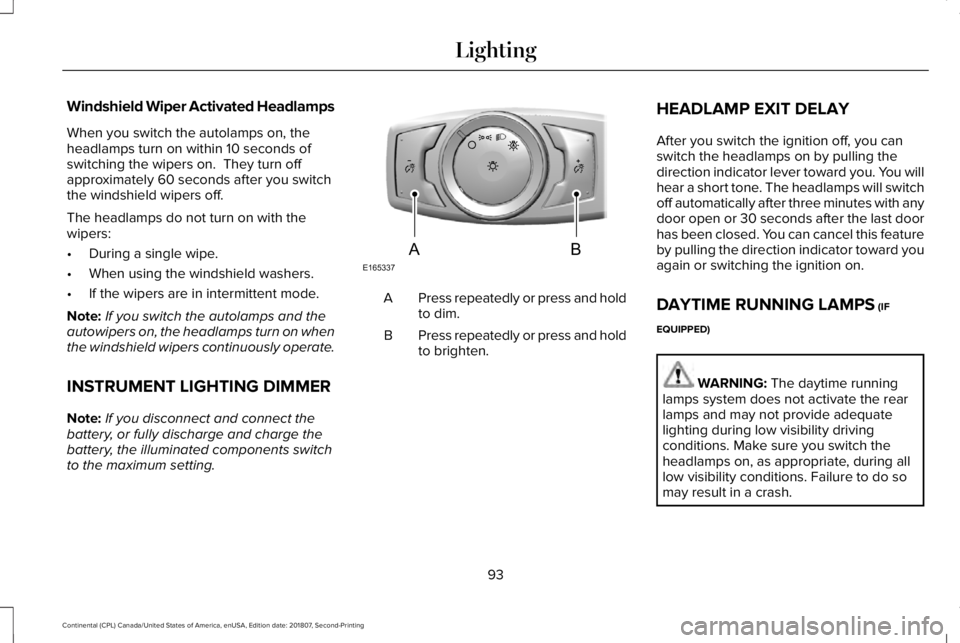
to the maximum setting. Press repeatedly or press and hold
to dim.
A
Press repeatedly or press and hold
to brighten.
B HEADLAMP EXIT DELAY
After you switch the ignition off, you can
switch the headlamps on by pulling the
direction indicator lever toward you. You will
hear a short tone. The headlamps will switch
off automatically after three minutes with any
door open or 30 seconds after the last door
has been closed. You can cancel this feature
by pulling the direction indicator toward you
again or switching the ignition on.
DAYTIME RUNNING LAMPS (IF
EQUIPPED) WARNING:
The daytime running
lamps system does not activate the rear
lamps and may not provide adequate
lighting during low visibility driving
conditions. Make sure you switch the
headlamps on, as appropriate, during all
low visibility conditions. Failure to do so
may result in a crash.
93
Continental (CPL) Canada/United States of America, enUSA, Edition date: 201807, Second-Printing LightingE165337AB
Page 104 of 627

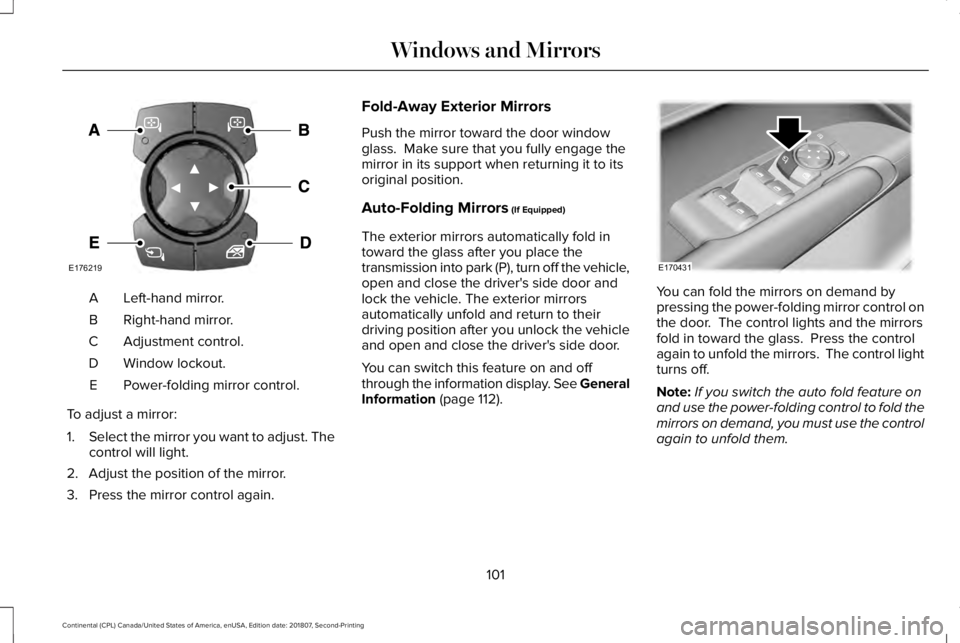
Left-hand mirror.
A
Right-hand mirror.
B
Adjustment control.
C
Window lockout.
D
Power-folding mirror control.
E
To adjust a mirror:
1. Select the mirror you want to adjust. The
control will light.
2. Adjust the position of the mirror.
3. Press the mirror control again. Fold-Away Exterior Mirrors
Push the mirror toward the door window
glass. Make sure that you fully engage the
mirror in its support when returning it to its
original position.
Auto-Folding Mirrors (If Equipped)
The exterior mirrors automatically fold in
toward the glass after you place the
transmission into park (P), turn off the vehicle,
open and close the driver's side door and
lock the vehicle. The exterior mirrors
automatically unfold and return to their
driving position after you unlock the vehicle
and open and close the driver's side door.
You can switch this feature on and off
through the information display. See General
Information
(page 112). You can fold the mirrors on demand by
pressing the power-folding mirror control on
the door. The control lights and the mirrors
fold in toward the glass. Press the control
again to unfold the mirrors. The control light
turns off.
Note:
If you switch the auto fold feature on
and use the power-folding control to fold the
mirrors on demand, you must use the control
again to unfold them.
101
Continental (CPL) Canada/United States of America, enUSA, Edition date: 201807, Second-Printing Windows and MirrorsE176219 E170431
Page 107 of 627

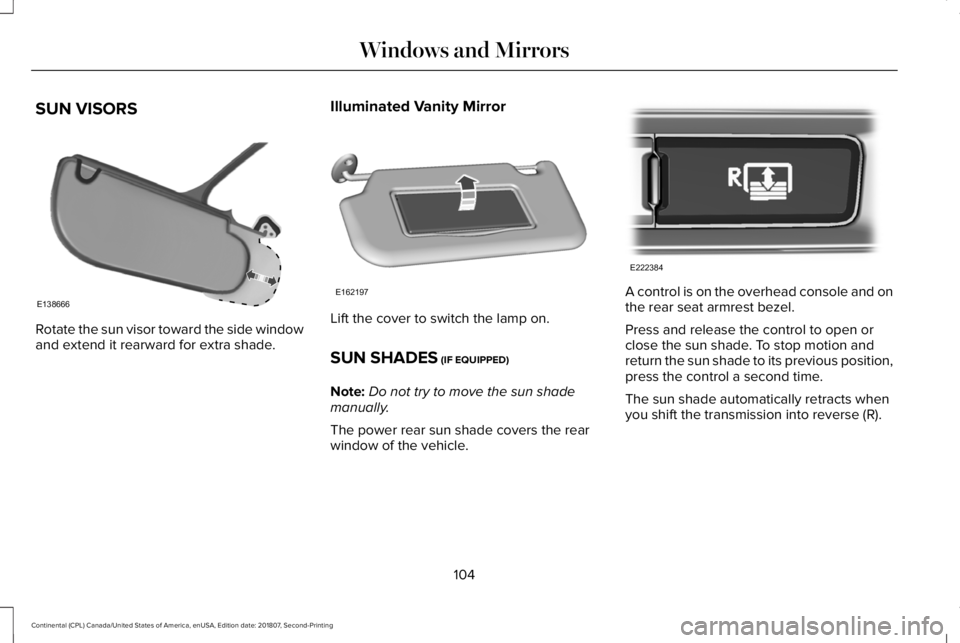
SUN VISORS
Rotate the sun visor toward the side window
and extend it rearward for extra shade.
Illuminated Vanity Mirror Lift the cover to switch the lamp on.
SUN SHADES (IF EQUIPPED)
Note: Do not try to move the sun shade
manually.
The power rear sun shade covers the rear
window of the vehicle. A control is on the overhead console and on
the rear seat armrest bezel.
Press and release the control to open or
close the sun shade. To stop motion and
return the sun shade to its previous position,
press the control a second time.
The sun shade automatically retracts when
you shift the transmission into reverse (R).
104
Continental (CPL) Canada/United States of America, enUSA, Edition date: 201807, Second-Printing Windows and MirrorsE138666 E162197 E222384
Page 155 of 627

1. Adjust the seat backrest to an upright
driving or riding position.
2. Pivot the head restraint forward toward your head to the desired position.
After the head restraint reaches the
forward-most tilt position, pivot it forward
again to release it to the rearward, un-tilted
position. Rear Seat Outermost Head Restraints
The rear outermost head restraints consist
of:
An energy absorbing head
restraint.
A
Two steel stems.
B
Guide sleeve unlock and remove
button.
C
Fold button (If Equipped).
D Removing the Head Restraint
1. Press and hold both C buttons.
2. Pull the head restraint up.
Installing the Head Restraint
Align the steel stems into the guide sleeves
and push the head restraint down until it
locks.
Folding the Head Restraint
1. Press and hold button D.
2. Pull it back up to reset.
152
Continental (CPL) Canada/United States of America, enUSA, Edition date: 201807, Second-Printing SeatsE144727 E293091
Page 176 of 627

CENTER CONSOLE
Stow items in the cup holder carefully as
items may become loose during hard
braking, acceleration or crashes, including
hot drinks which may spill.
Available console features include:
Front storage compartment with
two USB ports, DC power point
and CD player (optional).
A
Cup holders with auxiliary storage
bin.
B Storage compartment with DC
power point.
C
Storage compartment, heated seat
controls, or rear climate controls.
D
Rear compartment with DC power
point or two USB ports and AC
power point.
E
OVERHEAD CONSOLE Press near the rear edge of the door to open
it.REAR SEAT ARMREST
Fold the armrest down to use the armrest
and cupholders.
The cupholders are inside the rear seat
armrest. To access the cupholders, push the
plastic panel on the front edge of the
armrest.
Push the panel again to close the
cupholders.
173
Continental (CPL) Canada/United States of America, enUSA, Edition date: 201807, Second-Printing Storage CompartmentsE221077 E224352 E221057
Page 182 of 627

WARNING: Do not fully close the
hood, or allow it to drop under its own
weight when using the engine block
heater. This could damage the power cable
and may cause an electrical short resulting
in fire, injury and property damage.
Note: The heater is most effective when
outdoor temperatures are below
0°F (-18°C).
The heater acts as a starting aid by warming
the engine coolant. This allows the climate
control system to respond quickly. The
equipment includes a heater element
(installed in the engine block) and a wire
harness. You can connect the system to a
grounded 120-volt AC electrical source. We recommend that you do the following for
a safe and correct operation:
•
Use a 16-gauge outdoor extension cord
that is product certified by Underwriter’ s
Laboratory (UL) or Canadian Standards
Association (CSA). This extension cord
must be suitable for use outdoors, in cold
temperatures, and be clearly marked
Suitable for Use with Outdoor
Appliances. Do not use an indoor
extension cord outdoors. This could
result in an electric shock or become a
fire hazard.
• Use as short an extension cord as
possible.
• Do not use multiple extension cords.
• Make sure that when in operation, the
extension cord plug and heater cord plug
connections are free and clear of water.
This could cause an electric shock or fire.
• Make sure your vehicle is parked in a
clean area, clear of combustibles.
• Make sure the heater, heater cord and
extension cord are firmly connected. •
Check for heat anywhere in the electrical
hookup once the system has been
operating for approximately 30 minutes.
• Make sure the system is unplugged and
properly stowed before starting and
driving your vehicle. Make sure the
protective cover seals the prongs of the
block heater cord plug when not in use.
• Make sure the heater system is checked
for proper operation before winter.
Using the Engine Block Heater
Make sure the receptacle terminals are clean
and dry prior to use. Clean them with a dry
cloth if necessary.
The heater uses 0.4 to 1.0 kilowatt-hours of
energy per hour of use. The system does not
have a thermostat. It achieves maximum
temperature after approximately three hours
of operation. Using the heater longer than
three hours does not improve system
performance and unnecessarily uses
electricity.
179
Continental (CPL) Canada/United States of America, enUSA, Edition date: 201807, Second-Printing Starting and Stopping the Engine
Page 184 of 627

FUEL QUALITY
Choosing the Right Fuel
Your vehicle is designed to operate on
regular unleaded gasoline with a minimum
pump (R+M)/2 octane rating of 87.
Some fuel stations, particularly those in high
altitude areas, offer fuels posted as regular
unleaded gasoline with an octane rating
below 87. The use of these fuels could result
in engine damage that will not be covered
by the vehicle warranty. For best overall vehicle and engine
performance, premium fuel with an octane
rating of 91 or higher is recommended. The
performance gained by using premium fuel
is most noticeable in hot weather as well as
other conditions, for example when towing
a trailer. See Towing (page 268).
Do not be concerned if the engine
sometimes knocks lightly. However, if the
engine knocks heavily while using fuel with
the recommended octane rating, contact an
authorized dealer to prevent any engine
damage.
We recommend Top Tier detergent
gasolines, where available to help minimize
engine deposits and maintain optimal vehicle
and engine performance. For additional
information, refer to www.toptiergas.com.
Note: Use of any fuel for which the vehicle
was not designed can impair the emission
control system, cause loss of vehicle
performance, and cause damage to the
engine which may not be covered by the
vehicle Warranty. Do not use:
•
Diesel fuel.
• Fuels containing kerosene or paraffin.
• Fuel containing more than 15% ethanol
or E85 fuel.
• Fuels containing methanol.
• Fuels containing metallic-based additives,
including manganese-based compounds.
• Fuels containing the octane booster
additive, methylcyclopentadienyl
manganese tricarbonyl (MMT).
• Leaded fuel, using leaded fuel is
prohibited by law.
The use of fuels with metallic compounds
such as methylcyclopentadienyl manganese
tricarbonyl (commonly known as MMT), which
is a manganese-based fuel additive, will
impair engine performance and affect the
emission control system.
FUEL FILLER FUNNEL LOCATION
The fuel filler funnel is under the luggage
compartment floor covering.
181
Continental (CPL) Canada/United States of America, enUSA, Edition date: 201807, Second-Printing Fuel and RefuelingE161513
Page 191 of 627

•
An open or pinched sensor hose.
• Incorrect engine oil level.
• Incorrect fuel for climatic conditions.
• Incorrect engine oil viscosity for climactic
conditions.
Note: Some vehicles have a lifetime fuel filter
that is integrated with the fuel tank. Regular
maintenance or replacement is not needed.
Note: If these checks do not help you correct
the concern, have your vehicle checked as
soon as possible.
Noise Emissions Warranty, Prohibited
Tampering Acts and Maintenance
On January 1, 1978, Federal regulation
became effective governing the noise
emission on trucks over 10,000 lb (4,536 kg)
Gross Vehicle Weight Rating (GVWR). The
preceding statements concerning prohibited
tampering acts and maintenance, and the
noise warranty found in the Warranty Guide,
are applicable to complete chassis cabs over
10,000 lb (4,536 kg)
GVWR. CATALYTIC CONVERTER WARNING: Do not park, idle or drive
your vehicle on dry grass or other dry
ground cover. The emission system heats
up the engine compartment and exhaust
system, creating the risk of fire. WARNING:
The normal operating
temperature of the exhaust system is very
high. Never work around or attempt to
repair any part of the exhaust system until
it has cooled. Use special care when
working around the catalytic converter.
The catalytic converter heats up to a very
high temperature after only a short period
of engine operation and stays hot after the
engine is switched off. WARNING:
Exhaust leaks may result
in entry of harmful and potentially lethal
fumes into the passenger compartment. If
you smell exhaust fumes inside your
vehicle, have your vehicle inspected
immediately. Do not drive if you smell
exhaust fumes. Your vehicle has various emission control
components and a catalytic converter that
enables it to comply with applicable exhaust
emission standards.
To make sure that the catalytic converter and
other emission control components continue
to work properly:
•
Do not crank the engine for more than
10 seconds at a time.
• Do not run the engine with a spark plug
lead disconnected.
• Do not push-start or tow-start your
vehicle. Use booster cables.
See Jump
Starting the Vehicle (page 278).
• Use only the specified fuel listed.
• Do not switch the ignition off when your
vehicle is moving.
• Avoid running out of fuel.
• Have the items listed in scheduled
maintenance information performed
according to the specified schedule.
Note: Resulting component damage may
not be covered by the vehicle Warranty.
188
Continental (CPL) Canada/United States of America, enUSA, Edition date: 201807, Second-Printing Engine Emission Control