Page 410 of 777
409 5-2. Setup
5
Lexus Display Audio system
RX350/RX350L_U Go to “Delete Personal Data”: “MENU” button “Setup” “General”
“Delete Personal Data”
Select “Delete”. Check carefully beforeha nd, as data cannot be retrieved once deleted.
The following personal data will be dele ted or changed to its default settings.• Phonebook data
• Call history data
•Favorite data
•Bluetooth ®
devices data
• Phone sound settings
• Detailed Bluetooth ®
settings
• Audio/video setting
• Customized image data
•FM info setting
• iPod tagging information
• Software update history
• Software update detail information
• Phone display setting
• Contact/call history setting
• Messaging setting
• Traffic information map
• Weather information
• Phonebook data for voice recognition
• Music data for voice recognition NOTICE ■
To prevent damage to the USB me mory device or its terminals
P. 441
Deleting personal data 1
2
Page 412 of 777

4115-2. Setup
5
Lexus Display Audio system
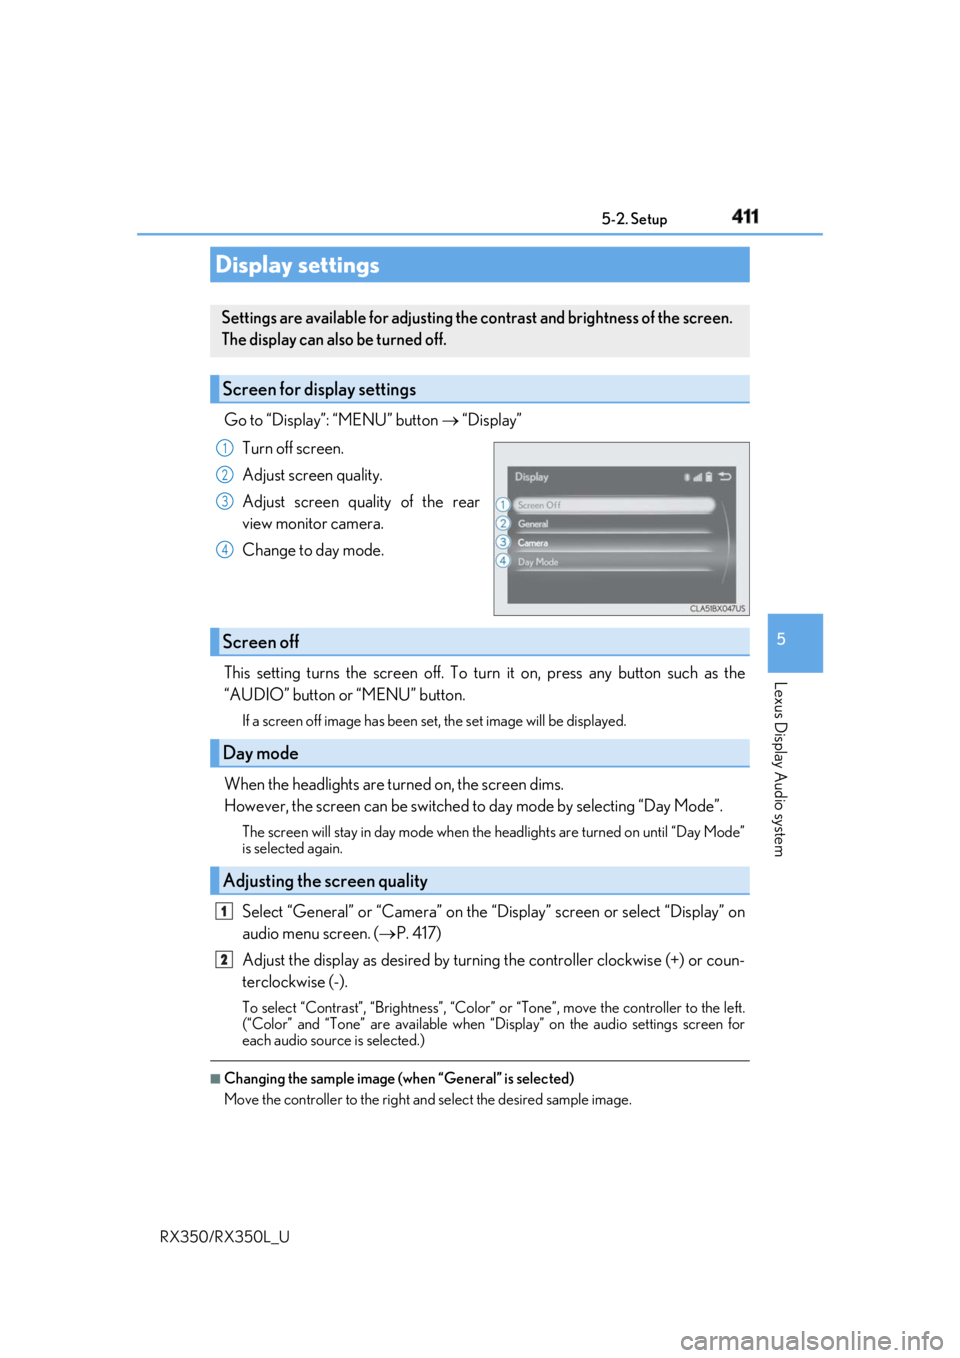
RX350/RX350L_U Go to “Display”: “MENU” button “Display”
Turn off screen.
Adjust screen quality.
Adjust screen quality of the rear
view monitor camera.
Change to day mode.
This setting turns the screen off. To tu rn it on, press any button such as the
“AUDIO” button or “MENU” button. If a screen off image has been se t, the set image will be displayed.
When the headlights are turned on, the screen dims.
However, the screen can be switched to day mode by selecting “Day Mode”.The screen will stay in day mode when the headlights are turned on until “Day Mode”
is selected again.
Select “General” or “Camera” on the “D isplay” screen or select “Display” on
audio menu screen. ( P. 417)
Adjust the display as desired by turning the controller clockwise (+) or coun-
terclockwise (-). To select “Contrast”, “Brightness”, “Color” or “Tone”, move the controller to the left.
(“Color” and “Tone” are available when “Display” on the audio settings screen for
each audio source is selected.) ■
Changing the sample image (when “General” is selected)
Move the controller to the right and select the desired sample image.Display settings Settings are available for adjusting the contrast and brightness of the screen.
The display can also be turned off.
Screen for display settings 1
2
3
4
Screen off
Day mode
Adjusting the screen quality 1
2
Page 413 of 777
412
RX350/RX350L_U 5-3. Using the audio system
Press the “AUDIO” button to display the “Source” screen.If the “Source” screen is not displayed, press the button again.
Select the desired audio source. The audio source can be se lected by pressing the “RADIO” or “MEDIA” button.
Press the “MODE” switch when the audio system is turned on. The audio source
changes each time the “MODE” switch is pressed. ■
Rearranging the list
The listing order of the sour ce list can be rearranged.
Move the controller to the left while on the “Source” screen.
Select “Audio Source Select”.
Select an item you wish to move and th en select where to move the item to.Selecting the audio source Switching between audio sources, such as the radio and CD, is explained in
this section.
Changing audio source
Using the steering wheel switches to change audio sources 1
2
1
2
3
Page 414 of 777

4135-3. Using the audio system
5
Lexus Display Audio system
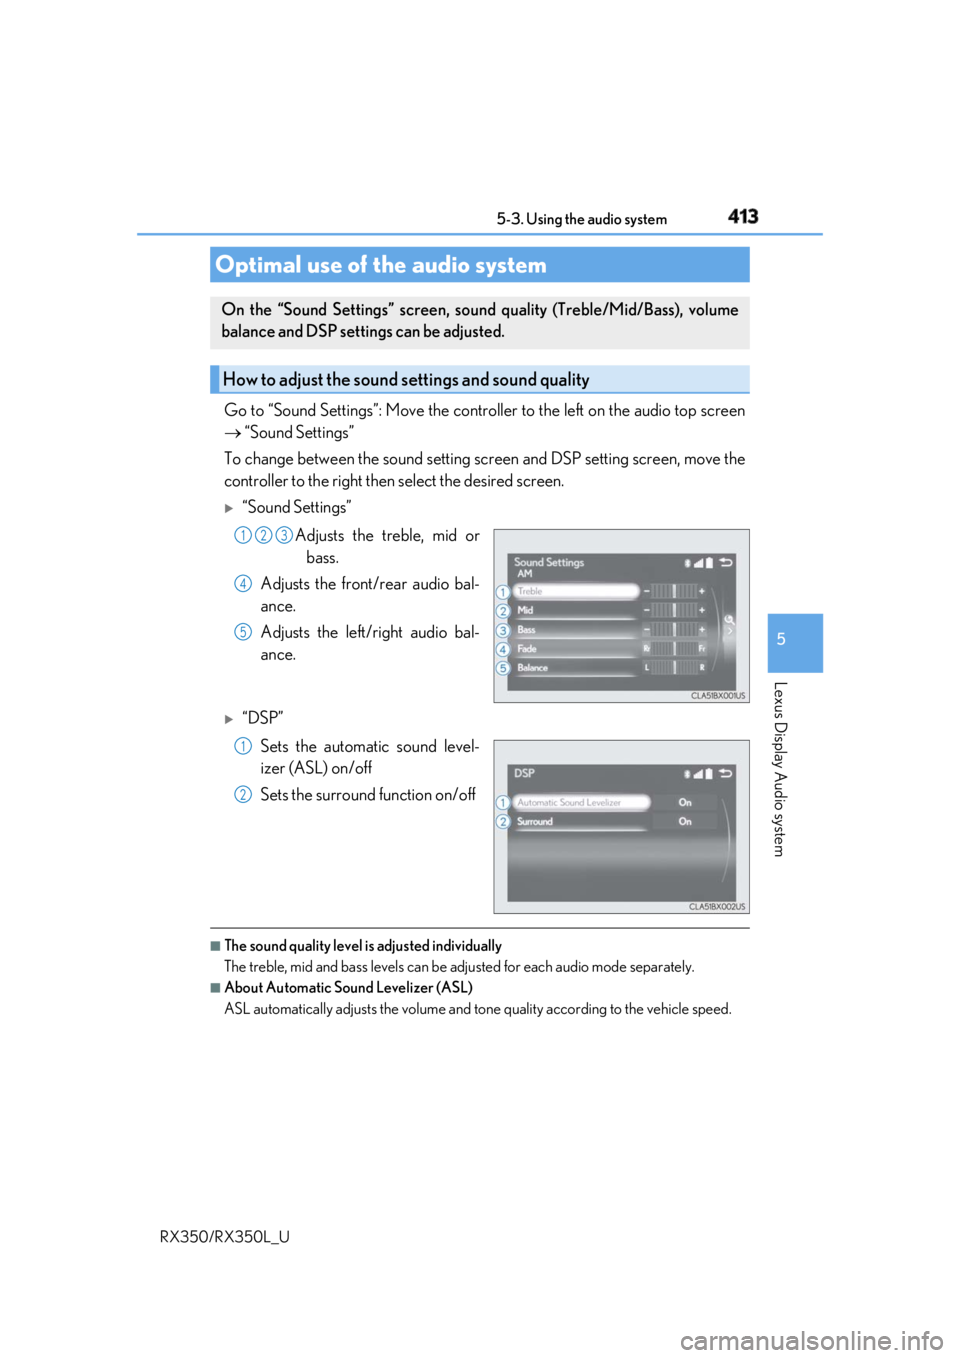
RX350/RX350L_U Go to “Sound Settings”: Move the contro ller to the left on the audio top screen
“Sound Settings”
To change between the sound setting sc reen and DSP setting screen, move the
controller to the right then select the desired screen.
“Sound Settings”
Adjusts the treble, mid or
bass.
Adjusts the front/rear audio bal-
ance.
Adjusts the left/right audio bal-
ance.
“DSP”
Sets the automatic sound level-
izer (ASL) on/off
Sets the surround function on/off
■
The sound quality level is adjusted individually
The treble, mid and bass levels can be adjusted for each audio mode separately. ■
About Automatic Sound Levelizer (ASL)
ASL automatically adjusts the volume and to ne quality according to the vehicle speed.Optimal use of the audio system On the “Sound Settings” screen, soun d quality (Treble/Mid/Bass), volume
balance and DSP settings can be adjusted.
How to adjust the sound settings and sound quality 1 2 3
4
5
1
2
Page 415 of 777
414 5-3. Using the audio system
RX350/RX350L_U Go to “Audio Settings”: “MENU” button “Setup” “Audio”
Change radio settings ( P. 414)
Change iPod settings ( P. 415)
Change A/V settings ( P. 415)
Change the cover art settings
( P. 416)
Change USB settings ( P. 416)
To display the radio settings screen in a different way, select “Radio Settings” on
the audio menu screen. ( P. 417)
Set the displaying RBDS text mes-
sage on/off
Change the number of radio presetsAudio settings Screen for audio settings 1
2
3
4
5
Changing radio settings 1
2
Page 416 of 777
4155-3. Using the audio system
5
Lexus Display Audio system
RX350/RX350L_U To display the iPod settings screen in a di fferent way, select “iPod Settings” on the
audio menu screen. ( P. 417)
Change the screen size (video
mode)
Change the cover art settings
( P. 416)
Adjust the screen quality (video
mode) ( P. 411)
Change video sound input port
To display the A/V settings screen in a different way, select “External Video Set-
tings” on the audio menu screen. ( P. 417)
Change the screen size
Change the video signal
Adjust the screen quality (video
mode) ( P. 411)Changing iPod settings 1
2
3
4
Changing A/V settings 1
2
3
Page 417 of 777
416 5-3. Using the audio system
RX350/RX350L_U To display the cover art settings screen in a different way, select “Cover Art Set-
tings” on the audio menu screen. ( P. 417)
Select to set the cover art display
on/off.
Select to set the priority of the Gra-
cenote database on/off.
To display the USB settings screen in a different way, select “USB Settings” on
the audio menu screen. ( P. 417)
Change the cover art settings
( P. 416)Changing the cover art settings 1
2
Changing USB settings 1
Page 418 of 777
4175-3. Using the audio system
5
Lexus Display Audio system
RX350/RX350L_U Go to audio menu screen: Move the contro ller to the left on the audio top screen
Radio mode
Audio menu screen operation You can change the settings and contro l functions for each audio source.
Audio menu screen
Button Function Target
radio mode
“SCAN” Scans for receivable stations AM, FM
“SEEK” Seeks a station of the nearest frequency (stops
when a station is found) AM, FM
“Tag” Captures the song title and artist name information
for potential purchase (when the “HD)” indicator
on the selected st ation is appears) FM
“Multicast” Changes the channel of HD Radio (HD2, HD3,
HD4 where applicable) FM
“Traffic” Seeks a station of th e traffic announcement FM
“HD Radio” Selects to set the station list shows of HD radio on/
off AM, FM
“Radio Settings” Changes radio settings ( P. 414) All mode
“Sound Settings” Changes sound settings ( P. 413) All mode