2019 Lexus ES300h coolant
[x] Cancel search: coolantPage 66 of 456

662-1. Instrument cluster
2-1.Instrument cluster
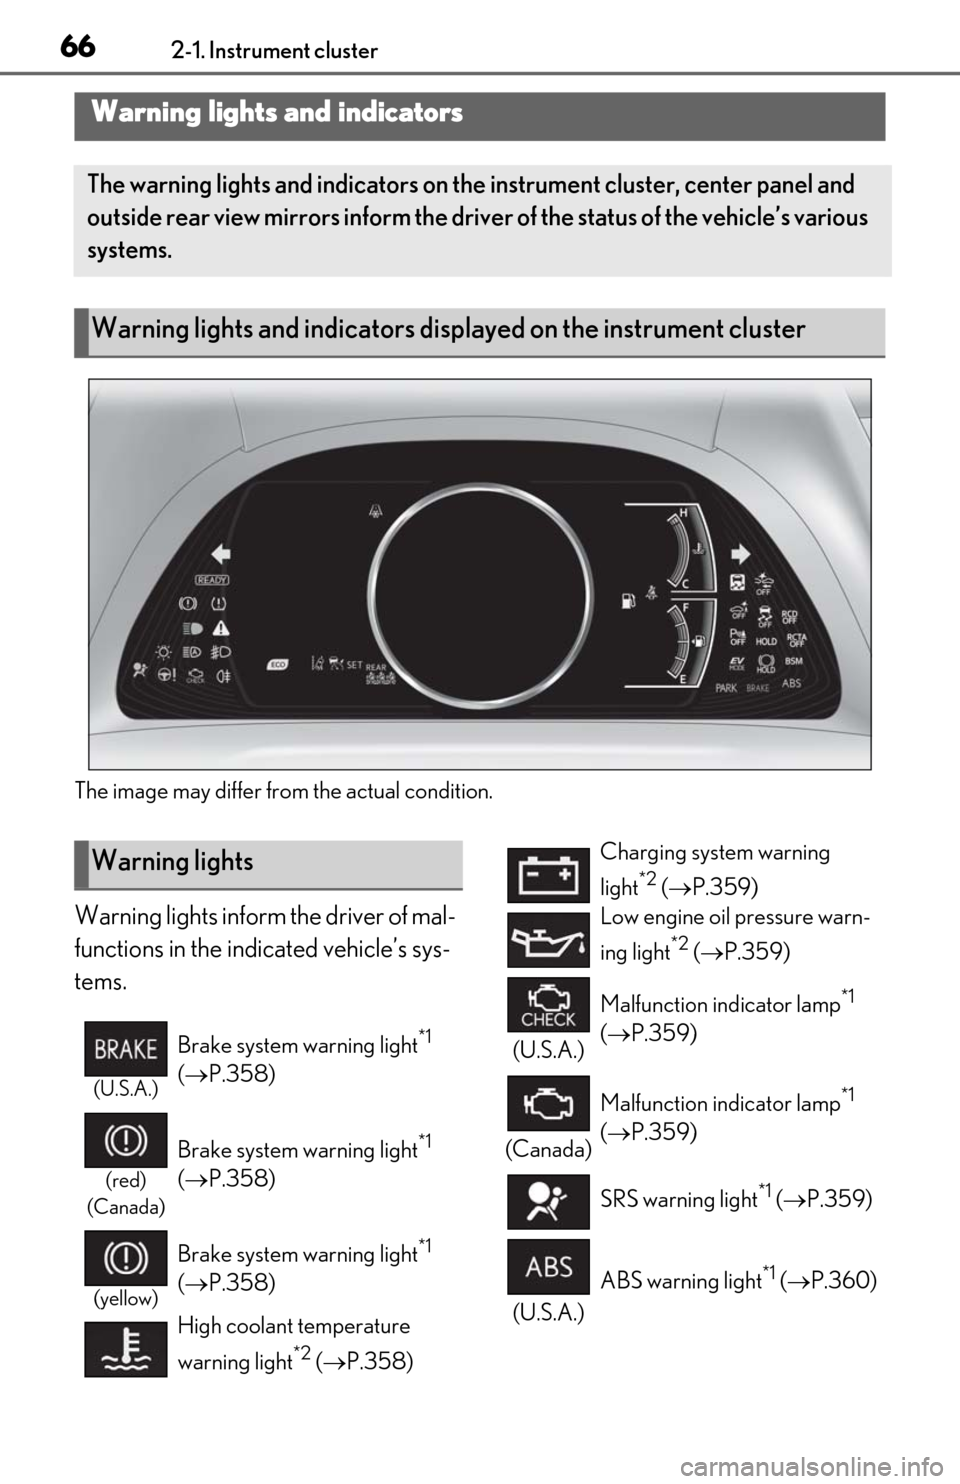
The image may differ from the actual condition.
Warning lights inform the driver of mal-
functions in the indicated vehicle’s sys-
tems.
Warning lights and indicators
The warning lights and indicators on the instrument cluster, center panel and
outside rear view mirrors inform the driver of the status of the vehicle’s various
systems.
Warning lights and indicators displayed on the instrument cluster
Warning lights
(U.S.A.)
Brake system warning light*1
( P.358)
(red)
(Canada)
Brake system warning light*1
( P.358)
(yellow)
Brake system warning light*1
( P.358)
High coolant temperature
warning light
*2 ( P.358)
Charging system warning
light
*2 ( P.359)
Low engine oil pressure warn-
ing light
*2 ( P.359)
(U.S.A.) Malfunction indicator lamp
*1
( P.359)
(Canada) Malfunction indicator lamp
*1
( P.359)
SRS warning light
*1 ( P.359)
(U.S.A.) ABS warning light
*1 (
P.360)
Page 70 of 456

702-1. Instrument cluster
■Locations of gauges and meters
The units of measure may differ depending on the intended destination of the vehicle.
Multi-information display
Presents the driver with a variety of vehicle data ( P.73)
Displays warning messages if a malfunction occurs (P.368)
Outside temperature
Displays the outside temperature within the range of -40°F (-40°C) to 122°F (50°C)
Low outside temperature indicator comes on wh en the ambient temperature is 37°F (3°C)
or lower
Hybrid System Indicator
Displays hybrid system outp ut or regeneration level (P.71)
This display changes to a tachometer depending on the driving mode, and can be set to
show the tachometer in any driving mode on the settings display. (P.75, 202)
Speedometer
Clock
Time displayed is linked to the analog clock on the center panel. (P.272)
Engine coolant temperature gauge
Displays the engine coolant temperature
Fuel gauge
Displays the quantity of fuel remaining in the tank
Gauges and meters
Meter display
A
B
C
D
E
F
G
Page 72 of 456

722-1. Instrument cluster
■Display items
Odometer
Displays the total distance the vehicle has
been driven.
Trip meter A/trip meter B
Displays the distance the vehicle has been
driven since the meter was last reset. Trip
meters A and B can be used to record and
display different distances independently.
Distance until next engine oil
change
Displays the distance the vehicle can be
driven until an oil change is necessary.
■Changing the display
Each time the “ODO TRIP” switch is
pressed, the displayed item will be changed. When the trip meter is dis-
played, pressing and holding the switch
will reset the trip meter.
■Pop-up display
Distance until the next engine oil
change will displayed when a warning
message indicating that oil mainte-
nance should be performed soon or is
required is displayed.
The brightness of the instrument panel
lights can be adjusted.
1
Darker
2
Brighter
■Brightness of the meter lights (day mode
and night mode)
The brightness of the meter lights can be
adjusted individually.
In the following situations, the meters
WARNING
For example, there is a lag between the
driver’s shifting and the new gear number
appearing on the display. This lag could
cause the driver to downshift again,
causing rapid and excessive engine brak-
ing and possibly an accident resulting in
death or injury.
NOTICE
■To prevent damage to the engine and
its components
●Do not let the indicator needle of the
tachometer enter the red zone, which
indicates the maximum engine speed.
●The engine may be overheating if the
engine coolant temperature gauge is
in the red zone (H). In this case, imme-
diately stop the vehicle in a safe place,
and check the engine after it has
cooled completely. ( P.389)
Odometer and trip meter dis-
play
Changing the instrument panel
light brightness
Page 242 of 456

2424-6. Driving tips
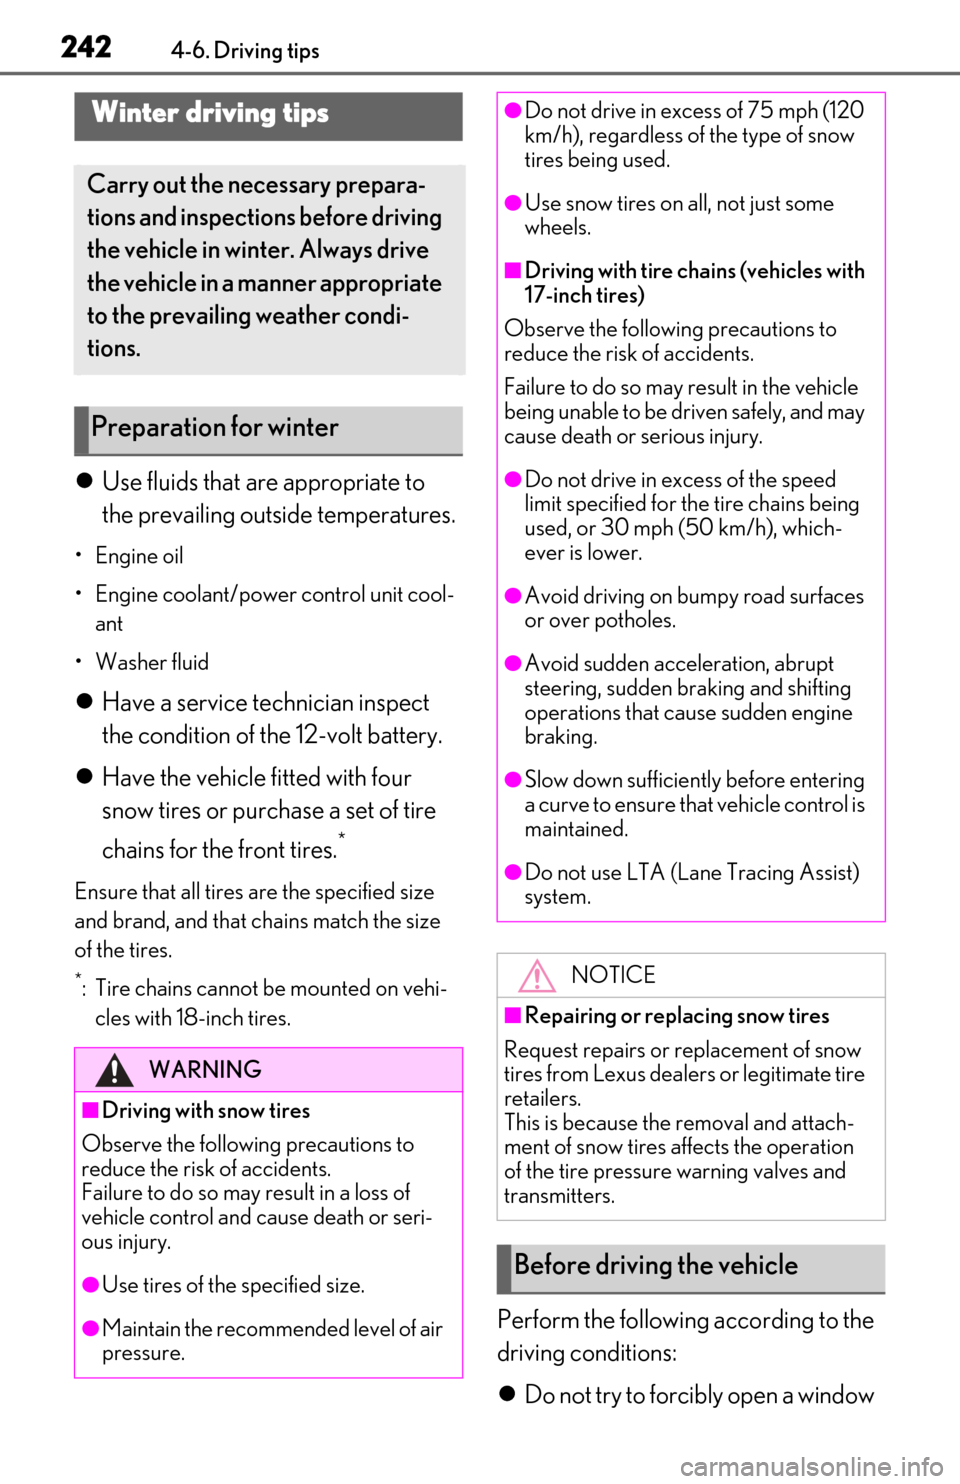
Use fluids that are appropriate to
the prevailing outside temperatures.
• Engine oil
• Engine coolant/power control unit cool-
ant
• Washer fluid
Have a service technician inspect
the condition of the 12-volt battery.
Have the vehicle fitted with four
snow tires or purchase a set of tire
chains for the front tires.
*
Ensure that all tires are the specified size
and brand, and that chains match the size
of the tires.
*: Tire chains cannot be mounted on vehi-
cles with 18-inch tires.
Perform the following according to the
driving conditions:
Do not try to forcibly open a window
Winter driving tips
Carry out the necessary prepara-
tions and inspections before driving
the vehicle in winter. Always drive
the vehicle in a manner appropriate
to the prevailing weather condi-
tions.
Preparation for winter
WARNING
■Driving with snow tires
Observe the following precautions to
reduce the risk of accidents.
Failure to do so may result in a loss of
vehicle control and cause death or seri-
ous injury.
●Use tires of the specified size.
●Maintain the recommended level of air
pressure.
●Do not drive in excess of 75 mph (120
km/h), regardless of the type of snow
tires being used.
●Use snow tires on all, not just some
wheels.
■Driving with tire chains (vehicles with
17-inch tires)
Observe the following precautions to
reduce the risk of accidents.
Failure to do so may result in the vehicle
being unable to be driven safely, and may
cause death or serious injury.
●Do not drive in excess of the speed
limit specified for the tire chains being
used, or 30 mph (50 km/h), which-
ever is lower.
●Avoid driving on bumpy road surfaces
or over potholes.
●Avoid sudden acceleration, abrupt
steering, sudden braking and shifting
operations that cause sudden engine
braking.
●Slow down sufficiently before entering
a curve to ensure that vehicle control is
maintained.
●Do not use LTA (Lane Tracing Assist)
system.
NOTICE
■Repairing or replacing snow tires
Request repairs or replacement of snow
tires from Lexus dealers or legitimate tire
retailers.
This is because the removal and attach-
ment of snow tires affects the operation
of the tire pressure warning valves and
transmitters.
Before driving the vehicle
Page 310 of 456

3106-2. Maintenance
3Press or of the meter control
switches and select “Scheduled Mainte-
nance”. Then press “OK”.
4
Select “Yes” and press “OK”.
A message will be disp layed when the reset
procedure has been completed.
You can perform some maintenance
procedures by yourself.
Please be aware that do-it-yourself
maintenance may affect warranty cov-
erage.
The use of Lexus repair manuals is recom-
mended.
For details about warranty coverage, refer
to the separate “Owner’s Guide”, “War-
ranty and Service Guide”, “Owner’s Man-
ual Supplement” or “Warranty Booklet”.
Do-it-yourself maintenance
General maintenance
Listed below are the general main-
tenance items that should be per-
formed at the intervals specified in
the “Warranty and Service Guide”
or “Owner’s Manual Supplement”.
It is recommended that any prob-
lem you notice should be brought to
the attention of your Lexus dealer
or qualified service shop for advice.
WARNING
■If the hybrid system is operating
Turn the hybrid system off and ensure
that there is adequate ventilation before
performing maintenance checks.
Engine compartment
ItemsCheck points
Brake fluid
Is the brake fluid at the
correct level?
( P.322)
Engine/power
control unit cool-
antIs the engine/power
control unit coolant at
the correct level?
( P.320)
Engine oil
Is the engine oil at the
correct level?
( P.318)
Exhaust system
There should not be
any fumes or strange
sounds.
Page 314 of 456

3146-3. Do-it-yourself maintenance
6-3.Do-it-yourself maintenance
Do-it-yourself service pre-
cautions
If you perform maintenance by
yourself, be sure to follow the cor-
rect procedure as given in these
sections.
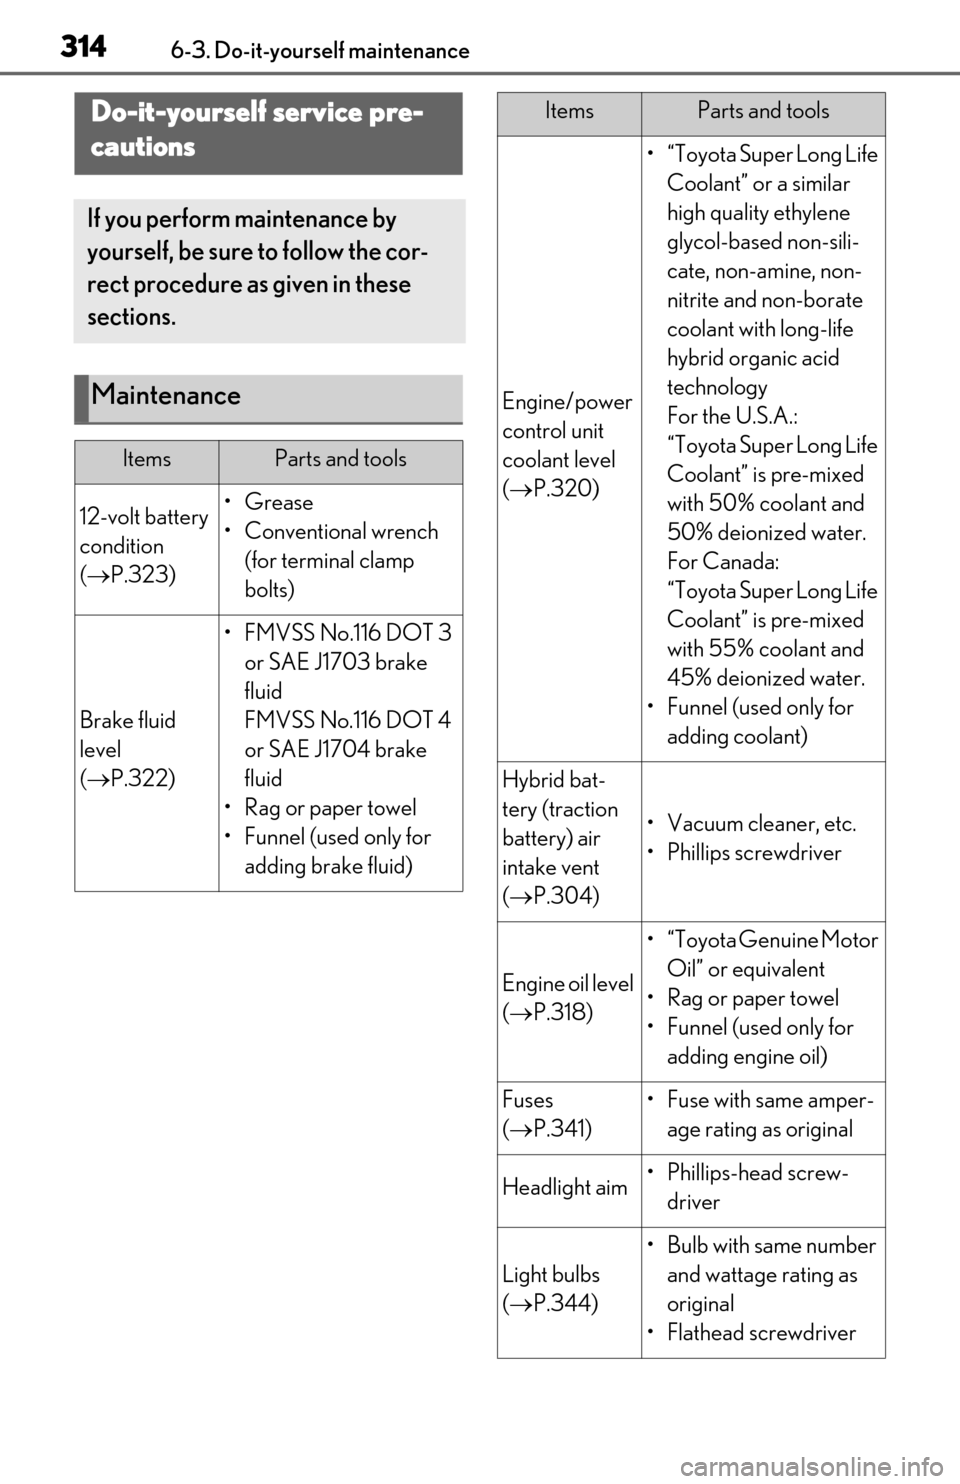
Maintenance
ItemsParts and tools
12-volt battery
condition
( P.323)•Grease
• Conventional wrench
(for terminal clamp
bolts)
Brake fluid
level
( P.322)
• FMVSS No.116 DOT 3
or SAE J1703 brake
fluid
FMVSS No.116 DOT 4
or SAE J1704 brake
fluid
• Rag or paper towel
• Funnel (used only for adding brake fluid)
Engine/power
control unit
coolant level
( P.320)
•“Toyota Super Long Life
Coolant” or a similar
high quality ethylene
glycol-based non-sili-
cate, non-amine, non-
nitrite and non-borate
coolant with long-life
hybrid organic acid
technology
For the U.S.A.:
“Toyota Super Long Life
Coolant” is pre-mixed
with 50% coolant and
50% deionized water.
For Canada:
“Toyota Super Long Life
Coolant” is pre-mixed
with 55% coolant and
45% deionized water.
• Funnel (used only for adding coolant)
Hybrid bat-
tery (traction
battery) air
intake vent
( P.304)
• Vacuum cleaner, etc.
• Phillips screwdriver
Engine oil level
( P.318)
•“Toyota Genuine Motor
Oil” or equivalent
•Rag or paper towel
• Funnel (used only for adding engine oil)
Fuses
( P.341)• Fuse with same amper-
age rating as original
Headlight aim• Phillips-head screw-driver
Light bulbs
( P.344)
•Bulb with same number
and wattage rating as
original
• Flathead sc rewdriver
ItemsParts and tools
Page 315 of 456

3156-3. Do-it-yourself maintenance
6
Maintenance and care
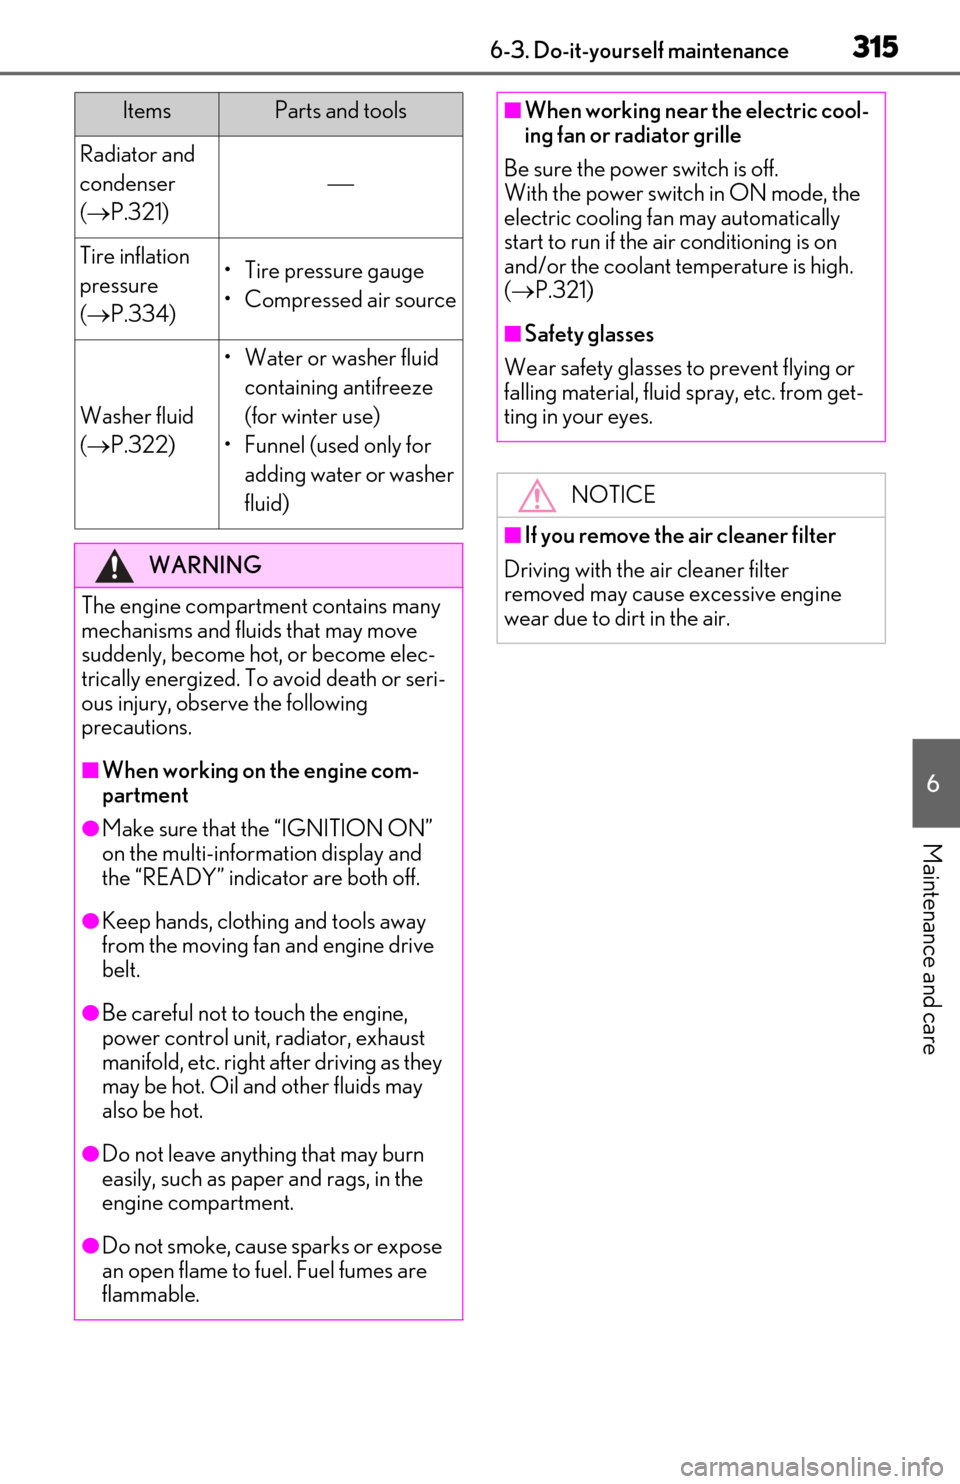
Radiator and
condenser
( P.321)
Tire inflation
pressure
( P.334)• Tire pressure gauge
• Compressed air source
Washer fluid
( P.322)
• Water or washer fluid
containing antifreeze
(for winter use)
• Funnel (used only for adding water or washer
fluid)
WARNING
The engine compartment contains many
mechanisms and fluids that may move
suddenly, become hot, or become elec-
trically energized. To avoid death or seri-
ous injury, observe the following
precautions.
■When working on the engine com-
partment
●Make sure that the “IGNITION ON”
on the multi-information display and
the “READY” indicator are both off.
●Keep hands, clothi ng and tools away
from the moving fan and engine drive
belt.
●Be careful not to touch the engine,
power control unit, radiator, exhaust
manifold, etc. right after driving as they
may be hot. Oil and other fluids may
also be hot.
●Do not leave anything that may burn
easily, such as paper and rags, in the
engine compartment.
●Do not smoke, cause sparks or expose
an open flame to fuel. Fuel fumes are
flammable.
ItemsParts and tools■When working near the electric cool-
ing fan or radiator grille
Be sure the power switch is off.
With the power switch in ON mode, the
electric cooling fan may automatically
start to run if the air conditioning is on
and/or the coolant temperature is high.
( P.321)
■Safety glasses
Wear safety glasses to prevent flying or
falling material, fluid spray, etc. from get-
ting in your eyes.
NOTICE
■If you remove the air cleaner filter
Driving with the air cleaner filter
removed may cause excessive engine
wear due to dirt in the air.
Page 318 of 456

3186-3. Do-it-yourself maintenance
Fuse boxes (P.341)
Engine oil filler cap ( P.319)
Engine oil level dipstick ( P.318)
Brake fluid reservoir ( P.322)
Radiator ( P.321)
Electric cooling fan
Condenser ( P.321)
Power control unit coolant reservoir ( P.321)
Engine coolant reservoir ( P.320)
Washer fluid tank ( P.322)
■12-volt battery
P.323
With the engine at operating tempera-
ture and turned off, check the oil level
Engine compartment
Components
A
B
C
D
E
F
G
H
I
J
Checking and adding the engine
oil