2019 KIA SOUL EV power steering
[x] Cancel search: power steeringPage 178 of 455
441
Features of your vehicle
Instrument Cluster Control
Adjusting Instrument ClusterIllumination
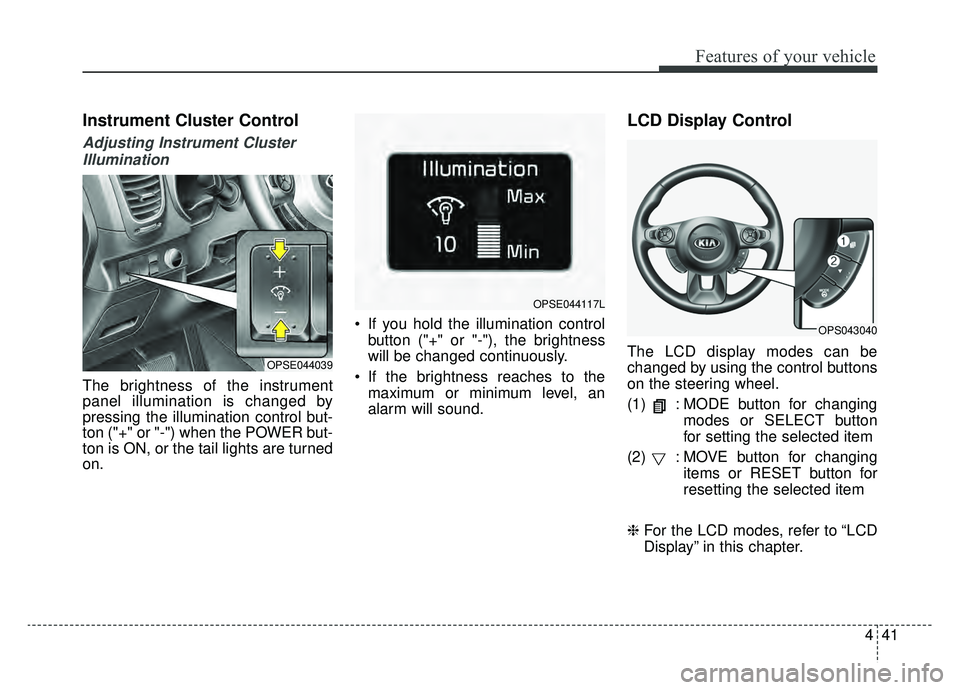
The brightness of the instrument
panel illumination is changed by
pressing the illumination control but-
ton ("+" or "-") when the POWER but-
ton is ON, or the tail lights are turned
on. If you hold the illumination control
button ("+" or "-"), the brightness
will be changed continuously.
If the brightness reaches to the maximum or minimum level, an
alarm will sound.
LCD Display Control
The LCD display modes can be
changed by using the control buttons
on the steering wheel.
(1) : MODE button for changing modes or SELECT button
for setting the selected item
(2) : MOVE button for changing items or RESET button for
resetting the selected item
❈ For the LCD modes, refer to “LCD
Display” in this chapter.OPSE044039
OPSE044117L
OPS043040
Page 200 of 455
463
Features of your vehicle
Average Vehicle Speed (2)
The average vehicle speed is cal-culated by the total driving dis-
tance and driving time since the
last average vehicle speed reset.
- Speed range: 160 MPH or 200km/h
To reset the average vehicle speed, press the RESET ( ) button on
the steering wheel for more than 1
second when the average vehicle
speed is displayed.
✽ ✽ NOTICE
• The average vehicle speed is not dis-
played if the driving distance is less
than 0.03 miles (50 meters) or the
driving time is less than 10 seconds
since the POWER button is turned
to ON.
• Even if the vehicle is not in motion, the average vehicle speed
keeps going while the vehicle is in
the ready ( ) mode.
Elapsed Time (3)
The elapsed time is the total driv-
ing time since the last elapsed time
reset.
- Time range (hh:mm): 00:00 ~ 99:59
To reset the elapsed time, press the RESET ( ) button on the
steering wheel for more than 1
second when the elapsed time is
displayed.
✽ ✽ NOTICE
Even if the vehicle is not in motion,
the elapsed time keeps going while
the vehicle is in the ready ( )
mode.
One time driving information mode
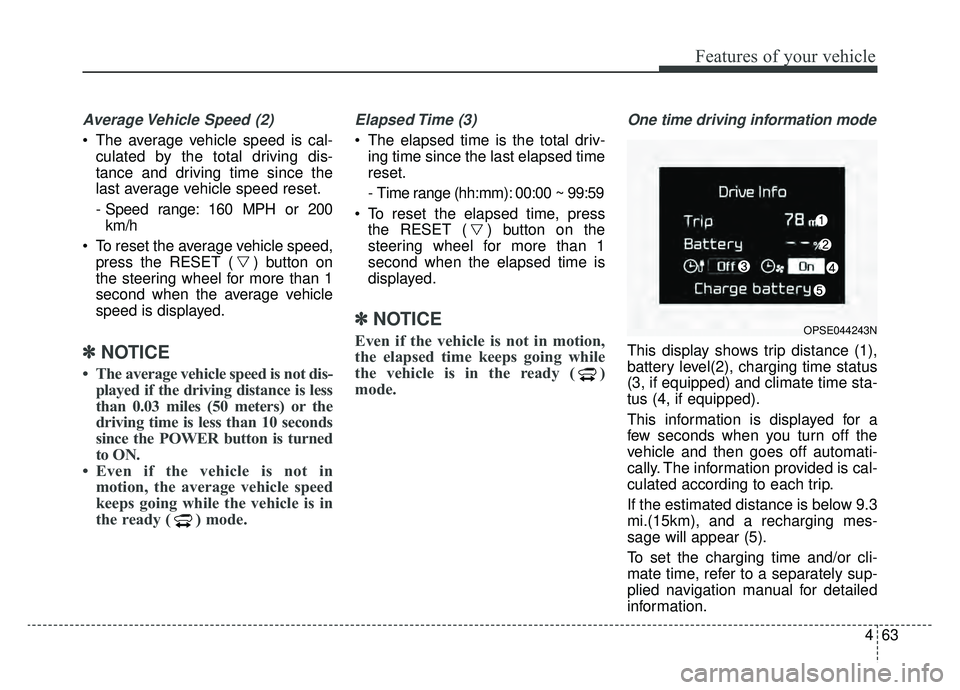
This display shows trip distance (1),
battery level(2), charging time status
(3, if equipped) and climate time sta-
tus (4, if equipped).
This information is displayed for a
few seconds when you turn off the
vehicle and then goes off automati-
cally. The information provided is cal-
culated according to each trip.
If the estimated distance is below 9.3
mi.(15km), and a recharging mes-
sage will appear (5).
To set the charging time and/or cli-
mate time, refer to a separately sup-
plied navigation manual for detailed
information.
OPSE044243N
Page 207 of 455
Features of your vehicle
70
4
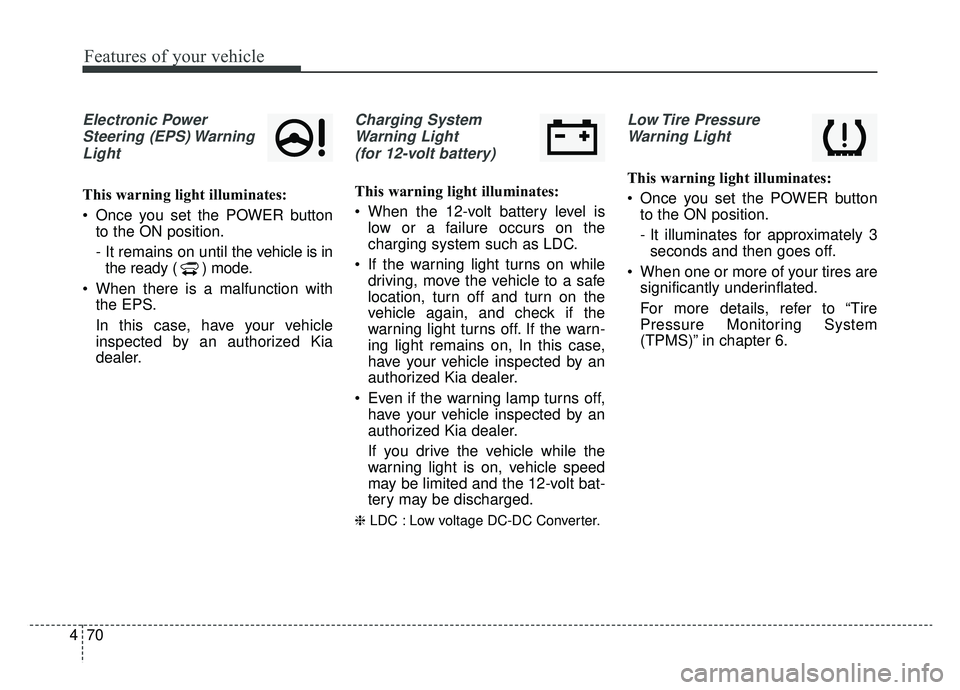
Electronic Power
Steering (EPS) WarningLight
This warning light illuminates:
Once you set the POWER button to the ON position.
- It remains on until the vehicle is in
the ready ( ) mode.
When there is a malfunction with the EPS.
In this case, have your vehicle
inspected by an authorized Kia
dealer.
Charging System
Warning Light (for 12-volt battery)
This warning light illuminates:
When the 12-volt battery level is low or a failure occurs on the
charging system such as LDC.
If the warning light turns on while driving, move the vehicle to a safe
location, turn off and turn on the
vehicle again, and check if the
warning light turns off. If the warn-
ing light remains on, In this case,
have your vehicle inspected by an
authorized Kia dealer.
Even if the warning lamp turns off, have your vehicle inspected by an
authorized Kia dealer.
If you drive the vehicle while the
warning light is on, vehicle speed
may be limited and the 12-volt bat-
tery may be discharged.
❈ LDC : Low voltage DC-DC Converter.
Low Tire Pressure
Warning Light
This warning light illuminates:
Once you set the POWER button to the ON position.
- It illuminates for approximately 3seconds and then goes off.
When one or more of your tires are significantly underinflated.
For more details, refer to “Tire
Pressure Monitoring System
(TPMS)” in chapter 6.
Page 218 of 455
481
Features of your vehicle
Headlamp escort (if equipped)
If you turn the POWER button to the
ACC or OFF position with the head-
lights ON, the headlights remain on
for about 5 minutes. However, if the
driver’s door is opened and closed,
the headlights are turned off after 15
seconds.
The headlights can be turned off by
pressing the lock button on the smart
key twice or turning the light switch to
the OFF or Auto position. However, if
you turn the light switch to the Auto
position when it is dark outside, the
headlights will not be turned off
immediately.
Battery saver function
The purpose of this feature is toprevent the battery from being dis-
charged. The system automatically
turns off the parking lights when
the driver turns the vehicle off and
opens the driver-side door (in that
order).
With this feature, the parking lights will turn off automatically if the driv-
er parks on the side of the road at
night.
If necessary, to keep the lights on
when the vehicle is turned off, per-
form the following:
1) Open the driver-side door.
2) Turn the parking lights OFF and ON again using the light switch
on the steering column.
Daytime running light
(if equipped)
The Daytime Running Lights (DRL)
can make it easier for others to see
the front of your vehicle during the
day. DRL can be helpful in many dif-
ferent driving conditions, and it is
especially helpful after dawn and
before sunset.
The DRL system turns OFF when:
1. The headlight switch is ON.
2. The engine is OFF.
3. Engaging the Parking Brake
LIGHTING
Page 304 of 455
525
Driving your vehicle
When you drive on a road havingpoor traction, such as an icy road,
and have operated your brakes
continuously, the ABS will be active
continuously and the ABS warning
light may illuminate. Pull your vehi-
cle over to a safe place and turn off
the POWER button.
Restart the vehicle. If the ABS warning light goes off, then your
ABS system is normal. Otherwise,
you may have a problem with the
ABS. Contact an authorized Kia
dealer as soon as possible.
✽ ✽ NOTICE
When you jump start your vehicle
because of a drained battery, the
ABS warning light may turn on.
This happens because of low battery
voltage. It does not mean your ABS
has malfunctioned.
• Do not pump your brakes!
• Have the battery recharged before
driving the vehicle.
Electronic stability control
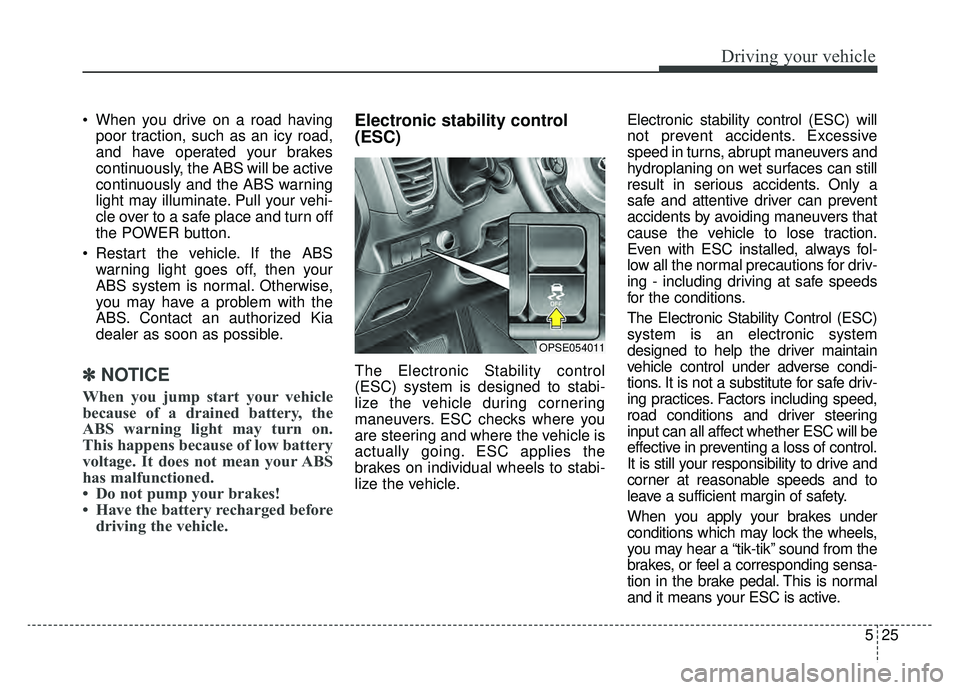
(ESC)
The Electronic Stability control
(ESC) system is designed to stabi-
lize the vehicle during cornering
maneuvers. ESC checks where you
are steering and where the vehicle is
actually going. ESC applies the
brakes on individual wheels to stabi-
lize the vehicle. Electronic stability control (ESC) will
not prevent accidents. Excessive
speed in turns, abrupt maneuvers and
hydroplaning on wet surfaces can still
result in serious accidents. Only a
safe and attentive driver can prevent
accidents by avoiding maneuvers that
cause the vehicle to lose traction.
Even with ESC installed, always fol-
low all the normal precautions for driv-
ing - including driving at safe speeds
for the conditions.
The Electronic Stability Control (ESC)
system is an electronic system
designed to help the driver maintain
vehicle control under adverse condi-
tions. It is not a substitute for safe driv-
ing practices. Factors including speed,
road conditions and driver steering
input can all affect whether ESC will be
effective in preventing a loss of control.
It is still your responsibility to drive and
corner at reasonable speeds and to
leave a sufficient margin of safety.
When you apply your brakes under
conditions which may lock the wheels,
you may hear a “tik-tik’’ sound from the
brakes, or feel a corresponding sensa-
tion in the brake pedal. This is normal
and it means your ESC is active.
OPSE054011
Page 309 of 455
Driving your vehicle
30
5
Malfunction indicator
The VSM can be deactivated even if
you don’t cancel the VSM operation
by pressing the ESC OFF button. It
indicates that a malfunction has
been detected somewhere in the
Electric Power Steering system or
VSM system. If the ESC indicator
light ( ) or EPS warning light
remains on, take your vehicle to an
authorized Kia dealer and have the
system checked.
✽ ✽
NOTICE
• The VSM is designed to function
above approximately 13 mph (22
km/h) on curves.
• The VSM is designed to function above approximately 6 mph (10
km/h) when a vehicle is braking on
a split-mu road. The split-mu road
is made of surfaces which have dif-
ferent friction forces.
The Vehicle Stability Management
system is not a substitute for safe
driving practices but a supplemen-
tary function only. It is the respon-
sibility of the driver to always check
the speed and the distance to the
vehicle ahead. Always hold the
steering wheel firmly while driving.
Your vehicle is designed to activate according to the driver’s intention,
even with installed VSM. Always
follow all the normal precautions
for driving at safe speeds for the
conditions – including driving in
inclement weather and on a slip-
pery road.Hill-start assist control (HAC)
A vehicle has the tendency to roll
back on a steep hill when it starts to
go after stopping. The Hill-start
Assist Control (HAC) prevents the
vehicle from rolling back by applying
the brakes automatically for about 2
seconds. The brakes are released
when the accelerator pedal is
depressed or after about 2 seconds.
The HAC is activated only for about 2
seconds, so when the vehicle is
starting off always depress the accel-
erator pedal.
Page 318 of 455
539
Driving your vehicle
Travel lightly. Don't carry unneces-sary weight in your vehicle. Weight
reduces energy economy.
Open windows at high speeds can reduce energy economy.
Energy economy is less in cross- winds and headwinds. To help off-
set some of this loss, slow down
when driving in these conditions.
Keeping a vehicle in good operating
condition is important both for econ-
omy and safety. Therefore, have an
authorized Kia dealer perform
scheduled inspections and mainte-
nance.
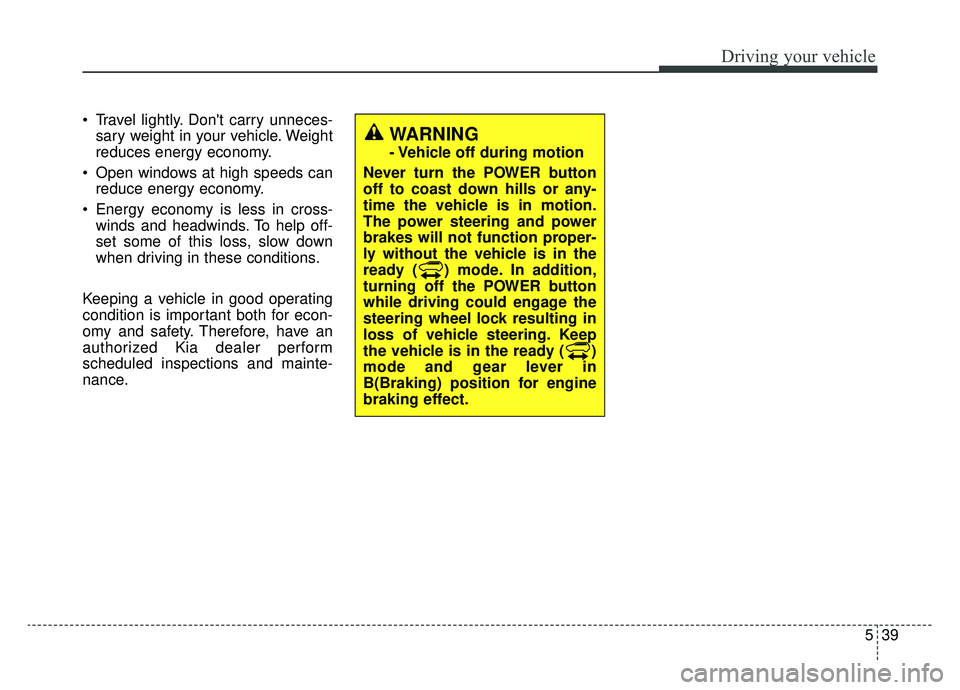
WARNING
- Vehicle off during motion
Never turn the POWER button
off to coast down hills or any-
time the vehicle is in motion.
The power steering and power
brakes will not function proper-
ly without the vehicle is in the
ready ( ) mode. In addition,
turning off the POWER button
while driving could engage the
steering wheel lock resulting in
loss of vehicle steering. Keep
the vehicle is in the ready ( )
mode and gear lever in
B(Braking) position for engine
braking effect.
Page 356 of 455
623
What to do in an emergency
3. Install the towing hook by turning itclockwise into the hole until it is
fully secured.
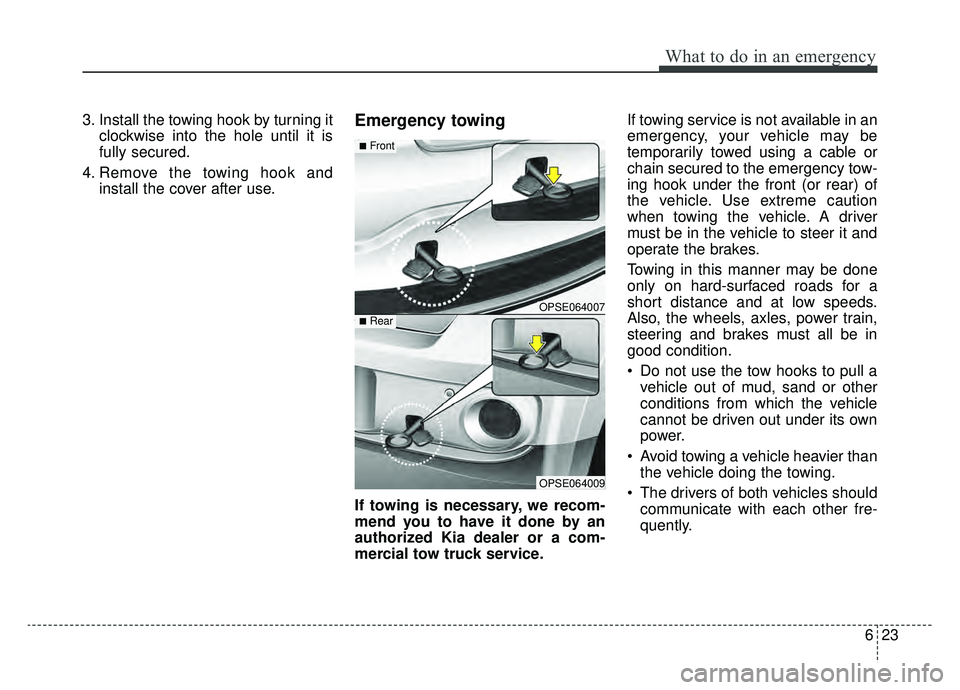
4. Remove the towing hook and install the cover after use.Emergency towing
If towing is necessary, we recom-
mend you to have it done by an
authorized Kia dealer or a com-
mercial tow truck service. If towing service is not available in an
emergency, your vehicle may be
temporarily towed using a cable or
chain secured to the emergency tow-
ing hook under the front (or rear) of
the vehicle. Use extreme caution
when towing the vehicle. A driver
must be in the vehicle to steer it and
operate the brakes.
Towing in this manner may be done
only on hard-surfaced roads for a
short distance and at low speeds.
Also, the wheels, axles, power train,
steering and brakes must all be in
good condition.
Do not use the tow hooks to pull a
vehicle out of mud, sand or other
conditions from which the vehicle
cannot be driven out under its own
power.
Avoid towing a vehicle heavier than the vehicle doing the towing.
The drivers of both vehicles should communicate with each other fre-
quently.
OPSE064007
OPSE064009
■Front
■Rear