2019 KIA SORENTO steering wheel
[x] Cancel search: steering wheelPage 396 of 573
5119
Driving your vehicle
Rocking the vehicle
If it is necessary to rock the vehicle
to free it from snow, sand, or mud,
first turn the steering wheel right and
left to clear the area around your
front wheels. Then, shift back and
forth between R (Reverse) and any
forward gear in vehicles equipped
with an automatic transmission. Do
not race the engine, and spin the
wheels as little as possible. If you are
still stuck after a few tries, have the
vehicle pulled out by a tow vehicle to
avoid engine overheating and possi-
ble damage to the transmission.The ESC system should be turned
OFF prior to rocking the vehicle.
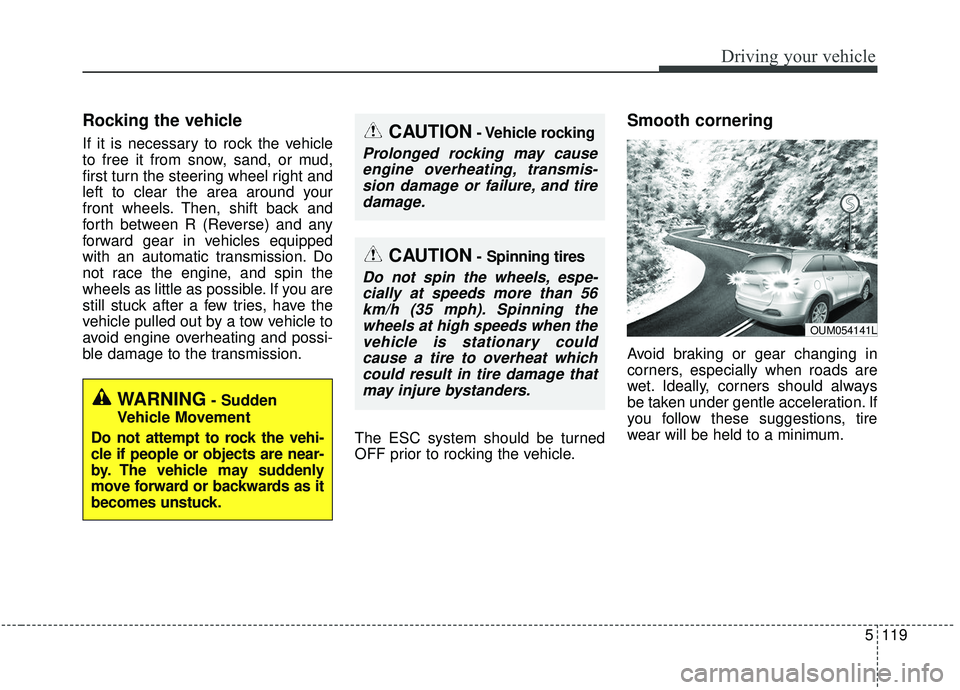
Smooth cornering
Avoid braking or gear changing in
corners, especially when roads are
wet. Ideally, corners should always
be taken under gentle acceleration. If
you follow these suggestions, tire
wear will be held to a minimum.
OUM054141L
CAUTION- Vehicle rocking
Prolonged rocking may causeengine overheating, transmis-sion damage or failure, and tiredamage.
CAUTION- Spinning tires
Do not spin the wheels, espe-cially at speeds more than 56km/h (35 mph). Spinning thewheels at high speeds when thevehicle is stationary couldcause a tire to overheat whichcould result in tire damage thatmay injure bystanders.
WARNING- Sudden
Vehicle Movement
Do not attempt to rock the vehi-
cle if people or objects are near-
by. The vehicle may suddenly
move forward or backwards as it
becomes unstuck.
Page 402 of 573
5125
Driving your vehicle
Don’t let your parking brake
freeze
Under some conditions your parking
brake can freeze in the engaged
position. This is most likely to happen
when there is an accumulation of
snow or ice around or near the rear
brakes or if the brakes are wet. If
there is a risk the parking brake may
freeze, apply it only temporarily while
you put the gear shift lever in P
(Park, automatic transmission) and
block the rear wheels so the vehicle
cannot roll. Then release the parking
brake.
Don't let ice and snow accu-
mulate underneath
Under some conditions, snow and
ice can build up under the fenders
and interfere with the steering. When
driving in severe winter conditions
where this may happen, you should
periodically check underneath the
vehicle to be sure the movement of
the front wheels and the steering
components are not obstructed.
Carry emergency equipment
Depending on the severity of the
weather, you should carry appropri-
ate emergency equipment. Some of
the items you may want to carry
include tow straps or chains, flash-
light, emergency flares, sand, shov-
el, jumper cables, window scraper,
gloves, ground cloth, coveralls, blan-
ket, etc.
Page 405 of 573

Driving your vehicle
128
5
Driving with a trailer
Towing a trailer requires a certain
amount of experience. Before setting
out for the open road, you must get
to know your trailer. Acquaint your-
self with the feel of handling and
braking with the added weight of the
trailer. And always keep in mind that
the vehicle you are driving is now a
good deal longer and not nearly so
responsive as your vehicle is by
itself.
Before you start, check the trailer
hitch and platform, safety chains,
electrical connector(s), lights, tires
and mirror adjustment. If the trailer
has electric brakes, start your vehicle
and trailer moving and then apply the
trailer brake controller by hand to be
sure the brakes are working. This lets
you check your electrical connection
at the same time.
During your trip, check occasionally
to be sure that the load is secure,
and that the lights and any trailer
brakes are still working.
Following distance
Stay at least twice as far behind the
vehicle ahead as you would when
driving your vehicle without a trailer.
This can help you avoid situations
that require heavy braking and sud-
den turns.
Passing
You’ll need more passing distance
up ahead when you’re towing a trail-
er. And, because of the increased
vehicle length, you’ll need to go
much farther beyond the passed
vehicle before you can return to your
lane. Due to the added load to the
engine when going uphill the vehicle
may also take longer to pass than it
would on flat ground.
Backing up
Hold the bottom of the steering
wheel with one hand. Then, to move
the trailer to the left, just move your
hand to the left. To move the trailer to
the right, move your hand to the
right. Always back up slowly and, if
possible, have someone guide you.
Making turns
When you’re turning with a trailer,
make wider turns than normal. Do
this so your trailer won’t strike soft
shoulders, curbs, road signs, trees,
or other objects near the edge of the
road. Avoid jerky or sudden maneu-
vers. Signal well in advance before
turning or lane changes.
Page 407 of 573
Driving your vehicle
130
5
Towing up hill
When towing a trailer on steep
grades (in excess of 6%) pay close
attention to the engine coolant
temperature gauge to ensure the
engine does not overheat.
If the needle of the coolant temper-
ature gauge moves across the dial
towards “H” (HOT), pull over and
stop as soon as it is safe to do so,
and allow the engine to idle until it
cools down. You may proceed once
the engine has cooled sufficiently.
You must decide driving speed depending on trailer weight and
uphill grade to reduce the possibil-
ity of engine and transmission
overheating.
Parking on hills
Generally, if you have a trailer
attached to your vehicle, you should
not park your vehicle on a hill. People
can be seriously or fatally injured,
and both your vehicle and the trailer
can be damaged if they unexpected-
ly roll downhill.
However, if you ever have to park
your trailer on a hill, here's how to do
it:
1.Pull the vehicle into the parkingspace. Turn the steering wheel in
the direction of the curb (right if
headed downhill, left if headed up
hill).
2.If the vehicle has an automatic transmission, place the vehicle in P
(Park).
3.Set the parking brake and shut off the engine.
4.Place chocks under the trailer wheels on the down hill side of the
wheels. 5.Start the vehicle, hold the brakes,
shift to neutral, release the parking
brake and slowly release the
brakes until the trailer chocks
absorb the load.
6.Reapply the brakes, reapply the parking brake and shift the vehicle
to P (Park) for automatic transmis-
sion.
7.Shut off the vehicle and release the vehicle brakes but leave the park-
ing brake set.
Page 450 of 573

77
Maintenance
OWNER MAINTENANCE
The following lists are vehicle checks
and inspections that should be per-
formed by the owner or an author-
ized Kia dealer at the frequencies
indicated to help ensure safe,
dependable operation of your vehi-
cle.
Any adverse conditions should be
brought to the attention of your deal-
er as soon as possible.
These Owner Maintenance Checks
are generally not covered by war-
ranties and you may be charged for
labor, parts and lubricants used.Owner maintenance schedule
When you stop for fuel:
Check the engine oil level.
Check the coolant level in thecoolant reservoir.
Check the windshield washer fluid level.
Look for low or under-inflated tires.
While operating your vehicle:
Note any changes in the sound of the exhaust or any smell of
exhaust fumes in the vehicle.
Check for vibrations in the steering wheel. Notice any increased steer-
ing effort or looseness in the steer-
ing wheel, or change in its straight-
ahead position.
Notice if your vehicle constantly turns slightly or “pulls” to one side
when traveling on smooth, level
road.
When stopping, listen and check for unusual sounds, pulling to one
side, increased brake pedal travel
or “hard-to-push” brake pedal.
If any slipping or changes in the operation of your transmission
occurs, check the transmission
fluid level.
Check the automatic transmission P (Park) function.
Check the parking brake.
Check for fluid leaks under your vehicle (water dripping from the air
conditioning system during or after
use is normal).
WARNING - Hot coolant
Be careful when checking your
engine coolant level when the
engine is hot. Scalding hot
coolant and steam may blow
out under pressure.
Page 461 of 573

Maintenance
18
7
Steering gear box, linkage &
boots/lower arm ball joint
With the vehicle stopped and engine
off, check for excessive free-play in
the steering wheel.
Check the linkage for bends or dam-
age. Check the dust boots and ball
joints for deterioration, cracks, or dam-
age. Replace any damaged parts.
Drive shafts and boots
Check the drive shafts, boots and
clamps for cracks, deterioration, or
damage. Replace any damaged parts
and, if necessary, repack the grease.
Air conditioning refrigerant
Check the air conditioning lines and
connections for leakage and damage. When checking engine oil, engine
coolant, brake fluid, and washer fluid,
always be sure to clean the area
around any filler plug, drain plug, or
dipstick before checking or draining
any lubricant or fluid. This is espe-
cially important in dusty or sandy
areas and when the vehicle is used
on unpaved roads. Cleaning the plug
and dipstick areas will prevent dirt
and grit from entering the engine and
other mechanisms that could be
damaged.
CHECKING FLUID LEVELS
Page 540 of 573
797
Maintenance
Taking care of leather seats
Vacuum the seat periodically toremove dust and sand on the seat.
It will prevent abrasion or damage of
the leather and maintain its quality.
Wipe the natural leather seat cover often with dry or soft cloth.
Sufficient use of a leather protec- tive may prevent abrasion of the
cover and helps maintain the color.
Be sure to read the instructions
and consult a specialist when
using leather coating or protective
agents.
Leather with bright colors(beige, cream beige) is easily contaminat-
ed and clear in appearance. Clean
the seats frequently.
Avoid wiping with wet cloth. It may cause the surface to crack.
Cleaning the leather seats
Remove all contaminates instantly.Refer to instructions below for
removal of each contaminant.
Cosmetic products(sunscreen, foundation, etc.)
- Apply cleansing cream on a clothand wipe the contaminated point.
Wipe off the cream with a wet
cloth and remove water with a dry
cloth.
Beverages(coffee, soft drink, etc.) - Apply a small amount of neutraldetergent and wipe until contami-
nations do not smear.
Oil - Remove oil instantly withabsorbable cloth and wipe with
stain remover for natural leather
only.
Chewing gum - Harden the gum with ice andremove gradually.CAUTION - Leather
When cleaning leather products(steering wheel, seats etc.), useneutral detergents or low alco-hol content solutions. If you usehigh alcohol content solutionsor acid/alkaline detergents, thecolor of the leather may fade orthe surface may get stripped off.
Page 559 of 573
Index
2I
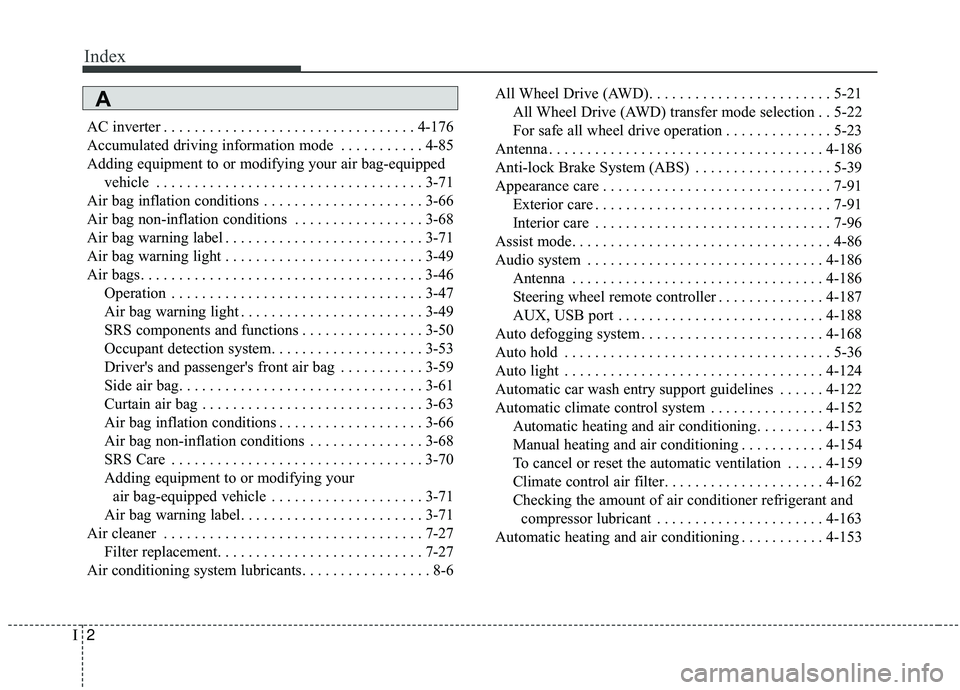
AC inverter . . . . . . . . . . . . . . . . . . . . . . . . . . . . . . . . . 4-176
Accumulated driving information mode . . . . . . . . . . . 4-85
Adding equipment to or modifying your air bag-equipped vehicle . . . . . . . . . . . . . . . . . . . . . . . . . . . . . . . . . . . 3-\
71
Air bag inflation conditions . . . . . . . . . . . . . . . . . . . . . 3-66
Air bag non-inflation conditions . . . . . . . . . . . . . . . . . 3-68
Air bag warning label . . . . . . . . . . . . . . . . . . . . . . . . . . 3-71
Air bag warning light . . . . . . . . . . . . . . . . . . . . . . . . . . 3-49
Air bags. . . . . . . . . . . . . . . . . . . . . . . . . . . . . . . . . . . . \
. 3-46 Operation . . . . . . . . . . . . . . . . . . . . . . . . . . . . . . . . . 3-47
Air bag warning light . . . . . . . . . . . . . . . . . . . . . . . . 3-49
SRS components and functions . . . . . . . . . . . . . . . . 3-50
Occupant detection system. . . . . . . . . . . . . . . . . . . . 3-53
Driver's and passenger's front air bag . . . . . . . . . . . 3-59
Side air bag. . . . . . . . . . . . . . . . . . . . . . . . . . . . . . . . 3-61
Curtain air bag . . . . . . . . . . . . . . . . . . . . . . . . . . . . . 3-63
Air bag inflation conditions . . . . . . . . . . . . . . . . . . . 3-66
Air bag non-inflation conditions . . . . . . . . . . . . . . . 3-68
SRS Care . . . . . . . . . . . . . . . . . . . . . . . . . . . . . . . . . 3-70
Adding equipment to or modifying your air bag-equipped vehicle . . . . . . . . . . . . . . . . . . . . 3-71
Air bag warning label. . . . . . . . . . . . . . . . . . . . . . . . 3-71
Air cleaner . . . . . . . . . . . . . . . . . . . . . . . . . . . . . . . . . . 7-27\
Filter replacement. . . . . . . . . . . . . . . . . . . . . . . . . . . 7-27
Air conditioning system lubricants. . . . . . . . . . . . . . . . . 8-6 All Wheel Drive (AWD). . . . . . . . . . . . . . . . . . . . . . . . 5-21
All Wheel Drive (AWD) transfer mode selection . . 5-22
For safe all wheel drive operation . . . . . . . . . . . . . . 5-23
Antenna . . . . . . . . . . . . . . . . . . . . . . . . . . . . . . . . . . . . \
4-186
Anti-lock Brake System (ABS) . . . . . . . . . . . . . . . . . . 5-39
Appearance care . . . . . . . . . . . . . . . . . . . . . . . . . . . . . . 7-91 Exterior care . . . . . . . . . . . . . . . . . . . . . . . . . . . . . . . 7-91
Interior care . . . . . . . . . . . . . . . . . . . . . . . . . . . . . . . 7-96
Assist mode. . . . . . . . . . . . . . . . . . . . . . . . . . . . . . . . . . 4-86\
Audio system . . . . . . . . . . . . . . . . . . . . . . . . . . . . . . . 4-186 Antenna . . . . . . . . . . . . . . . . . . . . . . . . . . . . . . . . . 4-186
Steering wheel remote controller . . . . . . . . . . . . . . 4-187
AUX, USB port . . . . . . . . . . . . . . . . . . . . . . . . . . . 4-188
Auto defogging system . . . . . . . . . . . . . . . . . . . . . . . . 4-168
Auto hold . . . . . . . . . . . . . . . . . . . . . . . . . . . . . . . . . . . 5-\
36
Auto light . . . . . . . . . . . . . . . . . . . . . . . . . . . . . . . . . . 4-12\
4
Automatic car wash entry support guidelines . . . . . . 4-122
Automatic climate control system . . . . . . . . . . . . . . . 4-152 Automatic heating and air conditioning. . . . . . . . . 4-153
Manual heating and air conditioning . . . . . . . . . . . 4-154
To cancel or reset the automatic ventilation . . . . . 4-159
Climate control air filter. . . . . . . . . . . . . . . . . . . . . 4-162
Checking the amount of air conditioner refrigerant and compressor lubricant . . . . . . . . . . . . . . . . . . . . . . 4-163
Automatic heating and air conditioning . . . . . . . . . . . 4-153
A