Page 64 of 503

347
Safety features of your vehicle
✽ ✽NOTICE
The PASSENGER AIR BAG “OFF”
indicator illuminates for about 4 sec-
onds after the ignition switch is
turned to the ON position or after
the engine is started. If the front
passenger seat is occupied, the occu-
pant detection sensor will then clas-
sify the front passenger after several
more seconds.
Any child age 12 and under should
ride in the rear seat. Children too
large for child restraints should use
the available lap/shoulder belts. No
matter what type of crash, children of
all ages are safer when restrained in
the rear seat. If the occupant detection system is
not working properly, the SRS air bag
warning light on the instrument
panel will illuminate because the pas-
senger's front air bag is connected
with the occupant detection system. If
there is a malfunction of the occupant
detection system, the PASSENGER
AIR BAG “OFF” indicator will not illu-
minate and the passenger's front air
bag will inflate in frontal impact crash-
es even if there is no occupant in the
front passenger's seat.
✽ ✽
NOTICE
Air bags can only be used once - have
an authorized Kia dealer replace the
air bag immediately after deployment.
WARNING - ODS
Interference
Do not place a heavy load or an active electronic device (ex.
laptop computer, after market
DMB/navigation/satellite
audio, video game machine,
MP3, etc.) in the front passen-
ger seatback pocket or on the
front passenger seat.
Do not hang any items such as seatback table on the front
passenger seatback.
Do not place feet on the front passenger seatback.
Do not place any items under the front passenger seat.
Do not place sharp objects on the front passenger seat.
These may damage the occu-
pant detection system, if they
puncture the seat cushion.
Do not spill any liquids on the seat.
(Continued)(Continued)
Any of the above could interfere
with the proper operation of the
ODS sensor thereby increasing
the risk of an injury in an acci-
dent.
SC CAN (ENG) 3.QXP 7/18/2018 5:57 PM Page 47
Page 67 of 503

Safety features of your vehicle
50
3
Advanced air bags are combined
with pre-tensioner seat belts to help
provide enhanced occupant protec-
tion in frontal crashes. Front air bags
are not intended to deploy in colli-
sions in which sufficient protection
can be provided by the pre-tensioner
seat belt alone.
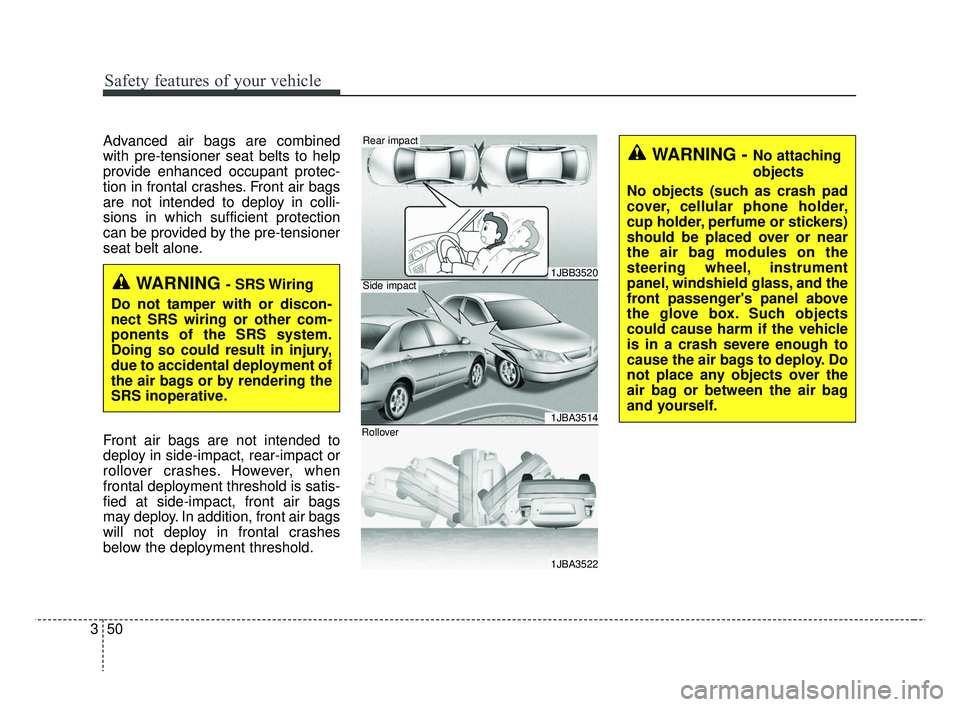
Front air bags are not intended to
deploy in side-impact, rear-impact or
rollover crashes. However, when
frontal deployment threshold is satis-
fied at side-impact, front air bags
may deploy. In addition, front air bags
will not deploy in frontal crashes
below the deployment threshold.
WARNING - SRS Wiring
Do not tamper with or discon-
nect SRS wiring or other com-
ponents of the SRS system.
Doing so could result in injury,
due to accidental deployment of
the air bags or by rendering the
SRS inoperative.1JBB3520
1JBA3514
1JBA3522
Side impact
Rear impact
Rollover
WARNING - No attaching
objects
No objects (such as crash pad
cover, cellular phone holder,
cup holder, perfume or stickers)
should be placed over or near
the air bag modules on the
steering wheel, instrument
panel, windshield glass, and the
front passenger's panel above
the glove box. Such objects
could cause harm if the vehicle
is in a crash severe enough to
cause the air bags to deploy. Do
not place any objects over the
air bag or between the air bag
and yourself.
SC CAN (ENG) 3.QXP 7/18/2018 5:57 PM Page 50
Page 130 of 503

Features of your vehicle
52
4
Tilt and telescopic steering
(if equipped)
Tilt steering allows you to adjust the
steering wheel before you drive. You
can also raise it to give your legs
more room when you exit and enter
the vehicle.
The steering wheel should be posi-
tioned so that it is comfortable for
you to drive, while permitting you to
see the instrument panel warning
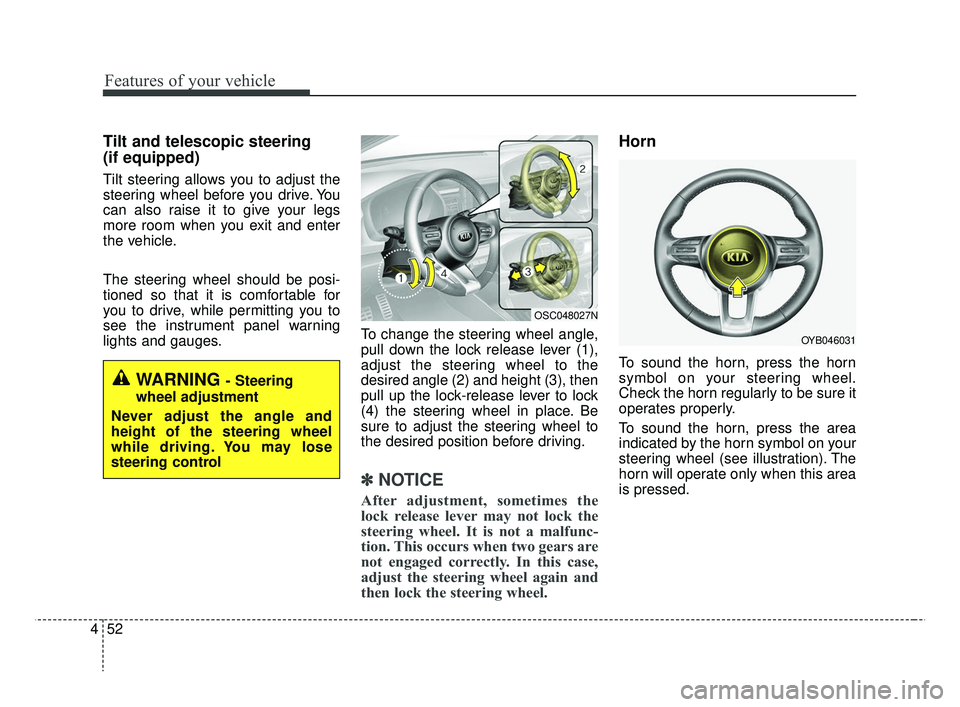
lights and gauges. To change the steering wheel angle,
pull down the lock release lever (1),
adjust the steering wheel to the
desired angle (2) and height (3), then
pull up the lock-release lever to lock
(4) the steering wheel in place. Be
sure to adjust the steering wheel to
the desired position before driving.
✽ ✽
NOTICE
After adjustment, sometimes the
lock release lever may not lock the
steering wheel. It is not a malfunc-
tion. This occurs when two gears are
not engaged correctly. In this case,
adjust the steering wheel again and
then lock the steering wheel.
Horn
To sound the horn, press the horn
symbol on your steering wheel.
Check the horn regularly to be sure it
operates properly.
To sound the horn, press the area
indicated by the horn symbol on your
steering wheel (see illustration). The
horn will operate only when this area
is pressed.
WARNING - Steering
wheel adjustment
Never adjust the angle and
height of the steering wheel
while driving. You may lose
steering control
OYB046031
OSC048027N
SC CAN (ENG) 4.QXP 7/18/2018 5:47 PM Page 52
Page 136 of 503
Features of your vehicle
58
4
Instrument Cluster Control
Adjusting Instrument Cluster
Illumination
The instrument panel illumination
intensity can be adjusted by pressing
the control switch with the headlight
switch in any position when the igni-
tion switch is in the ON position.
The illumination intensity is shown
on the instrument cluster LCD win-
dow. If you hold the illumination control
button (“+” or “-”), the brightness
will be changed continuously.
If the brightness reaches to the maximum or minimum level, an
alarm will sound.
LCD window Control
The LCD window modes can be
changed by using the control buttons
on the steering wheel.
[Type A]
(1) TRIP : TRIP button for changing
trip modes
(2) RESET : RESET button for reset- ting itemsOYB046035
OYB046121
OSC047127N
■ Type A
■ Type B
OYB046036
SC CAN (ENG) 4.QXP 7/18/2018 5:48 PM Page 58
Page 172 of 503
Features of your vehicle
94
4
Parking light position ( )
When the light switch is in the park-
ing light position (3rd position), the
tail, position, license and instrument
panel lights will turn ON.
Headlight position ( )
When the light switch is in the head-
light position (4th position) the head,
tail, position, license and instrument
panel lights will turn ON.
The ignition switch must be in the ON
position to turn on the headlights.
Auto light position (if equipped)
When the light switch is in the AUTO
light position, the taillights and head-
lights will turn ON or OFF automati-
cally depending on the amount of
light outside the vehicle.
OSC047416N
OSC047402N
■ Type A
■ Type B
OSC047417N
OSC047403N
■ Type A
■ Type B
OSC047415N
OSC047401N
■ Type A
■ Type B
SC CAN (ENG) 4.QXP 7/18/2018 5:49 PM Page 94
Page 174 of 503

Features of your vehicle
96
4
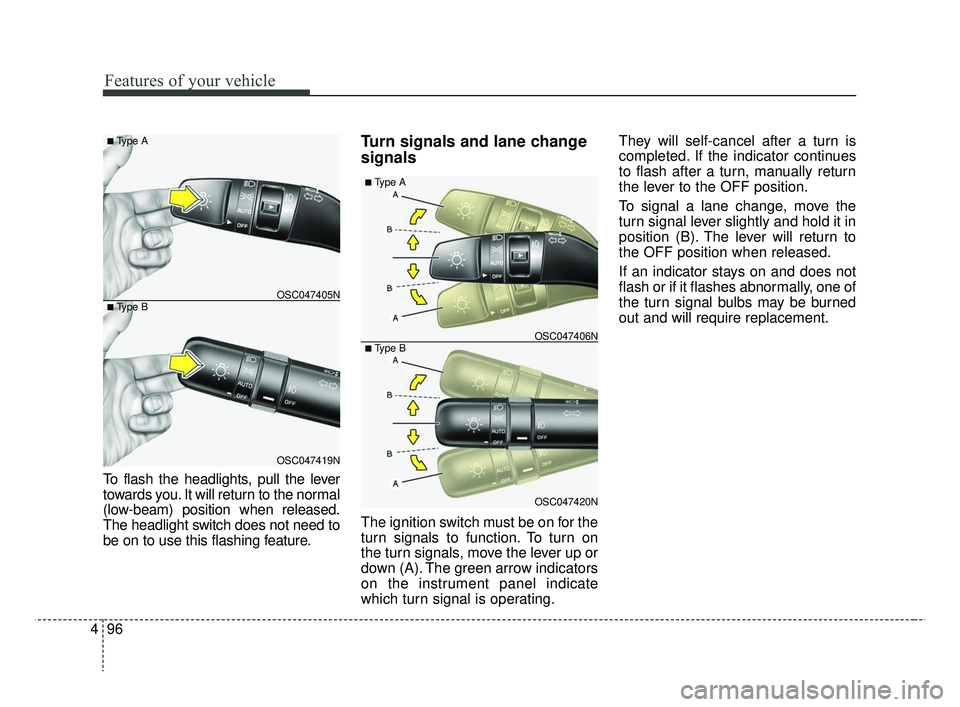
To flash the headlights, pull the lever
towards you. It will return to the normal
(low-beam) position when released.
The headlight switch does not need to
be on to use this flashing feature.
Turn signals and lane change
signals
The ignition switch must be on for the
turn signals to function. To turn on
the turn signals, move the lever up or
down (A). The green arrow indicators
on the instrument panel indicate
which turn signal is operating. They will self-cancel after a turn is
completed. If the indicator continues
to flash after a turn, manually return
the lever to the OFF position.
To signal a lane change, move the
turn signal lever slightly and hold it in
position (B). The lever will return to
the OFF position when released.
If an indicator stays on and does not
flash or if it flashes abnormally, one of
the turn signal bulbs may be burned
out and will require replacement.
OSC047420N
OSC047406N
■ Type A
■ Type B
OSC047419N
OSC047405N
■ Type A
■ Type B
SC CAN (ENG) 4.QXP 7/18/2018 5:50 PM Page 96
Page 186 of 503

Features of your vehicle
108
4
If you want to defrost and defog the
front windshield, refer to “Windshield
Defrosting and Defogging” in this
section.
Rear window defroster
The defroster heats the window to
remove frost, fog and thin ice from
the interior and exterior of the rear
window, while the engine is running.
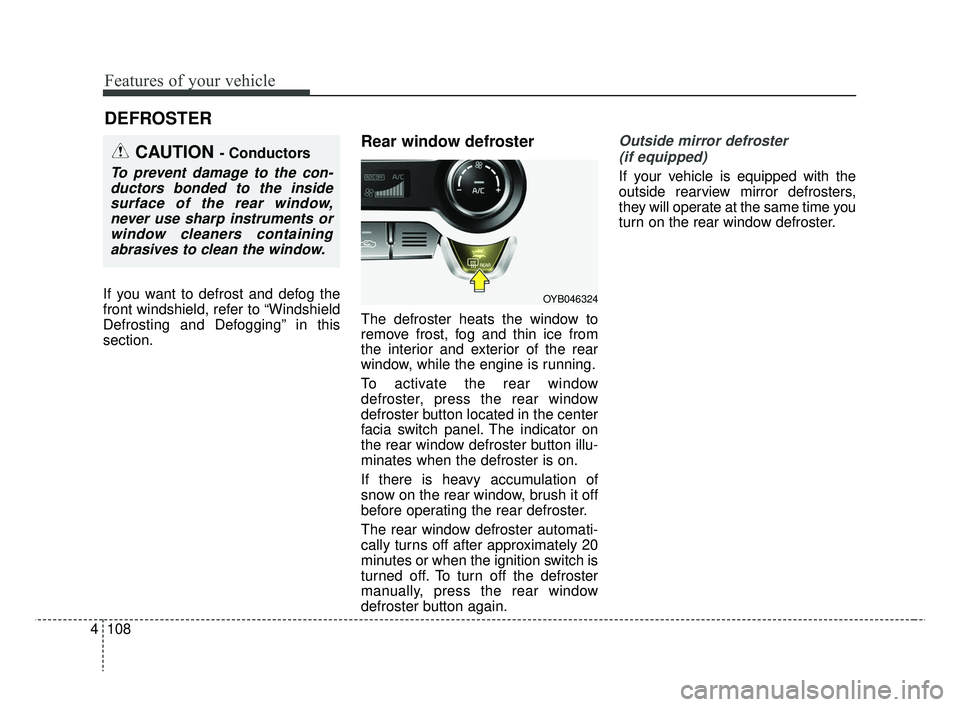
To activate the rear window
defroster, press the rear window
defroster button located in the center
facia switch panel. The indicator on
the rear window defroster button illu-
minates when the defroster is on.
If there is heavy accumulation of
snow on the rear window, brush it off
before operating the rear defroster.
The rear window defroster automati-
cally turns off after approximately 20
minutes or when the ignition switch is
turned off. To turn off the defroster
manually, press the rear window
defroster button again.
Outside mirror defroster
(if equipped)
If your vehicle is equipped with the
outside rearview mirror defrosters,
they will operate at the same time you
turn on the rear window defroster.
DEFROSTER
OYB046324
CAUTION - Conductors
To prevent damage to the con-ductors bonded to the insidesurface of the rear window,never use sharp instruments orwindow cleaners containingabrasives to clean the window.
SC CAN (ENG) 4.QXP 7/18/2018 5:51 PM Page 108
Page 190 of 503
Features of your vehicle
112
4
MAX A/C-Level (B, D) (if equipped)
The MAX A/C mode is used to cool
the inside of the vehicle faster. Air
flow is directed toward the upper
body and face.
In this mode, the air conditioning and
the recirculated air position will be
selected automatically. Instrument panel vents
The outlet vents can be opened or
closed separately using the thumb-
wheel.
Also, you can adjust the direction of
air delivered from these vents using
the vent control lever as shown.
Temperature control
The temperature control knob allows
you to control the temperature of the
air flowing from the ventilation sys-
tem. To change the air temperature in
the passenger compartment, turn
the knob to the right for warm air or
left for cooler air.
OSC047311NOYB046305
OYB046304
SC CAN (ENG) 4.QXP 7/18/2018 5:51 PM Page 112