Page 215 of 546

3-124
Convenient features of your vehicle
Rear View Monitor
The Rear View Monitor will activate
when the engine is running and the
shift lever is in the R (Reverse) posi-
tion.This is a supplemental system that
helps provide a view of the area
behind the vehicle through the multi-
media screen while the vehicle is in
the R (Reverse) position.
Always keep the camera lens
clean. The camera may not work
normally if the lens is covered
with dirt, water or snow.
NOTICE
D DR
RI
IV
VE
ER
R
A
AS
SS
SI
IS
ST
T
S
SY
YS
ST
TE
EM
M
The Rear View Monitor is not a
safety device. It only serves to
assist the driver in identifying
objects directly behind the mid-
dle of the vehicle. The camera
does NOT cover the complete
area behind the vehicle.
WARNING
Never rely solely on the Rear
view monitor when backing-
up.
ALWAYS look around your
vehicle to make sure there are
no objects or obstacles before
moving the vehicle in any
direction to prevent a collision.
Always pay close attention
when the vehicle is driven
close to objects, particularly
pedestrians, and especially
children.
WARNING
OTLE048052
OTLE048333Q
Page 221 of 546
3-130
Convenient features of your vehicle
MAX A/C-Level (B, D)
The MAX A/C mode is used to cool
the inside of the vehicle faster. Air
flow is directed toward the upper
body and face.
In this mode, the air conditioning and
the recirculated air position will be
selected automatically.
Instrument panel vents
The instrument panel vent air flow
can be directed up/down or left/right
using the vent adjustment lever.
Front
The outlet vents can be opened or
closed separately using the vent
control lever. To close the vent com-
pletely, move the vent control lever
all the way to the left. You will hear a
click.
Rear
The outlet vents can be opened ( )
or closed ( ) separately using the
thumbwheel.
OTL045209OTLE048086
OTLE048087
■ Front
■ Rear (if equipped)
Page 233 of 546
3-142
Convenient features of your vehicle
Instrument panel vents
The instrument panel vent air flow
can be directed up/down or left/right
using the vent adjustment lever.
Front
The outlet vents can be opened or
closed separately using the vent
control lever. To close the vent com-
pletely, move the vent control lever
all the way to the left. You will hear a
click.
Rear
The outlet vents can be opened ( )
or closed ( ) separately using the
thumbwheel.
Temperature control
Turn the knob to the right to increase
the temperature. Turn the knob to the
left to decrease the temperature.
The temperature will increase or
decrease by 1°F/0.5°C for each
incremental location. When set to the
lowest temperature setting, the air
conditioning will operate continuous-
ly.
OTL045219
■Driver's side■Passenger's side
OTLE048086
■Front
OTLE048087
■Rear (if equipped)
Page 241 of 546

3-150
Convenient features of your vehicle
W WI
IN
ND
DS
SH
HI
IE
EL
LD
D
D
DE
EF
FR
RO
OS
ST
TI
IN
NG
G
A
AN
ND
D
D
DE
EF
FO
OG
GG
GI
IN
NG
G
For maximum windshield defrost-
ing, set the temperature control
knob to the highest temperature
setting and the fan control knob to
the highest fan speed. Select the
front defrost button on the climate
control display. After the engine
warm-up period, warm air will be
directed to the front windshield.
If warm air to the floor is desired
while defrosting or defogging, set the
mode to the floor-defrost position.
Before driving, clear all snow and
ice from the windshield, rear win-
dow, side view mirrors, and all side
windows.
Clear all snow and ice from the
hood and air inlet in the cowl grill to
improve heater and defroster effi-
ciency and to reduce the probability
of fogging up the inside of the wind-
shield.
If the engine temperature is still
cold after starting, then a brief
engine warm up period may be
required for the vented air flow to
become warm or hot.Manual Climate Control System
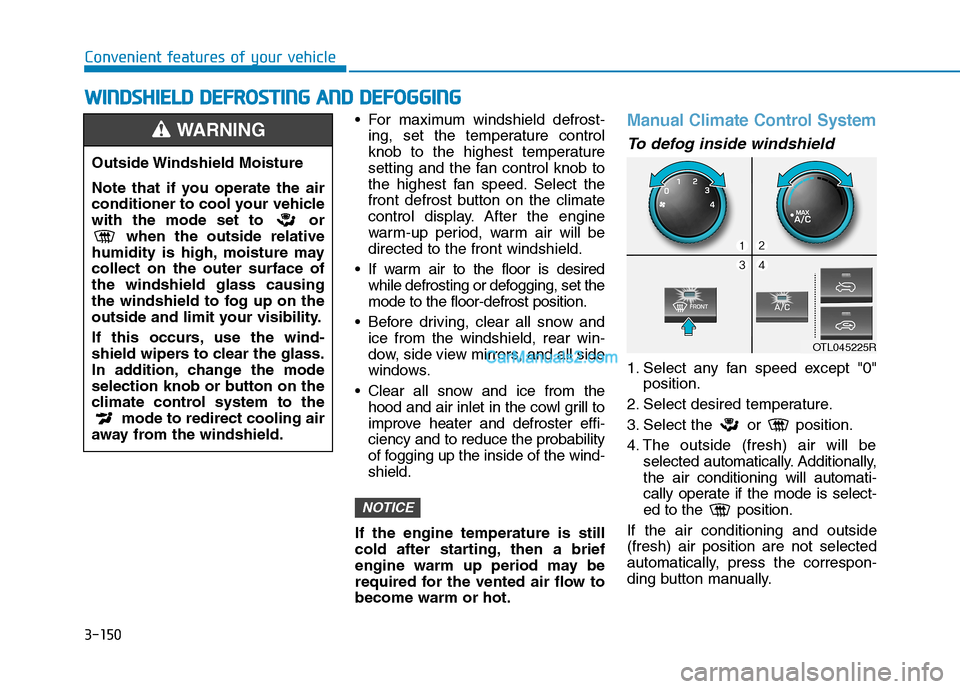
To defog inside windshield
1. Select any fan speed except "0"
position.
2. Select desired temperature.
3. Select the or position.
4. The outside (fresh) air will be
selected automatically. Additionally,
the air conditioning will automati-
cally operate if the mode is select-
ed to the position.
If the air conditioning and outside
(fresh) air position are not selected
automatically, press the correspon-
ding button manually.
NOTICE
Outside Windshield Moisture
Note that if you operate the air
conditioner to cool your vehicle
with the mode set to or
when the outside relative
humidity is high, moisture may
collect on the outer surface of
the windshield glass causing
the windshield to fog up on the
outside and limit your visibility.
If this occurs, use the wind-
shield wipers to clear the glass.
In addition, change the mode
selection knob or button on the
climate control system to the
mode to redirect cooling air
away from the windshield.
WARNING
OTL045225R
Page 249 of 546
3-158
Convenient features of your vehicle
Sunglass HolderTo open:
Push and release the cover and the
holder will slowly open. Place your
sunglasses in the compartment door
with the lenses facing out.
To close:
Push back into position.
Make sure the sunglass holder is
closed while driving.
Do not keep objects except
sunglasses inside the sun-
glass holder. Such objects can
be thrown from the holder in
the event of a sudden stop or
an accident, possibly injuring
the passengers in the vehicle.
Do not open the sunglass
holder while the vehicle is
moving. The rear view mirror
of the vehicle can be blocked
by an open sunglass holder.
Do not put the glasses
forcibly into a sunglass hold-
er. It may cause personal
injury if you try to open it
forcibly when the glasses are
jammed in holder.
WARNING
OTL045275
■Type A
OTL045091
■Type B
Page 250 of 546
3-159
Convenient features of your vehicle
3
I IN
NT
TE
ER
RI
IO
OR
R
F
FE
EA
AT
TU
UR
RE
ES
S
Cup Holder
Front
Cups or small beverages cups may
be placed in the cup holders.
Rear
Pull the armrest down to use the cup
holders.
Avoid abrupt starting and
braking when the cup holder
is in use to prevent spilling
your drink. If hot liquid spills,
you could be burned. Such a
burn to the driver could cause
loss of vehicle control result-
ing in an accident.
Do not place uncovered or
unsecured cups, bottles,
cans, etc., in the cup holder
containing hot liquid while the
vehicle is in motion. Injuries
may result in the event of a
sudden stop or collision.
Only use soft cups in the cup
holders. Hard objects can
injure you in an accident.
WARNING
Keep cans or bottles out of
direct sun light and do not put
them in a hot vehicle. It may
explode.
WARNING
OTLA045094
■Front
OTLE045096
■Rear
Page 252 of 546

3-161
Convenient features of your vehicle
3
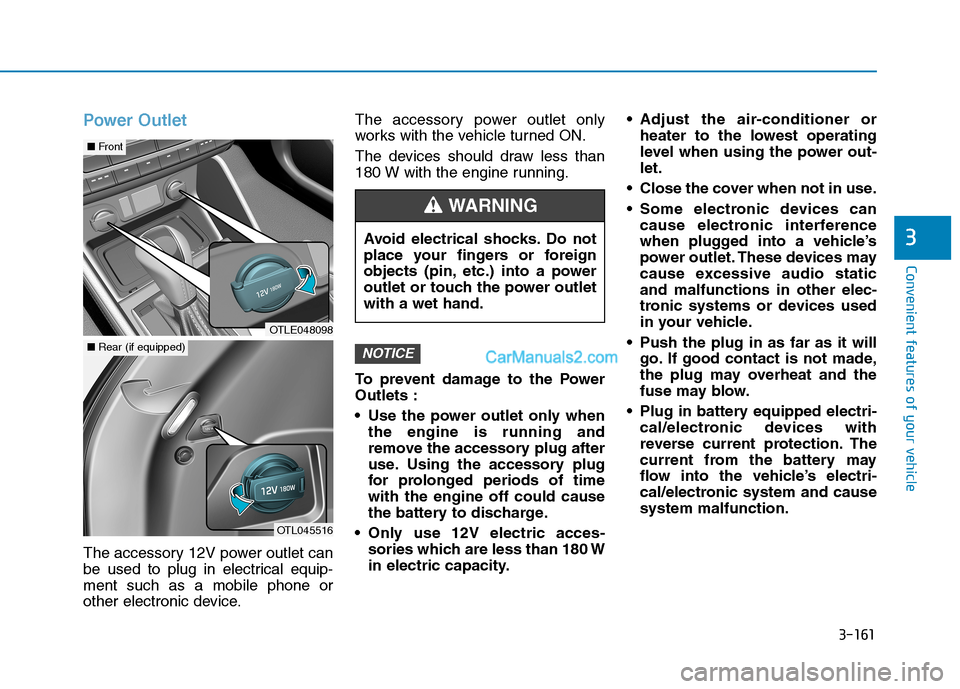
Power Outlet
The accessory 12V power outlet can
be used to plug in electrical equip-
ment such as a mobile phone or
other electronic device.The accessory power outlet only
works with the vehicle turned ON.
The devices should draw less than
180 W with the engine running.
To prevent damage to the Power
Outlets :
• Use the power outlet only when
the engine is running and
remove the accessory plug after
use. Using the accessory plug
for prolonged periods of time
with the engine off could cause
the battery to discharge.
Only use 12V electric acces- sories which are less than 180 W
in electric capacity. Adjust the air-conditioner or
heater to the lowest operating
level when using the power out-
let.
Close the cover when not in use.
Some electronic devices can cause electronic interference
when plugged into a vehicle’s
power outlet. These devices may
cause excessive audio static
and malfunctions in other elec-
tronic systems or devices used
in your vehicle.
Push the plug in as far as it will go. If good contact is not made,
the plug may overheat and the
fuse may blow.
Plug in battery equipped electri- cal/electronic devices with
reverse current protection. The
current from the battery may
flow into the vehicle’s electri-
cal/electronic system and cause
system malfunction.
NOTICE
Avoid electrical shocks. Do not
place your fingers or foreign
objects (pin, etc.) into a power
outlet or touch the power outlet
with a wet hand.
WARNING
OTLE048098
■ Front
OTL045516
■Rear (if equipped)
Page 258 of 546
3-167
Convenient features of your vehicle
3
Cargo Net Holder (if equipped)
To keep items from shifting in the
rear area of the vehicle, you can use
the four hooks around the floorboard
of the rear cargo area to attach a
cargo net.
Your vehicle may come equipped
with a cargo net, or the cargo net is
available as an optional accessory at
your local HYUNDAI dealer.
Cargo Security Screen
(if equipped)
Use the cargo security screen to
cover items stored in the cargo area.
OTL045232
To avoid eye injury, DO NOT
overstretch the luggage net.
ALWAYS keep your face and
body out of the luggage net’s
recoil path. DO NOT use the lug-
gage net when the strap has vis-
ible signs of wear or damage.
WARNING
To prevent damage to the goods
or the vehicle, care should be
taken when carrying fragile or
bulky objects in the luggage
compartment.
CAUTION
OTL045233