2019 Hyundai Tucson instrument cluster
[x] Cancel search: instrument clusterPage 254 of 546
3-163
Convenient features of your vehicle
3
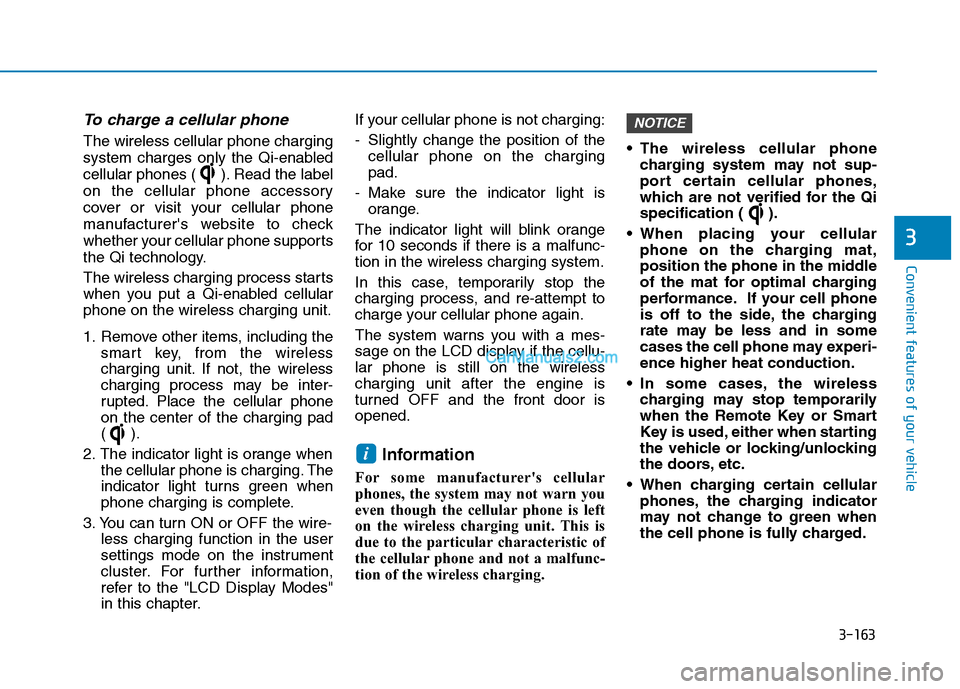
To charge a cellular phone
The wireless cellular phone charging
system charges only the Qi-enabled
cellular phones ( ). Read the label
on the cellular phone accessory
cover or visit your cellular phone
manufacturer's website to check
whether your cellular phone supports
the Qi technology.
The wireless charging process starts
when you put a Qi-enabled cellular
phone on the wireless charging unit.
1. Remove other items, including the
smart key, from the wireless
charging unit. If not, the wireless
charging process may be inter-
rupted. Place the cellular phone
on the center of the charging pad
().
2. The indicator light is orange when
the cellular phone is charging. The
indicator light turns green when
phone charging is complete.
3. You can turn ON or OFF the wire-
less charging function in the user
settings mode on the instrument
cluster. For further information,
refer to the "LCD Display Modes"
in this chapter.If your cellular phone is not charging:
- Slightly change the position of the
cellular phone on the charging
pad.
- Make sure the indicator light is
orange.
The indicator light will blink orange
for 10 seconds if there is a malfunc-
tion in the wireless charging system.
In this case, temporarily stop the
charging process, and re-attempt to
charge your cellular phone again.
The system warns you with a mes-
sage on the LCD display if the cellu-
lar phone is still on the wireless
charging unit after the engine is
turned OFF and the front door is
opened.
Information
For some manufacturer's cellular
phones, the system may not warn you
even though the cellular phone is left
on the wireless charging unit. This is
due to the particular characteristic of
the cellular phone and not a malfunc-
tion of the wireless charging. The wireless cellular phone
charging system may not sup-
port certain cellular phones,
which are not verified for the Qi
specification ( ).
When placing your cellular
phone on the charging mat,
position the phone in the middle
of the mat for optimal charging
performance. If your cell phone
is off to the side, the charging
rate may be less and in some
cases the cell phone may experi-
ence higher heat conduction.
In some cases, the wireless
charging may stop temporarily
when the Remote Key or Smart
Key is used, either when starting
the vehicle or locking/unlocking
the doors, etc.
When charging certain cellular
phones, the charging indicator
may not change to green when
the cell phone is fully charged.
NOTICE
i
Page 311 of 546
5-45
Driving your vehicle
5
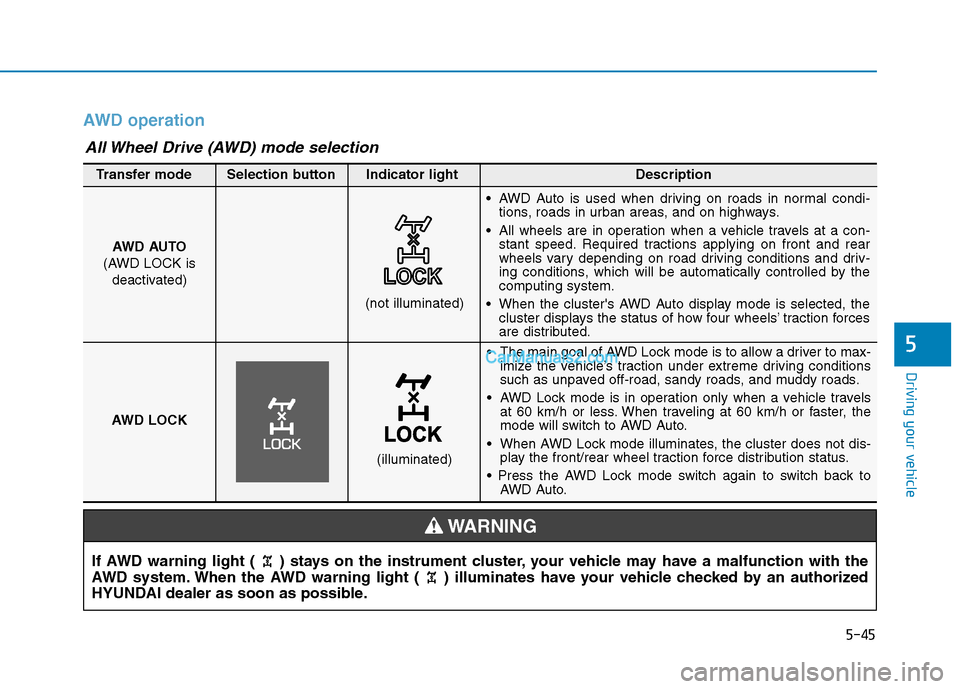
AWD operation
If AWD warning light ( ) stays on the instrument cluster, your vehicle may have a malfunction with the
AWD system. When the AWD warning light ( ) illuminates have your vehicle checked by an authorized
HYUNDAI dealer as soon as possible.
WARNING
The main goal of AWD Lock mode is to allow a driver to max-
imize the vehicle’s traction under extreme driving conditions
such as unpaved off-road, sandy roads, and muddy roads.
AWD Lock mode is in operation only when a vehicle travels
at 60 km/h or less. When traveling at 60 km/h or faster, the
mode will switch to AWD Auto.
When AWD Lock mode illuminates, the cluster does not dis-
play the front/rear wheel traction force distribution status.
AWD Auto. AWD AUTO
(AWD LOCK is
deactivated)
(not illuminated)
Transfer mode Selection button Indicator light Description
AWD Auto is used when driving on roads in normal condi-
tions, roads in urban areas, and on highways.
All wheels are in operation when a vehicle travels at a con-
stant speed. Required tractions applying on front and rear
wheels vary depending on road driving conditions and driv-
ing conditions, which will be automatically controlled by the
computing system.
When the cluster's AWD Auto display mode is selected, the
cluster displays the status of how four wheels’ traction forces
are distributed.
AWD LOCK
(illuminated)
All Wheel Drive (AWD) mode selection
Page 317 of 546
5-51
Driving your vehicle
5
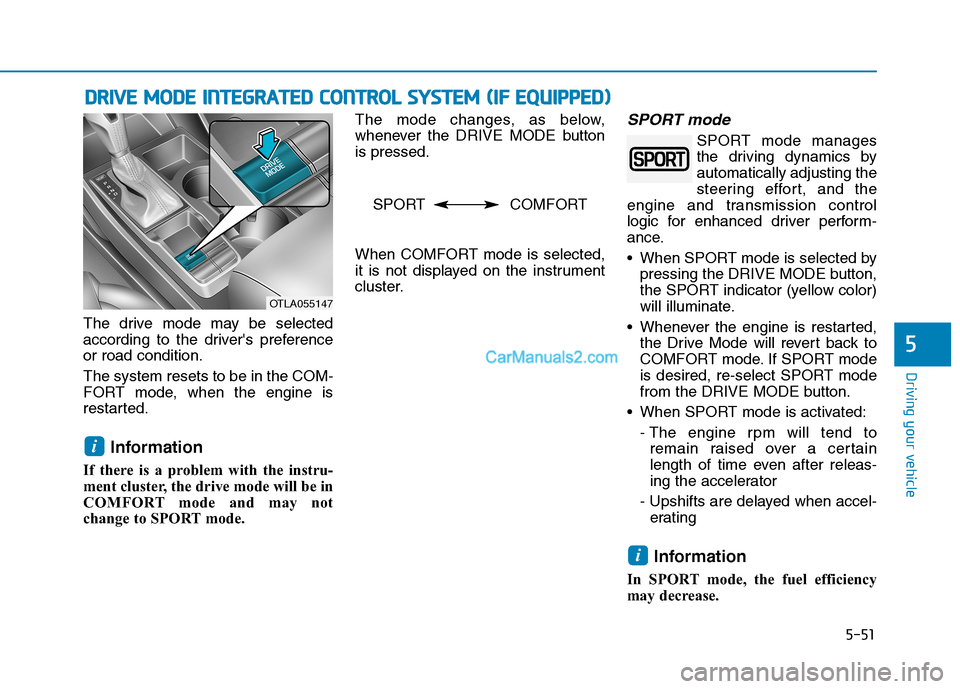
The drive mode may be selected
according to the driver's preference
or road condition.
The system resets to be in the COM-
FORT mode, when the engine is
restarted.
Information
If there is a problem with the instru-
ment cluster, the drive mode will be in
COMFORT mode and may not
change to SPORT mode. The mode changes, as below,
whenever the DRIVE MODE button
is pressed.
When COMFORT mode is selected,
it is not displayed on the instrument
cluster.
SPORT mode
SPORT mode manages
the driving dynamics by
automatically adjusting the
steering effort, and the
engine and transmission control
logic for enhanced driver perform-
ance.
When SPORT mode is selected by
pressing the DRIVE MODE button,
the SPORT indicator (yellow color)
will illuminate.
Whenever the engine is restarted,
the Drive Mode will revert back to
COMFORT mode. If SPORT mode
is desired, re-select SPORT mode
from the DRIVE MODE button.
When SPORT mode is activated:
- The engine rpm will tend to
remain raised over a certain
length of time even after releas-
ing the accelerator
- Upshifts are delayed when accel-
erating
Information
In SPORT mode, the fuel efficiency
may decrease.
i
i
D DR
RI
IV
VE
E
M
MO
OD
DE
E
I
IN
NT
TE
EG
GR
RA
AT
TE
ED
D
C
CO
ON
NT
TR
RO
OL
L
S
SY
YS
ST
TE
EM
M
(
(I
IF
F
E
EQ
QU
UI
IP
PP
PE
ED
D)
)
OTLA055147
SPORT COMFORT
Page 355 of 546

5-89
Driving your vehicle
5
LKA System Operation
To activate/deactivate the LKA sys-
tem:
With the ignition switch in the ON
position, press the LKA system
switch located on the instrument
panel on the left hand side of the
steering wheel. The indicator in the
cluster display will initially illuminate
white. This indicates the LKA system
is in the READY but NOT ENABLED
state.
If you press the LKA button again,
the indicator on the cluster display
will go off.Note that the vehicle
speed must be at least
approximately 40 mph
(64 km/h) to ENABLE the
LKA system. The indicator in the
cluster display will illuminate green.
The color of indicator will change
depending on the condition of LKA
system.
- White :Sensor does not detect
lane markers or vehicle
speed is under 40 mph (64
km/h).
- Green : Sensor detects lane mark-
ers and the system is able
to control vehicle steering.
Information
If the indicator (white) is activated
from the previous ignition cycle, the
system will turn ON without any addi-
tional control. If you press the LKA
switch again, the indicator on the clus-
ter goes off.
LKA system activation
To see the LKA system screen on
the LCD display in the cluster,
select Assist mode ( ).For more
details, refer to "LCD Display
Modes" in chapter 3.
i
OTLE058189OTL058188
Page 366 of 546
5-100
Driving your vehicle
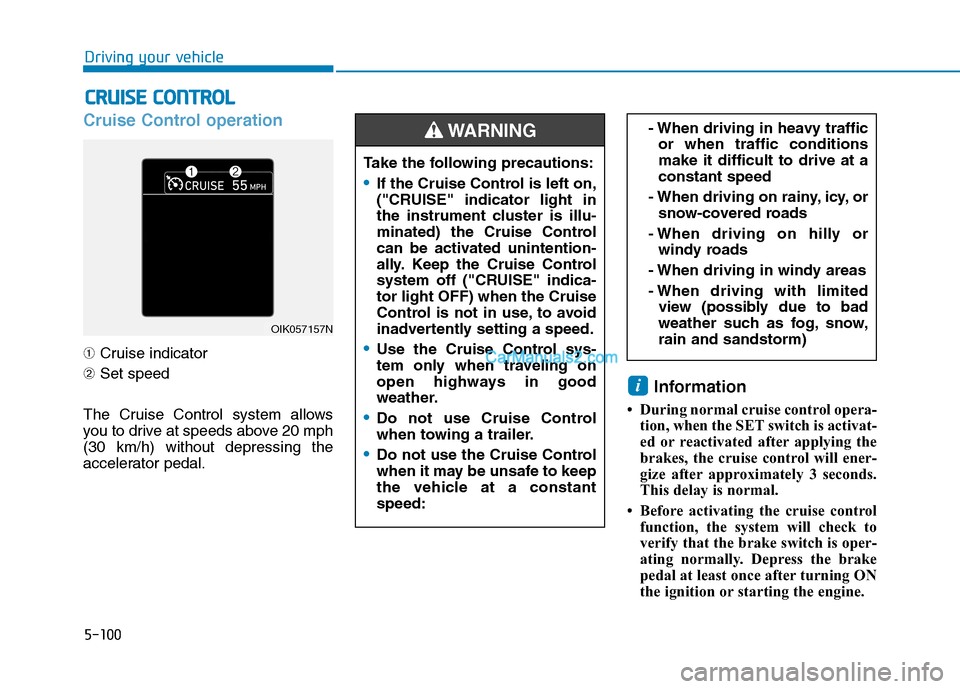
Cruise Control operation
➀Cruise indicator
➁Set speed
The Cruise Control system allows
you to drive at speeds above 20 mph
(30 km/h) without depressing the
accelerator pedal.
Information
• During normal cruise control opera-
tion, when the SET switch is activat-
ed or reactivated after applying the
brakes, the cruise control will ener-
gize after approximately 3 seconds.
This delay is normal.
• Before activating the cruise control
function, the system will check to
verify that the brake switch is oper-
ating normally. Depress the brake
pedal at least once after turning ON
the ignition or starting the engine.
i
C CR
RU
UI
IS
SE
E
C
CO
ON
NT
TR
RO
OL
L
- When driving in heavy traffic
or when traffic conditions
make it difficult to drive at a
constant speed
- When driving on rainy, icy, or
snow-covered roads
- When driving on hilly or
windy roads
- When driving in windy areas
- When driving with limited
view (possibly due to bad
weather such as fog, snow,
rain and sandstorm)
OIK057157N
Take the following precautions:
If the Cruise Control is left on,
("CRUISE" indicator light in
the instrument cluster is illu-
minated) the Cruise Control
can be activated unintention-
ally. Keep the Cruise Control
system off ("CRUISE" indica-
tor light OFF) when the Cruise
Control is not in use, to avoid
inadvertently setting a speed.
Use the Cruise Control sys-
tem only when traveling on
open highways in good
weather.
Do not use Cruise Control
when towing a trailer.
Do not use the Cruise Control
when it may be unsafe to keep
the vehicle at a constant
speed:
WARNING
Page 369 of 546
5-103
Driving your vehicle
5
Cruise Control will be canceled
when:
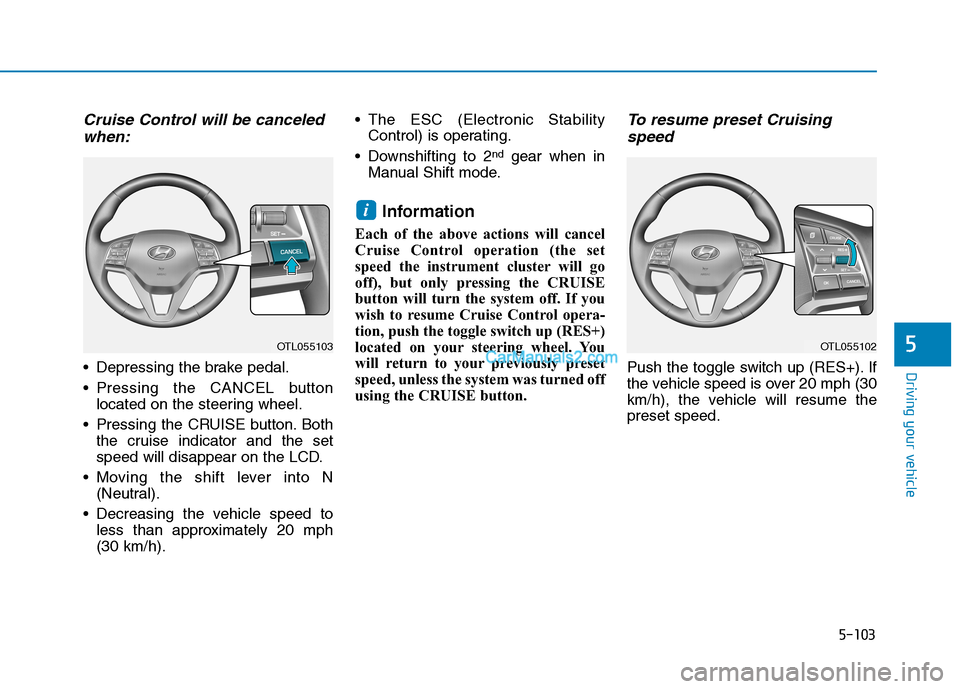
Depressing the brake pedal.
Pressing the CANCEL button
located on the steering wheel.
Pressing the CRUISE button. Both
the cruise indicator and the set
speed will disappear on the LCD.
Moving the shift lever into N
(Neutral).
Decreasing the vehicle speed to
less than approximately 20 mph
(30 km/h). The ESC (Electronic Stability
Control) is operating.
Downshifting to 2
ndgear when in
Manual Shift mode.
Information
Each of the above actions will cancel
Cruise Control operation (the set
speed the instrument cluster will go
off), but only pressing the CRUISE
button will turn the system off. If you
wish to resume Cruise Control opera-
tion, push the toggle switch up (RES+)
located on your steering wheel. You
will return to your previously preset
speed, unless the system was turned off
using the CRUISE button.
To resume preset Cruising
speed
Push the toggle switch up (RES+). If
the vehicle speed is over 20 mph (30
km/h), the vehicle will resume the
preset speed.
i
OTL055102OTL055103
Page 379 of 546
5-113
Driving your vehicle
5
If you push the smart cruise control
toggle switch (RES+ or SET-) while
Auto Hold and smart cruise control
is operating the Auto Hold will be
released regardless of accelerator
pedal operation and the vehicle will
start to move. The AUTO HOLD
indicator changes from green to
white.- Driving on rainy, icy, or
snow-covered roads
- Driving on a steep downhill
or uphill
- Driving in windy areas
- Driving in parking lots
- Driving near crash barriers
- Driving on a sharp curve
- Driving with limited view
(possibly due to bad weath-
er, such as fog, snow, rain or
sandstorm)
- The vehicle's sensing ability
decreases due to vehicle
modification, resulting in a
level difference of the vehi-
cle's front and rear
Unexpected situations may
lead to possible accidents.
Pay attention continuously to
road conditions and driving
even when the smart cruise
control system is being oper-
ated.
Take the following precautions :
Always set the vehicle speed
under the speed limit.
If the Smart Cruise Control is
left on, (cruise indicator light
in the instrument cluster is
illuminated) the Smart Cruise
Control can be activated unin-
tentionally. Keep the Smart
Cruise Control system off
(cruise indicator light OFF)
when the Smart Cruise
Control is not in use, to avoid
inadvertently setting a speed.
Use the Smart Cruise Control
system only when traveling
on open highways in good
weather.
Do not use the Smart Cruise
Control when it may not be
safe to keep the vehicle at a
constant speed.
Do not use when:
- Driving in heavy traffic or
when traffic conditions make
it difficult to drive at a con-
stant speed
WARNING
Page 491 of 546

7
Maintenance
Instrument panel fuse panel
Fuse Name Fuse ratingCircuit Protected
A/CON1 7.5AA/C Control Module, Cluster Ionizer (Auto A/C), E/R Junction Block (Blower Relay)
WIPER RR 15AICM Relay Box (Rear Wiper Relay), Rear Wiper Motor
MODULE6 10ABCM, Smart Key Control Module
WASHER 15AMultifunction Switch (Washer Switch)
MODULE5 7.5ACrash Pad Switch, Parking Distance Warning Buzzer, BCM, ATM Shift Lever, 4WD ECM,
Console Switch, Blind-Spot Collision Warning Unit LH/RH, Lane Keeping Assist Unit,
Forward Collision Avoidance Assist Unit
AIR BAG 15ASRS Control Module, Passenger Occupant Detection Sensor
MODULE1 10ABCM, Smart Key Control Module, Audio, A/V & Navigation Head Unit, AMP, Power Outside Mirror
Switch, PCB Block (Power Outlet Relay), Wireless Charger, Surround View Monitor, Rear USB Charger
START 10AICM Relay Box (Burglar Alarm Relay), Transaxle Range Switch
MODULE7 7.5AFront Air Ventilation Seat Control Module, Front Seat Warmer Control Module, Rear Seat Warmer,
Surround View Monitor
HEATED STEERING 15ABCM
MODULE8 7.5ACenter Facia Switch, Key Solenoid, Forward Collision Avoidance Assist Unit, Data Link Connector
MODULE4 7.5AMultipurpose Check Connector, A/C Control Module, Audio, A/V & Navigation Head Unit,
Electro Chromic Mirror, Front Air Ventilation Seat Control Module, ATM Shift Lever ILL.,
Front Seat Warmer Control Module, Rear Seat Warmer
A/BAG IND 7.5AInstrument Cluster, Center Facia Switch
MODULE310ABCM, ATM Shift Lever, Stop Lamp Switch
SMART KEY115ASmart Key Control Module
MODULE910ABCM, Security Indicator, Rain Sensor
4WD20A4WD ECM
7-57