Page 145 of 546

3-54
Convenient features of your vehicle
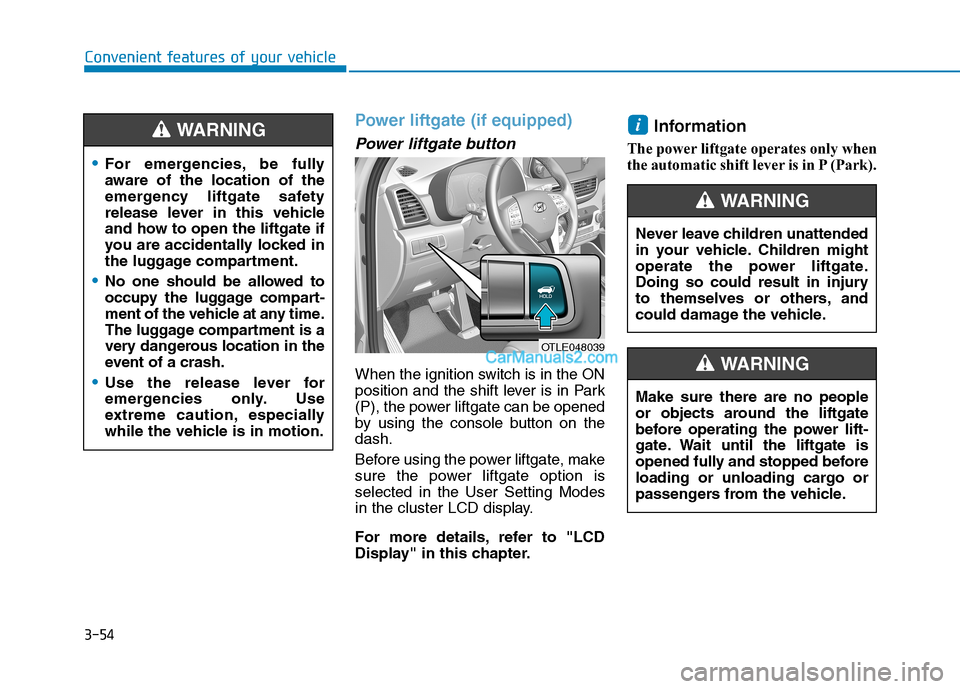
Power liftgate (if equipped)
Power liftgate button
When the ignition switch is in the ON
position and the shift lever is in Park
(P), the power liftgate can be opened
by using the console button on the
dash.
Before using the power liftgate, make
sure the power liftgate option is
selected in the User Setting Modes
in the cluster LCD display.
For more details, refer to "LCD
Display" in this chapter.
Information
The power liftgate operates only when
the automatic shift lever is in P (Park).
i
OTLE048039
For emergencies, be fully
aware of the location of the
emergency liftgate safety
release lever in this vehicle
and how to open the liftgate if
you are accidentally locked in
the luggage compartment.
No one should be allowed to
occupy the luggage compart-
ment of the vehicle at any time.
The luggage compartment is a
very dangerous location in the
event of a crash.
Use the release lever for
emergencies only. Use
extreme caution, especially
while the vehicle is in motion.
WARNING
Never leave children unattended
in your vehicle. Children might
operate the power liftgate.
Doing so could result in injury
to themselves or others, and
could damage the vehicle.
WARNING
Make sure there are no people
or objects around the liftgate
before operating the power lift-
gate. Wait until the liftgate is
opened fully and stopped before
loading or unloading cargo or
passengers from the vehicle.
WARNING
Page 175 of 546

3-84
Convenient features of your vehicle
All Wheel Drive (AWD)
LOCK Indicator Light
(if equipped)
This indicator light illuminates:
When you set the ignition switch or
Engine Start/Stop Button to the ON
position.
- It illuminates for approximately 3
seconds and then goes off.
When you select AWD Lock mode
by pressing the AWD LOCK button.
- The AWD LOCK mode is to trans-
fer a portion of the drive torque to
the rear wheels for increased
traction on wet pavement, snow
covered roads or when driving off
road.
Downhill Brake Control
(DBC) Indicator Light
(if equipped)
This indicator light illuminates:
When you set the ignition switch or
Engine Start/Stop Button to the ON
position.
- It illuminates for approximately 3
seconds and then goes off.
When you activate the system by
pressing the DBC button.
This indicator light blinks:
When the DBC is operating.
This indicator light illuminates yel-
low:
When there is a malfunction with
the DBC system.
If this occurs, have your vehicle
inspected by an authorized
HYUNDAI dealer.
For more details, refer to
"Downhill Brake Control (DBC)
System" in chapter 5.
LCD Display Messages
Shift to P or N to start engine
(for smart key system)
This warning message is displayed if
you try to start the engine with the
shift lever not in the P (Park) or N
(Neutral) position.
Information
You can start the engine with the shift
lever in the N (Neutral) position. But,
for your safety, we recommend that
you start the engine with the shift
lever in the P (Park) position.
i
AWD Lock Mode
Do not use the AWD lock mode
on dry paved roads. Doing so
can cause abnormal noise or
vibration, and may damage the
AWD system.
CAUTION
Page 178 of 546

3-87
Convenient features of your vehicle
3
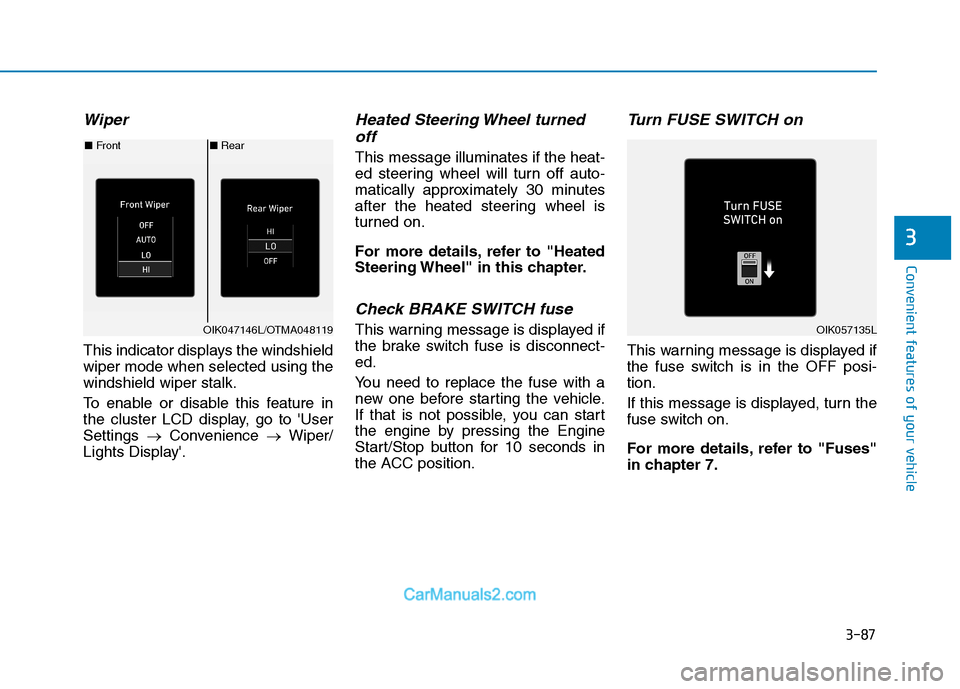
Wiper
This indicator displays the windshield
wiper mode when selected using the
windshield wiper stalk.
To enable or disable this feature in
the cluster LCD display, go to 'User
Settings →Convenience →Wiper/
Lights Display'.
Heated Steering Wheel turned off
This message illuminates if the heat-
ed steering wheel will turn off auto-
matically approximately 30 minutes
after the heated steering wheel is
turned on.
For more details, refer to "Heated
Steering Wheel" in this chapter.
Check BRAKE SWITCH fuse
This warning message is displayed if
the brake switch fuse is disconnect-
ed.
You need to replace the fuse with a
new one before starting the vehicle.
If that is not possible, you can start
the engine by pressing the Engine
Start/Stop button for 10 seconds in
the ACC position.
Turn FUSE SWITCH on
This warning message is displayed if
the fuse switch is in the OFF posi-
tion.
If this message is displayed, turn the
fuse switch on.
For more details, refer to "Fuses"
in chapter 7.
■ Rear
■ Front
OIK047146L/OTMA048119OIK057135L
Page 182 of 546
3-91
Convenient features of your vehicle
3
LCD Display Control
[A] : Type A, [B] : Type B, [C] : Type C
The LCD display modes can be
changed by using the control but-
tons.
(1) : MODE button for changing
modes
(2) , : MOVE switch for
changing items
(3) OK : SELECT/RESET button for
setting or resetting the
selected item
L LC
CD
D
D
DI
IS
SP
PL
LA
AY
Y
OTLE048112/OTLE048603
Page 194 of 546
3-103
Convenient features of your vehicle
3
The trip computer is a microcomput-
er-controlled driver information sys-
tem that displays information related
to driving.
Information
Some driving information stored in the
trip computer (for example Average
Vehicle Speed) resets if the battery is
disconnected.
Trip modes
[A] : Type A, [B] : Type B, [C] : Type C
To change the trip mode, toggle the
" , " switch on the steering
wheel.
i
T TR
RI
IP
P
C
CO
OM
MP
PU
UT
TE
ER
R
Accumulated Info
Drive Info
Fuel Economy
Digital Speedometer
OTLE048112
OTLE048603
Page 206 of 546

3-115
Convenient features of your vehicle
3
Headlamp delay function
If the key is removed from the ignition
switch or placed in the ACC position
or the LOCK/OFF position with the
headlamps ON, the headlamps
(and/or parking lamps) remain on for
about 5 minutes. However, if the dri-
ver's door is opened and closed, the
headlights are turned off after 15
seconds. Also, with the engine off if
the driver's door is opened and
closed, the headlamps (and/or park-
ing lamps) are turned off after 15
seconds.
The headlamps (and/or parking
lamps) can be turned off by pressing
the lock button on the remote key or
smart key twice or turning the light
switch to the OFF or AUTO position.
However, if you turn the light switch
to the AUTO position when it is dark
outside, the headlamps will not be
turned off.You can activate or deactivate the
Headlamp Delay function from the
User Settings Mode on the LCD dis-
play.
For more details, refer to the "LCD
Display" section in this chapter.
If the driver gets out of the vehicle
through other doors (except dri-
ver’s door), the battery saver func-
tion does not operate and the
headlamp delay function does not
turn off automatically. Therefore, It
causes the battery to be dis-
charged. In this case, make sure
to turn off the headlamp switch
before getting out of the vehicle.
Welcome System (if equipped)
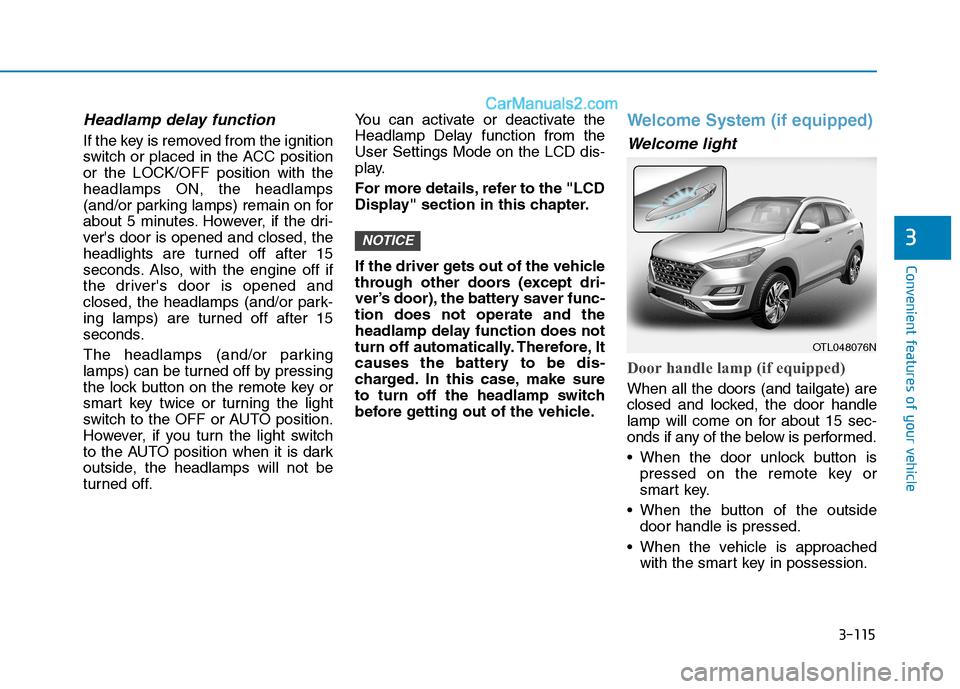
Welcome light
Door handle lamp (if equipped)
When all the doors (and tailgate) are
closed and locked, the door handle
lamp will come on for about 15 sec-
onds if any of the below is performed.
When the door unlock button is
pressed on the remote key or
smart key.
When the button of the outside
door handle is pressed.
When the vehicle is approached
with the smart key in possession.
NOTICE
OTL048076N
Page 207 of 546

3-116
Convenient features of your vehicle
Headlamp and Parking lamp
When the headlamp (lamp switch in
the headlamp or AUTO position) is
on and all doors (and tailgate) are
locked and closed, the parking lamp
and headlamp will come on for 15
seconds when the door unlock but-
ton is pressed on the remote key or
smart key.
At this time, if you press the door lock
or unlock button, the parking lamp
and headlamp will turn off immedi-
ately.
You can activate or deactivate the
Welcome Light from the User
Settings Mode on the LCD display.
For more details, refer to the "LCD
Display" section in this chapter.
Interior lamp
When the interior lamp switch is in
the DOOR position and all doors (and
tailgate) are closed and locked, the
room lamp will come on for 30 sec-
onds if any of the below is performed.
When the door unlock button is
pressed on the remote key or
smart key.
When the button of the outside
door handle is pressed.
At this time, if you press the door lock
or unlock button on the remote key or
smart keythe room lamp will turn off
immediately.
Interior Lights
Do not use the interior lights for
extended periods when the engine
is turned off or the battery will dis-
charge.
NOTICE
Do not use the interior lights
when driving in the dark. The inte-
rior lights may obscure your view
and cause an accident.
WARNING
Page 211 of 546

3-120
Convenient features of your vehicle
A : Wiper speed control
· MIST – Single wipe
· OFF – Off
· INT – Intermittent wipe
AUTO* – Auto control wipe
· LO – Low wiper speed
· HI – High wiper speed
B : Intermittent control wipe time
adjustment
C : Wash with brief wipes
(pull lever towards you)
D : Rear wiper/washer control
· HI – High wiper speed
· LO – Low wiper speed
· OFF – Off
E : Wash with brief wipes (rear)
(push lever away from you)
* : if equipped
Windshield Wipers
Operates as follows when the igni-
tion switch is in the ON position.
MIST : For a single wiping cycle,
push the lever upward and
release. The wipers will oper-
ate continuously if the lever is
held in this position.
OFF : Wiper is not in operation.
INT : Wiper operates intermittently at
the same wiping intervals. To
vary the speed setting, move
the speed control lever.
AUTO : A rain sensor located near
the top of the windshield
detects moisture accumula-
tion and controls the wiping
cycle automatically. This
mode is designed to operate
the wiper at an appropriate
speed depending on the
amount of rainfall. The sensi-
tivity can be varied by turn-
ing the adjustment control
(B) located on the wiper
stalk.
LO : The wiper runs at a lower speed.
HI : The wiper runs at a higher speed.
W WI
IP
PE
ER
RS
S
A
AN
ND
D
W
WA
AS
SH
HE
ER
RS
S
OTLE045161
OTLA045318
■Front windshield wiper/washer
■Rear window wiper/washer