Page 116 of 522

3-31
Convenient features of your vehicle
3
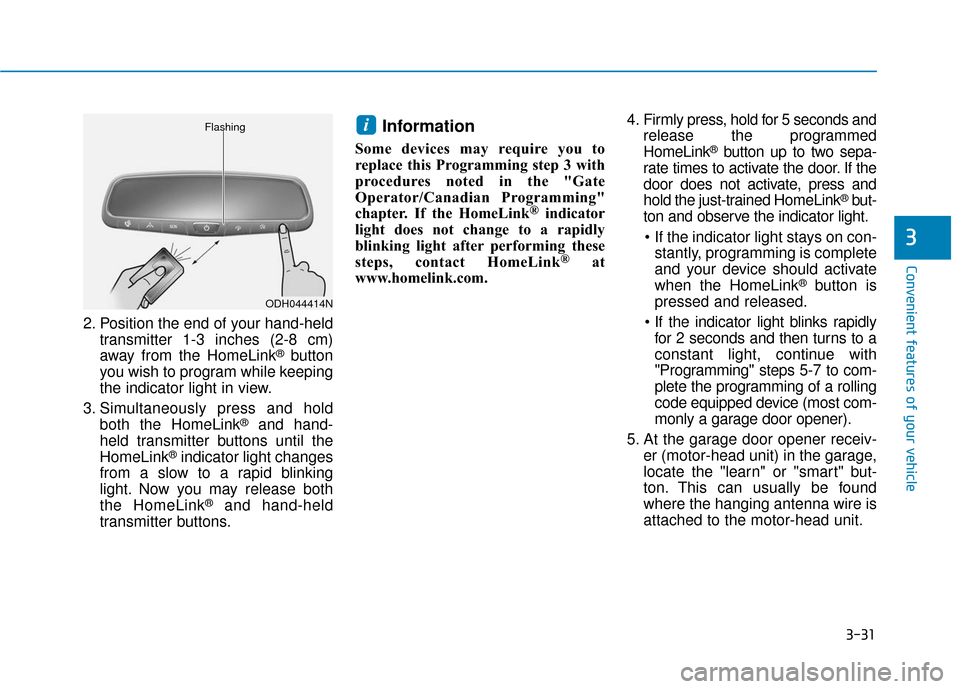
2. Position the end of your hand-heldtransmitter 1-3 inches (2-8 cm)
away from the HomeLink
®button
you wish to program while keeping
the indicator light in view.
3. Simultaneously press and hold both the HomeLink
®and hand-
held transmitter buttons until the
HomeLink
®indicator light changes
from a slow to a rapid blinking
light. Now you may release both
the HomeLink
®and hand-held
transmitter buttons.
Information
Some devices may require you to
replace this Programming step 3 with
procedures noted in the "Gate
Operator/Canadian Programming"
chapter. If the HomeLink
®indicator
light does not change to a rapidly
blinking light after performing these
steps, contact HomeLink
®at
www.homelink.com. 4. Firmly press, hold for 5 seconds and
release the programmed
HomeLink
®button up to two sepa-
rate times to activate the door. If the
door does not activate, press and
hold the just-trained HomeLink
®but-
ton and observe the indicator light.
stantly, programming is complete
and your device should activate
when the HomeLink
®button is
pressed and released.
for 2 seconds and then turns to a
constant light, continue with
"Programming" steps 5-7 to com-
plete the programming of a rolling
code equipped device (most com-
monly a garage door opener).
5. At the garage door opener receiv- er (motor-head unit) in the garage,
locate the "learn" or "smart" but-
ton. This can usually be found
where the hanging antenna wire is
attached to the motor-head unit.
i
ODH044414N
Flashing
Page 118 of 522

3-33
Convenient features of your vehicle
3
Erasing HomeLink®buttons
Individual buttons cannot be erased.
However, to erase all three pro-
grammed buttons:
1. Press and hold the two outerHomeLink
®buttons until the indi-
cator light begins to flash after 10
seconds.
2. Release both buttons. Do not hold for longer than 20 seconds.
The Integrated HomeLink
®Wireless
Control System is now in the training
(learn) mode and can be pro-
grammed at any time following the
appropriate steps in the
Programming chapters above.
NVS
®is a registered trademark and
Z-Nav™ is a trademark of the Gentex
Corporation, Zeeland, Michigan.
HomeLink
®is a registered trademark
owned by Johnson Controls,
Incorporated, Milwaukee, Wisconsin.
FCC ID: NZLTLMHL4
IC: 4112A-TLMHL4
Information
This device complies with Part 15 of
the FCC Rules.
Operation is subject to the following
three conditions:
1. This device may not cause harmful interference, and
2. This device must accept any inter- ference received, including interfer-
ence that may cause undesired
operation.
3. The transceiver has been tested and complies with FCC and Industry
Canada rules. Changes or modifica-
tions not expressly approved by the
party responsible for compliance
could void the user’s authority to
operate the device.
Electric chromic mirror (ECM)with compass and HomeLink®
system (for Canada)
Your vehicle may be equipped with a
Gentex Automatic-Dimming Mirror
with a Z-Nav™ Electronic Compass
Display and an Integrated HomeLink
®
Wireless Control System.
During nighttime driving, this feature
will automatically detect and reduce
rearview mirror glare while the com-
pass indicates the direction the vehi-
cle is pointed. The HomeLink
®
Universal Transceiver allows you to
activate your garage door(s), electric
gate, home lighting, etc.
i
Page 125 of 522

3-40
Convenient features of your vehicle
Erasing HomeLink®buttons
Individual buttons cannot be erased.
However, to erase all three pro-
grammed buttons:
1. Press and hold the two outerHomeLink
®buttons until the indi-
cator light begins to flash-after 20
seconds.
2. Release both buttons. Do not hold for longer than 30 seconds.
The Integrated HomeLink
®Wireless
Control System is now in the training
(learn) mode and can be pro-
grammed at any time following the
appropriate steps in the Programming
chapters above.
NVS
®is a registered trademark and
Z-Nav™ is a trademark of the Gentex
Corporation, Zeeland, Michigan.
HomeLink
®is a registered trademark
owned by Johnson Controls,
Incorporated, Milwaukee, Wisconsin.
FCC ID: NZLZTVHL3
IC: 4112A-ZTVHL3
Information
This device complies with Part 15 of
the FCC Rules.
Operation is subject to the following
three conditions:
1. This device may not cause harmful interference, and
2. This device must accept any interfer- ence received, including interference
that may cause undesired operation.
3. The transceiver has been tested and complies with FCC and Industry
Canada rules. Changes or modifica-
tions not expressly approved by the
party responsible for compliance
could void the user’s authority to
operate the device.
Side View Mirrors
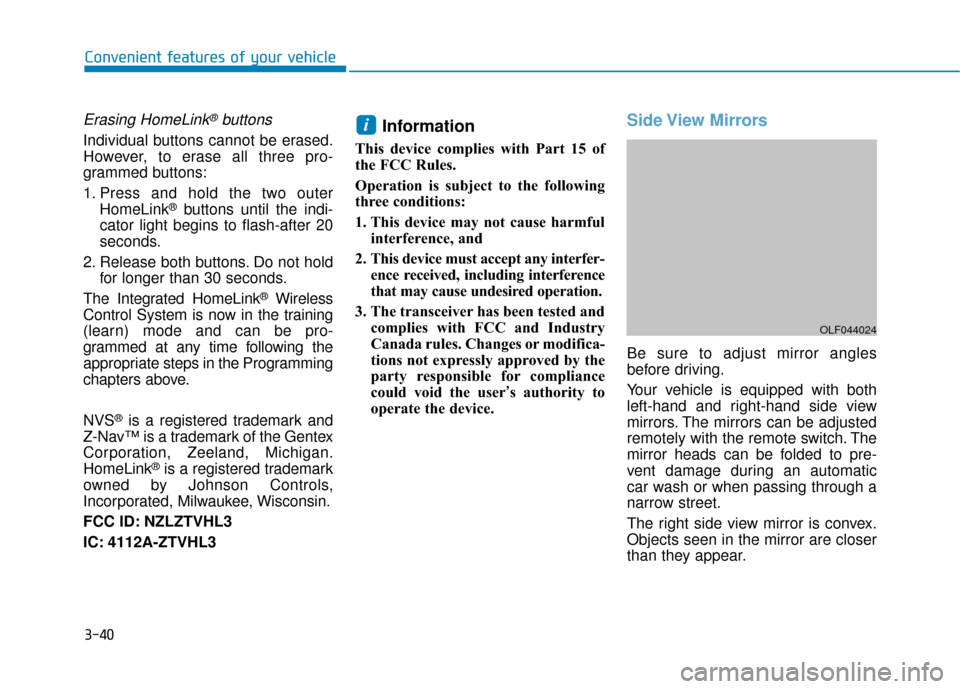
Be sure to adjust mirror angles
before driving.
Your vehicle is equipped with both
left-hand and right-hand side view
mirrors. The mirrors can be adjusted
remotely with the remote switch. The
mirror heads can be folded to pre-
vent damage during an automatic
car wash or when passing through a
narrow street.
The right side view mirror is convex.
Objects seen in the mirror are closer
than they appear.
i
OLF044024
Page 142 of 522
3-57
Convenient features of your vehicle
3
1. Setting
To activate the Smart Trunk, go to
User Settings Mode and select
Smart Trunk on the LCD display.
For more information, refer to the
"LCD Display" section in this
chapter.2. Detect and Alert
If you are positioned in the detecting
area (20~40 inches (50 ~100 cm)
behind the vehicle) carrying a smart
key, the hazard warning lights will blink
and chime will sound to alert you the
smart key has been detected and the
trunk will open.
Information
Do not approach the detecting area if
you do not want the trunk to open. If
you have unintentionally entered the
detecting area and the hazard warn-
ing lights and chime starts to operate,
leave the detecting area with the
smart key. The trunk will stay closed.3. Automatic opening
The hazard warning lights will blink
and chime will sound 6 times and
then the trunk will open.
i
OLF057450NOLF047047NOLF047048
Page 147 of 522

3-62
Convenient features of your vehicle
Information
Make sure to refuel your vehicle
according to the "Fuel Requirements"
suggested in the Introduction chapter.
Do not spill fuel on the exteriorsurfaces of the vehicle. Any type
of fuel spilled on painted sur-
faces may damage the paint.
If the fuel filler cap requires replacement, use only a genuine
HYUNDAI cap or the equivalent
specified for your vehicle. An
incorrect fuel filler cap can
result in a serious malfunction
of the fuel system or emission
control system.
Emergency fuel filler door release
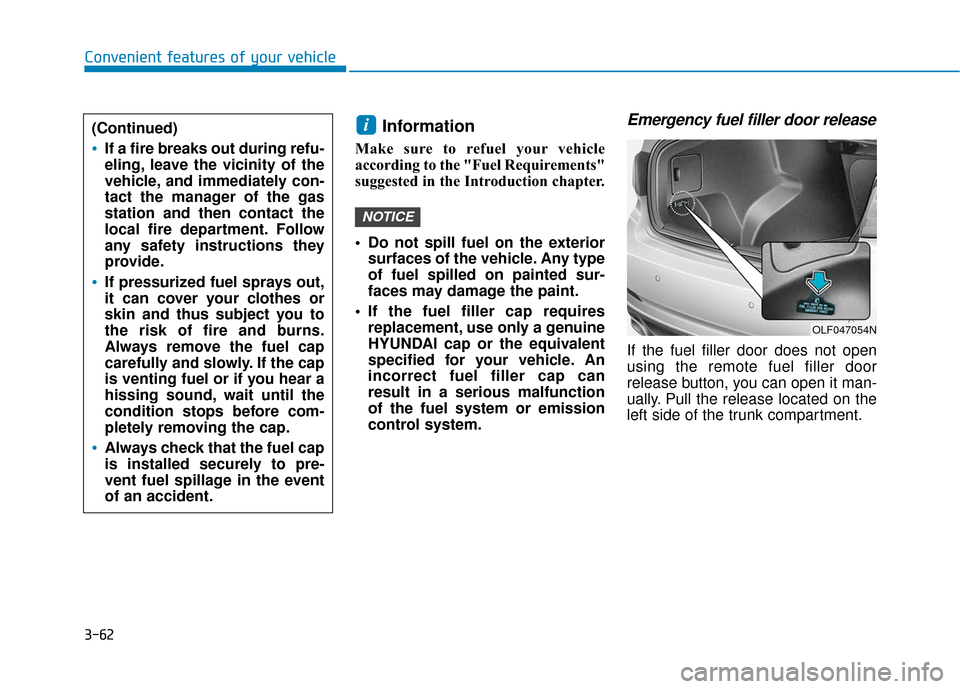
If the fuel filler door does not open
using the remote fuel filler door
release button, you can open it man-
ually. Pull the release located on the
left side of the trunk compartment.
NOTICE
i
OLF047054N
(Continued)
If a fire breaks out during refu-
eling, leave the vicinity of the
vehicle, and immediately con-
tact the manager of the gas
station and then contact the
local fire department. Follow
any safety instructions they
provide.
If pressurized fuel sprays out,
it can cover your clothes or
skin and thus subject you to
the risk of fire and burns.
Always remove the fuel cap
carefully and slowly. If the cap
is venting fuel or if you hear a
hissing sound, wait until the
condition stops before com-
pletely removing the cap.
Always check that the fuel cap
is installed securely to pre-
vent fuel spillage in the event
of an accident.
Page 150 of 522
3-65
Convenient features of your vehicle
3
Instrument Cluster Control
Adjusting instrument clusterillumination
When the vehicle's parking lights or
headlights are on, press the illumina-
tion control button to adjust the
brightness of the instrument panel
illumination. When pressing the illumination con-
trol button, the interior switch illumi-
nation intensity is also adjusted. The
selected brightness of illumination
can be saved in the Driver Position
Memory System (if equipped).
For more information, refer to
"Driver position Memory System"
in this chapter.
The brightness of the instrumentpanel illumination is displayed.
If the brightness reaches the maxi- mum or minimum level, an alarm
will sound.
OLF047102
OLF047142N
Page 151 of 522
3-66
Convenient features of your vehicle
LCD Display Control
The LCD display modes can be
changed by using the control buttons
on the steering wheel.
(1) : MODE button for changingmodes
(2) ▲, ▼: MOVE switch for chang-
ing items
(3) OK : SELECT/RESET button for setting or resetting the
selected item
For more information on LCD
Modes, refer to "LCD Display" in
the next pages of this chapter.
Gauges
Speedometer
The speedometer indicates the
speed of the vehicle and is calibrated
in miles per hour (mph) and/or kilo-
meters per hour (km/h).
Tachometer
The tachometer indicates the
approximate number of engine revo-
lutions per minute (rpm).
Use the tachometer to select the cor-
rect shift points and to prevent lug-
ging and/or over-revving the engine.
OLF047201
■ Type A
■Type B
■Type COLF047103N
OLF047104N
■Type A, B
■ Type C, D
OLF047105
OLF047529
■Type A, B
■ Type C, D
Page 152 of 522
3-67
Convenient features of your vehicle
3
Do not operate the engine within
the tachometer's RED ZONE. This
may cause severe engine damage.
Engine Coolant TemperatureGauge
This gauge indicates the tempera-
ture of the engine coolant when the
ignition switch or Engine Start/Stop
button is ON. If the gauge pointer moves
beyond the normal range area
toward the "H" position, it indi-
cates overheating that may dam-
age the engine.
Do not continue driving with an
overheated engine. If your vehicle
overheats, refer to "If the Engine
Overheats" in chapter 6.
NOTICENOTICE
OLF047107
OLF047506
■
Type A, B
■ Type C, D
Never remove the radiator cap
when the engine is hot. The
engine coolant is under pres-
sure and could severely burn.
Wait until the engine is cool
before adding coolant to the
reservoir.
WARNING