Page 236 of 546
3-100
Convenient features of your vehicle
To flash the high beam headlamp,
pull the lever towards you, then
release the lever. The high beams
will remain ON as long as you hold
the lever towards you.
Smart High Beam (if equipped)
The Smart High Beam is a system that automatically adjusts the head-
lamp range (switches between high
beam and low beam) according to
the brightness of other vehicles and
road conditions.
OLF044088C
OLF044090C
Do not use high beam when
there are other vehicles
approaching you. Using highbeam could obstruct the otherdriver's vision.
WARNING
Page 238 of 546

3-102
Convenient features of your vehicle
(Continued)
When there is a similar shape
lamp with the front vehicle’slamps.
When it is hard to see
because of fog, heavy rain or
snow.
When the headlamp is not repaired or replaced at an
authorized dealer.
When headlamp aiming is not
properly adjusted.
When driving on a narrow
curved road or rough road.
When driving downhill or uphill.
When only part of the vehicle
in front is visible on a cross-
road or curved road.
When there is a traffic light,
reflecting sign, flashing sign
or mirror.(Continued)
(Continued)
When the road conditions are
bad such as being wet or cov-
ered with snow.
When the front vehicle’s head-
lamps are off but the foglamps on.
When a vehicle suddenly
appears from a curve.
When the vehicle is tilted from
a flat tire or being towed.
When the LKAS (Lane
Keeping Assist System) warn-
ing light illuminates. (ifequipped)
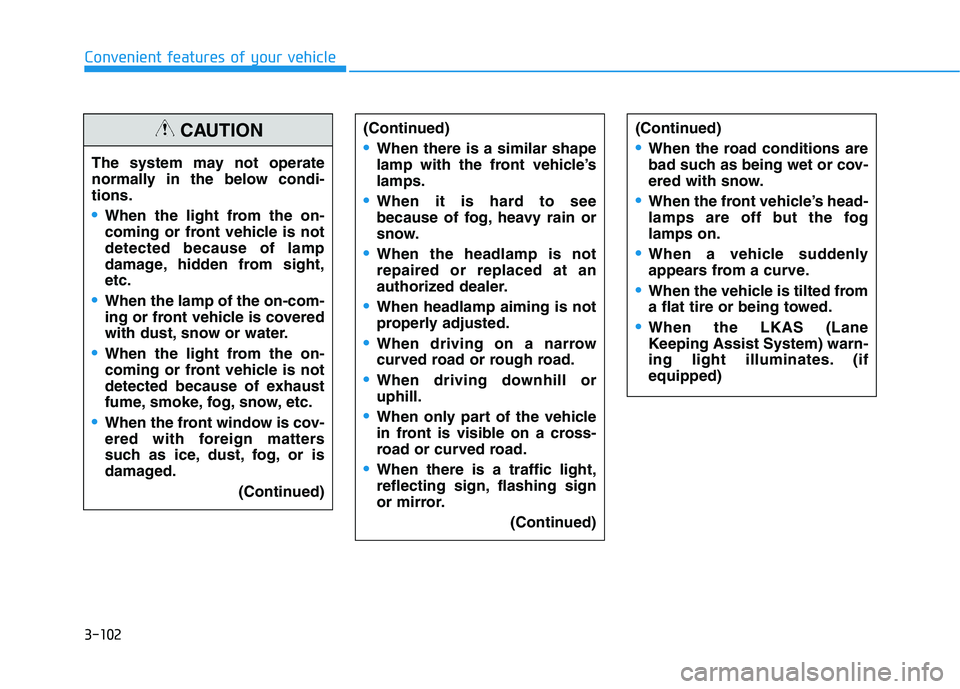
The system may not operate
normally in the below condi-tions.
When the light from the on-
coming or front vehicle is notdetected because of lamp
damage, hidden from sight,etc.
When the lamp of the on-com-
ing or front vehicle is covered
with dust, snow or water.
When the light from the on-
coming or front vehicle is not
detected because of exhaust
fume, smoke, fog, snow, etc.
When the front window is cov-
ered with foreign matters
such as ice, dust, fog, or is
damaged.
(Continued)
CAUTION
Page 248 of 546

3-112
Convenient features of your vehicle
Windshield Washers
In the OFF position, pull the lever
gently toward you to spray washer
fluid on the windshield and to run the
wipers 1-3 cycles. The spray and
wiper operation will continue until
you release the lever. If the washer
does not work, you may need to add
washer fluid to the washer fluid
reservoir.If equipped with the Headlamp
Washer, washer fluid will be sprayedon the headlamp at the same time
you operate the windshield washerwhen:
1. Engine Start/Stop button is in the
ON position.
2. The light switch is in the headlamp position. To prevent possible damage to
the washer pump, do not oper- ate the washer when the fluid
reservoir is empty.
To prevent possible damage to the wipers or windshield, do not
operate the wipers when the
windshield is dry.
To prevent damage to the wiper arms and other components, do
not attempt to move the wipers
manually.
To prevent possible damage to the wipers and washer system,use anti-freezing washer fluidsin the winter season or cold
weather.
NOTICE
When the outside temperature
is below freezing, ALWAYSwarm the windshield using the
defroster to prevent the washer
fluid from freezing on the wind-
shield and obscuring your
vision which could result in an
accident and serious injury ordeath.
WARNING
OLF044095N
Page 259 of 546

3-123
Convenient features of your vehicle
3
Face-Level (B, D, F)
Air flow is directed toward the upper
body and face. Additionally, eachoutlet can be controlled to direct theair discharged from the outlet.
Bi-Level (B, C, D, E, F)
Air flow is directed towards the face
and the floor.
Floor & Defrost (A, C, D, E)
Most of the air flow is directed to the floor and the windshield with a small
amount directed to the side window
defrosters.
Floor-Level (A, C, D, E)
Most of the air flow is directed to the
floor, with a small amount of the airbeing directed to the windshield and
side window defrosters.
Defrost-Level (A, D)
Most of the air flow is directed to the windshield with a small amount of air
directed to the side window
defrosters.
Instrument panel vents
The outlet vents can be opened or
closed separately using the thumb-
wheel. To close the vent, rotate it left
(Rear : down) to the maximum posi-
tion. To open the vent, rotate it right
(Rear : up) to the desired position.
Also, you can adjust the direction of
air delivery from these vents using
the vent control lever as shown.
OLFH047746
OLF047209
OLF044222
■Front
■Rear (if equipped)
Page 288 of 546

4-5
Multimedia System
4
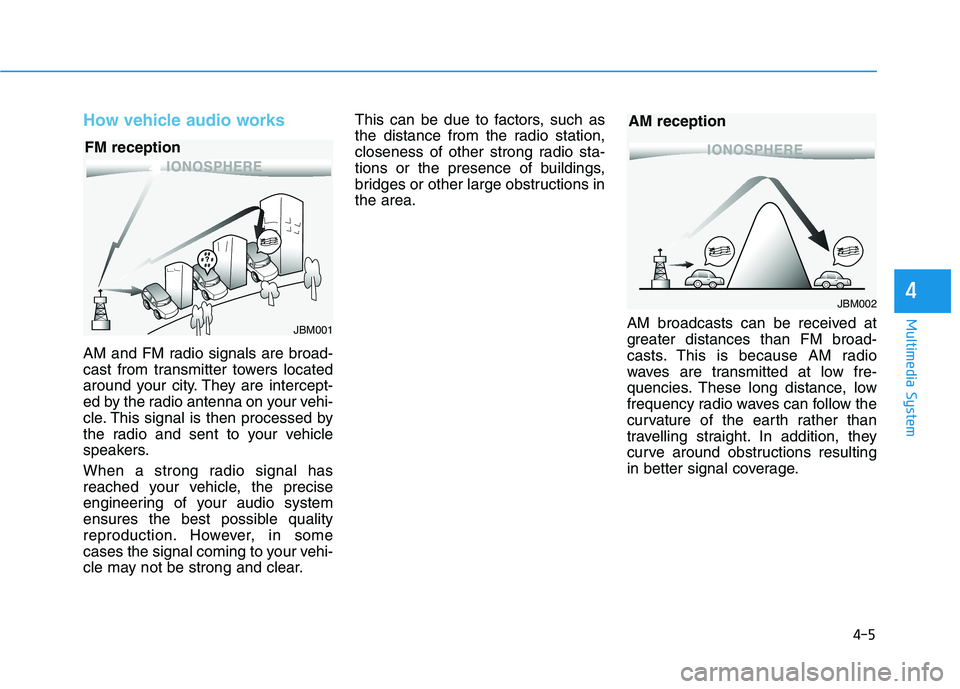
How vehicle audio works
AM and FM radio signals are broad-
cast from transmitter towers located
around your city. They are intercept-
ed by the radio antenna on your vehi-
cle. This signal is then processed by
the radio and sent to your vehicle
speakers.
When a strong radio signal has
reached your vehicle, the precise
engineering of your audio system
ensures the best possible quality
reproduction. However, in some
cases the signal coming to your vehi-
cle may not be strong and clear.This can be due to factors, such as
the distance from the radio station,
closeness of other strong radio sta-
tions or the presence of buildings,
bridges or other large obstructions inthe area.
AM broadcasts can be received at
greater distances than FM broad-
casts. This is because AM radio
waves are transmitted at low fre-
quencies. These long distance, low
frequency radio waves can follow the
curvature of the earth rather than
travelling straight. In addition, they
curve around obstructions resulting
in better signal coverage.
JBM001
FM reception
JBM002
AM reception
Page 292 of 546

5
Cruise control .......................................................5-79Cruise Control operation ...............................................5-79
Smart Cruise Control system..............................5-84 To adjust the sensitivity of Smart Cruise Control ..5-85
To convert to Cruise Control Mode ............................5-86
Smart Cruise Control speed ..........................................5-86
Smart Cruise Control vehicle-to-vehicle distance..5-91
SCC front radar sensor..................................................5-93
Limitations of the system .............................................5-95
Special driving conditions .................................5-100 Hazardous driving conditions ....................................5-100
Rocking the vehicle ......................................................5-100
Smooth cornering .........................................................5-101
Driving at night ..............................................................5-101
Driving in the rain .........................................................5-102
Driving in flooded areas..............................................5-102
Highway driving .............................................................5-103
Winter driving .....................................................5-104 Snow or icy conditions ................................................5-104
Winter Precautions .......................................................5-105
Vehicle load limit ................................................5-107 Tire loading information label ...................................5-108
Trailer towing .....................................................5-112
Page 300 of 546

5-10
Driving your vehicle
Information
Do not wait for the engine to warm up while the vehicle remains station-
ary.
Start driving at moderate engine
speeds. (Steep accelerating and
decelerating should be avoided.)
Always start the vehicle with your foot on the brake pedal. Do not
depress the accelerator while start-
ing the vehicle. Do not race the
engine while warming it up.
If ambient temperature is low, the " " indicator may remain illumi-
nated longer than the normal amount
of time. To prevent damage to the vehicle:
If the " " indicator turns off
while you are in motion, do not
attempt to move the shift lever
to the P (Park) position.
If traffic and road conditions
permit, you may put the shift
lever in the N (Neutral) position
while the vehicle is still moving
and press the Engine Start/Stop
button in an attempt to restart
the hybrid system.
Do not push or tow your vehicle to start the hybrid system. To prevent damage to the vehicle:
Do not press the Engine Start/
Stop button for more than 10 sec-
onds except when the stop lamp
fuse is blown.
When the stop lamp fuse is blown,
you cannot normally start the
hybrid system. Replace the fuse
with a new one. If you are not able
to replace the fuse, you can start
the hybrid system by pressing
and holding the Engine Start/Stop
button for 10 seconds with the
Engine Start/Stop button in the
ACC position.
For your safety always depress
the brake pedal before starting the
hybrid system.NOTICENOTICEi
Page 313 of 546

5-23
Driving your vehicle
5
To release EPB automatically:
Shift lever in P (Park)With the engine running depress
the brake pedal and shift out of P
(Park) to R (Reverse) or D (Drive).
Shift lever in N (Neutral) With the engine running depress
the brake pedal and shift out of N
(Neutral) to R (Reverse) or D
(Drive).
Make sure the Parking Brake Warning
light ( , red color) goes off. Information
For your safety, you can engage the EPB even though the Engine Stop/
Start button is in the OFF position,
but you cannot release it.
For your safety, depress the brake pedal and release the parking brake
manually with the EPB switch when
you drive downhill or when backing
up the vehicle.
If the parking brake warning light ( , red color) is still on eventhough the EPB has been
released, have the system checked
by an authorized HYUNDAI dealer.
Do not drive your vehicle with the EPB applied. It may cause
excessive brake pad and brake
rotor wear.
When the EPB does not release:
Contact an authorized HYUNDAI
dealer by loading the vehicle on a
flatbed tow truck and have the sys-
tem checked.
EPB may be automatically applied
when:
The EPB is overheated
It is requested by other systems
The hybrid system is turned offwhen the Auto Hold switch is on
NOTICE
i