2019 Hyundai Santa Fe Engine stop
[x] Cancel search: Engine stopPage 377 of 557
5-103
Driving your vehicle
5
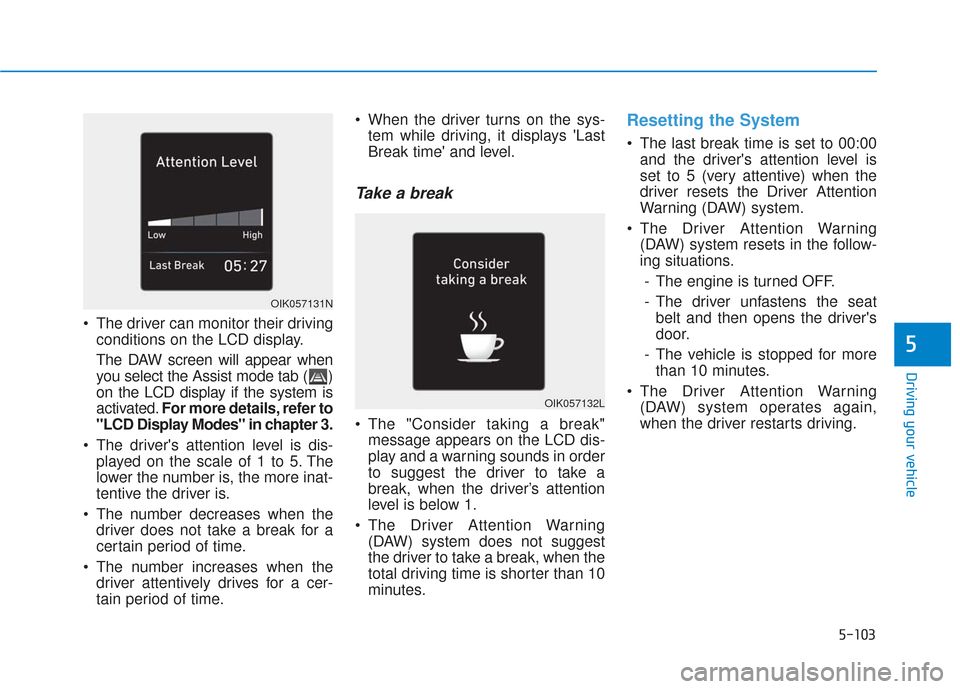
The driver can monitor their drivingconditions on the LCD display.
The DAW screen will appear when
you select the Assist mode tab ( )
on the LCD display if the system is
activated. For more details, refer to
"LCD Display Modes" in chapter 3.
The driver's attention level is dis- played on the scale of 1 to 5. The
lower the number is, the more inat-
tentive the driver is.
The number decreases when the driver does not take a break for a
certain period of time.
The number increases when the driver attentively drives for a cer-
tain period of time. When the driver turns on the sys-
tem while driving, it displays 'Last
Break time' and level.
Take a break
The "Consider taking a break"message appears on the LCD dis-
play and a warning sounds in order
to suggest the driver to take a
break, when the driver’s attention
level is below 1.
The Driver Attention Warning (DAW) system does not suggest
the driver to take a break, when the
total driving time is shorter than 10
minutes.
Resetting the System
The last break time is set to 00:00and the driver's attention level is
set to 5 (very attentive) when the
driver resets the Driver Attention
Warning (DAW) system.
The Driver Attention Warning (DAW) system resets in the follow-
ing situations.
- The engine is turned OFF.
- The driver unfastens the seat belt and then opens the driver's
door.
- The vehicle is stopped for more than 10 minutes.
The Driver Attention Warning (DAW) system operates again,
when the driver restarts driving.
OIK057132L
OIK057131N
Page 383 of 557

5-109
Driving your vehicle
5
To temporarily accelerate withthe Smart Cruise Control on
If you want to speed up temporarily
when the Smart Cruise Control is on,
depress the accelerator pedal.
Increased speed will not interfere
with Smart Cruise Control operation
or change the set speed.
To return to the set speed, take your
foot off the accelerator pedal.
If you push the toggle switch down
(SET-) at increased speed, the cruis-
ing speed will be set again pedal.
Smart Cruise Control set speedwill be temporarily canceledwhen:
Canceled manually
Depressing the brake pedal.
Pushing the CANCEL button locat-
ed on the steering wheel.
The Smart Cruise Control turns off
temporarily when the Set Speed and
Vehicle-to-Vehicle Distance indicator
on the LCD display turns off.
The cruise indicator is illuminated
continuously.
Canceled automatically
The driver's door is opened.
The vehicle is shifted to N (Neutral), R (Reverse) or P (Park).
The EPB (Electronic Parking Brake) is applied.
The vehicle speed is over 105 mph (170 km/h).
The vehicle stops on a steep incline.
The ESC (Electronic Stability Control), TCS (Traction Control
System) or ABS is operating.
The ESC is turned off.
The sensor or the cover is dirty or blocked with foreign matter.
The vehicle is stopped for a certain period of time.
The vehicle stops and goes repeat- edly for a long period of time.
The accelerator pedal is continu- ously depressed for a long period
of time.
The engine performance is abnor- mal.
Engine rpm is in the red zone.
Be careful when accelerating
temporarily, because the speed
is not controlled automatically
at this time even if there is a
vehicle in front of you.
CAUTIONOTM058040
Page 389 of 557

5-115
Driving your vehicle
5
Sensor to Detect Distance to
the Vehicle Ahead
The Smart Cruise Control uses a
sensor to detect distance to the vehi-
cle ahead.
If the sensor is covered with dirt or
other foreign matter, the vehicle to
vehicle distance control may not
operate correctly.
Always keep the sensor clean.
Warning message
Smart Cruise Control disabled.
Radar blocked
When the sensor lens cover is
blocked with dirt, snow, or debris, the
Smart Cruise Control system opera-
tion may stop temporarily. If this
occurs, a warning message will
appear on the LCD display. Remove
any dirt, snow, or debris and clean
the radar sensor lens cover before
operating the Smart Cruise Control
system. The Smart Cruise Control
system may not properly activate, if
the radar is totally contaminated, or if
any substance is not detected after
turning on the engine (e.g. in an
open terrain).
Information
For the SCC operation is temporarily
stopped if the radar is blocked, but
you wish to use conventional cruise
control mode (speed only control func-
tion), you must convert to the cruise
control mode (refer to "To convert to
Cruise Control mode" in the following
page).
i
OTMA058028
OTM058061LDo not apply license plate
frame or foreign objects such
as a bumper sticker or a
bumper guard near the radar
sensor. Doing so may
adversely affect the sensing
performance of the radar.
Always keep the radar sensor
and lens cover clean and free
of dirt and debris.
Use only a soft cloth to wash
the vehicle. Do not spray pres-
surized water directly on the
sensor or sensor cover.
CAUTION
Page 397 of 557
5-123
Driving your vehicle
5
The Leading Vehicle Departure Alert
system alerts the driver of the depar-
ture of the vehicle in front when the
vehicle is stopped and the Smart
Cruise Control (SCC) system is in
activation.System Setting and Activation
System setting
With the engine ON, the Leading
Vehicle Departure Alert system turns
on and gets ready to be activated
when the 'User Settings →Driver
Assistance →Driving Assist →
Leading vehicle departure alert' is
selected selected in the cluster LCD
display. The system stops operation
when the setting is deactivated.
However, if the engine is turned off
then on again, the system maintains
the previous state.
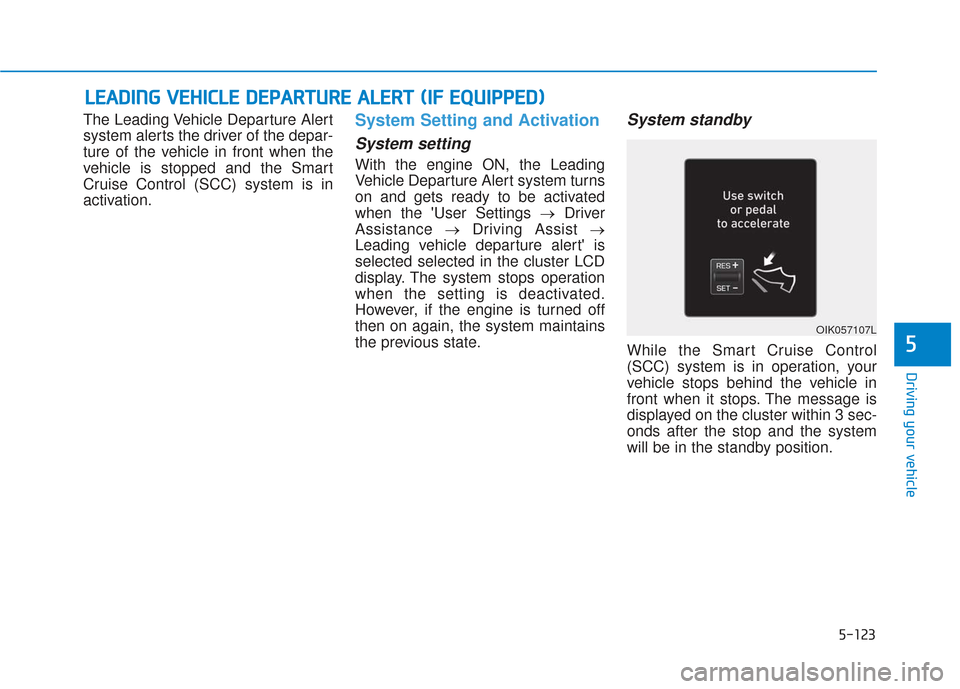
System standby
While the Smart Cruise Control
(SCC) system is in operation, your
vehicle stops behind the vehicle in
front when it stops. The message is
displayed on the cluster within 3 sec-
onds after the stop and the system
will be in the standby position.
L L E
E A
A D
DI
IN
N G
G
V
V E
EH
H I
IC
C L
LE
E
D
D E
EP
P A
A R
RT
TU
U R
RE
E
A
A L
LE
E R
R T
T
(
( I
IF
F
E
E Q
Q U
UI
IP
P P
PE
ED
D )
)
OIK057107L
Page 399 of 557
5-125
Driving your vehicle
5
Hazardous Driving Conditions
When hazardous driving elements
are encountered such as water,
snow, ice, mud and sand, take the
below suggestions:
Drive cautiously and keep a longerbraking distance.
Avoid abrupt braking or steering.
When your vehicle is stuck in snow, mud, or sand, use second
gear. Accelerate slowly to avoid
unnecessary wheel spin.
Put sand, rock salt, tire chains or other non-slip materials under the
wheels to provide additional trac-
tion while the vehicle becomes
stuck in ice, snow, or mud.
Rocking the Vehicle
If it is necessary to rock the vehicle
to free it from snow, sand, or mud,
first turn the steering wheel right and
left to clear the area around your
front wheels. Then, shift back and
forth between R (Reverse) and a for-
ward gear.
Try to avoid spinning the wheels, and
do not race the engine.
To prevent transmission wear, wait
until the wheels stop spinning before
shifting gears. Release the accelera-
tor pedal while shifting, and press
lightly on the accelerator pedal while
the transmission is in gear. Slowly
spinning the wheels in forward and
reverse directions causes a rocking
motion that may free the vehicle.
S SP
P E
EC
CI
IA
A L
L
D
D R
RI
IV
V I
IN
N G
G
C
C O
O N
ND
DI
IT
T I
IO
O N
NS
S
Downshifting with an automatic
transmission while driving on
slippery surfaces can cause an
accident. The sudden change in
tire speed could cause the tires
to skid. Be careful when down-
shifting on slippery surfaces.
WARNING
If the vehicle is stuck and
excessive wheel spin occurs,
the temperature in the tires can
increase very quickly. If the tires
become damaged, a tire blow
out or tire explosion can occur.
This condition is dangerous -
you and others may be injured.
Do not attempt this procedure if
people or objects are anywhere
near the vehicle.
If you attempt to free the vehicle,
the vehicle can overheat quickly,
possibly causing an engine
compartment fire or other dam-
age. Try to avoid spinning the
wheels as much as possible to
prevent overheating of either the
tires or the engine. DO NOT
allow the vehicle to spin the
wheels above 35 mph (56 km/h).
WARNING
Page 400 of 557
5-126
Driving your vehicle
Information
The ESC system must be turned OFF
before rocking the vehicle.
If you are still stuck after rocking
the vehicle a few times, have the
vehicle pulled out by a tow vehicle
to avoid engine overheating, pos-
sible damage to the transmission,
and tire damage. See "Towing" in
chapter 6.
Smooth Cornering
Avoid braking or gear changing in
corners, especially when roads are
wet. Ideally, corners should always
be taken under gentle acceleration.
Driving at Night
Night driving presents more hazards
than driving in the daylight. Here are
some important tips to remember:
Slow down and keep more dis-tance between you and other vehi-
cles, as it may be more difficult to
see at night, especially in areas
where there may not be any street
lights.
Adjust your mirrors to reduce the glare from other driver's head-
lamps.
Keep your headlamps clean and properly aimed. Dirty or improper-
ly aimed headlamps will make it
much more difficult to see at night.
Avoid staring directly at the head- lamps of oncoming vehicles. You
could be temporarily blinded, and
it will take several seconds for your
eyes to readjust to the darkness.
Driving in the Rain
Rain and wet roads can make driving
dangerous. Here are a few things to
consider when driving in the rain or
on slick pavement:
Slow down and allow extra follow-ing distance. A heavy rainfall
makes it harder to see and
increases the distance needed to
stop your vehicle.
Turn OFF your Cruise Control.
Replace your windshield wiper blades when they show signs of
streaking or missing areas on the
windshield.
Tires should be properly main- tained with at least 2/32nds of an
inch of tread depth. If your tires do
not have enough tread, making a
quick stop on wet pavement can
cause a skid and possibly lead to
an accident. See "Tire replace-
ment" in chapter 7 .
Turn on your headlamps to make it easier for others to see you.
NOTICE
i
Page 401 of 557
5-127
Driving your vehicle
5
Driving too fast through large pud-dles can affect your brakes. If you
must go through puddles, try to
drive through them slowly.
If you believe your brakes may be wet, apply them lightly while driv-
ing until normal braking operation
returns.
Hydroplaning
If the road is wet enough and you are
going fast enough, your vehicle may
have little or no contact with the road
surface and actually ride on the
water. The best advice is SLOW
DOWN when the road is wet.
The risk of hydroplaning increas-
es as the depth of tire tread
decreases, refer to "Tire replace-
ment " in chapter 7.
Driving in Flooded Areas
Avoid driving through flooded areas
unless you are sure the water is no
higher than the bottom of the wheel
hub. Drive through any water slowly.
Allow adequate stopping distance
because brake performance may be
reduced.
After driving through water, dry the
brakes by gently applying them sev-
eral times while the vehicle is moving
slowly.
Highway Driving
Tires
Adjust the tire inflation, as specified.
Under-inflation may overheat or
damage the tires.
Do not install worn-out or damaged
tires, which may reduce traction or
adversely affect vehicle handling.
This could lead to sudden tire failure
that may cause loss of vehicle con-
trol resulting in an accident.
Information
Never over-inflate your tires above the
maximum inflation pressure, as speci-
fied on your tires.
Fuel, engine coolant and engineoil
Driving at higher speeds on the high-
way consumes more fuel and is less
efficient than driving at a slower,
more moderate speed. Maintain a
moderate speed in order to conserve
fuel when driving on the highway.
Be sure to check both the engine
coolant level and the engine oil
before driving.
Drive belt
A loose or damaged drive belt may
overheat the engine.
i
Page 404 of 557
5-130
Driving your vehicle
Damage to your vehicle caused by
improper tire chain use is not cov-
ered by your vehicle manufacturer’s
warranty.
When using tire chains, attach them
to the drive wheels as follows.
2WD : Front wheels
AWD : All four wheels
If a full set of chains are not available
for an AWD vehicle, chains may be
installed on the front wheels only.
Information
• Install tire chains on both left and right front tires. It should be noted
that installing tire chains on the
tires will provide a greater driving
force, but will not prevent side
skids.
• Do not install studded tires without first checking local, state and
municipal regulations for possible
restrictions against their use.
Chain installation
When installing tire chains, follow the
manufacturer’s instructions and
mount them as tightly possible. Drive
slowly (less than 20 mph (30 km/h))
with chains installed. If you hear the
chains contacting the body or chas-
sis, stop and tighten them. If they still
make contact, slow down until the
noise stops. Remove the tire chains
as soon as you begin driving on
cleared roads.
When mounting snow chains, park
the vehicle on level ground away
from traffic. Turn on the vehicle
Hazard Warning Flasher and place a
triangular emergency warning device
behind the vehicle (if available).
Always place the vehicle in P (Park),
apply the parking brake and turn off
the engine before installing snow
chains.i
The use of tire chains may
adversely affect vehicle han-
dling:
Drive less than 20 mph
(30 km/h) or the chain manu-
facturer's recommended speed
limit, whichever is lower.
Drive carefully and avoid
bumps, holes, sharp turns,
and other road hazards, which
may cause the vehicle to
bounce.
Avoid sharp turns or locked
wheel braking.
WARNING