Page 186 of 557
3-97
Convenient features of your vehicle
3
- Smart Cruise Control with Stop &Go radar blocked (if equipped)
- Lamp malfunction
- High Beam Assist malfunction (if equipped)
- Tire Pressure Monitoring System (TPMS) malfunction
The Master Warning Light illumi-
nates if one or more of the above
warning situations occur. At this time,
the LCD Modes Icon will change
from ( ) to ( ).
If the warning situation is solved, the
master warning light will be turned
off and the LCD Modes Icon will be
changed back to its previous icon
().User settings mode
In this mode, you can change the
settings of the instrument cluster,
doors, lamps, etc.
1. Head-up display
2. Driver Assistance
3. Door
4. Lights
5. Sound
6. Convenience
7. Service interval
8. Other
9. Language
10. Reset The information provided may differ
depending on which functions are
applicable to your vehicle.
OIK047148L
Page 272 of 557

4-2
Multimedia System
• If you install an aftermarket HID head lamp, your vehicle's audio
and electronic devices may not
function properly.
Prevent chemicals such as per- fume, cosmetic oil, sun cream,
hand cleaner, and air freshener
from contacting the interior
parts because they may cause
damage or discoloration.
AUX, USB and iPod®Por t
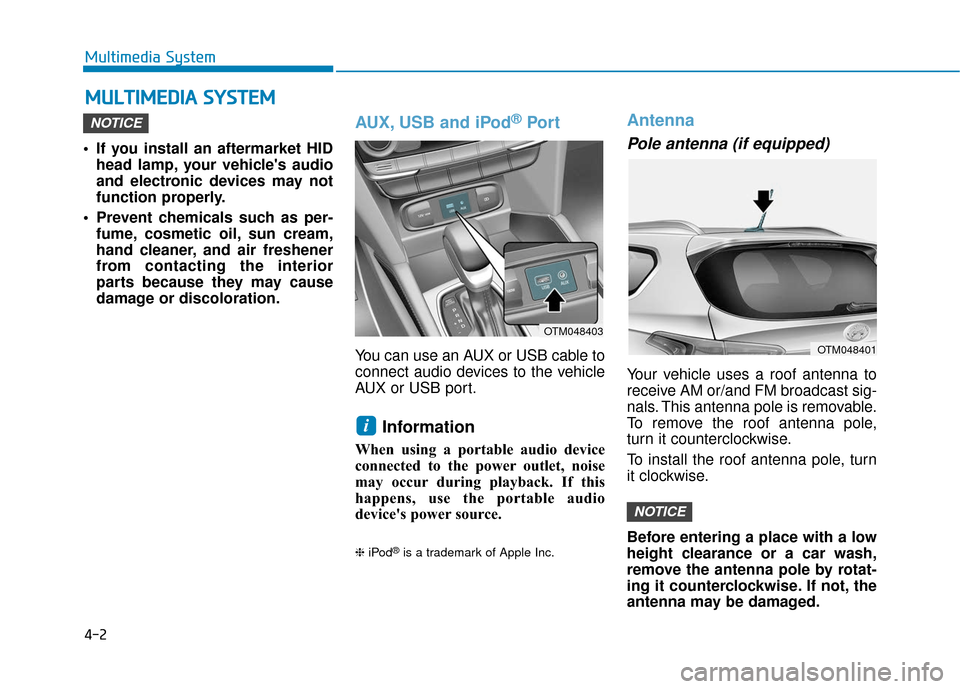
You can use an AUX or USB cable to
connect audio devices to the vehicle
AUX or USB port.
Information
When using a portable audio device
connected to the power outlet, noise
may occur during playback. If this
happens, use the portable audio
device's power source.
❈ iPod®is a trademark of Apple Inc.
Antenna
Pole antenna (if equipped)
Your vehicle uses a roof antenna to
receive AM or/and FM broadcast sig-
nals. This antenna pole is removable.
To remove the roof antenna pole,
turn it counterclockwise.
To install the roof antenna pole, turn
it clockwise.
Before entering a place with a low
height clearance or a car wash,
remove the antenna pole by rotat-
ing it counterclockwise. If not, the
antenna may be damaged.
NOTICE
i
NOTICE
M MU
UL
LT
T I
IM
M E
ED
D I
IA
A
S
S Y
Y S
ST
T E
EM
M
OTM048401
OTM048403
Page 337 of 557

5-63
Driving your vehicle
5
The vehicle is on unpaved oruneven rough surfaces, or road
with sudden gradient changes.
The vehicle drives through a con- struction area, on an unpaved
road, or above metal materials,
such as a railway
The vehicle in front is too small to be detected (for example a motor-
cycle or a bicycle, etc.)
The camera’s field of view is not well illuminated (either too dark or
too much reflection or too much
backlight that obscures the field of
view)
The camera does not recognize the entire vehicle in front.
The vehicle in front is an oversize vehicle or trailer that is too big to
be detected by the camera recog-
nition system (for example a trac-
tor trailer, etc.)
The vehicle in front does not have rear lights or the rear lights are not
turned ON or the rear lights are
located unusually.
The outside brightness changes suddenly, for example when enter-
ing or exiting a tunnel The vehicle drives inside a building,
such as a basement parking lot
The adverse road conditions cause excessive vehicle vibrations
while driving
You are on a roundabout and the vehicle in front circles
The camera lens is contaminated due to tinted, filmed or coated
windshield, damaged glass, or
stuck of foreign matter (sticker,
bug, etc.) on the glass
The camera is damaged.
The brightness outside is too low such as when the headlamps are
not on at night or the vehicle is
going through a tunnel.
Light coming from a street light or an oncoming vehicle is reflected
on a wet road surface such as a
puddle in the road
The field of view in front is obstruct- ed by sun glare
The shadow is on the road by a median strip, trees, etc.
The vehicle drives through a toll- gate. The windshield glass is fogged up; a
clear view of the road is obstructed
The radar/camera sensor recogni- tion is limited
The rear part of the vehicle in front is not normally visible (for exam-
ple, the vehicle is spinning or the
vehicle is overturned)
There is severe irregular reflection from the radar sensor
The sensor recognition changes suddenly when passing over a
speed bump
The vehicle in front is driving errat- ically
The vehicle in front is moving ver- tically to the driving direction
The vehicle in front is stopped ver- tically
The vehicle in front is driving towards your vehicle or reversing
Page 340 of 557

5-66
Driving your vehicle
Detecting pedestrians
The sensor may be limited when:
The pedestrian is not fully detect-ed by the camera recognition sys-
tem, for example, if the pedestrian
is leaning over or is not fully walk-
ing upright
The pedestrian is moving very quickly or appears abruptly in the
camera detection area
The pedestrian is wearing clothing that easily blends into the back-
ground, making it difficult to be
detected by the camera recogni-
tion system
The outside lighting is too bright (e.g. when driving in bright sun-
light or in sun glare) or too dark
(e.g. when driving on a dark rural
road at night)
It is difficult to detect and distin- guish the pedestrian from other
objects in the surroundings, for
example, when there is a group of
pedestrians or a large crowd
There is an item similar to a per- son's body structure
The pedestrian is small The pedestrian has impaired
mobility
The radar sensor or camera is blocked with a foreign object or
debris
The camera lens is contaminated due to tinted, filmed or coated
windshield, damaged glass, or
piece of foreign matter (sticker,
bug, etc.) on the glass
The brightness outside is too low such as when the headlamps are
not on at night or the vehicle is
going through a tunnel
Inclement weather such as heavy rain or snow obscures the field of
view of the radar sensor or camera
When light coming from a street light or an oncoming vehicle is
reflected on a wet road surface
such as a puddle in the road
The field of view in front is obstructed by sun glare
The windshield glass is fogged up; a clear view of the road is
obstructed The adverse road conditions
cause excessive vehicle vibrations
while driving
The sensor recognition changes suddenly when passing over a
speed bump
You are on a roundabout
Page 511 of 557

7-69
7
Maintenance
Front Fog Lamp Replacement
(if equipped)
Type A
1. Loosen the pin-type retainers ofthe under cover and then remove
the undercover.
2. Reach your hand into the back of the front bumper.
3. Disconnect the power connector from the socket.
4. Remove the bulb-socket from the housing by turning the socket
counterclockwise until the tabs on
the socket align with the slots of
the housing. 5. Install a new bulb-socket into the
housing by aligning the tabs on the
socket with the slots in the housing.
Push the socket into the housing and turn the socket clockwise.
Type B
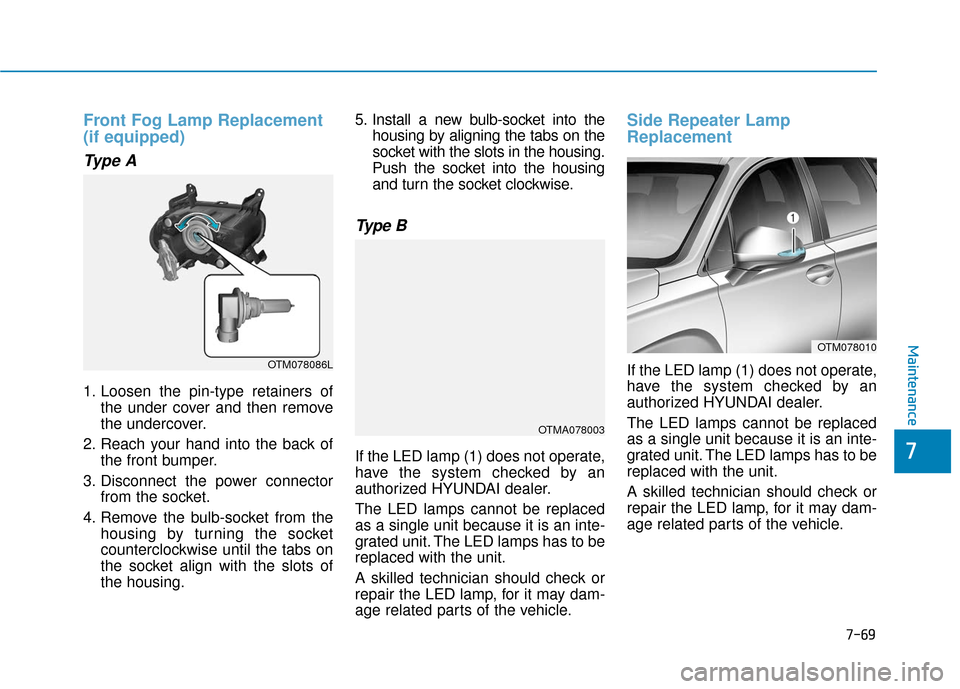
If the LED lamp (1) does not operate,
have the system checked by an
authorized HYUNDAI dealer.
The LED lamps cannot be replaced
as a single unit because it is an inte-
grated unit. The LED lamps has to be
replaced with the unit.
A skilled technician should check or
repair the LED lamp, for it may dam-
age related parts of the vehicle.
Side Repeater Lamp
Replacement
If the LED lamp (1) does not operate,
have the system checked by an
authorized HYUNDAI dealer.
The LED lamps cannot be replaced
as a single unit because it is an inte-
grated unit. The LED lamps has to be
replaced with the unit.
A skilled technician should check or
repair the LED lamp, for it may dam-
age related parts of the vehicle.
OTM078010
OTMA078003
OTM078086L
7
Maintenance
Page 512 of 557
Rear Combination Light Bulb
Replacement
Type A
(1) Stop/Tail lamp
(2) Tail lamp
(3) Side marker
(4) Turn signal lamp
(5) Backup lamp
Stop/Tail lamp and side marker
lamp
1. Turn off the engine.
2. Open the liftgate.
3. Remove the cover using a flat-blade screwdriver. 4. Loosen the lamp assembly retain-
ing screws with a cross-tip screw-
driver.
5. Remove the rear combination lamp assembly from the body of
the vehicle.
OTM078006
OTMA078004
OTM078005
Maintenance
7-70
Page 514 of 557
4. Remove the socket from theassembly by turning the socket
counterclockwise until the tabs on
the socket align with the slots on
the assembly.
5. Remove the bulb from the socket by pulling it straight out.
6. Insert a new bulb by pushing it in into the socket.
7. Install the socket into the assem- bly by aligning the tabs on the
socket with the slots in the assem-
bly. Push the socket into the
assembly and turn the socket
clockwise.
8. Reinstall the lamp assembly to the body of the vehicle.
Turn signal lamp and back up lamp
If the light bulb does not operate,
have the vehicle checked by an
authorized HYUNDAI dealer.
Type B
(1) Tail lamp
(2) Stop lamp
(3) Side marker
(4) Turn signal lamp
(5) Back up lamp
OTMA078050
OTM078007
Maintenance
7-72
Page 515 of 557

Tail lamp, stop lamp and side
marker lamp
If the LED lamp does not operate,
have the system checked by an
authorized HYUNDAI dealer.
The LED lamps cannot replaced as a
single unit because it is an integrated
unit. The LED lamps has to be
replaced with the unit.
A skilled technician should check or
repair the LED lamp, for it may dam-
age related parts of the vehicle.
Turn signal lamp and back up lamp
If the light bulb does not operate,
have the vehicle checked by an
authorized HYUNDI dealer.
High Mounted Stop Lamp Bulb
Replacement
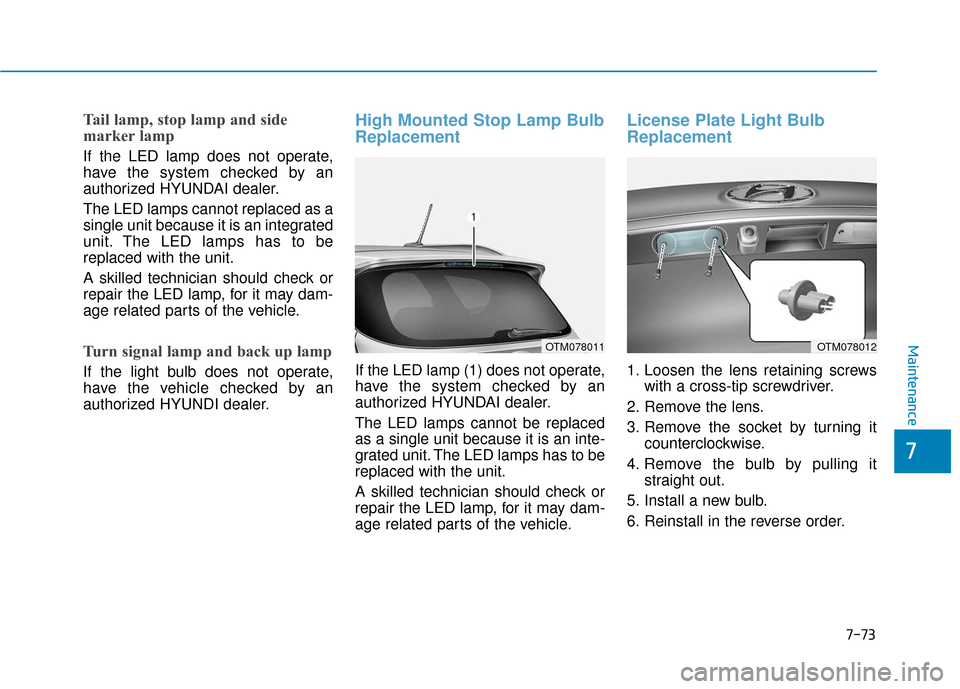
If the LED lamp (1) does not operate,
have the system checked by an
authorized HYUNDAI dealer.
The LED lamps cannot be replaced
as a single unit because it is an inte-
grated unit. The LED lamps has to be
replaced with the unit.
A skilled technician should check or
repair the LED lamp, for it may dam-
age related parts of the vehicle.
License Plate Light Bulb
Replacement
1. Loosen the lens retaining screwswith a cross-tip screwdriver.
2. Remove the lens.
3. Remove the socket by turning it counterclockwise.
4. Remove the bulb by pulling it straight out.
5. Install a new bulb.
6. Reinstall in the reverse order.
OTM078011OTM078012Maintenance
7-73
7