Page 217 of 557

3-128
Convenient features of your vehicle
When washing the vehicle, set the wiper switch in the OFF posi-
tion to stop the auto wiper oper-
ation. The wiper may operate
and be damaged if the switch is
set in the AUTO mode while
washing the vehicle.
Do not remove the sensor cover located on the upper end of the
passenger side windshield
glass. Damage to system parts
could occur and may not be cov-
ered by your vehicle warranty.
Because of using a photo sen- sor, temporary malfunction
could occur according to sud-
den ambient light change made
by stone and dust while driving.
Front Windshield Washers
In the OFF position, pull the lever
gently toward you to spray washer
fluid on the windshield and to run the
wipers 1-3 cycles. The spray and
wiper operation will continue until
you release the lever. If the washer
does not work, you may need to add
washer fluid to the washer fluid
reservoir.
NOTICE
When the outside temperature
is below freezing, ALWAYS
warm the windshield using the
defroster to help prevent the
washer fluid from freezing on
the windshield and obscuring
your vision which could result
in an accident and serious
injury or death.
WARNING
OTLE045164
Page 229 of 557

3-140
Convenient features of your vehicle
Face-Level (B, D, F)
Air flow is directed toward the upper
body and face. Additionally, each
outlet can be controlled to direct the
air discharged from the outlet.
Bi-Level (B, C, D, E, F)
Air flow is directed towards the face
and the floor.
Floor-Level (A, C, D, E, F)
Most of the air flow is directed to the
floor, with a small amount of the air
being directed to the windshield and
side window defrosters.
Floor & Defrost
(A, C, D, E, F)
Most of the air flow is directed to the
floor and the windshield with a small
amount directed to the side window
defrosters.
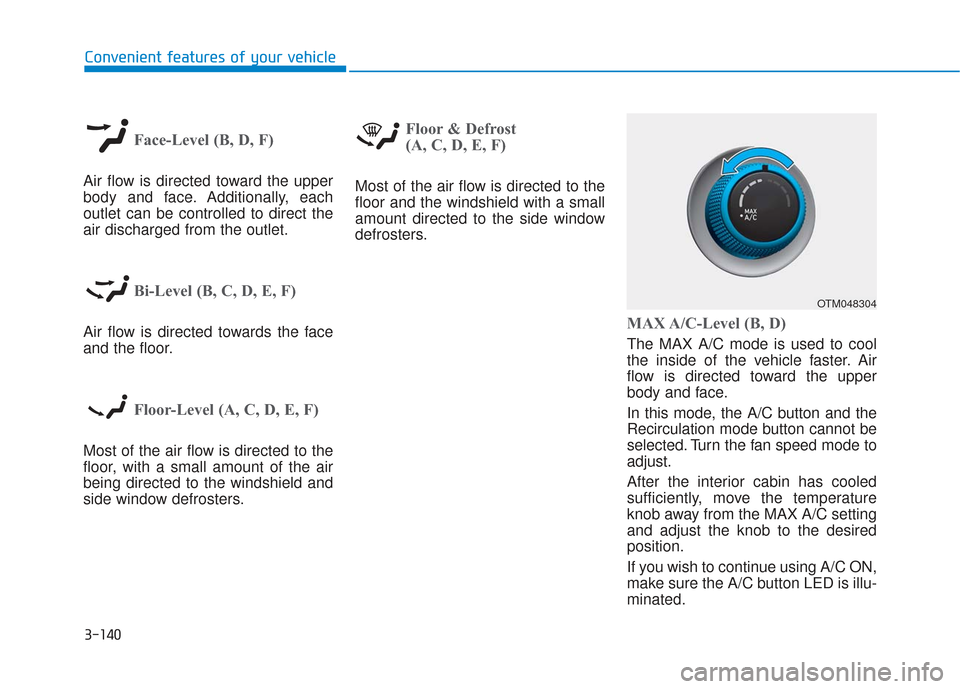
MAX A/C-Level (B, D)
The MAX A/C mode is used to cool
the inside of the vehicle faster. Air
flow is directed toward the upper
body and face.
In this mode, the A/C button and the
Recirculation mode button cannot be
selected. Turn the fan speed mode to
adjust.
After the interior cabin has cooled
sufficiently, move the temperature
knob away from the MAX A/C setting
and adjust the knob to the desired
position.
If you wish to continue using A/C ON,
make sure the A/C button LED is illu-
minated.
OTM048304
Page 240 of 557
3-151
Convenient features of your vehicle
3
The air flow outlet direction is cycled
as follows:
Face-Level (B, D, F)
Air flow is directed toward the upper
body and face. Additionally, each
outlet can be controlled to direct the
air discharged from the outlet.
Bi-Level (B, C, D, E, F)
Air flow is directed towards the face
and the floor.
Floor & Defrost
(A, C, D, E, F)
Most of the air flow is directed to the
floor and the windshield with a small
amount directed to the side window
defrosters.
Floor-Level (A, C, D, E, F)
Most of the air flow is directed to the
floor, with a small amount of the air
being directed to the windshield and
side window defrosters.Defrost-Level (A, D)
Most of the air flow is directed to the
windshield with a small amount of air
directed to the side window defrosters.
OTM048329
Page 258 of 557

3-169
Convenient features of your vehicle
3
Keep your drinks sealed whiledriving to prevent spilling your
drink. If liquid spills, it may get
into the vehicle's electrical/elec-
tronic system and damage elec-
trical/electronic parts.
When cleaning spilled liquids do not use hot air to blow out or dry
the cup holder. This may dam-
age the interior.
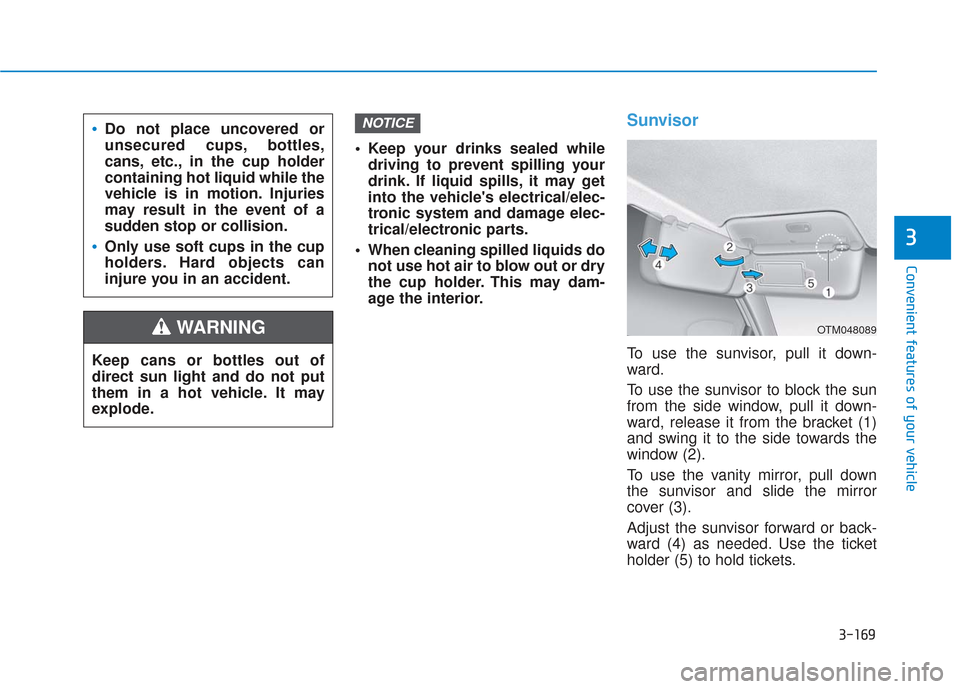
Sunvisor
To use the sunvisor, pull it down-
ward.
To use the sunvisor to block the sun
from the side window, pull it down-
ward, release it from the bracket (1)
and swing it to the side towards the
window (2).
To use the vanity mirror, pull down
the sunvisor and slide the mirror
cover (3).
Adjust the sunvisor forward or back-
ward (4) as needed. Use the ticket
holder (5) to hold tickets.
NOTICE
Keep cans or bottles out of
direct sun light and do not put
them in a hot vehicle. It may
explode.
WARNING
Do not place uncovered or
unsecured cups, bottles,
cans, etc., in the cup holder
containing hot liquid while the
vehicle is in motion. Injuries
may result in the event of a
sudden stop or collision.
Only use soft cups in the cup
holders. Hard objects can
injure you in an accident.
OTM048089
Page 267 of 557
3-178
Convenient features of your vehicle
Cargo Security Screen
(if equipped)
Use the cargo security screen to
cover items stored in the cargo area.
To use the cargo security screen
1. Pull the cargo security screentowards the rear of the vehicle by
the handle (1).
2. Insert the guide pin (2) into the guide (3).
Information
Pull out the cargo security screen with
the handle in the center to prevent the
guide pin from falling out of the guide.
When the cargo security screen is
not in use:
1. Pull the cargo security screenbackward and up to release it from
the guides.
2. The cargo security screen will automatically slide back in.
Information
The cargo security screen may not
automatically slide back in if the
cargo security screen is not fully
pulled out. Pull the cargo screen out
all the way and then slowly allow the
screen to retract back into the mecha-
nism.
i
i
OTMA048411
OTM048412
Page 276 of 557

5
Rear Cross-Traffic Collision Warning (RCCW) /
Rear Cross-Traffic Collision-Avoidance Assist
(RCCA) ...................................................................5-82
System Description .........................................................5-82
System Setting and Activation.....................................5-83
Warning and System Control .......................................5-85
Detecting Sensor .............................................................5-88
Limitations of the System .............................................5-89
Lane Keeping Assist (LKA) System ...................5-93
LKA System Operation...................................................5-94
Warning Light and Message.........................................5-97
Limitations of the System .............................................5-99
LKA System Function Change ...................................5-101
Driver Attention WARNING (DAW) System ....5-102
System Setting and Activation ..................................5-102
Resetting the System ...................................................5-103
System Standby.............................................................5-104
System Malfunction .....................................................5-104
Smart Cruise Control With Stop &
Go System............................................................5-106
Smart Cruise Control Switch ......................................5-106
Smart Cruise Control Speed .......................................5-107
Smart Cruise Control Vehicle-to-Vehicle Distance ... 5-111
Sensor to Detect Distance to the Vehicle Ahead ......5-115
To Adjust the Sensitivity of Smart Cruise Control .....5-116To Convert to Cruise Control Mode .........................5-117
Limitations of the System...........................................5-118
Leading Vehicle Departure Alert .....................5-123
System Setting and Activation ..................................5-123
Special Driving Conditions ................................5-125
Hazardous Driving Conditions....................................5-124
Rocking the Vehicle ......................................................5-125
Smooth Cornering .........................................................5-126
Driving at Night .............................................................5-126
Driving in the Rain ........................................................5-126
Driving in Flooded Areas.............................................5-127
Highway Driving ............................................................5-127
Reducing the Risk of a Rollover ...............................5-128
Winter Driving ....................................................5-129
Snow or Icy Conditions................................................5-129
Winter Precautions .......................................................5-131
Trailer Towing .....................................................5-133
If you decide to pull a trailer .....................................5-133
Trailer towing equipment ............................................5-135
Driving with a trailer ....................................................5-136
Maintenance when trailer towing.............................5-139
Vehicle Load Limit..............................................5-141
Tire Loading Information Label .................................5-142
Page 281 of 557
5-7
Driving your vehicle
5
Key ignition switch positions
Switch
PositionActionNotice
LOCK
To turn the ignition switch to the LOCK position, put the
key in at the ACC position and turn the key towards the
LOCK position.
The ignition key can be removed in the LOCK position.
The shift lever must be in the P (Park) position.
ACCSome of the electrical accessories are usable.
ON
This is the normal key position when the engine has
started.
All features and accessories are usable.
The warning lights can be checked when you turn the
ignition switch from ACC to ON.Do not leave the ignition switch in the ON position when
the engine is not running in order to prevent the battery
from discharging.
START
To start the engine, turn the ignition switch to the START
position. The switch returns to the ON position when you
let go of the key.The engine will crank until you release the key.
Page 282 of 557

5-8
Starting the engine 1. Make sure the parking brake isapplied.
2. Make sure the shift lever is in P (Park).
3. Depress the brake pedal.
4. Turn the ignition switch to the START position. Hold the key
(maximum of 10 seconds) until the
engine starts and release it.
Information
• It is best to maintain a moderateengine speed until the vehicle engine
comes up to normal operating tem-
perature. Avoid harsh or abrupt
acceleration or deceleration while
the engine is still cold.
• Whether the engine is cold or warm, always start the vehicle with
your foot on the brake pedal. Do
not depress the accelerator while
starting the vehicle. Do not rev the
engine while warming it up. To prevent damage to the vehicle:
Do not hold the ignition key in
the START position for more
than 10 seconds. Wait 5 to 10
seconds before trying again.
Do not push or tow your vehicle to start the engine.
Turning off the engine
1. Stop the vehicle and depress the brake pedal fully.
2. Move the shift lever to P (Park).
3. Turn the ignition switch to the off position and apply the parking
brake.
NOTICE
i
Driving your vehicle
Always wear appropriate shoes
when operating your vehicle.
Unsuitable shoes, such as high
heels, ski boots, sandals, flip-
flops, etc., may interfere with
your ability to use the brake and
accelerator pedals.
WARNING