Page 118 of 557
3-29
Convenient features of your vehicle
3
Tilt Steering / Telescopic
Steering
When adjusting the steering wheel to
a comfortable position, adjust the
steering wheel so that it points
toward your chest, not toward your
face. Make sure you can see the
instrument cluster warning lights and
gauges. After adjusting, push the
steering wheel both up and down to
be certain it is locked in position.
Always adjust the position of the
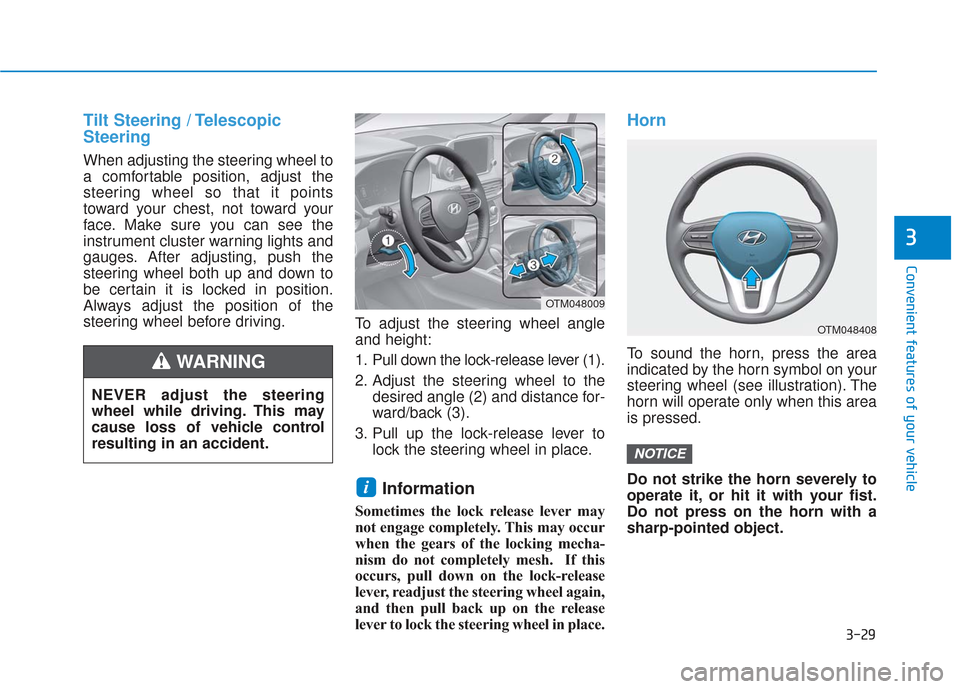
steering wheel before driving.To adjust the steering wheel angle
and height:
1. Pull down the lock-release lever (1).
2. Adjust the steering wheel to the
desired angle (2) and distance for-
ward/back (3).
3. Pull up the lock-release lever to lock the steering wheel in place.
Information
Sometimes the lock release lever may
not engage completely. This may occur
when the gears of the locking mecha-
nism do not completely mesh. If this
occurs, pull down on the lock-release
lever, readjust the steering wheel again,
and then pull back up on the release
lever to lock the steering wheel in place.
Horn
To sound the horn, press the area
indicated by the horn symbol on your
steering wheel (see illustration). The
horn will operate only when this area
is pressed.
Do not strike the horn severely to
operate it, or hit it with your fist.
Do not press on the horn with a
sharp-pointed object.
NOTICE
i
OTM048408
OTM048009
NEVER adjust the steering
wheel while driving. This may
cause loss of vehicle control
resulting in an accident.
WARNING
Page 120 of 557
3-31
Convenient features of your vehicle
3
When cleaning the mirror, use a
paper towel or similar material
dampened with glass cleaner. Do
not spray glass cleaner directly on
the mirror as this may cause the
liquid cleaner to enter the mirror
housing.
Day/night rearview mirror (if equipped)
[A]: Day, [B]: Night
Make this adjustment before you
start driving and while the day/night
lever is in the day position.
Pull the day/night lever towards you
to reduce glare from the headlights
of the vehicles behind you during
night driving.
Remember that you lose some
rearview clarity in the night position.
NOTICE
NEVER adjust the mirror while
driving. This may cause loss of
vehicle control resulting in an
accident.
WARNING
OTM048011
■ Type A
OTMA048464
■Type B
Page 138 of 557
3-49
Convenient features of your vehicle
3
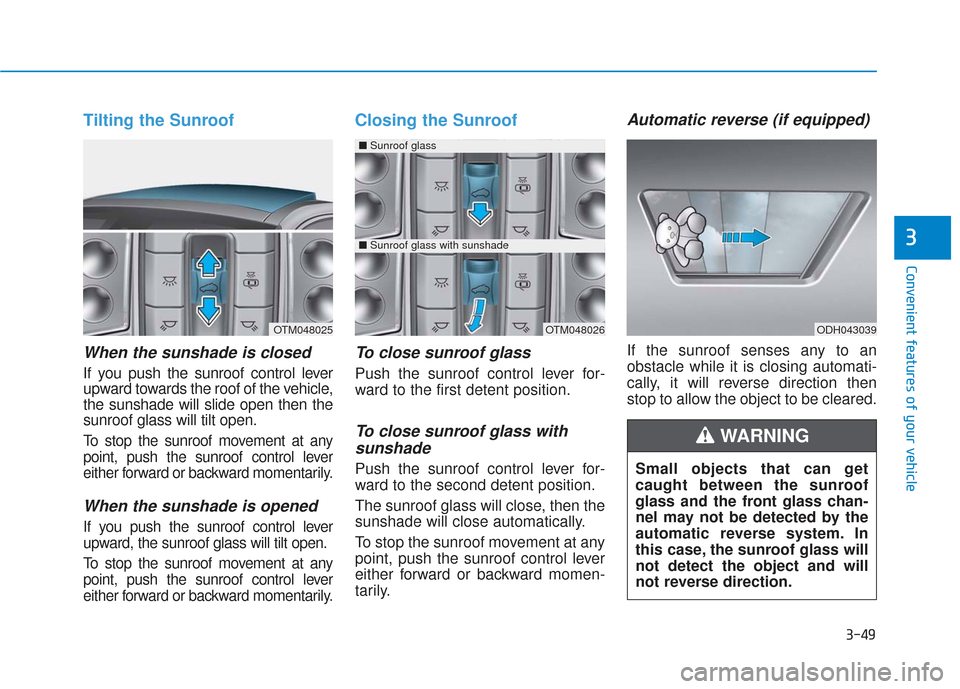
Tilting the Sunroof
When the sunshade is closed
If you push the sunroof control lever
upward towards the roof of the vehicle,
the sunshade will slide open then the
sunroof glass will tilt open.
To stop the sunroof movement at any
point, push the sunroof control lever
either forward or backward momentarily.
When the sunshade is opened
If you push the sunroof control lever
upward, the sunroof glass will tilt open.
To stop the sunroof movement at any
point, push the sunroof control lever
either forward or backward momentarily.
Closing the Sunroof
To close sunroof glass
Push the sunroof control lever for-
ward to the first detent position.
To close sunroof glass withsunshade
Push the sunroof control lever for-
ward to the second detent position.
The sunroof glass will close, then the
sunshade will close automatically.
To stop the sunroof movement at any
point, push the sunroof control lever
either forward or backward momen-
tarily.
Automatic reverse (if equipped)
If the sunroof senses any to an
obstacle while it is closing automati-
cally, it will reverse direction then
stop to allow the object to be cleared.
ODH043039OTM048025OTM048026
■ Sunroof glass
■Sunroof glass with sunshade
Small objects that can get
caught between the sunroof
glass and the front glass chan-
nel may not be detected by the
automatic reverse system. In
this case, the sunroof glass will
not detect the object and will
not reverse direction.
WARNING
Page 159 of 557

3-70
Convenient features of your vehicle
Gauges and Meters
Speedometer
The speedometer indicates the
speed of the vehicle and is calibrated
in miles per hour (MPH) and/or kilo-
meters per hour (km/h).
Tachometer
The tachometer indicates the
approximate number of engine revo-
lutions per minute (rpm).
Use the tachometer to select the cor-
rect shift points and to prevent lug-
ging and/or over-revving the engine.
Do not operate the engine within
the tachometer's RED ZONE. This
may cause severe engine damage.
Engine coolant temperaturegauge
This gauge indicates the tempera-
ture of the engine coolant when the
ignition switch is in the ON position.
If the gauge pointer moves
beyond the normal range area
toward the "H" position, it indi-
cates overheating that may dam-
age the engine.
Do not continue driving with an
overheated engine. If your vehicle
overheats, refer to "If the Engine
Overheats" in chapter 6.
NOTICE
NOTICE
OTM048102L
OTMA048103
OTM048105/OTM048106
■
Type A
■Type B
OTM048108/OTM048109
■
Type A
■Type B
■
Type A
■ Type B
Page 205 of 557
3-116
Convenient features of your vehicle
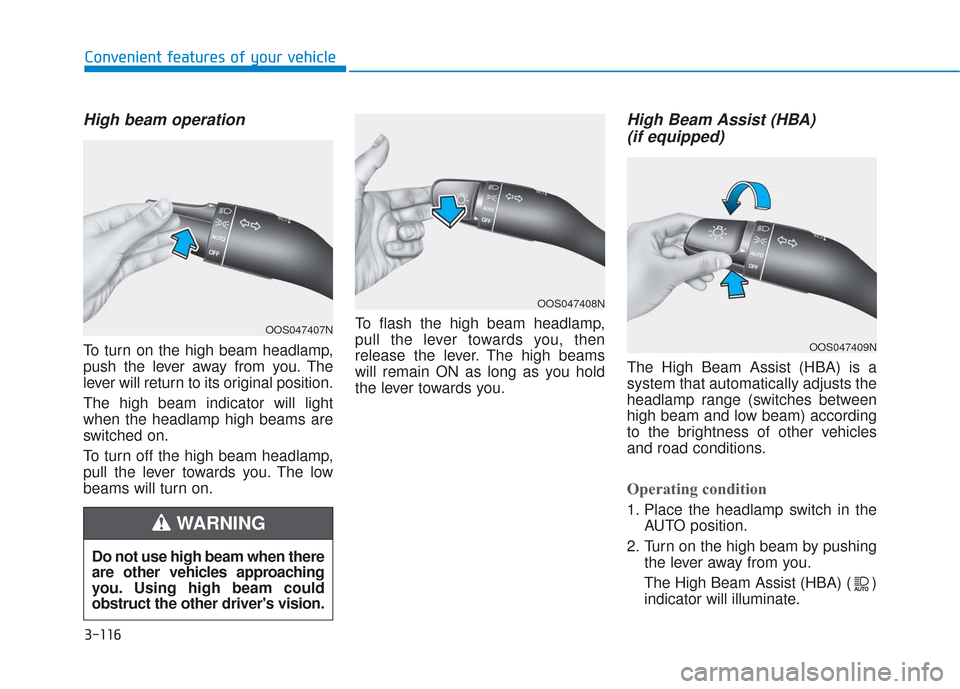
High beam operation
To turn on the high beam headlamp,
push the lever away from you. The
lever will return to its original position.
The high beam indicator will light
when the headlamp high beams are
switched on.
To turn off the high beam headlamp,
pull the lever towards you. The low
beams will turn on.To flash the high beam headlamp,
pull the lever towards you, then
release the lever. The high beams
will remain ON as long as you hold
the lever towards you.
High Beam Assist (HBA)
(if equipped)
The High Beam Assist (HBA) is a
system that automatically adjusts the
headlamp range (switches between
high beam and low beam) according
to the brightness of other vehicles
and road conditions.
Operating condition
1. Place the headlamp switch in the
AUTO position.
2. Turn on the high beam by pushing the lever away from you.
The High Beam Assist (HBA) ( ) indicator will illuminate.
Do not use high beam when there
are other vehicles approaching
you. Using high beam could
obstruct the other driver's vision.
WARNING
OOS047407N
OOS047408N
OOS047409N
Page 206 of 557
3-117
Convenient features of your vehicle
3
3. The High Beam Assist (HBA) willturn on when vehicle speed is
above 25 mph (40 km/h).
If the headlamp switch is pushedaway when the High Beam Assist
(HBA) is operating, the High
Beam Assist (HBA) will turn off
and the high beam will be on con-
tinuously.
If the headlamp switch is pulled
towards you when the high beam
is off, the high beam will turn on
without the High Beam Assist
(HBA) canceled. When you let go
of the light switch, the lever will
move to the middle and the high
beam will turn off.
If the headlamp switch is pulled
towards you when the high beam
is on by the High Beam Assist
(HBA), the low beam will be on
and the High Beam Assist (HBA)
will turn off.
If the headlamp switch is placed to the headlamp ON position, the
High Beam Assist (HBA) will turn
off and the low beam will be on
continuously. When the High Beam Assist (HBA) is
operating, the high beam switches to
low beam if any of the following con-
ditions occur :
- When the headlamp of an on-
coming vehicle is detected.
- When the tail lamp of a vehicle in front is detected.
- When the headlamp or tail lamp of a motorcycle or a bicycle is detect-
ed.
- When the surrounding ambient light is bright enough that high beams
are not required.
- When streetlights or other lights are detected.
- When the headlamp s witch is not
in the AUTO position.
- When the High Beam Assist (HBA) is off.
- When vehicle speed is below 15 mph (24 km/h).
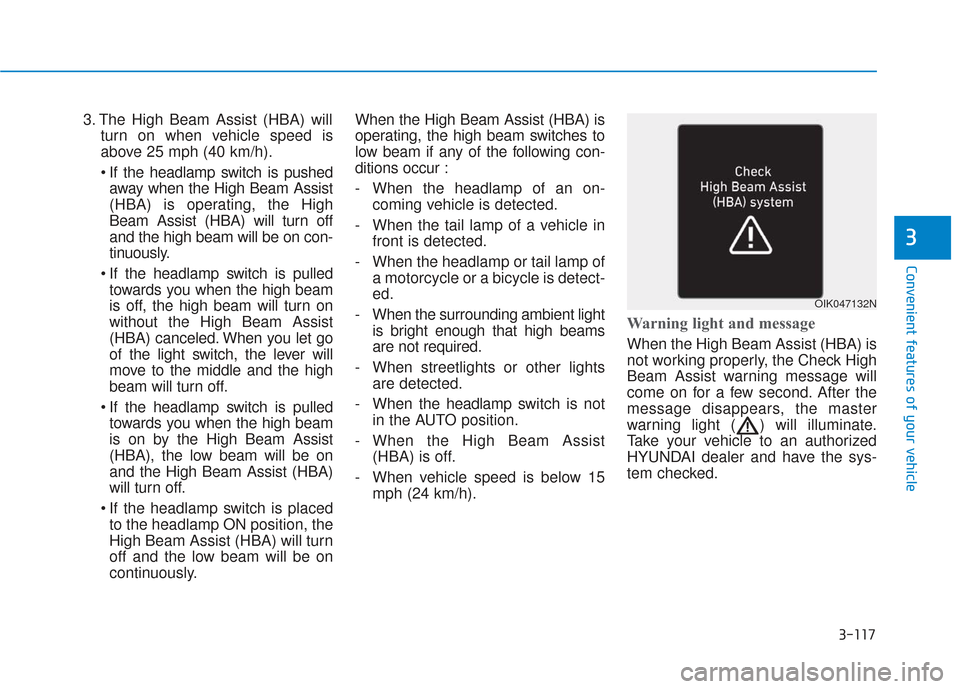
Warning light and message
When the High Beam Assist (HBA) is
not working properly, the Check High
Beam Assist warning message will
come on for a few second. After the
message disappears, the master
warning light ( ) will illuminate.
Take your vehicle to an authorized
HYUNDAI dealer and have the sys-
tem checked.
OIK047132N
Page 207 of 557
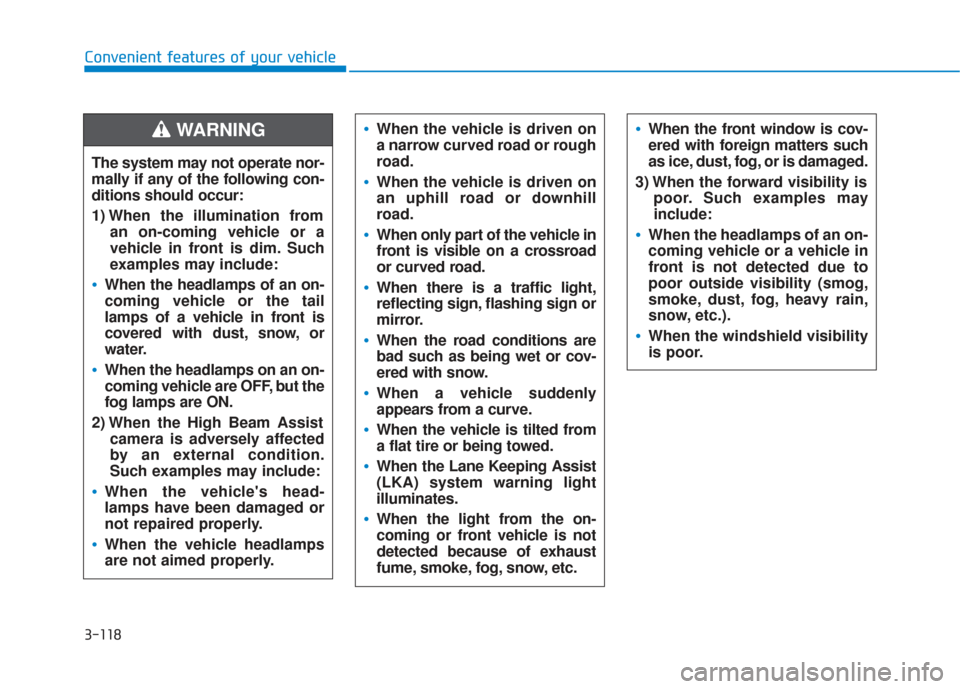
3-118
Convenient features of your vehicleThe system may not operate nor-
mally if any of the following con-
ditions should occur:
1) When the illumination from an on-coming vehicle or a
vehicle in front is dim. Such
examples may include:
When the headlamps of an on-
coming vehicle or the tail
lamps of a vehicle in front is
covered with dust, snow, or
water.
When the headlamps on an on-
coming vehicle are OFF, but the
fog lamps are ON.
2) When the High Beam Assist camera is adversely affected
by an external condition.
Such examples may include:
When the vehicle's head-
lamps have been damaged or
not repaired properly.
When the vehicle headlamps
are not aimed properly.
When the vehicle is driven on
a narrow curved road or rough
road.
When the vehicle is driven on
an uphill road or downhill
road.
When only part of the vehicle in
front is visible on a crossroad
or curved road.
When there is a traffic light,
reflecting sign, flashing sign or
mirror.
When the road conditions are
bad such as being wet or cov-
ered with snow.
When a vehicle suddenly
appears from a curve.
When the vehicle is tilted from
a flat tire or being towed.
When the Lane Keeping Assist
(LKA) system warning light
illuminates.
When the light from the on-
coming or front vehicle is not
detected because of exhaust
fume, smoke, fog, snow, etc.
When the front window is cov-
ered with foreign matters such
as ice, dust, fog, or is damaged.
3) When the forward visibility is poor. Such examples may
include:
When the headlamps of an on-
coming vehicle or a vehicle in
front is not detected due to
poor outside visibility (smog,
smoke, dust, fog, heavy rain,
snow, etc.).
When the windshield visibility
is poor.
WARNING
Page 215 of 557

3-126
Convenient features of your vehicleA : Wiper speed control· MIST – Single wipe
· OFF – Off
· INT – Intermittent wipeAUTO* – Auto control wipe
· LO – Low wiper speed
· HI – High wiper speed
B : Intermittent control wipe time adjustment
C : Wash with brief wipes (pull lever towards you)
D : Rear wiper/washer control · HI – High wiper speed
· LO – Low wiper speed
· OFF – Off
E : Wash with brief wipes (rear) (push lever away from you)
* : if equipped
Front Windshield Wipers
Operates as follows when the igni-
tion switch is in the ON position.
MIST : For a single wiping cycle, push the lever upward and
release. The wipers will
operate continuously if the
lever is held in this position.
OFF : Wiper is not in operation.
INT : Wiper operates intermittently at the same wiping intervals. To
vary the speed setting, move
the speed control lever. The top
most setting will run the wipers
most frequently (for more rain).
The bottom setting will run the
wipers the least frequently (for
less rain).
AUTO : The rain sensor located on the upper end of the wind-
shield glass senses the
amount of rainfall and con-
trols the wiping cycle for the
proper interval. The more it
rains, the faster the wiper
operates. When the rain
stops, the wiper stops.To
vary the speed setting, turn
the speed control knob (B).
W WI
IP
P E
ER
R S
S
A
A N
N D
D
W
W A
AS
SH
H E
ER
R S
S
OPD047454L
OTLA045318
■ Front windshield wiper/washer
■Rear window wiper/washer