2019 Hyundai Kona length
[x] Cancel search: lengthPage 43 of 526
2-25
Safety system of your vehicle
2
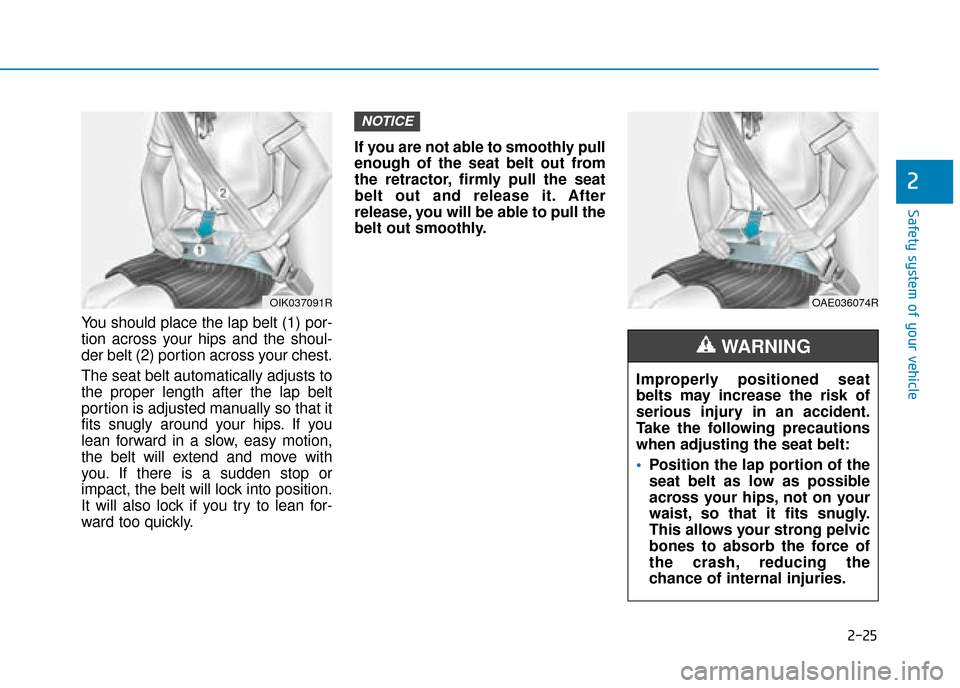
You should place the lap belt (1) por-
tion across your hips and the shoul-
der belt (2) portion across your chest.
The seat belt automatically adjusts to
the proper length after the lap belt
portion is adjusted manually so that it
fits snugly around your hips. If you
lean forward in a slow, easy motion,
the belt will extend and move with
you. If there is a sudden stop or
impact, the belt will lock into position.
It will also lock if you try to lean for-
ward too quickly.If you are not able to smoothly pull
enough of the seat belt out from
the retractor, firmly pull the seat
belt out and release it. After
release, you will be able to pull the
belt out smoothly.
NOTICE
OAE036074R
Improperly positioned seat
belts may increase the risk of
serious injury in an accident.
Take the following precautions
when adjusting the seat belt:
Position the lap portion of the
seat belt as low as possible
across your hips, not on your
waist, so that it fits snugly.
This allows your strong pelvic
bones to absorb the force of
the crash, reducing the
chance of internal injuries.
WARNING
OIK037091R
Page 222 of 526
3-140
Roof rack (if equipped)
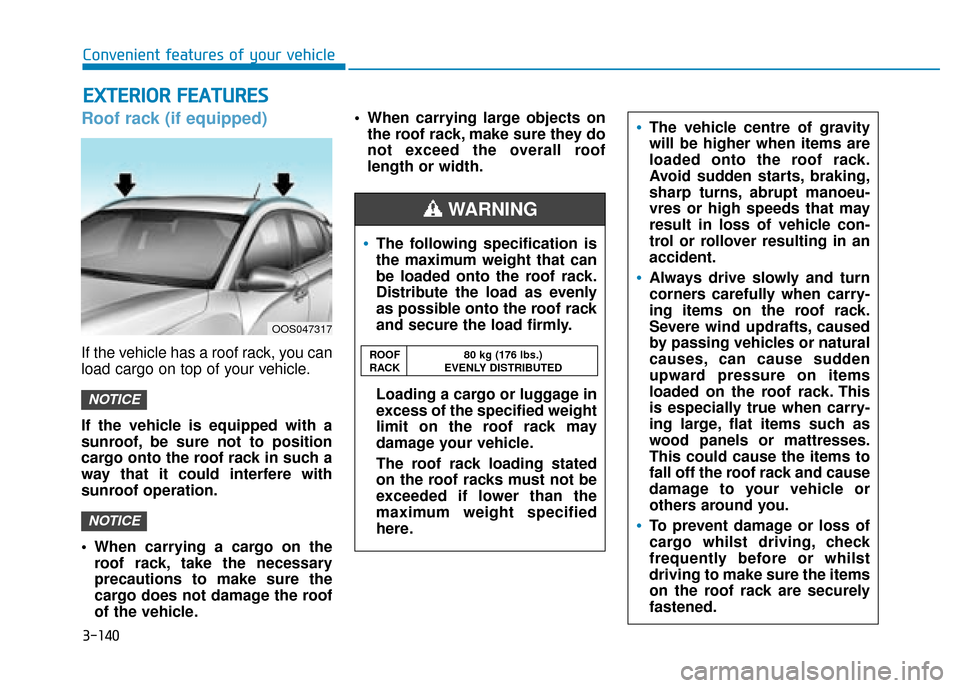
If the vehicle has a roof rack, you can
load cargo on top of your vehicle.
If the vehicle is equipped with a
sunroof, be sure not to position
cargo onto the roof rack in such a
way that it could interfere with
sunroof operation.
When carrying a cargo on theroof rack, take the necessary
precautions to make sure the
cargo does not damage the roof
of the vehicle. When carrying large objects on
the roof rack, make sure they do
not exceed the overall roof
length or width.
NOTICE
NOTICE
E EX
X T
TE
ER
R I
IO
O R
R
F
F E
E A
A T
TU
U R
RE
ES
S
Convenient features of your vehicle
OOS047317
The following specification is
the maximum weight that can
be loaded onto the roof rack.
Distribute the load as evenly
as possible onto the roof rack
and secure the load firmly.
Loading a cargo or luggage in
excess of the specified weight
limit on the roof rack may
damage your vehicle.
The roof rack loading stated
on the roof racks must not be
exceeded if lower than the
maximum weight specified
here.
The vehicle centre of gravity
will be higher when items are
loaded onto the roof rack.
Avoid sudden starts, braking,
sharp turns, abrupt manoeu-
vres or high speeds that may
result in loss of vehicle con-
trol or rollover resulting in an
accident.
Always drive slowly and turn
corners carefully when carry-
ing items on the roof rack.
Severe wind updrafts, caused
by passing vehicles or natural
causes, can cause sudden
upward pressure on items
loaded on the roof rack. This
is especially true when carry-
ing large, flat items such as
wood panels or mattresses.
This could cause the items to
fall off the roof rack and cause
damage to your vehicle or
others around you.
To prevent damage or loss of
cargo whilst driving, check
frequently before or whilst
driving to make sure the items
on the roof rack are securely
fastened.
WARNING
ROOF 80 kg (176 lbs.)
RACK EVENLY DISTRIBUTED
Page 314 of 526
5-59
Driving your vehicle
5
Limitation of ECO mode opera-
tion:
If the following conditions occur
whilst ECO mode is operating, the
system operation is limited even
though there is no change in ECO
indicator.
When the coolant temperature islow:
The system will be limited until
engine performance becomes nor-
mal.
When driving up a hill: The system will be limited to gain
power when driving uphill because
engine torque is restricted.
When driving the vehicle with the dual clutch transmission gear shift
lever in manual shift mode:
The system will be limited due to
the shift location.
When the accelerator pedal is deeply depressed for a few seconds:
The system will be limited, judging
that the driver wants to speed up.SPORT mode
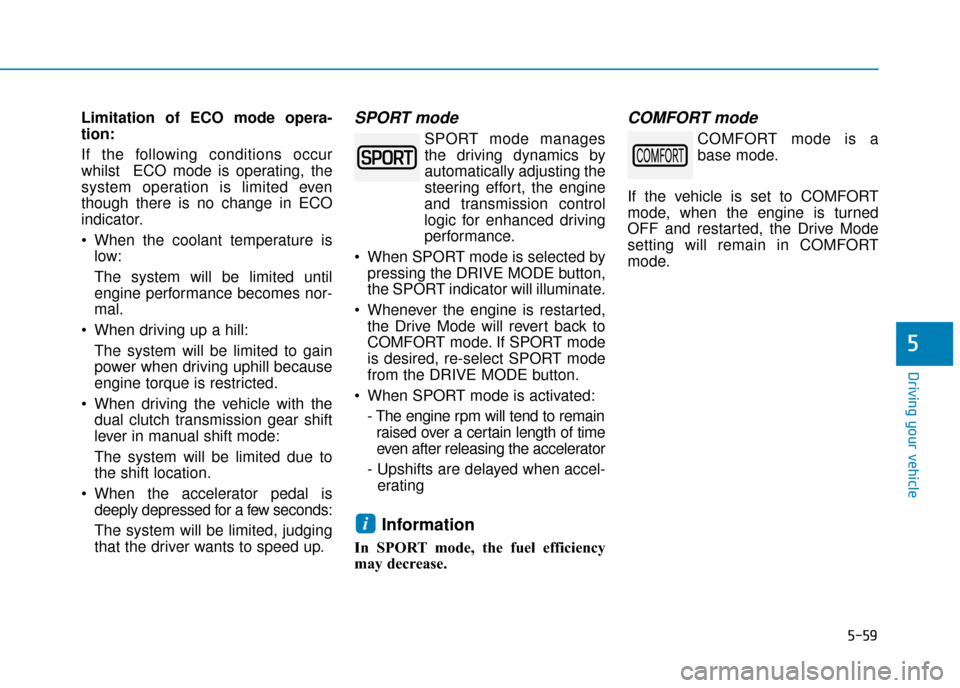
SPORT mode managesthe driving dynamics by
automatically adjusting the
steering effort, the engine
and transmission control
logic for enhanced driving
performance.
When SPORT mode is selected by pressing the DRIVE MODE button,
the SPORT indicator will illuminate.
Whenever the engine is restarted, the Drive Mode will revert back to
COMFORT mode. If SPORT mode
is desired, re-select SPORT mode
from the DRIVE MODE button.
When SPORT mode is activated: - The engine rpm will tend to remainraised over a certain length of time
even after releasing the accelerator
- Upshifts are delayed when accel- erating
Information
In SPORT mode, the fuel efficiency
may decrease.
COMFORT mode
COMFORT mode is a
base mode.
If the vehicle is set to COMFORT
mode, when the engine is turned
OFF and restarted, the Drive Mode
setting will remain in COMFORT
mode.
i
Page 368 of 526
5-113
Driving your vehicle
5
Driving with a trailer
Towing a trailer requires a certain
amount of experience. Before setting
out for the open road, you must get
to know your trailer. Acquaint your-
self with the feel of handling and
braking with the added weight of the
trailer. And always keep in mind that
the vehicle you are driving is now
longer and not nearly as responsive
as your vehicle is by itself.
Before you start, check the trailer
towbar and platform, safety chains,
electrical connector(s), lights, tyres
and brakes.
During your trip, occasionally check
to be sure that the load is secure,
and that the lights and trailer brakes
are still working.
Distance
Stay at least twice as far behind the
vehicle ahead as you would when
driving your vehicle without a trailer.
This can help you avoid situations
that require heavy braking and sud-
den turns.
Passing
You will need more passing distance
up ahead when you’re towing a trail-
er. And, because of the increased
vehicle length, you’ll need to go
much farther beyond the passed
vehicle before you can return to your
lane.
Backing up
Hold the bottom of the steering
wheel with one hand. Then, to move
the trailer to the left, move your hand
to the left. To move the trailer to the
right, move your hand to the right.
Always back up slowly and, if possi-
ble, have someone guide you.
Making turns
When you’re turning with a trailer,
make wider turns than normal. Do this
so your trailer won’t strike soft shoul-
ders, kerbs, road signs, trees, or other
objects. Avoid jerky or sudden
maneuvers. Signal well in advance.
Turn signals
When you tow a trailer, your vehicle
has to have a different turn signal
flasher and extra wiring. The green
arrows on your instrument panel will
flash whenever you signal a turn or
lane change. Properly connected,
the trailer lights will also flash to alert
other drivers you’re about to turn,
change lanes, or stop.
When towing a trailer, the green
arrows on your instrument panel will
flash for turns even if the bulbs on
the trailer are burned out. Thus, you
may think drivers behind you are
seeing your signals when, in fact,
they are not. It’s important to check
occasionally to be sure the trailer
bulbs are still working. You must also
check the lights every time you dis-
connect and then reconnect the
wires.
Page 508 of 526
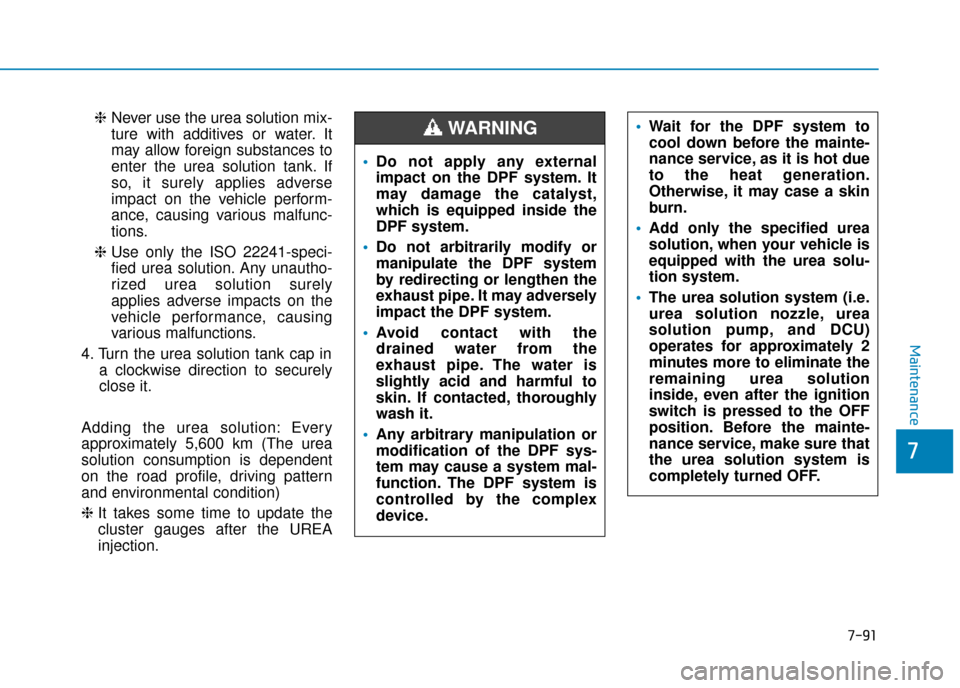
❈Never use the urea solution mix-
ture with additives or water. It
may allow foreign substances to
enter the urea solution tank. If
so, it surely applies adverse
impact on the vehicle perform-
ance, causing various malfunc-
tions.
❈ Use only the ISO 22241-speci-
fied urea solution. Any unautho-
rized urea solution surely
applies adverse impacts on the
vehicle performance, causing
various malfunctions.
4. Turn the urea solution tank cap in a clockwise direction to securely
close it.
Adding the urea solution: Every
approximately 5,600 km (The urea
solution consumption is dependent
on the road profile, driving pattern
and environmental condition)
❈ It takes some time to update the
cluster gauges after the UREA
injection.
7-91
7
Maintenance
Do not apply any external
impact on the DPF system. It
may damage the catalyst,
which is equipped inside the
DPF system.
Do not arbitrarily modify or
manipulate the DPF system
by redirecting or lengthen the
exhaust pipe. It may adversely
impact the DPF system.
Avoid contact with the
drained water from the
exhaust pipe. The water is
slightly acid and harmful to
skin. If contacted, thoroughly
wash it.
Any arbitrary manipulation or
modification of the DPF sys-
tem may cause a system mal-
function. The DPF system is
controlled by the complex
device.
Wait for the DPF system to
cool down before the mainte-
nance service, as it is hot due
to the heat generation.
Otherwise, it may case a skin
burn.
Add only the specified urea
solution, when your vehicle is
equipped with the urea solu-
tion system.
The urea solution system (i.e.
urea solution nozzle, urea
solution pump, and DCU)
operates for approximately 2
minutes more to eliminate the
remaining urea solution
inside, even after the ignition
switch is pressed to the OFF
position. Before the mainte-
nance service, make sure that
the urea solution system is
completely turned OFF.WARNING
Page 514 of 526
8-2
Specifications & Consumer information
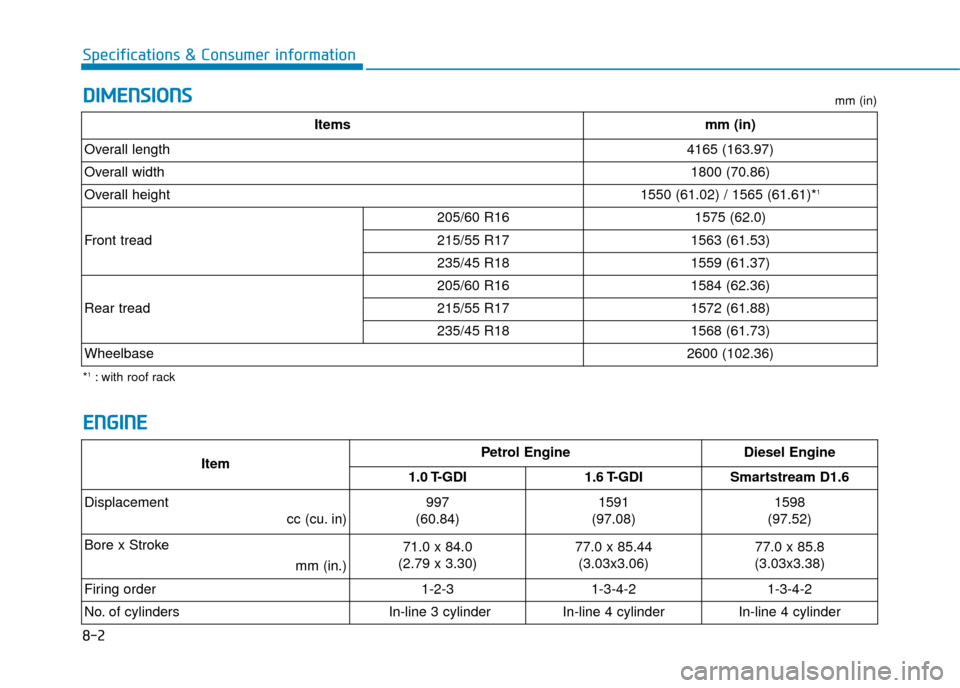
D
DI
IM
M E
EN
N S
SI
IO
O N
NS
S
E
E N
N G
GI
IN
N E
E
ItemPetrol EngineDiesel Engine
1.0 T-GDI 1.6 T-GDISmartstream D1.6
Displacement cc (cu. in)
997
(60.84)1591
(97.08)1598
(97.52)
Bore x Stroke mm (in.)
71.0 x 84.0
(2.79 x 3.30)77.0 x 85.44 (3.03x3.06)77.0 x 85.8
(3.03x3.38)
Firing order
1-2-31-3-4-21-3-4-2
No. of cylinders
In-line 3 cylinderIn-line 4 cylinderIn-line 4 cylinder
*1: with roof rack mm (in)
Itemsmm (in)
Overall length4165 (163.97)
Overall width1800 (70.86)
Overall height1550 (61.02) / 1565 (61.61)*1
Front tread
205/60 R161575 (62.0)
215/55 R171563 (61.53)
235/45 R181559 (61.37)
Rear tread
205/60 R161584 (62.36)
215/55 R171572 (61.88)
235/45 R181568 (61.73)
Wheelbase2600 (102.36)