Page 238 of 603
3-146
Convenient features of your vehicle
To Defrost Outside Windshield
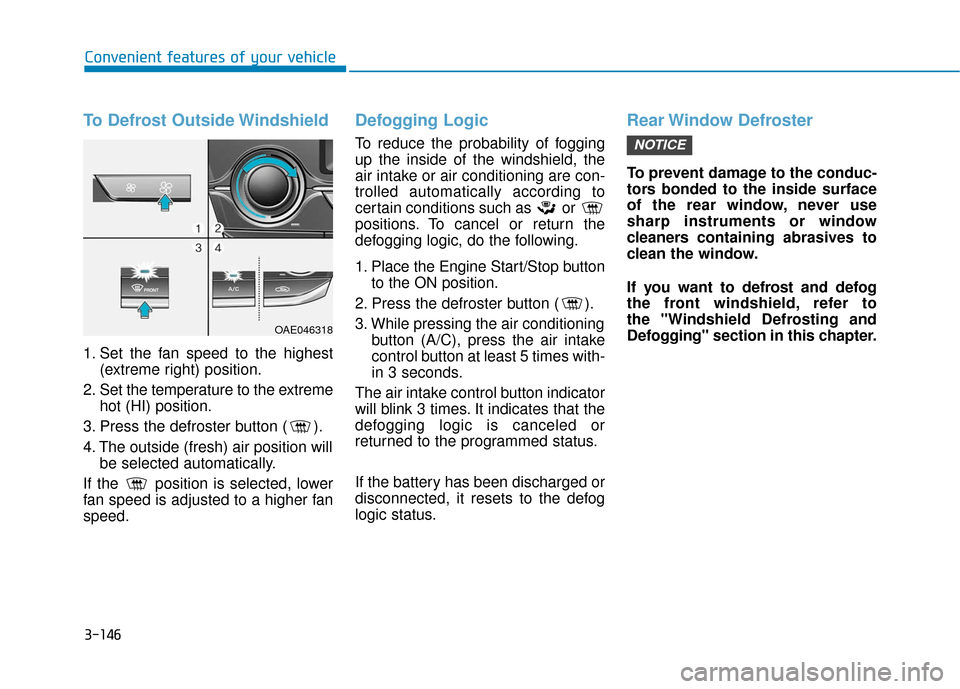
1. Set the fan speed to the highest(extreme right) position.
2. Set the temperature to the extreme hot (HI) position.
3. Press the defroster button ( ).
4. The outside (fresh) air position will be selected automatically.
If the position is selected, lower
fan speed is adjusted to a higher fan
speed.
Defogging Logic
To reduce the probability of fogging
up the inside of the windshield, the
air intake or air conditioning are con-
trolled automatically according to
certain conditions such as or
positions. To cancel or return the
defogging logic, do the following.
1. Place the Engine Start/Stop button to the ON position.
2. Press the defroster button ( ).
3. While pressing the air conditioning button (A/C), press the air intake
control button at least 5 times with-
in 3 seconds.
The air intake control button indicator
will blink 3 times. It indicates that the
defogging logic is canceled or
returned to the programmed status.
If the battery has been discharged or
disconnected, it resets to the defog
logic status.
Rear Window Defroster
To prevent damage to the conduc-
tors bonded to the inside surface
of the rear window, never use
sharp instruments or window
cleaners containing abrasives to
clean the window.
If you want to defrost and defog
the front windshield, refer to
the "Windshield Defrosting and
Defogging" section in this chapter.
NOTICE
OAE046318
Page 243 of 603
3-151
Convenient features of your vehicle
3
Sunglass Holder
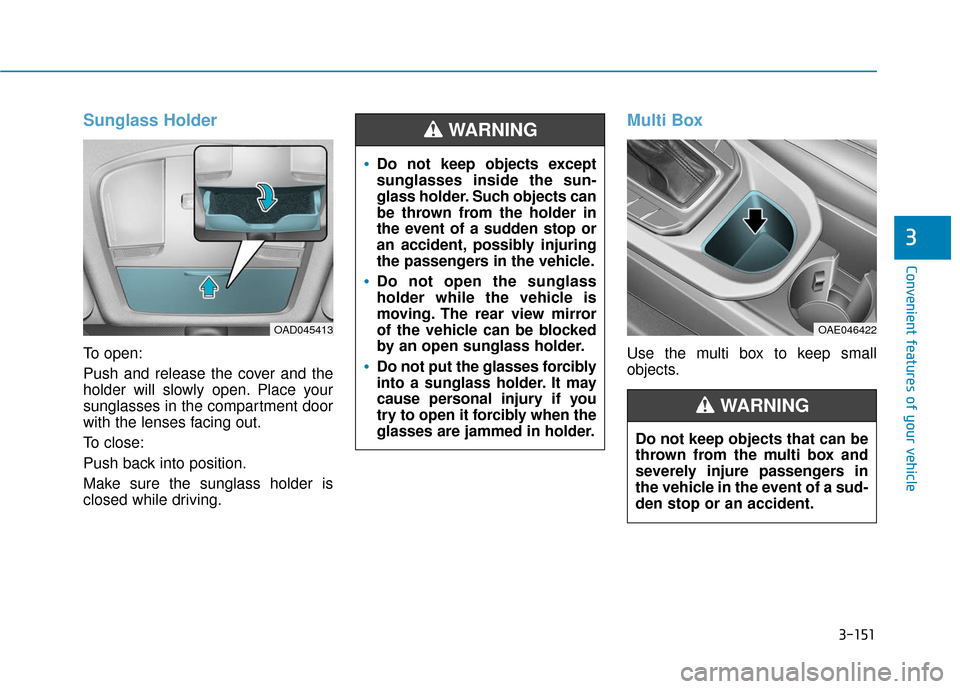
To open:
Push and release the cover and the
holder will slowly open. Place your
sunglasses in the compartment door
with the lenses facing out.
To close:
Push back into position.
Make sure the sunglass holder is
closed while driving.
Multi Box
Use the multi box to keep small
objects.
OAD045413OAE046422
Do not keep objects except
sunglasses inside the sun-
glass holder. Such objects can
be thrown from the holder in
the event of a sudden stop or
an accident, possibly injuring
the passengers in the vehicle.
Do not open the sunglass
holder while the vehicle is
moving. The rear view mirror
of the vehicle can be blocked
by an open sunglass holder.
Do not put the glasses forcibly
into a sunglass holder. It may
cause personal injury if you
try to open it forcibly when the
glasses are jammed in holder.
WARNING
Do not keep objects that can be
thrown from the multi box and
severely injure passengers in
the vehicle in the event of a sud-
den stop or an accident.
WARNING
Page 247 of 603
3-155
Convenient features of your vehicle
3
A device that requires a specific re-
charging method may not properly
re-charge with this USB charger. If
this is the case, use the specified
charger for your device.
This USB charging terminal will not
allow you to play your media on the
AVN unit. To connect your media to
the AVN unit, use the USB port in the
multi box and follow steps in the Car
Multimedia User's Manual that is
supplied with the vehicle.Wireless Cellular Phone
Charging System (if equipped)
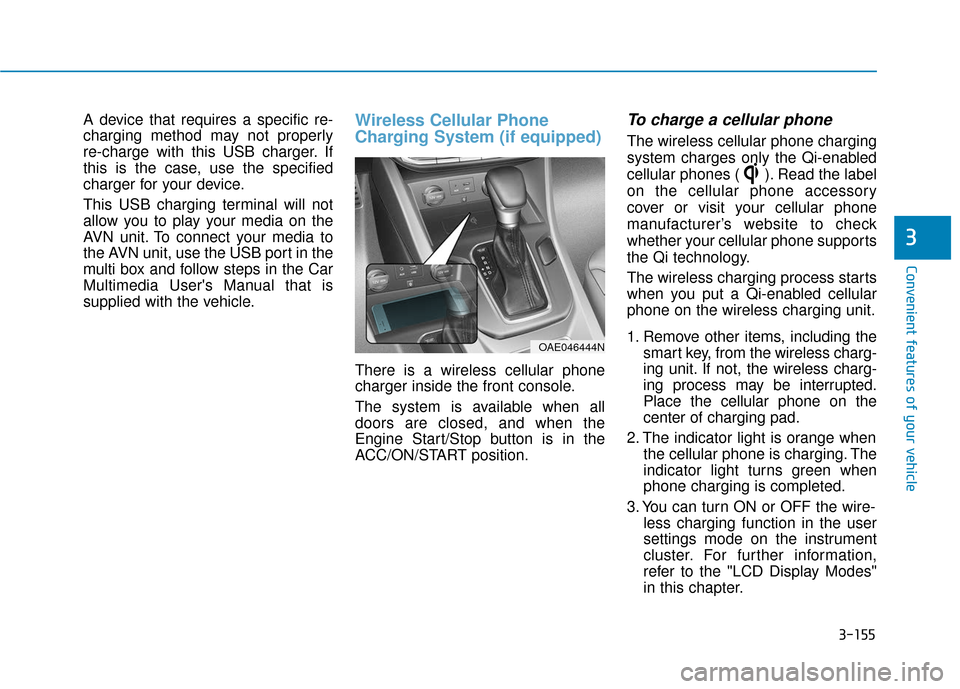
There is a wireless cellular phone
charger inside the front console.
The system is available when all
doors are closed, and when the
Engine Start/Stop button is in the
ACC/ON/START position.
To charge a cellular phone
The wireless cellular phone charging
system charges only the Qi-enabled
cellular phones ( ). Read the label
on the cellular phone accessory
cover or visit your cellular phone
manufacturer’s website to check
whether your cellular phone supports
the Qi technology.
The wireless charging process starts
when you put a Qi-enabled cellular
phone on the wireless charging unit.
1. Remove other items, including thesmart key, from the wireless charg-
ing unit. If not, the wireless charg-
ing process may be interrupted.
Place the cellular phone on the
center of charging pad.
2. The indicator light is orange when the cellular phone is charging. The
indicator light turns green when
phone charging is completed.
3. You can turn ON or OFF the wire- less charging function in the user
settings mode on the instrument
cluster. For further information,
refer to the "LCD Display Modes"
in this chapter.
OAE046444N
Page 249 of 603
3-157
Convenient features of your vehicle
3
(Continued)
Some magnetic items like creditcards, phone cards or rail tickets
may be damaged if left with the
cellular phone during the charg-
ing process.
If the cellular phone without the wireless charging function or
the metallic items are placed on
the charging pad, it may cause
slight noise. This noise does not
affect the cellular phone and the
vehicle, because this noise is an
operating sound during deter-
mining the item on the charging
pad.
If the ignition switch is in the OFF position, the charging also
stops.Clock
Vehicles with Audio system
Select the [SETUP] button on the
audio system ➟ Select [Date/Time].
Set time: Set the time displayed on the audio screen.
Time format: Choose between 12- hour and 24-hour time formats.
Vehicles with Navigation system
Select the Settings menu on the
Navigation system ➟Select
[Date/Time].
GPS time: Displays time according to the received GNSS time.
24-hour: Switches to 12 hour or 24 hour.
Clothes Hanger (if equipped)
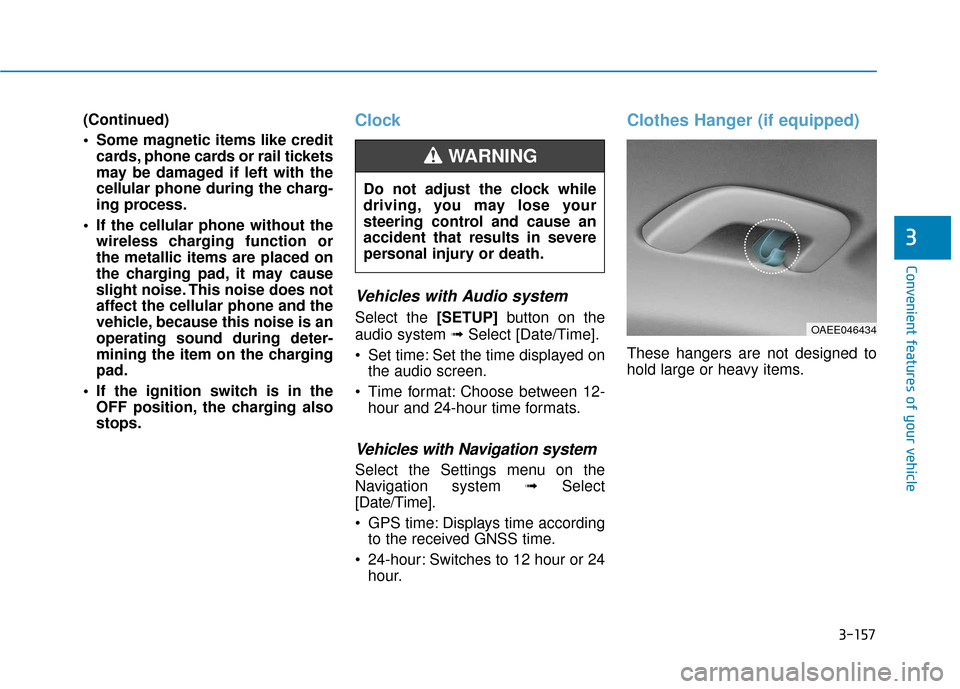
These hangers are not designed to
hold large or heavy items.
Do not adjust the clock while
driving, you may lose your
steering control and cause an
accident that results in severe
personal injury or death.
WARNING
OAEE046434
Page 250 of 603
3-158
Convenient features of your vehicle
Floor Mat Anchor(s)
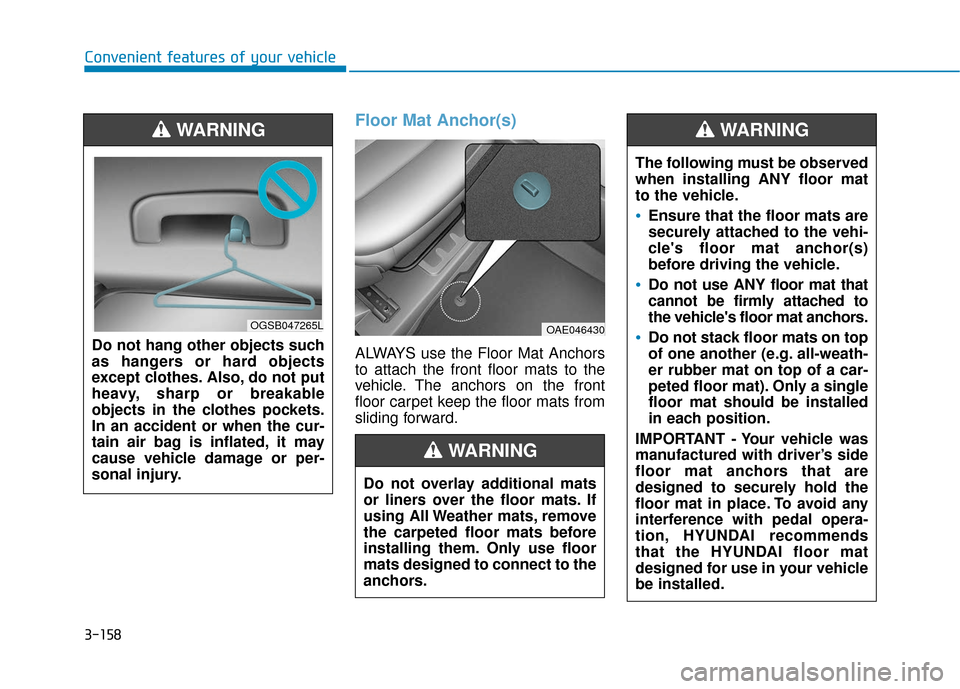
ALWAYS use the Floor Mat Anchors
to attach the front floor mats to the
vehicle. The anchors on the front
floor carpet keep the floor mats from
sliding forward.
Do not hang other objects such
as hangers or hard objects
except clothes. Also, do not put
heavy, sharp or breakable
objects in the clothes pockets.
In an accident or when the cur-
tain air bag is inflated, it may
cause vehicle damage or per-
sonal injury.
WARNING
OGSB047265LOAE046430
Do not overlay additional mats
or liners over the floor mats. If
using All Weather mats, remove
the carpeted floor mats before
installing them. Only use floor
mats designed to connect to the
anchors.
WARNING
The following must be observed
when installing ANY floor mat
to the vehicle.
Ensure that the floor mats are
securely attached to the vehi-
cle's floor mat anchor(s)
before driving the vehicle.
Do not use ANY floor mat that
cannot be firmly attached to
the vehicle's floor mat anchors.
Do not stack floor mats on top
of one another (e.g. all-weath-
er rubber mat on top of a car-
peted floor mat). Only a single
floor mat should be installed
in each position.
IMPORTANT - Your vehicle was
manufactured with driver’s side
floor mat anchors that are
designed to securely hold the
floor mat in place. To avoid any
interference with pedal opera-
tion, HYUNDAI recommends
that the HYUNDAI floor mat
designed for use in your vehicle
be installed.
WARNING
Page 294 of 603
![Hyundai Ioniq Hybrid 2019 Owners Manual 4-42
Multimedia System
Sound
Press the [SETUP]button on the
audio system ➟ Select [Sound].
Position: Sound balance and pan- ning can be adjusted.
Tone: Sound tone color can be adjusted.
Speed de Hyundai Ioniq Hybrid 2019 Owners Manual 4-42
Multimedia System
Sound
Press the [SETUP]button on the
audio system ➟ Select [Sound].
Position: Sound balance and pan- ning can be adjusted.
Tone: Sound tone color can be adjusted.
Speed de](/manual-img/35/14928/w960_14928-293.png)
4-42
Multimedia System
Sound
Press the [SETUP]button on the
audio system ➟ Select [Sound].
Position: Sound balance and pan- ning can be adjusted.
Tone: Sound tone color can be adjusted.
Speed dependent volume: Automatically adjust volume based
on vehicle speed.
Beep: Select whether to play a beep sound when the screen is touched.
Date/Time
Press the [SETUP] button on the
audio system ➟ Select [Date/Time].
Set Time: Set the time displayed on the audio screen.
Time Format: Choose between 12-
hour and 24-hour time formats.
Set Date: Set the date displayed on the audio screen.
Bluetooth
Press the [SETUP] button on the
audio system ➟ Select [Bluetooth].
Connections: Control pairing, dele- tion, connection and disconnection
of
Blluetooth®Wireless Technology
devices.
Auto Connection Priority: Set the
connection priority of
Bluetooth®
Wireless Technology devices when
the vehicle is started.
Download Contacts: Contacts can be downloaded from connected
Bluetooth®Wireless Technology
devices. Bluetooth Voice Prompts*: Play or
mute voice prompts for
Bluetooth®
Wireless Technology de vice pair-
ing, connection and errors.
* if equipped
Information
• When paired devices are deleted, the call history and contacts of the
device saved to the audio system are
deleted.
•ForBluetooth
®Wireless Technology
connections with low connection
priority, some time may be required
for the connection to be established.
• Contacts can be downloaded only from the currently connected
Bluetooth
®Wireless Technology
device.
• If no Bluetooth
®Wireless Technology
device is connected, the Download
Contacts button is disabled.
i
Date/Time Setting Distraction
Adjusting the date/time setting
while driving can result in a loss
of vehicle control that may lead
to an accident, severe personal-
injury, and death.
WARNING
Page 302 of 603
5-6
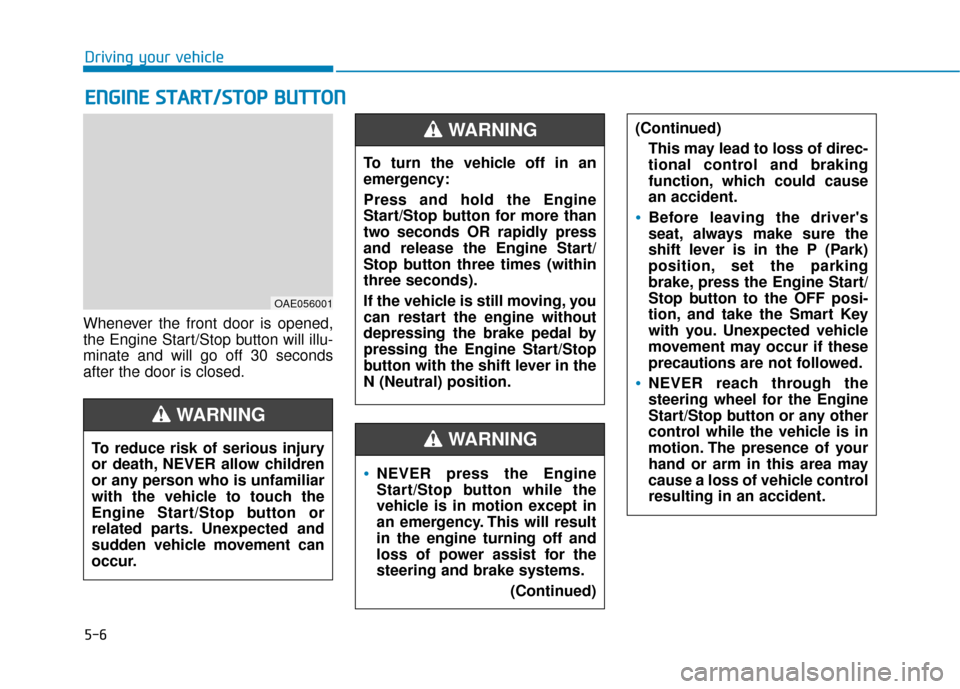
Whenever the front door is opened,
the Engine Start/Stop button will illu-
minate and will go off 30 seconds
after the door is closed.
E EN
N G
GI
IN
N E
E
S
S T
T A
A R
RT
T/
/S
S T
T O
O P
P
B
B U
U T
TT
TO
O N
N
Driving your vehicle
To reduce risk of serious injury
or death, NEVER allow children
or any person who is unfamiliar
with the vehicle to touch the
Engine Start/Stop button or
related parts. Unexpected and
sudden vehicle movement can
occur.
WARNING
OAE056001
NEVER press the Engine
Start/Stop button while the
vehicle is in motion except in
an emergency. This will result
in the engine turning off and
loss of power assist for the
steering and brake systems. (Continued)
WARNING
To turn the vehicle off in an
emergency:
Press and hold the Engine
Start/Stop button for more than
two seconds OR rapidly press
and release the Engine Start/
Stop button three times (within
three seconds).
If the vehicle is still moving, you
can restart the engine without
depressing the brake pedal by
pressing the Engine Start/Stop
button with the shift lever in the
N (Neutral) position.
WARNING (Continued)This may lead to loss of direc-
tional control and braking
function, which could cause
an accident.
Before leaving the driver's
seat, always make sure the
shift lever is in the P (Park)
position, set the parking
brake, press the Engine Start/
Stop button to the OFF posi-
tion, and take the Smart Key
with you. Unexpected vehicle
movement may occur if these
precautions are not followed.
NEVER reach through the
steering wheel for the Engine
Start/Stop button or any other
control while the vehicle is in
motion. The presence of your
hand or arm in this area may
cause a loss of vehicle control
resulting in an accident.
Page 303 of 603
5-7
Driving your vehicle
5
Engine Start/Stop Button Positions
Button PositionAction Notice
OFF
To turn off the vehicle, press the Engine
Start/Stop button with shift lever in P (Park).
When you press the Engine Start/Stop but-
ton without the shift lever in P (Park), the
Engine Start/Stop button does not turn to the
OFF position, but turns to the ACC position.
ACC Press the Engine Start/Stop button when the
button is in the OFF position without depress-
ing the brake pedal.
Some electrical accessories are usable. If you leave the Engine Start/Stop button in the
ACC position for more than one hour, the bat-
tery power will turn off automatically to prevent
the battery from discharging.