2019 Hyundai Ioniq Hybrid acc position
[x] Cancel search: acc positionPage 314 of 603
5-18
Driving your vehicle
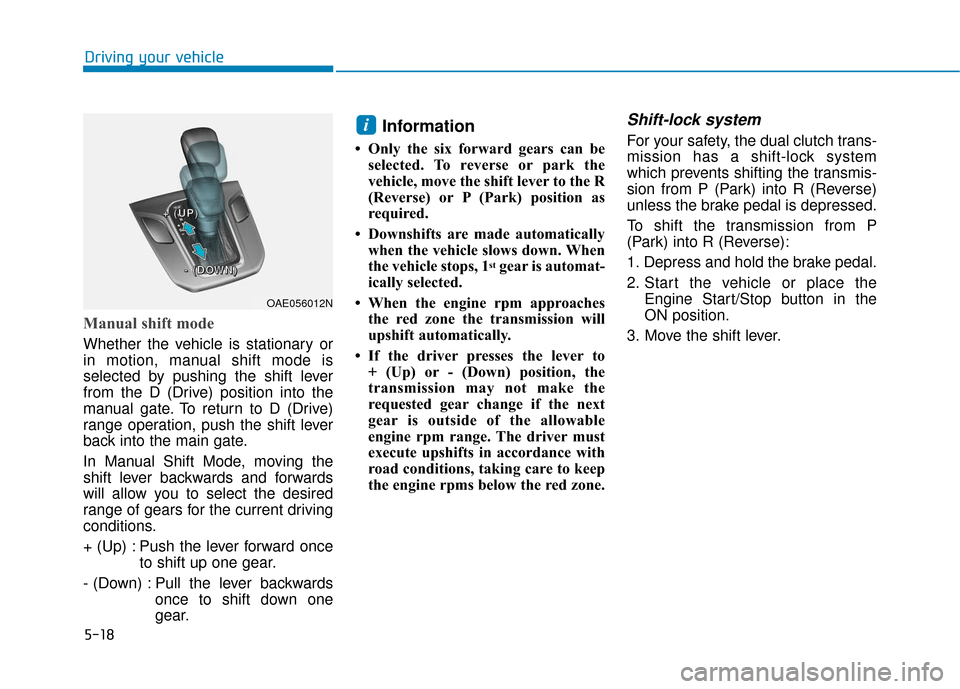
Manual shift mode
Whether the vehicle is stationary or
in motion, manual shift mode is
selected by pushing the shift lever
from the D (Drive) position into the
manual gate. To return to D (Drive)
range operation, push the shift lever
back into the main gate.
In Manual Shift Mode, moving the
shift lever backwards and forwards
will allow you to select the desired
range of gears for the current driving
conditions.
+ (Up) : Push the lever forward onceto shift up one gear.
- (Down) : Pull the lever backwards once to shift down one
gear.
Information
• Only the six forward gears can beselected. To reverse or park the
vehicle, move the shift lever to the R
(Reverse) or P (Park) position as
required.
• Downshifts are made automatically when the vehicle slows down. When
the vehicle stops, 1
stgear is automat-
ically selected.
• When the engine rpm approaches the red zone the transmission will
upshift automatically.
• If the driver presses the lever to + (Up) or - (Down) position, the
transmission may not make the
requested gear change if the next
gear is outside of the allowable
engine rpm range. The driver must
execute upshifts in accordance with
road conditions, taking care to keep
the engine rpms below the red zone.
Shift-lock system
For your safety, the dual clutch trans-
mission has a shift-lock system
which prevents shifting the transmis-
sion from P (Park) into R (Reverse)
unless the brake pedal is depressed.
To shift the transmission from P
(Park) into R (Reverse):
1. Depress and hold the brake pedal.
2. Start the vehicle or place the Engine Start/Stop button in the
ON position.
3. Move the shift lever.i
OAE056012N
+
+
+
+
(
(
(
(
U
U
U
U
P
P
P
P
)
)
)
)
-
-
-
-
(
(
(
(
D
D
D
D
O
O
O
O
W
W
W
W
N
N
N
N
)
)
)
)
Page 315 of 603
5-19
Driving your vehicle
5
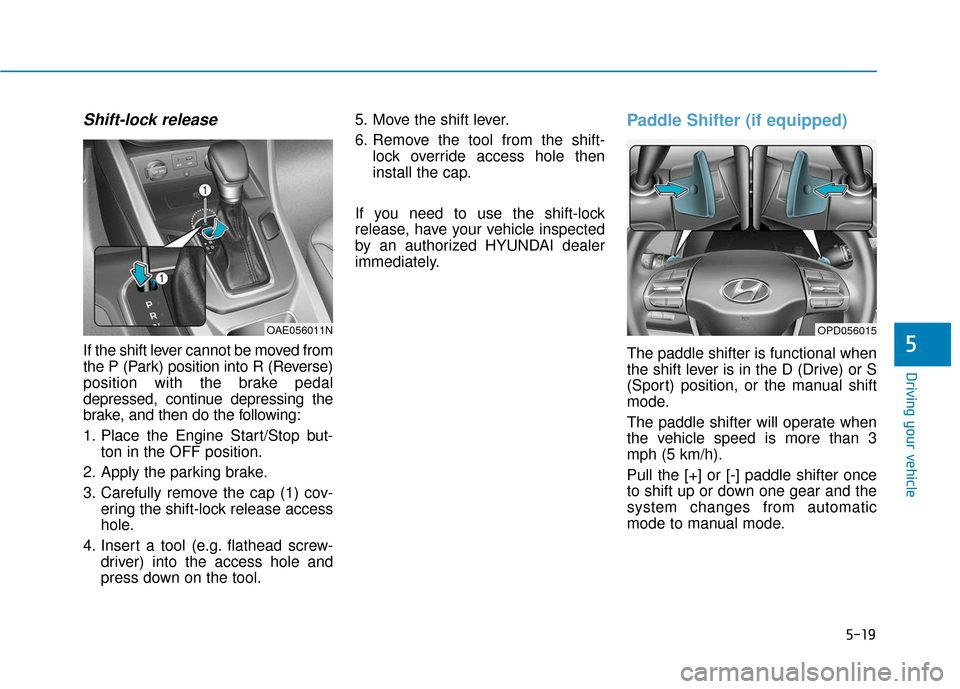
Shift-lock release
If the shift lever cannot be moved from
the P (Park) position into R (Reverse)
position with the brake pedal
depressed, continue depressing the
brake, and then do the following:
1. Place the Engine Start/Stop but-ton in the OFF position.
2. Apply the parking brake.
3. Carefully remove the cap (1) cov- ering the shift-lock release access
hole.
4. Insert a tool (e.g. flathead screw- driver) into the access hole and
press down on the tool. 5. Move the shift lever.
6. Remove the tool from the shift-
lock override access hole then
install the cap.
If you need to use the shift-lock
release, have your vehicle inspected
by an authorized HYUNDAI dealer
immediately.
Paddle Shifter (if equipped)
The paddle shifter is functional when
the shift lever is in the D (Drive) or S
(Sport) position, or the manual shift
mode.
The paddle shifter will operate when
the vehicle speed is more than 3
mph (5 km/h).
Pull the [+] or [-] paddle shifter once
to shift up or down one gear and the
system changes from automatic
mode to manual mode.
OAE056011NOPD056015
Page 316 of 603
5-20
Driving your vehicle
The system changes from manual mode to automatic mode when
- the vehicle speed is lower than 3mph (5 km/h),
- you depress the accelerator pedal for more than 5 seconds,
- you pull the [+] paddle shifter for more than 1 second, or
- you move the shift lever from D (Drive) to S (Sport) or manual
shift mode (+, -) and then back to
D (Drive).
Information
If the [+] and [-] paddle shifters are
pulled at the same time, gear shift may
not occur.
Parking
Always come to a complete stop and
continue to depress the brake pedal.
Move the shift lever into the P (Park)
position, apply the parking brake,
and place the Engine Start/Stop but-
ton in the OFF position. Take the key
with you when exiting the vehicle.
Good Driving Practices
Never move the shift lever from P (Park) or N (Neutral) to any other
position with the accelerator pedal
depressed.
Never move the shift lever into P (Park) when the vehicle is in
motion.
Be sure the vehicle is completely
stopped before you attempt to shift
into R (Reverse) or D (Drive).
Do not move the shift lever to N (Neutral) when driving. Doing so
may result in an accident because
of a loss of engine braking and the
transmission could be damaged.
Do not drive with your foot resting on the brake pedal. Even light, but
consistent pedal pressure can
result in the brakes overheating,
brake wear and possibly even
brake failure.
Depressing both accelerator and brake pedals at the same time can
trigger logic for engine power
reduction to assure vehicle decel-
eration. Vehicle acceleration will
resume after the brake pedal is
released.
i
When you stay in the vehicle
with the engine running, be
careful not to depress the accel-
erator pedal for a long period of
time. The engine or exhaust
system may overheat and start
a fire.
The exhaust gas and the
exhaust system are very hot.
Keep away from the exhaust
system components.
Do not stop or park over flam-
mable materials, such as dry
grass, paper or leaves. They
may ignite and cause a fire.
WARNING
Page 318 of 603
5-22
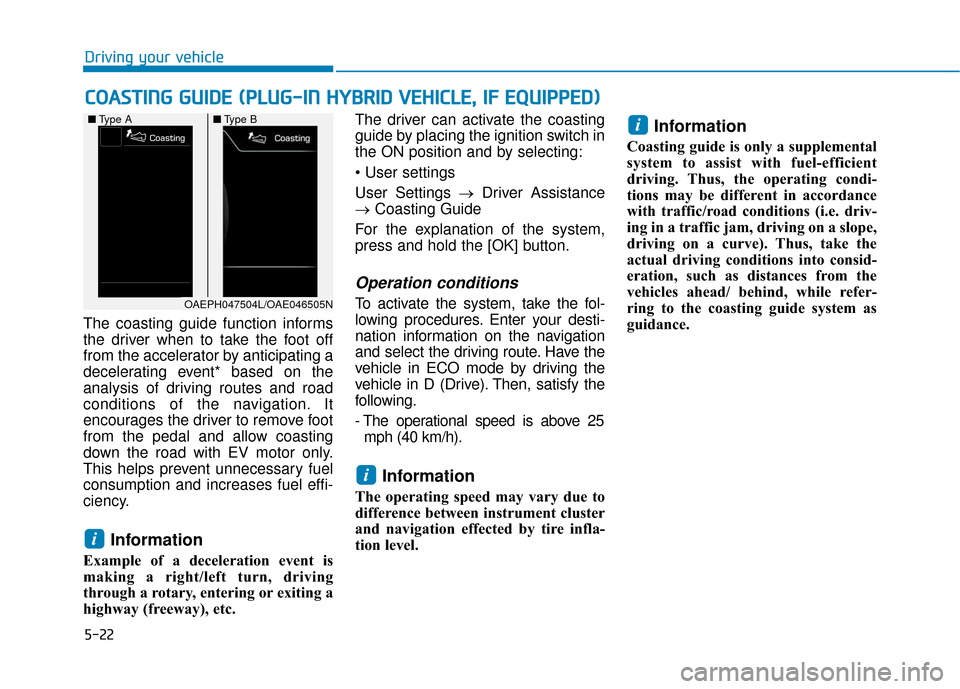
The coasting guide function informs
the driver when to take the foot off
from the accelerator by anticipating a
decelerating event* based on the
analysis of driving routes and road
conditions of the navigation. It
encourages the driver to remove foot
from the pedal and allow coasting
down the road with EV motor only.
This helps prevent unnecessary fuel
consumption and increases fuel effi-
ciency.
Information
Example of a deceleration event is
making a right/left turn, driving
through a rotary, entering or exiting a
highway (freeway), etc. The driver can activate the coasting
guide by placing the ignition switch in
the ON position and by selecting:
User Settings →
Driver Assistance
→ Coasting Guide
For the explanation of the system,
press and hold the [OK] button.
Operation conditions
To activate the system, take the fol-
lowing procedures. Enter your desti-
nation information on the navigation
and select the driving route. Have the
vehicle in ECO mode by driving the
vehicle in D (Drive). Then, satisfy the
following.
- The operational speed is above 25 mph (40 km/h).
Information
The operating speed may vary due to
difference between instrument cluster
and navigation effected by tire infla-
tion level.
Information
Coasting guide is only a supplemental
system to assist with fuel-efficient
driving. Thus, the operating condi-
tions may be different in accordance
with traffic/road conditions (i.e. driv-
ing in a traffic jam, driving on a slope,
driving on a curve). Thus, take the
actual driving conditions into consid-
eration, such as distances from the
vehicles ahead/ behind, while refer-
ring to the coasting guide system as
guidance.
i
i
i
C C O
O A
AS
ST
T I
IN
N G
G
G
G U
U I
ID
D E
E
(
( P
P L
LU
U G
G-
-I
IN
N
H
H Y
Y B
BR
RI
ID
D
V
V E
EH
H I
IC
C L
LE
E ,
,
I
IF
F
E
E Q
Q U
UI
IP
P P
PE
ED
D )
)
Driving your vehicle
OAEPH047504L/OAE046505N
■
Type A ■Type B
Page 321 of 603
5-25
Driving your vehicle
5
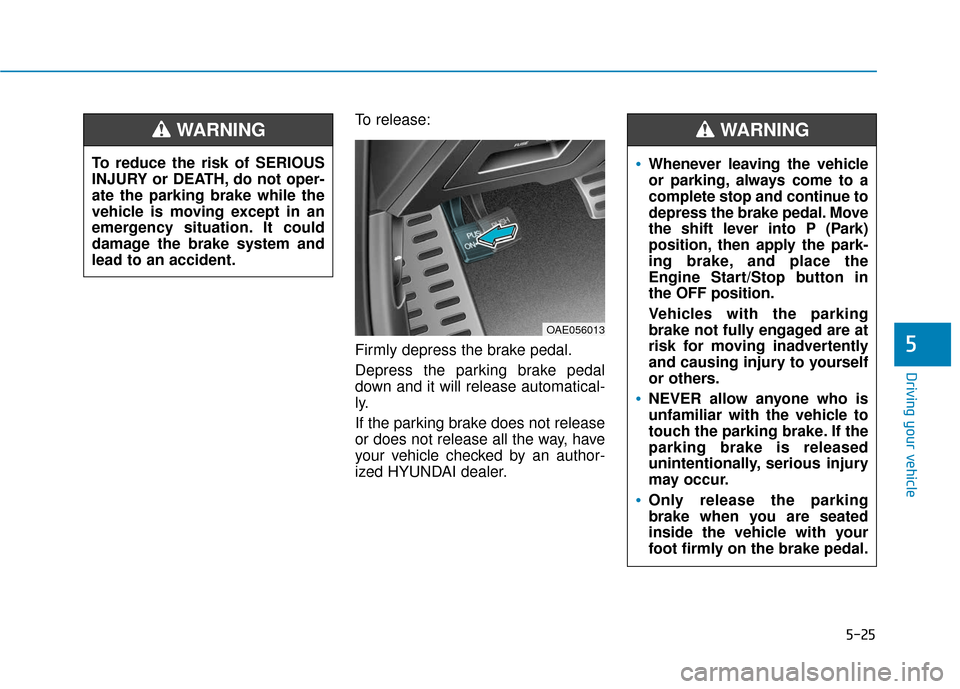
To release:
Firmly depress the brake pedal.
Depress the parking brake pedal
down and it will release automatical-
ly.
If the parking brake does not release
or does not release all the way, have
your vehicle checked by an author-
ized HYUNDAI dealer.
OAE056013
Whenever leaving the vehicle
or parking, always come to a
complete stop and continue to
depress the brake pedal. Move
the shift lever into P (Park)
position, then apply the park-
ing brake, and place the
Engine Start/Stop button in
the OFF position.
Vehicles with the parking
brake not fully engaged are at
risk for moving inadvertently
and causing injury to yourself
or others.
NEVER allow anyone who is
unfamiliar with the vehicle to
touch the parking brake. If the
parking brake is released
unintentionally, serious injury
may occur.
Only release the parking
brake when you are seated
inside the vehicle with your
foot firmly on the brake pedal.
WARNING
To reduce the risk of SERIOUS
INJURY or DEATH, do not oper-
ate the parking brake while the
vehicle is moving except in an
emergency situation. It could
damage the brake system and
lead to an accident.
WARNING
Page 322 of 603
5-26
Driving your vehicle
Do not apply the accelerator pedal while the parking brake is
engaged. If you depress the
accelerator pedal with the park-
ing brake engaged, warning will
sound. Damage to the parking
brake may occur.
Driving with the parking brake on can overheat the braking sys-
tem and cause premature wear
or damage to brake parts. Make
sure the parking brake is
released and the Brake Warning
Light is off before driving. Check the Parking
Brake Warning Light
by placing the Engine
Start/Stop button to
the ON position (vehi-
cle not in the ready
( ) mode).
This light will be illuminated when the
parking brake is applied with the
Engine Start/Stop button in the
START or ON position.
Before driving, be sure the parking
brake is released and the Brake
Warning Light is OFF.
If the Parking Brake Warning Light
remains on after the parking brake is
released while the vehicle is in the
ready ( ) mode, there may be a
malfunction in the brake system.
Immediate attention is necessary.
If at all possible, cease driving the
vehicle immediately. If that is not pos-
sible, use extreme caution while
operating the vehicle and only con-
tinue to drive the vehicle until you
can reach a safe location.
Anti-lock Brake System (ABS)NOTICE
An Anti-Lock Braking System
(ABS) or an Electronic Stability
Control (ESC) system will not
prevent accidents due to
improper or dangerous driving
maneuvers. Even though vehi-
cle control is improved during
emergency braking, always
maintain a safe distance
between you and objects ahead
of you. Vehicle speeds should
always be reduced during
extreme road conditions. The
braking distance for cars
equipped with ABS or ESC may
be longer than for those without
these systems in the following
road conditions.
(Continued)
WARNING
Page 325 of 603
5-29
Driving your vehicle
5
ESC operation
ESC ON condition
When the Engine Start/Stop button
is in the ON position, the ESC and
the ESC OFF indicator lights illumi-
nate for approximately three sec-
onds. After both lights go off, the
ESC is enabled.
When operating
When the ESC is in opera-
tion, the ESC indicator light
blinks:
When you apply your brakes under conditions which may lock the
wheels, you may hear sounds from
the brakes, or feel a corresponding
sensation in the brake pedal. This
is normal and it means your ESC is
active.
When the ESC activates, the vehi- cle may not respond to the accel-
erator as it does under routine con-
ditions.
If the Cruise Control was in use when the ESC activates, the
Cruise Control automatically disen-
gages. The Cruise Control can be
reengaged when the road condi-
tions allow. See "Cruise Control
System" later in this chapter. (if
equipped)
When moving out of the mud or driving on a slippery road, the
engine RPM (revolutions per
minute) may not increase even if
you press the accelerator pedal
deeply. This is to maintain the sta-
bility and traction of the vehicle and
does not indicate a problem.
ESC OFF condition
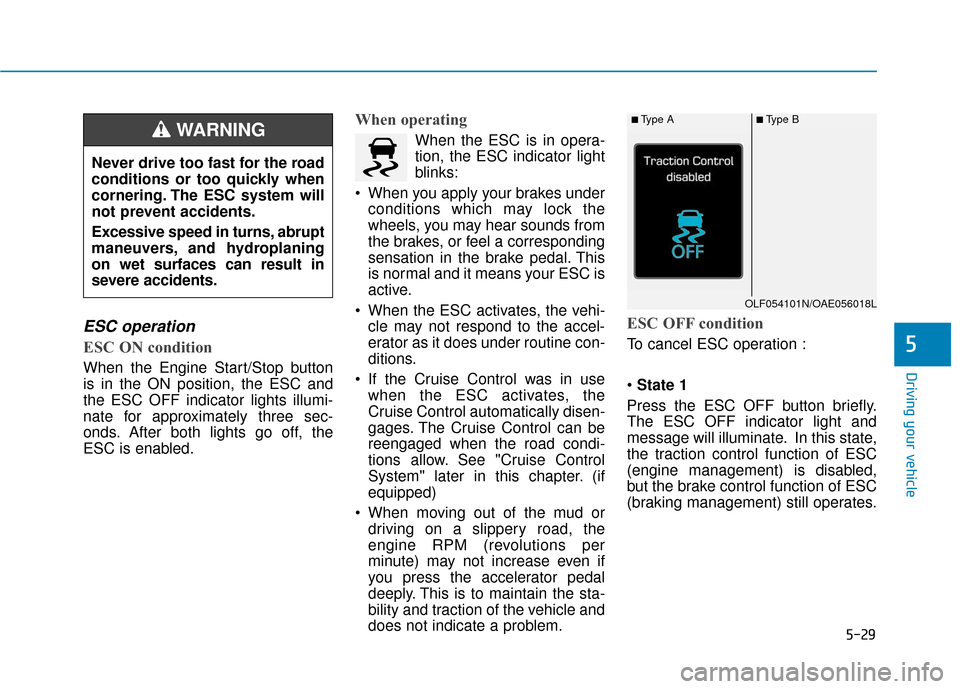
To cancel ESC operation :
State 1
Press the ESC OFF button briefly.
The ESC OFF indicator light and
message will illuminate. In this state,
the traction control function of ESC
(engine management) is disabled,
but the brake control function of ESC
(braking management) still operates.
Never drive too fast for the road
conditions or too quickly when
cornering. The ESC system will
not prevent accidents.
Excessive speed in turns, abrupt
maneuvers, and hydroplaning
on wet surfaces can result in
severe accidents.
WARNING ■Type A■Type B
OLF054101N/OAE056018L
Page 326 of 603
5-30
Driving your vehicle
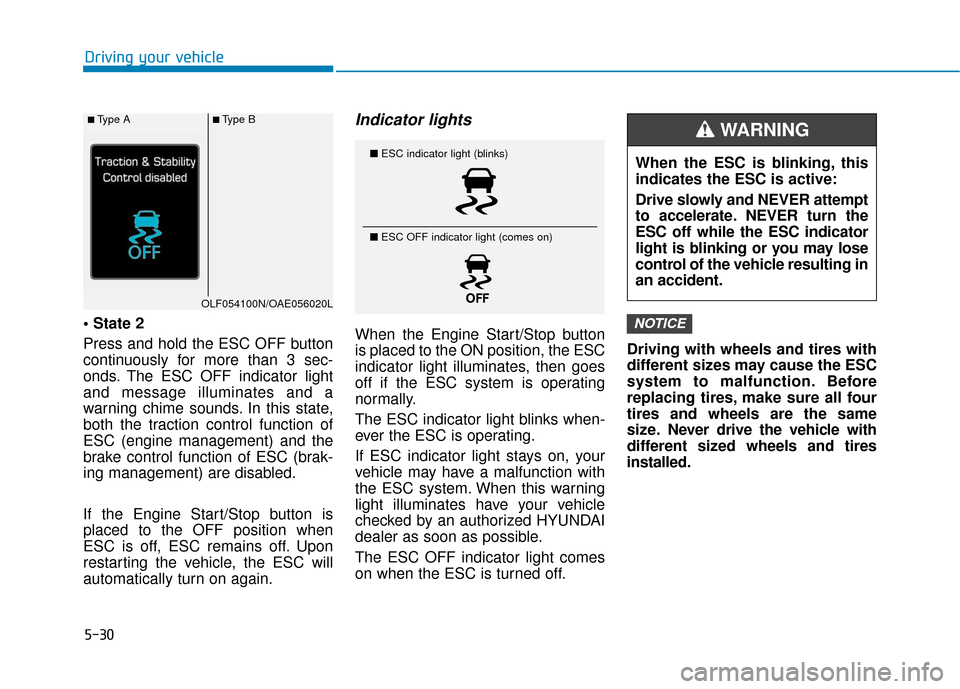
Press and hold the ESC OFF button
continuously for more than 3 sec-
onds. The ESC OFF indicator light
and message illuminates and a
warning chime sounds. In this state,
both the traction control function of
ESC (engine management) and the
brake control function of ESC (brak-
ing management) are disabled.
If the Engine Start/Stop button is
placed to the OFF position when
ESC is off, ESC remains off. Upon
restarting the vehicle, the ESC will
automatically turn on again.
Indicator lights
When the Engine Start/Stop button
is placed to the ON position, the ESC
indicator light illuminates, then goes
off if the ESC system is operating
normally.
The ESC indicator light blinks when-
ever the ESC is operating.
If ESC indicator light stays on, your
vehicle may have a malfunction with
the ESC system. When this warning
light illuminates have your vehicle
checked by an authorized HYUNDAI
dealer as soon as possible.
The ESC OFF indicator light comes
on when the ESC is turned off. Driving with wheels and tires with
different sizes may cause the ESC
system to malfunction. Before
replacing tires, make sure all four
tires and wheels are the same
size. Never drive the vehicle with
different sized wheels and tires
installed.NOTICE
■
ESC indicator light (blinks)
■ ESC OFF indicator light (comes on)When the ESC is blinking, this
indicates the ESC is active:
Drive slowly and NEVER attempt
to accelerate. NEVER turn the
ESC off while the ESC indicator
light is blinking or you may lose
control of the vehicle resulting in
an accident.
WARNING ■Type A■Type B
OLF054100N/OAE056020L