2019 Hyundai Ioniq Electric change time
[x] Cancel search: change timePage 109 of 555
3-24
Convenient features of your vehicle
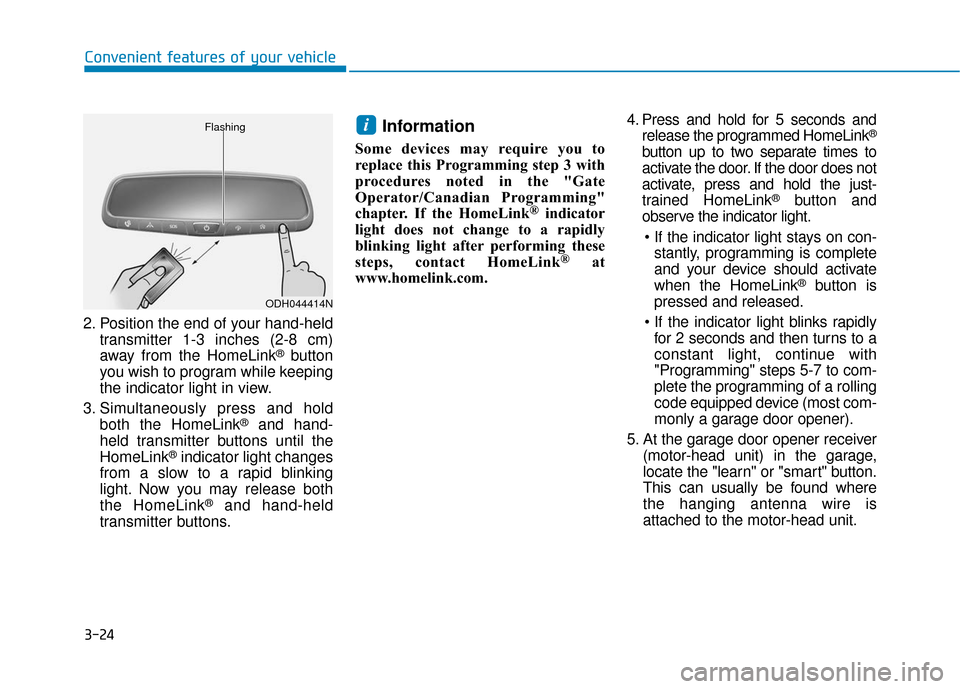
2. Position the end of your hand-held transmitter 1-3 inches (2-8 cm)
away from the HomeLink
®button
you wish to program while keeping
the indicator light in view.
3. Simultaneously press and hold both the HomeLink
®and hand-
held transmitter buttons until the
HomeLink
®indicator light changes
from a slow to a rapid blinking
light. Now you may release both
the HomeLink
®and hand-held
transmitter buttons.
Information
Some devices may require you to
replace this Programming step 3 with
procedures noted in the "Gate
Operator/Canadian Programming"
chapter. If the HomeLink
®indicator
light does not change to a rapidly
blinking light after performing these
steps, contact HomeLink
®at
www.homelink.com. 4. Press and hold for 5 seconds and
release the programmed HomeLink
®
button up to two separate times to
activate the door. If the door does not
activate, press and hold the just-
trained HomeLink
®button and
observe the indicator light.
stantly, programming is complete
and your device should activate
when the HomeLink
®button is
pressed and released.
for 2 seconds and then turns to a
constant light, continue with
"Programming" steps 5-7 to com-
plete the programming of a rolling
code equipped device (most com-
monly a garage door opener).
5. At the garage door opener receiver (motor-head unit) in the garage,
locate the "learn" or "smart" button.
This can usually be found where
the hanging antenna wire is
attached to the motor-head unit.
i
ODH044414N
Flashing
Page 111 of 555
3-26
Convenient features of your vehicle
Erasing HomeLink®buttons
Individual buttons cannot be erased.
However, to erase all three pro-
grammed buttons:
1. Press and hold the two outerHomeLink
®buttons until the indi-
cator light begins to flash after 10
seconds.
2. Release both buttons. Do not hold for longer than 20 seconds.
The Integrated HomeLink
®Wireless
Control System is now in the training
(learn) mode and can be pro-
grammed at any time following the
appropriate steps in the
Programming chapters above.
NVS
®is a registered trademark and
Z-Nav™ is a trademark of the Gentex
Corporation, Zeeland, Michigan.
HomeLink
®is a registered trademark
owned by Johnson Controls,
Incorporated, Milwaukee, Wisconsin.
FCC ID: NZLTLMHL4
IC: 4112A-TLMHL4
Information
This device complies with Part 15 of
the FCC Rules.
Operation is subject to the following
three conditions:
1. This device may not cause harmful interference, and
2. This device must accept any inter- ference received, including interfer-
ence that may cause undesired
operation.
3. The transceiver has been tested and complies with FCC and Industry
Canada rules. Changes or modifica-
tions not expressly approved by the
party responsible for compliance
could void the user's authority to
operate the device.
Electric chromic mirror (ECM)with compass and HomeLink®
system (for Canada)
Your vehicle may be equipped with a
Gentex Automatic-Dimming Mirror
with a Z-Nav™ Electronic Compass
Display and an Integrated HomeLink
®
Wireless Control System.
During nighttime driving, this feature
will automatically detect and reduce
rearview mirror glare while the com-
pass indicates the direction the vehi-
cle is pointed. The HomeLink
®
Universal Transceiver allows you to
activate your garage door(s), electric
gate, home lighting, etc.
i
Page 118 of 555
3-33
Convenient features of your vehicle
3
Reprogramming a singleHomeLink®button
To program a new device to a previ-
ously trained HomeLink®button, fol-
low these steps:
1. Press and hold the desired HomeLink
®button. Do NOT
release until step 4 has been com-
pleted.
2. When the indicator light begins to flash slowly (after 20 seconds),
position the handheld transmitter 1
to 3 inches away from the
HomeLink
®surface.
3. Press and hold the handheld transmitter button. The HomeLink
®
indicator light will flash, first slowly
and then rapidly.
4. When the indicator light begins to flash rapidly, release both buttons.
5. Press and hold the just-trained HomeLink
®button and observe
the red Status Indicator LED. If the
indicator light stays on constantly,
programming is complete and
your new device should activate.
Erasing HomeLink®buttons
Individual buttons cannot be erased.
However, to erase all three pro-
grammed buttons:
1. Press and hold the two outer HomeLink
®buttons until the indi-
cator light begins to flash-after 20
seconds.
2. Release both buttons. Do not hold for longer than 30 seconds.
The Integrated HomeLink
®Wireless
Control System is now in the training
(learn) mode and can be pro-
grammed at any time following the
appropriate steps in the Programming
chapters above.
NVS
®is a registered trademark and
Z-Nav™ is a trademark of the Gentex
Corporation, Zeeland, Michigan.
HomeLink
®is a registered trademark
owned by Johnson Controls,
Incorporated, Milwaukee, Wisconsin.
FCC ID: NZLZTVHL3
IC: 4112A-ZTVHL3
Information
This device complies with Part 15 of
the FCC Rules.
Operation is subject to the following
three conditions:
1. This device may not cause harmful interference, and
2. This device must accept any interfer- ence received, including interference
that may cause undesired operation.
3. The transceiver has been tested and complies with FCC and Industry
Canada rules. Changes or modifica-
tions not expressly approved by the
party responsible for compliance
could void the user’s authority to
operate the device.
i
Page 153 of 555
3-68
Convenient features of your vehicle
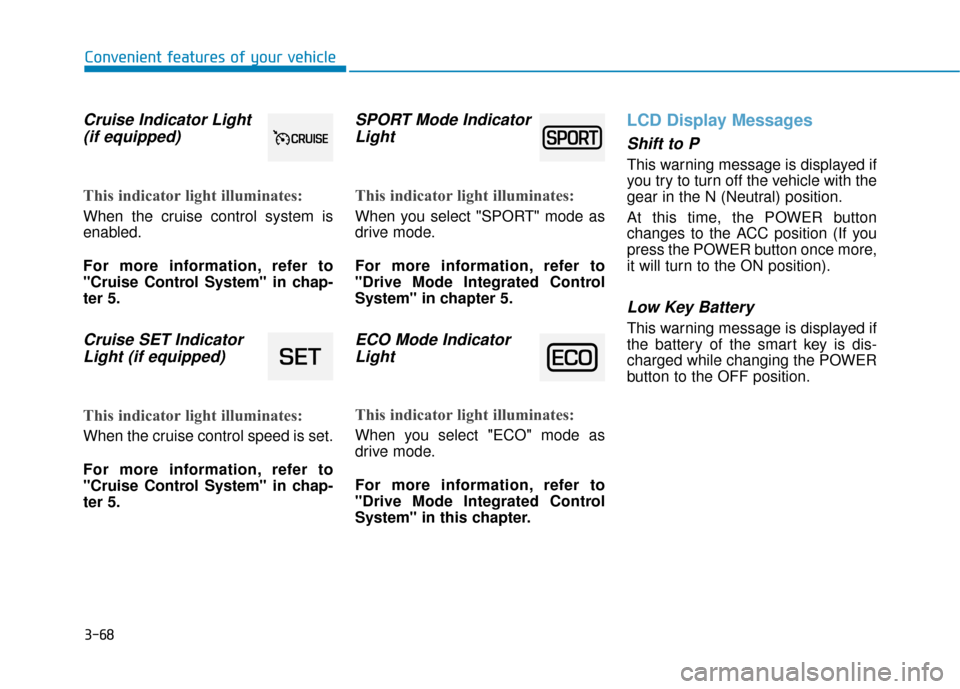
Cruise Indicator Light(if equipped)
This indicator light illuminates:
When the cruise control system is
enabled.
For more information, refer to
"Cruise Control System" in chap-
ter 5.
Cruise SET IndicatorLight (if equipped)
This indicator light illuminates:
When the cruise control speed is set.
For more information, refer to
"Cruise Control System" in chap-
ter 5.
SPORT Mode IndicatorLight
This indicator light illuminates:
When you select "SPORT" mode as
drive mode.
For more information, refer to
"Drive Mode Integrated Control
System" in chapter 5.
ECO Mode IndicatorLight
This indicator light illuminates:
When you select "ECO" mode as
drive mode.
For more information, refer to
"Drive Mode Integrated Control
System" in this chapter.
LCD Display Messages
Shift to P
This warning message is displayed if
you try to turn off the vehicle with the
gear in the N (Neutral) position.
At this time, the POWER button
changes to the ACC position (If you
press the POWER button once more,
it will turn to the ON position).
Low Key Battery
This warning message is displayed if
the battery of the smart key is dis-
charged while changing the POWER
button to the OFF position.
Page 154 of 555
3-69
Convenient features of your vehicle
3
Press POWER button whileturning wheel
This warning message is displayed if
the steering wheel does not unlock
normally when the POWER button is
pressed.
You should press the POWER button
while turning the steering wheel right
and left.
Check Steering Wheel LockSystem
This warning message is displayed if
the steering wheel does not lock nor-
mally while the POWER button
changes to the OFF position.
Press brake pedal to start vehicle
This warning message is displayed if
the POWER button changes to the
ACC position twice by pressing the
button repeatedly without depressing
the brake pedal.
You can start the vehicle by depress-
ing the brake pedal.
Key not in vehicle
This warning message is displayed if
the smart key is not in the vehicle
when you press the POWER button.
When attempting to start the vehicle,
always have the smart key with you.
Key not detected
This warning message is displayed if
the smart key is not detected when
you press the POWER button.
Press POWER button again
This message is displayed if you
were unable to start the vehicle when
the POWER button was pressed.
If this occurs, attempt to start the
vehicle by pressing the POWER but-
ton again.
If the warning message appears
each time you press the POWER
button, have your vehicle inspected
by an authorized HYUNDAI dealer.
Page 185 of 555
3-100
Turn signals and lane changesignals
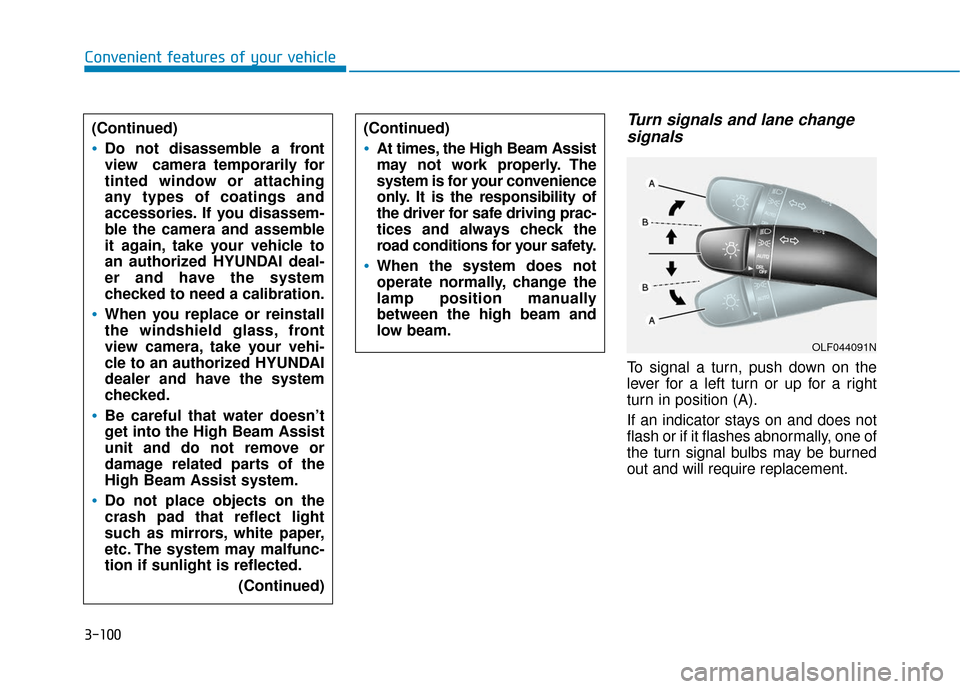
To signal a turn, push down on the
lever for a left turn or up for a right
turn in position (A).
If an indicator stays on and does not
flash or if it flashes abnormally, one of
the turn signal bulbs may be burned
out and will require replacement.
Convenient features of your vehicle
(Continued)
Do not disassemble a front
view camera temporarily for
tinted window or attaching
any types of coatings and
accessories. If you disassem-
ble the camera and assemble
it again, take your vehicle to
an authorized HYUNDAI deal-
er and have the system
checked to need a calibration.
When you replace or reinstall
the windshield glass, front
view camera, take your vehi-
cle to an authorized HYUNDAI
dealer and have the system
checked.
Be careful that water doesn’t
get into the High Beam Assist
unit and do not remove or
damage related parts of the
High Beam Assist system.
Do not place objects on the
crash pad that reflect light
such as mirrors, white paper,
etc. The system may malfunc-
tion if sunlight is reflected. (Continued)
(Continued)
At times, the High Beam Assist
may not work properly. The
system is for your convenience
only. It is the responsibility of
the driver for safe driving prac-
tices and always check the
road conditions for your safety.
When the system does not
operate normally, change the
lamp position manually
between the high beam and
low beam.
OLF044091N
Page 186 of 555
3-101
Convenient features of your vehicle
Onetouch turn signal function
To activate the One Touch Turn
Signal function, push the turn signal
lever up or down to position (B) and
then release it.
The lane change signals will blink 3,
5 or 7 times.
You can activate or deactivate the
One Touch Turn Signal function or
choose the number of blinking (3, 5,
or 7) from the User Settings mode
(Light) on the LCD display.
For more information, refer to the
"LCD Display" section in this
chapter.
Battery saver function
The purpose of this feature is to pre-
vent the battery from being dis-
charged. The system automatically
turns off the parking lamp when the
driver turns the vehicle off and opens
the driver-side door.
With this feature, the parking lamps
will turn off automatically if the driver
parks on the side of road at night.
If necessary, to keep the lamps on
when the the vehicle is turned off, per-
form the following:
1) Open the driver-side door.
2) Turn the parking lamps OFF andON again using the light switch on
the steering column.
Headlamp delay function (if equipped)
If the POWER button is placed in the
ACC position or the OFF position
with the headlamps ON, the head-
lamps (and/or parking lamps) remain
on for about 5 minutes. However, if
the driver’s door is opened and
closed, the headlights are turned off
after 15 seconds. Also, with the vehi-
cle off if the driver's door is opened
and closed, the headlamps (and/or
parking lamps) are turned off after 15
seconds.
The headlamps (and/or parking
lamps) can be turned off by pressing
the lock button on the smart key
twice or turning the light switch to the
OFF or AUTO position.
You can activate or deactivate the
Headlamp Delay function from the
User Settings mode (Light) on the
LCD display.
For more information, refer to the
"LCD Display" section in this
chapter.
3
Page 198 of 555
3-113
Convenient features of your vehicle
3
Automatic Heating and Air
Conditioning
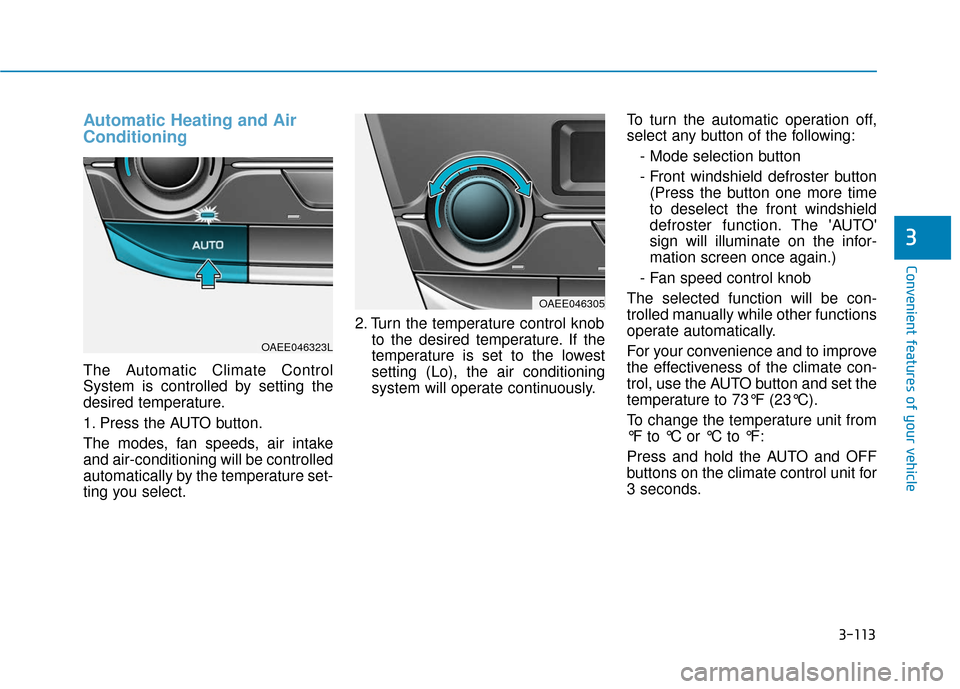
The Automatic Climate Control
System is controlled by setting the
desired temperature.
1. Press the AUTO button.
The modes, fan speeds, air intake
and air-conditioning will be controlled
automatically by the temperature set-
ting you select.2. Turn the temperature control knob
to the desired temperature. If the
temperature is set to the lowest
setting (Lo), the air conditioning
system will operate continuously. To turn the automatic operation off,
select any button of the following:
- Mode selection button
- Front windshield defroster button(Press the button one more time
to deselect the front windshield
defroster function. The 'AUTO'
sign will illuminate on the infor-
mation screen once again.)
- Fan speed control knob
The selected function will be con-
trolled manually while other functions
operate automatically.
For your convenience and to improve
the effectiveness of the climate con-
trol, use the AUTO button and set the
temperature to 73°F (23°C).
To change the temperature unit from
°F to °C or °C to °F:
Press and hold the AUTO and OFF
buttons on the climate control unit for
3 seconds.
OAEE046305
OAEE046323L