Page 117 of 555
3-32
Convenient features of your vehicle
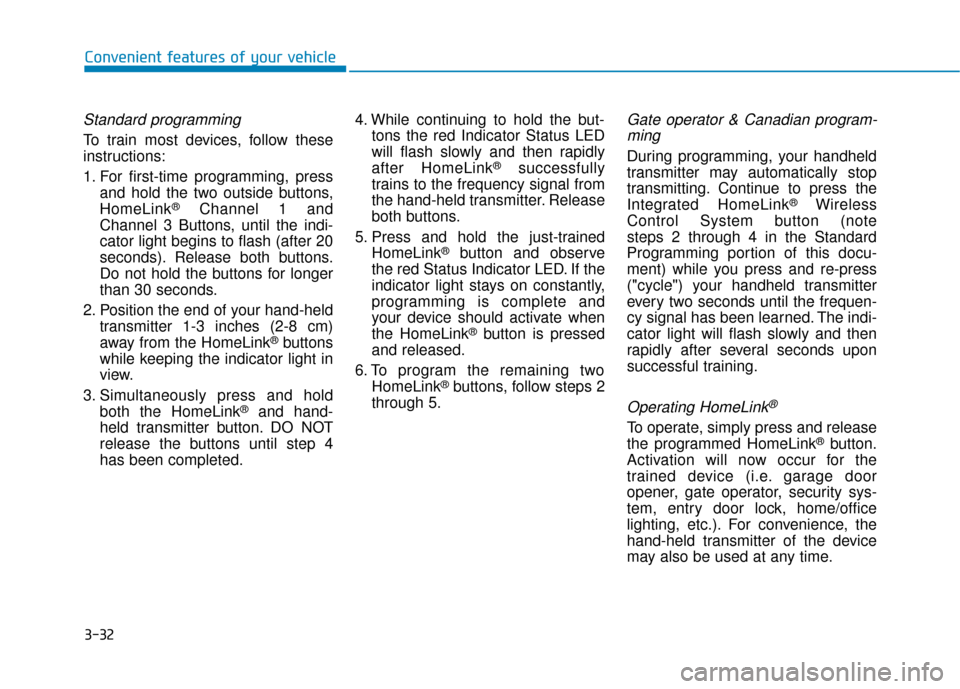
Standard programming
To train most devices, follow these
instructions:
1. For first-time programming, pressand hold the two outside buttons,
HomeLink
®Channel 1 and
Channel 3 Buttons, until the indi-
cator light begins to flash (after 20
seconds). Release both buttons.
Do not hold the buttons for longer
than 30 seconds.
2. Position the end of your hand-held transmitter 1-3 inches (2-8 cm)
away from the HomeLink
®buttons
while keeping the indicator light in
view.
3. Simultaneously press and hold both the HomeLink
®and hand-
held transmitter button. DO NOT
release the buttons until step 4
has been completed. 4. While continuing to hold the but-
tons the red Indicator Status LED
will flash slowly and then rapidly
after HomeLink
®successfully
trains to the frequency signal from
the hand-held transmitter. Release
both buttons.
5. Press and hold the just-trained HomeLink
®button and observe
the red Status Indicator LED. If the
indicator light stays on constantly,
programming is complete and
your device should activate when
the HomeLink
®button is pressed
and released.
6. To program the remaining two HomeLink
®buttons, follow steps 2
through 5.
Gate operator & Canadian program- ming
During programming, your handheld
transmitter may automatically stop
transmitting. Continue to press the
Integrated HomeLink
®Wireless
Control System button (note
steps 2 through 4 in the Standard
Programming portion of this docu-
ment) while you press and re-press
("cycle") your handheld transmitter
every two seconds until the frequen-
cy signal has been learned. The indi-
cator light will flash slowly and then
rapidly after several seconds upon
successful training.
Operating HomeLink®
To operate, simply press and release
the programmed HomeLink®button.
Activation will now occur for the
trained device (i.e. garage door
opener, gate operator, security sys-
tem, entry door lock, home/office
lighting, etc.). For convenience, the
hand-held transmitter of the device
may also be used at any time.
Page 118 of 555
3-33
Convenient features of your vehicle
3
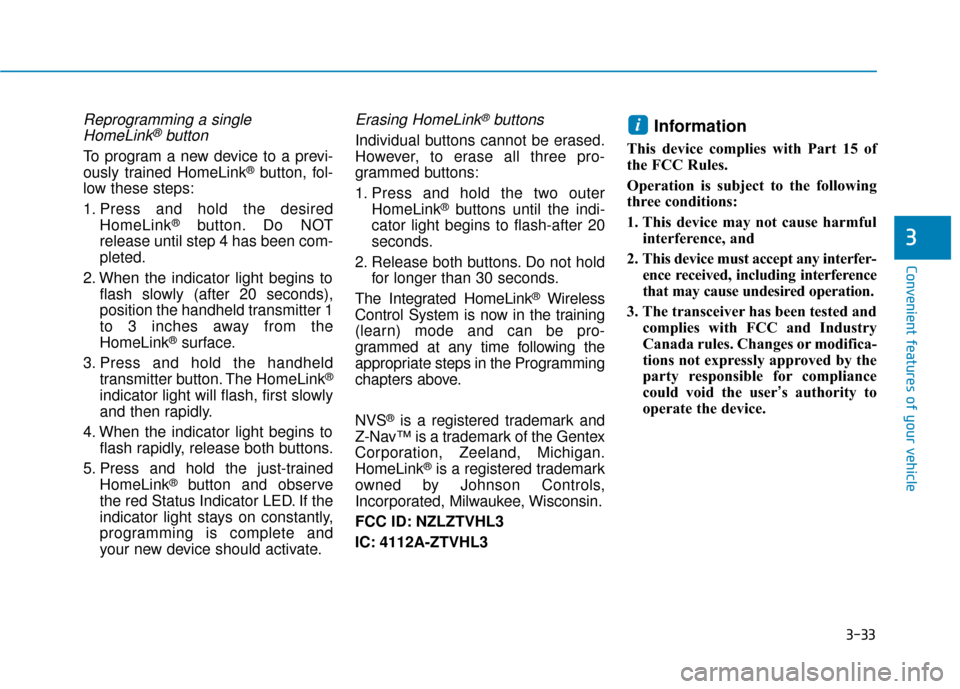
Reprogramming a singleHomeLink®button
To program a new device to a previ-
ously trained HomeLink®button, fol-
low these steps:
1. Press and hold the desired HomeLink
®button. Do NOT
release until step 4 has been com-
pleted.
2. When the indicator light begins to flash slowly (after 20 seconds),
position the handheld transmitter 1
to 3 inches away from the
HomeLink
®surface.
3. Press and hold the handheld transmitter button. The HomeLink
®
indicator light will flash, first slowly
and then rapidly.
4. When the indicator light begins to flash rapidly, release both buttons.
5. Press and hold the just-trained HomeLink
®button and observe
the red Status Indicator LED. If the
indicator light stays on constantly,
programming is complete and
your new device should activate.
Erasing HomeLink®buttons
Individual buttons cannot be erased.
However, to erase all three pro-
grammed buttons:
1. Press and hold the two outer HomeLink
®buttons until the indi-
cator light begins to flash-after 20
seconds.
2. Release both buttons. Do not hold for longer than 30 seconds.
The Integrated HomeLink
®Wireless
Control System is now in the training
(learn) mode and can be pro-
grammed at any time following the
appropriate steps in the Programming
chapters above.
NVS
®is a registered trademark and
Z-Nav™ is a trademark of the Gentex
Corporation, Zeeland, Michigan.
HomeLink
®is a registered trademark
owned by Johnson Controls,
Incorporated, Milwaukee, Wisconsin.
FCC ID: NZLZTVHL3
IC: 4112A-ZTVHL3
Information
This device complies with Part 15 of
the FCC Rules.
Operation is subject to the following
three conditions:
1. This device may not cause harmful interference, and
2. This device must accept any interfer- ence received, including interference
that may cause undesired operation.
3. The transceiver has been tested and complies with FCC and Industry
Canada rules. Changes or modifica-
tions not expressly approved by the
party responsible for compliance
could void the user’s authority to
operate the device.
i
Page 165 of 555
3-80
Convenient features of your vehicle
LCD Display Control
The LCD display modes can be
changed by using the control buttons
on the steering wheel.
(1) : MODE button for changingmodes
(2) , : MOVE switch for changing items
(3) OK : SELECT/RESET button for setting or resetting the
selected item
L
LC
C D
D
D
D I
IS
S P
P L
LA
A Y
Y
OAE046402
■
■
■
■T
T
T
T
y
y
y
y
p
p
p
p
e
e
e
e
A
A
A
A
■
■
■
■T
T
T
T
y
y
y
y
p
p
p
p
e
e
e
e
B
B
B
B
■
■
■
■T
T
T
T
y
y
y
y
p
p
p
p
e
e
e
e
C
C
C
C
Page 198 of 555
3-113
Convenient features of your vehicle
3
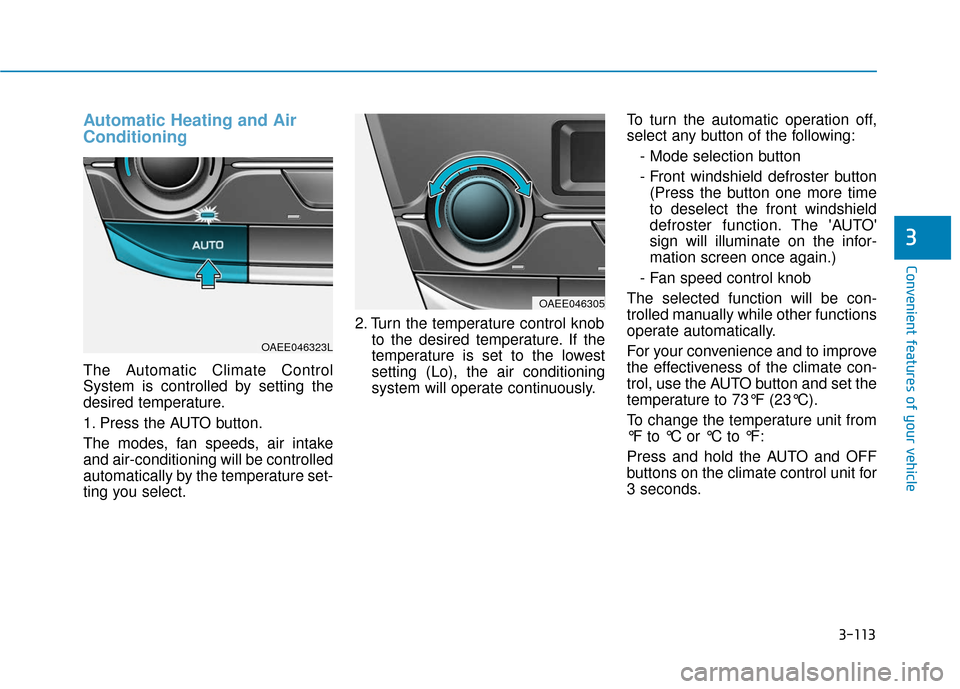
Automatic Heating and Air
Conditioning
The Automatic Climate Control
System is controlled by setting the
desired temperature.
1. Press the AUTO button.
The modes, fan speeds, air intake
and air-conditioning will be controlled
automatically by the temperature set-
ting you select.2. Turn the temperature control knob
to the desired temperature. If the
temperature is set to the lowest
setting (Lo), the air conditioning
system will operate continuously. To turn the automatic operation off,
select any button of the following:
- Mode selection button
- Front windshield defroster button(Press the button one more time
to deselect the front windshield
defroster function. The 'AUTO'
sign will illuminate on the infor-
mation screen once again.)
- Fan speed control knob
The selected function will be con-
trolled manually while other functions
operate automatically.
For your convenience and to improve
the effectiveness of the climate con-
trol, use the AUTO button and set the
temperature to 73°F (23°C).
To change the temperature unit from
°F to °C or °C to °F:
Press and hold the AUTO and OFF
buttons on the climate control unit for
3 seconds.
OAEE046305
OAEE046323L
Page 199 of 555
3-114
Convenient features of your vehicle
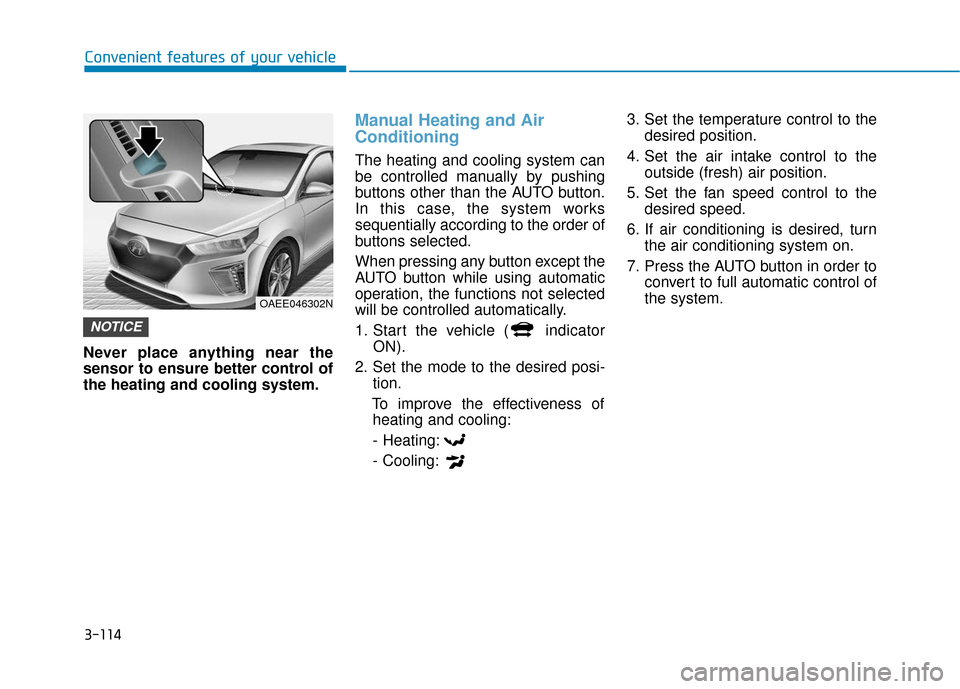
Never place anything near the
sensor to ensure better control of
the heating and cooling system.
Manual Heating and Air
Conditioning
The heating and cooling system can
be controlled manually by pushing
buttons other than the AUTO button.
In this case, the system works
sequentially according to the order of
buttons selected.
When pressing any button except the
AUTO button while using automatic
operation, the functions not selected
will be controlled automatically.
1. Start the vehicle ( indicator ON).
2. Set the mode to the desired posi- tion.
To improve the effectiveness of heating and cooling:
- Heating:
- Cooling: 3. Set the temperature control to the
desired position.
4. Set the air intake control to the outside (fresh) air position.
5. Set the fan speed control to the desired speed.
6. If air conditioning is desired, turn the air conditioning system on.
7. Press the AUTO button in order to convert to full automatic control of
the system.
NOTICE
OAEE046302N
Page 226 of 555
4-3
Multimedia System
4
Roof antenna
The roof antenna receives both AM
and FM broadcast signals, SXM sig-
nals (only type B). Rotate the roof
antenna in a counterclockwise direc-
tion to remove it. Rotate it in a clock-
wise direction to reinstall it. Before entering a place with a
low height clearance or a car
wash, remove the antenna by
rotating it counterclockwise. If
not, the antenna may be dam-
aged.
When reinstalling your antenna, it is important that it is fully
tightened and adjusted to the
upright position to ensure prop-
er reception.
Steering Wheel Audio Control
Do not operate multiple audio
remote control buttons simultane-
ously.
NOTICE
NOTICE
OAE046438
OAE046481L
OAE048481N
■ Type A
■Type B
Page 227 of 555
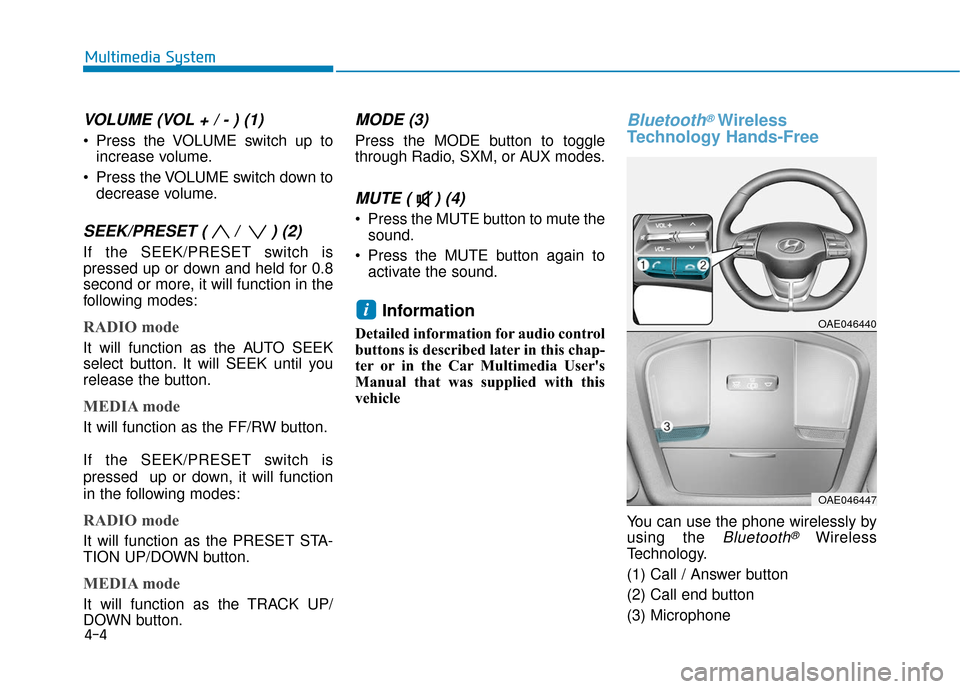
4-4
Multimedia System
VOLUME (VOL + / - ) (1)
Press the VOLUME switch up toincrease volume.
Press the VOLUME switch down to decrease volume.
SEEK/PRESET ( / ) (2)
If the SEEK/PRESET switch is
pressed up or down and held for 0.8
second or more, it will function in the
following modes:
RADIO mode
It will function as the AUTO SEEK
select button. It will SEEK until you
release the button.
MEDIA mode
It will function as the FF/RW button.
If the SEEK/PRESET switch is
pressed up or down, it will function
in the following modes:
RADIO mode
It will function as the PRESET STA-
TION UP/DOWN button.
MEDIA mode
It will function as the TRACK UP/
DOWN button.
MODE (3)
Press the MODE button to toggle
through Radio, SXM, or AUX modes.
MUTE ( ) (4)
Press the MUTE button to mute thesound.
Press the MUTE button again to activate the sound.
Information
Detailed information for audio control
buttons is described later in this chap-
ter or in the Car Multimedia User's
Manual that was supplied with this
vehicle
Bluetooth®Wireless
Technology Hands-Free
You can use the phone wirelessly by
using the
Bluetooth®Wireless
Technology.
(1) Call / Answer button
(2) Call end button
(3) Microphone
iOAE046440
OAE046447
Page 263 of 555
![Hyundai Ioniq Electric 2019 Owners Manual 4-40
Multimedia System
Dial
Press the [PHONE]button on the
audio ➟Select [Dial].
(1) Phone number entry window: The phone number entered using the
keypad is displayed.
(2) Clear - Press to delete i Hyundai Ioniq Electric 2019 Owners Manual 4-40
Multimedia System
Dial
Press the [PHONE]button on the
audio ➟Select [Dial].
(1) Phone number entry window: The phone number entered using the
keypad is displayed.
(2) Clear - Press to delete i](/manual-img/35/14897/w960_14897-262.png)
4-40
Multimedia System
Dial
Press the [PHONE]button on the
audio ➟Select [Dial].
(1) Phone number entry window: The phone number entered using the
keypad is displayed.
(2) Clear - Press to delete individual digits.
- Press and hold to delete theentire phone number.
(3) Keypad: Enter phone number.
(4)
Bluetooth®Wireless Technology
Phone name
- The name of the connected
Bluetooth®Wireless Technology
device is displayed.
- Contacts matching the keypad number/letter input are displayed.(5) Call
- Enter and select a phone num-ber to call.
- Select without entering a phone number to see the most recent
dialed call.
Settings
Press the [PHONE]button on the
audio ➟Select [Settings].
- For phone Setup, refer to Setup page ➟Select [Bluetooth].
Siri
Information -
Using Siri
• If you want to use Siri, you have to connect your iOS device to multime-
dia system through Bluetooth
®
Wireless Technology. (Please check
whether your iOS device supports
Siri and turning Siri On)
• If the iOS version is changed, the functions and response may be dif-
ferent according to the iOS device
and the latest version.
• Siri automatically stops in the fol- lowing events.
1)Outgoing and incoming phonecalls.
2)Media (USB, etc.) is connected. (Siri mode is maintained when
iPod
®s are connected)
3)Rear view monitor is activated (option).
4)Vehicle is started or engine is turned off.
5)Screen transition buttons, such as RADIO or MEDIA, are selected.
(Continued)
i