2019 Hyundai Ioniq Electric Break
[x] Cancel search: BreakPage 56 of 555
2-41
Safety system of your vehicle
2
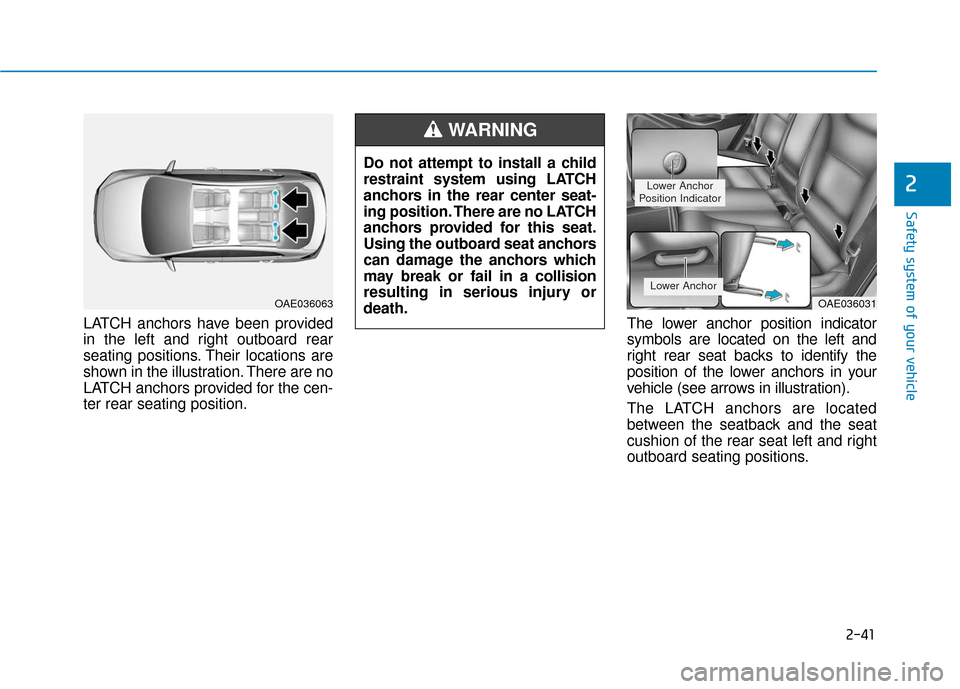
LATCH anchors have been provided
in the left and right outboard rear
seating positions. Their locations are
shown in the illustration. There are no
LATCH anchors provided for the cen-
ter rear seating position.The lower anchor position indicator
symbols are located on the left and
right rear seat backs to identify the
position of the lower anchors in your
vehicle (see arrows in illustration).
The LATCH anchors are located
between the seatback and the seat
cushion of the rear seat left and right
outboard seating positions.
Do not attempt to install a child
restraint system using LATCH
anchors in the rear center seat-
ing position. There are no LATCH
anchors provided for this seat.
Using the outboard seat anchors
can damage the anchors which
may break or fail in a collision
resulting in serious injury or
death.
WARNING
OAE036063OAE036031
Lower Anchor
Position Indicator
Lower Anchor
Page 57 of 555
2-42
Safety system of your vehicle
Securing a child restraint withthe LATCH anchors system
To install a LATCH-compatible child
restraint in either of the rear outboard
seating positions:
1. Move the seat belt buckle away from
the lower anchors.
2. Move any other objects away from the anchors that could prevent a
secure connection between the child
restraint and the lower anchors.
3. Place the child restraint on the vehi- cle seat, then attach the seat to the
lower anchors according to the
instructions provided by the child
restraint manufacturer.
4. Follow the child restraint instructions for properly adjusting and tightening
the lower attachments on the child
restraint to the lower anchors. The recommended weight for the
LATCH system is under 65 lb (30
kg).
How to determine an appropriate
child restraint weight:
Child weight + Child restraint
weight < 65 lb (30kg)
NOTICE
Take the following precautions
when using the LATCH system:
Read and follow all installation
instructions provided with
your child restraint system.
To prevent the child from
reaching and taking hold of
unretracted seat belts, buckle
all unused rear seat belts and
retract the seat belt webbing
behind the child. Children can
be strangled if a shoulder belt
becomes wrapped around
their neck and the seat belt
tightens.
NEVER attach more than one
child restraint to a single
anchor. This could cause the
anchor or attachment to come
loose or break.
Always have the LATCH sys-
tem inspected by your author-
ized HYUNDAI dealer after an
accident. An accident can
damage the LATCH system
and may not properly secure
the child restraint.
WARNING
Page 58 of 555
2-43
Safety system of your vehicle
2
Securing a child restraint seatwith "Tether Anchor" system
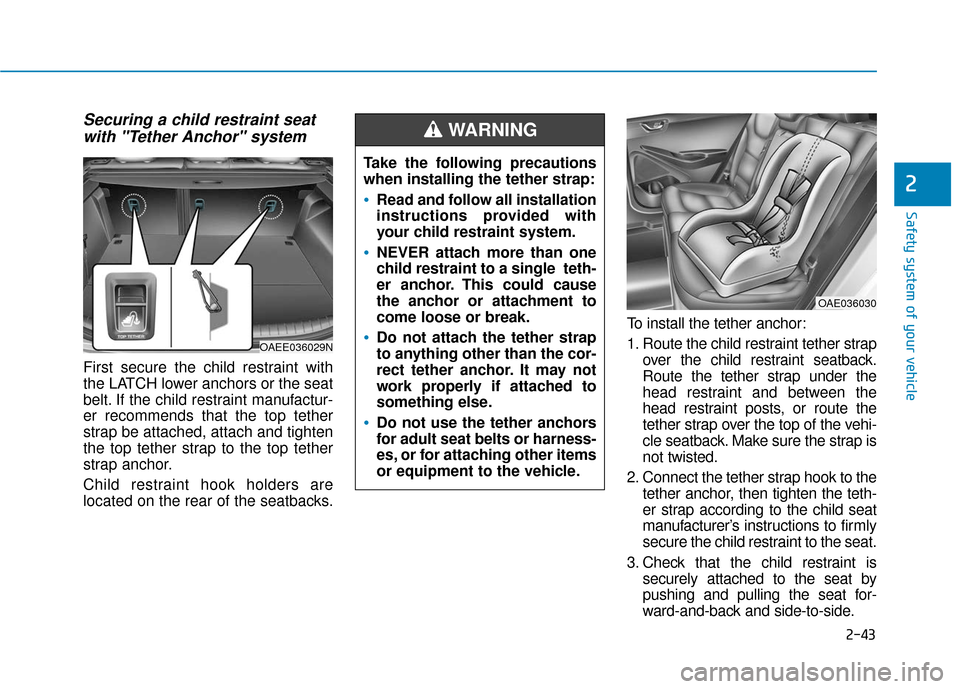
First secure the child restraint with
the LATCH lower anchors or the seat
belt. If the child restraint manufactur-
er recommends that the top tether
strap be attached, attach and tighten
the top tether strap to the top tether
strap anchor.
Child restraint hook holders are
located on the rear of the seatbacks. To install the tether anchor:
1. Route the child restraint tether strap
over the child restraint seatback.
Route the tether strap under the
head restraint and between the
head restraint posts, or route the
tether strap over the top of the vehi-
cle seatback. Make sure the strap is
not twisted.
2. Connect the tether strap hook to the tether anchor, then tighten the teth-
er strap according to the child seat
manufacturer’s instructions to firmly
secure the child restraint to the seat.
3. Check that the child restraint is securely attached to the seat by
pushing and pulling the seat for-
ward-and-back and side-to-side.
Take the following precautions
when installing the tether strap:
Read and follow all installation
instructions provided with
your child restraint system.
NEVER attach more than one
child restraint to a single teth-
er anchor. This could cause
the anchor or attachment to
come loose or break.
Do not attach the tether strap
to anything other than the cor-
rect tether anchor. It may not
work properly if attached to
something else.
Do not use the tether anchors
for adult seat belts or harness-
es, or for attaching other items
or equipment to the vehicle.
WARNING
OAE036030
OAEE036029N
Page 67 of 555
2-52
Safety system of your vehicle
They are designed to help protect the
heads of the front seat occupants
and the rear outboard seat occupants
in certain side impact collisions.
The curtain air bags are designed to
deploy only during certain side
impact collisions, depending on the
crash severity.
The side and curtain air bags on
both sides of the vehicle may deploy
if a rollover or possible rollover is
detected.
The curtain air bags are not designed
to deploy in all side impact or rollover
situations.
To reduce the risk of serious
injury or death from an inflating
curtain air bags, take the follow-
ing precautions:
All seat occupants must wear
seat belts at all times to help
keep occupants positioned
properly. (Continued)
(Continued)
Properly secure child
restraints as far away from the
door as possible.
Do not place any objects over
the air bag. Also, do not attach
any objects around the area
the air bag inflates such as
the door, side door glass,
front and rear pillar, roof side
rail.
Do not hang other objects
except clothes, especially
hard or breakable objects. In
an accident, it may cause
vehicle damage or personal
injury.
Do not allow passengers to
lean their heads or bodies
onto doors, put their arms on
the doors, stretch their arms
out of the window, or place
objects between the doors
and seats.(Continued)
(Continued)
Do not open or repair the side
curtain air bags.
WARNING
Page 221 of 555
3-136
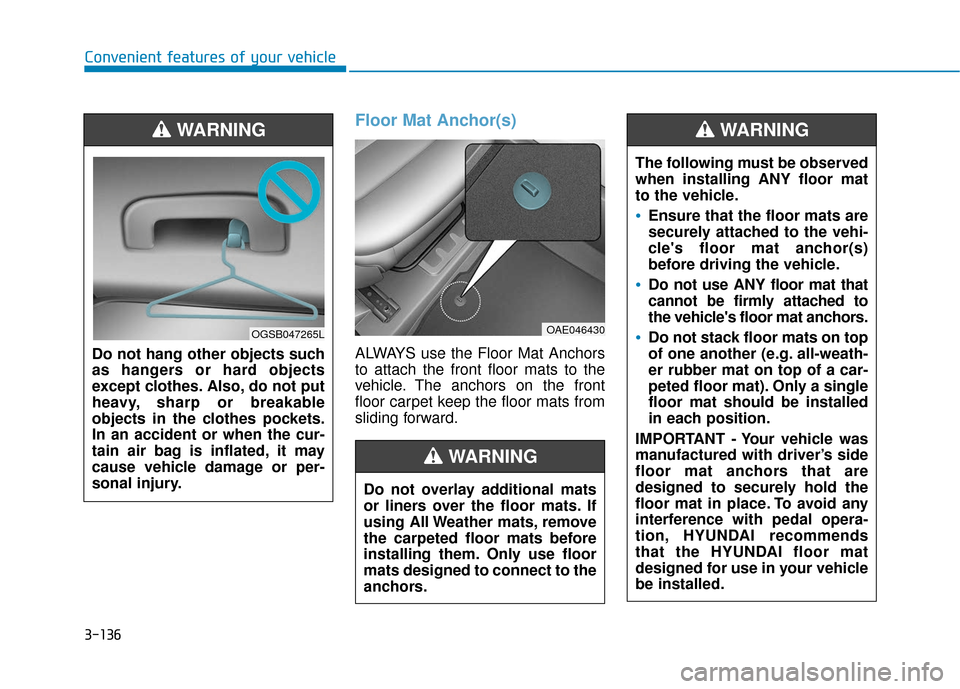
Floor Mat Anchor(s)
ALWAYS use the Floor Mat Anchors
to attach the front floor mats to the
vehicle. The anchors on the front
floor carpet keep the floor mats from
sliding forward.
Convenient features of your vehicleDo not overlay additional mats
or liners over the floor mats. If
using All Weather mats, remove
the carpeted floor mats before
installing them. Only use floor
mats designed to connect to the
anchors.
WARNING
Do not hang other objects such
as hangers or hard objects
except clothes. Also, do not put
heavy, sharp or breakable
objects in the clothes pockets.
In an accident or when the cur-
tain air bag is inflated, it may
cause vehicle damage or per-
sonal injury.
WARNING
OGSB047265LOAE046430
The following must be observed
when installing ANY floor mat
to the vehicle.
Ensure that the floor mats are
securely attached to the vehi-
cle's floor mat anchor(s)
before driving the vehicle.
Do not use ANY floor mat that
cannot be firmly attached to
the vehicle's floor mat anchors.
Do not stack floor mats on top
of one another (e.g. all-weath-
er rubber mat on top of a car-
peted floor mat). Only a single
floor mat should be installed
in each position.
IMPORTANT - Your vehicle was
manufactured with driver’s side
floor mat anchors that are
designed to securely hold the
floor mat in place. To avoid any
interference with pedal opera-
tion, HYUNDAI recommends
that the HYUNDAI floor mat
designed for use in your vehicle
be installed.
WARNING
Page 336 of 555
5-69
Driving your vehicle
5
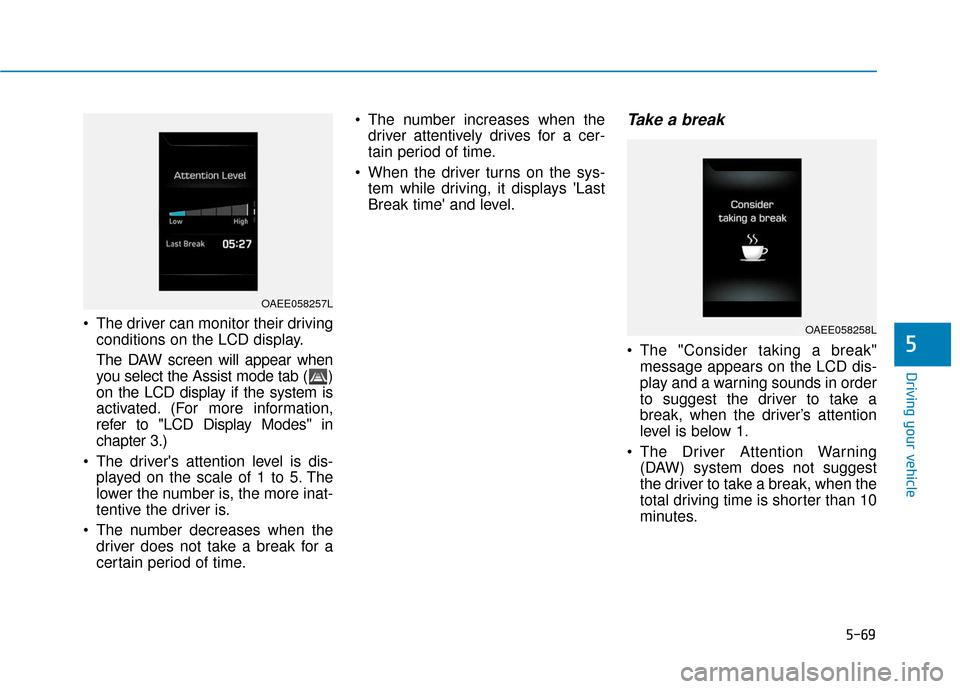
The driver can monitor their drivingconditions on the LCD display.
The DAW screen will appear when
you select the Assist mode tab ( )
on the LCD display if the system is
activated. (For more information,
refer to "LCD Display Modes" in
chapter 3.)
The driver's attention level is dis- played on the scale of 1 to 5. The
lower the number is, the more inat-
tentive the driver is.
The number decreases when the driver does not take a break for a
certain period of time. The number increases when the
driver attentively drives for a cer-
tain period of time.
When the driver turns on the sys- tem while driving, it displays 'Last
Break time' and level.
Take a break
The "Consider taking a break"message appears on the LCD dis-
play and a warning sounds in order
to suggest the driver to take a
break, when the driver’s attention
level is below 1.
The Driver Attention Warning (DAW) system does not suggest
the driver to take a break, when the
total driving time is shorter than 10
minutes.
OAEE058258L
OAEE058257L
Page 337 of 555
5-70
Resetting the System
The last break time is set to 00:00and the driver's attention level is
set to 5 (very attentive) when the
driver resets the Driver Attention
Warning (DAW) system.
The Driver Attention Warning (DAW) system resets in the follow-
ing situations.
- The vehicle is turned OFF.
- The driver unfastens the seat beltand then opens the driver's door.
- The vehicle is stopped for more than 10 minutes.
The Driver Attention Warning (DAW) system operates again,
when the driver restarts driving.
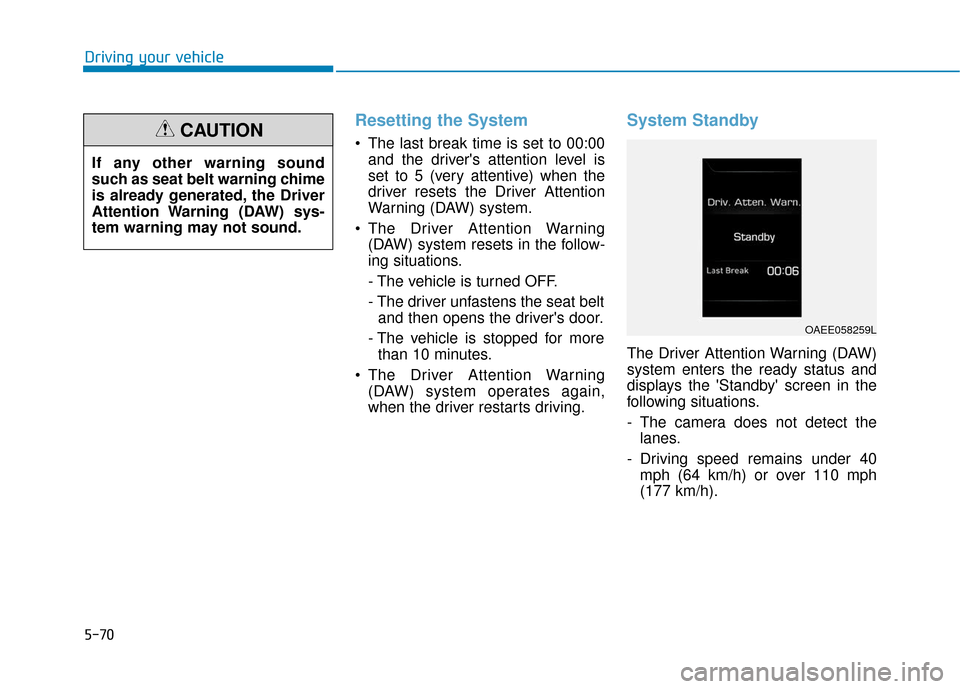
System Standby
The Driver Attention Warning (DAW)
system enters the ready status and
displays the 'Standby' screen in the
following situations.
- The camera does not detect thelanes.
- Driving speed remains under 40 mph (64 km/h) or over 110 mph
(177 km/h).
Driving your vehicle
If any other warning sound
such as seat belt warning chime
is already generated, the Driver
Attention Warning (DAW) sys-
tem warning may not sound.
CAUTION
OAEE058259L
Page 338 of 555
5-71
Driving your vehicle
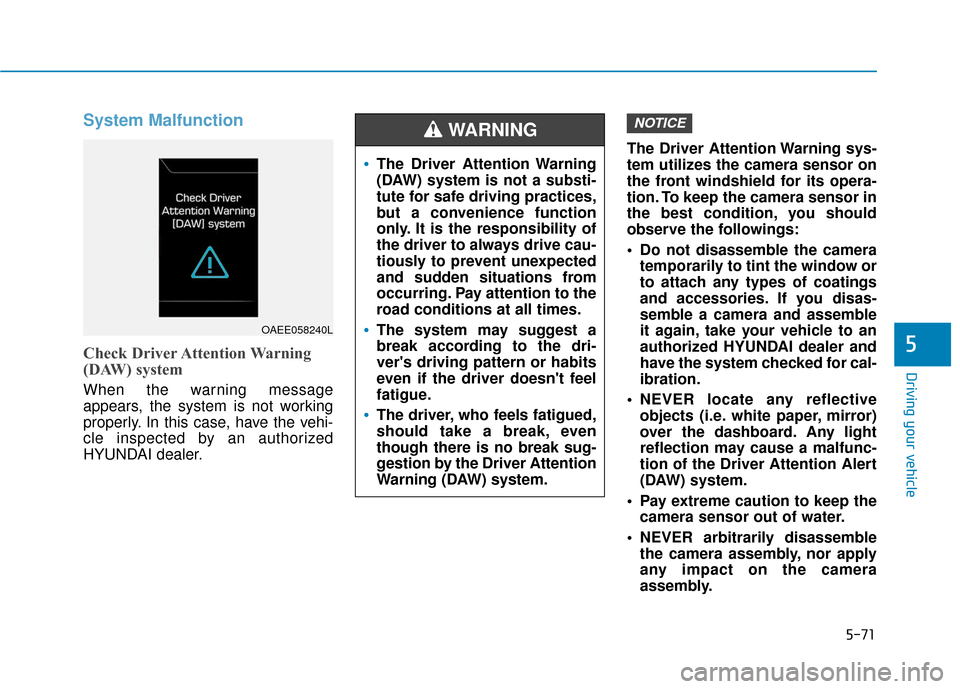
System Malfunction
Check Driver Attention Warning
(DAW) system
When the warning message
appears, the system is not working
properly. In this case, have the vehi-
cle inspected by an authorized
HYUNDAI dealer.The Driver Attention Warning sys-
tem utilizes the camera sensor on
the front windshield for its opera-
tion. To keep the camera sensor in
the best condition, you should
observe the followings:
Do not disassemble the camera
temporarily to tint the window or
to attach any types of coatings
and accessories. If you disas-
semble a camera and assemble
it again, take your vehicle to an
authorized HYUNDAI dealer and
have the system checked for cal-
ibration.
NEVER locate any reflective objects (i.e. white paper, mirror)
over the dashboard. Any light
reflection may cause a malfunc-
tion of the Driver Attention Alert
(DAW) system.
Pay extreme caution to keep the camera sensor out of water.
NEVER arbitrarily disassemble the camera assembly, nor apply
any impact on the camera
assembly.
NOTICE
5
OAEE058240L
The Driver Attention Warning
(DAW) system is not a substi-
tute for safe driving practices,
but a convenience function
only. It is the responsibility of
the driver to always drive cau-
tiously to prevent unexpected
and sudden situations from
occurring. Pay attention to the
road conditions at all times.
The system may suggest a
break according to the dri-
ver's driving pattern or habits
even if the driver doesn't feel
fatigue.
The driver, who feels fatigued,
should take a break, even
though there is no break sug-
gestion by the Driver Attention
Warning (DAW) system.
WARNING