2019 HONDA ACCORD SEDAN audio
[x] Cancel search: audioPage 172 of 727
uuLocking and Unlocking the Doors uLocking/Unlocking the Doors from the Outside
170
Controls
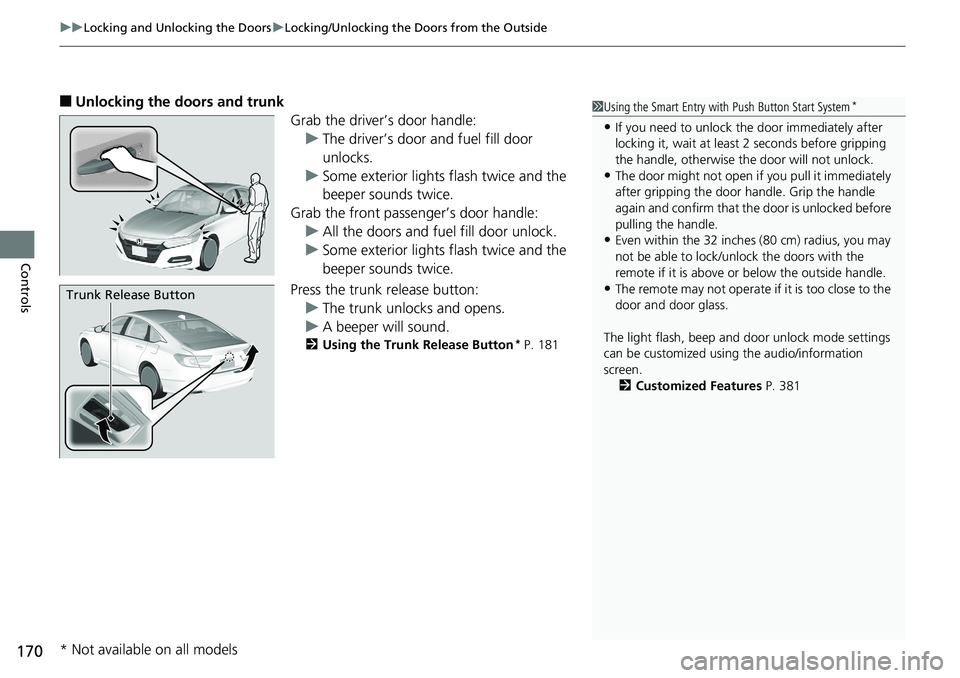
■Unlocking the doors and trunk
Grab the driver’s door handle:u The driver’s door and fuel fill door
unlocks.
u Some exterior lights flash twice and the
beeper sounds twice.
Grab the front passenger’s door handle: u All the doors and fuel fill door unlock.
u Some exterior lights flash twice and the
beeper sounds twice.
Press the trunk release button: u The trunk unlocks and opens.
u A beeper will sound.
2 Using the Trunk Release Button* P. 181
Trunk Release Button
1Using the Smart Entry with Push Button Start System*
•If you need to unlock the door immediately after
locking it, wait at least 2 seconds before gripping
the handle, otherwise th e door will not unlock.
•The door might not open if you pull it immediately
after gripping the door handle. Grip the handle
again and confirm that th e door is unlocked before
pulling the handle.
•Even within the 32 inches (80 cm) radius, you may
not be able to lock/unl ock the doors with the
remote if it is above or below the outside handle.
•The remote may not operate if it is too close to the
door and door glass.
The light flash, beep and door unlock mode settings
can be customized using the audio/information
screen.
2 Customized Features P. 381
* Not available on all models
Page 173 of 727
Continued171
uuLocking and Unlocking the Doors uLocking/Unlocking the Doors from the Outside
Controls
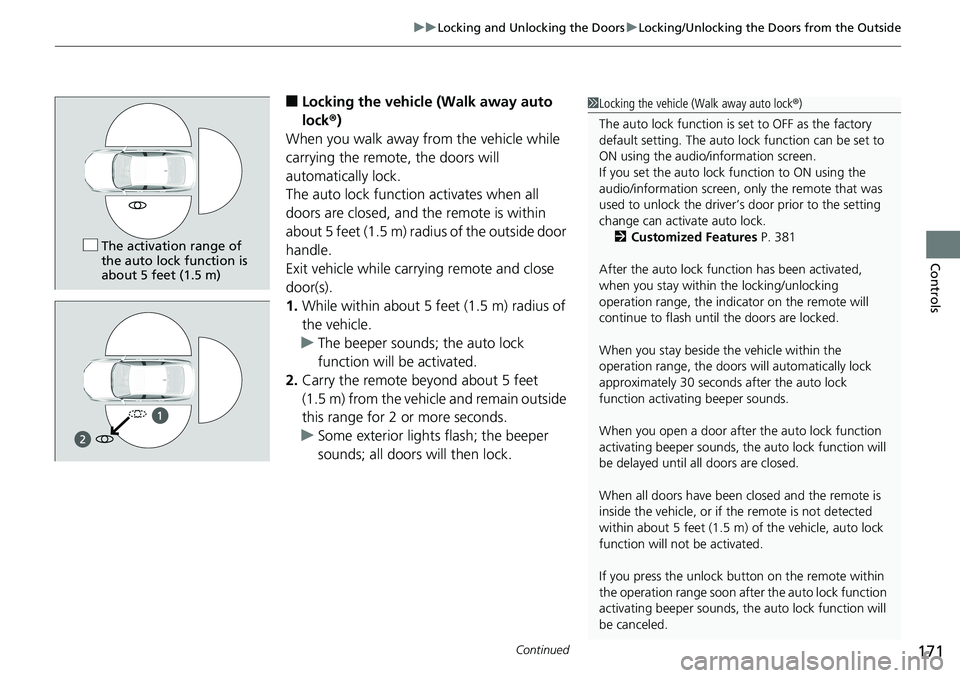
■Locking the vehicle (Walk away auto
lock ®)
When you walk away from the vehicle while
carrying the remote , the doors will
automatically lock.
The auto lock function activates when all
doors are closed, and the remote is within
about 5 feet (1.5 m) radius of the outside door
handle.
Exit vehicle while carrying remote and close
door(s).
1. While within about 5 feet (1.5 m) radius of
the vehicle.
u The beeper sounds; the auto lock
function will be activated.
2. Carry the remote beyond about 5 feet
(1.5 m) from the vehicle and remain outside
this range for 2 or more seconds.
u Some exterior lights flash; the beeper
sounds; all doors will then lock.1Locking the vehicle (Walk away auto lock® )
The auto lock function is set to OFF as the factory
default setting. The auto lo ck function can be set to
ON using the audio/information screen.
If you set the auto lock function to ON using the
audio/information screen, only the remote that was
used to unlock the driver’s door prior to the setting
change can activate auto lock. 2 Customized Features P. 381
After the auto lock function has been activated,
when you stay within the locking/unlocking
operation range, the indica tor on the remote will
continue to flash until the doors are locked.
When you stay beside the vehicle within the
operation range, the doors wi ll automatically lock
approximately 30 seconds after the auto lock
function activating beeper sounds.
When you open a door after the auto lock function
activating beeper sounds, the auto lock function will
be delayed until al l doors are closed.
When all doors have been closed and the remote is
inside the vehicle, or if the remote is not detected
within about 5 feet (1.5 m) of the vehicle, auto lock
function will not be activated.
If you press the unlock but ton on the remote within
the operation range soon after the auto lock function
activating beeper sounds, the auto lock function will
be canceled.
The activation range of
the auto lock function is
about 5 feet (1.5 m)
Page 179 of 727
Continued177
uuLocking and Unlocking the Doors uLocking/Unlocking the Doors from the Inside
Controls
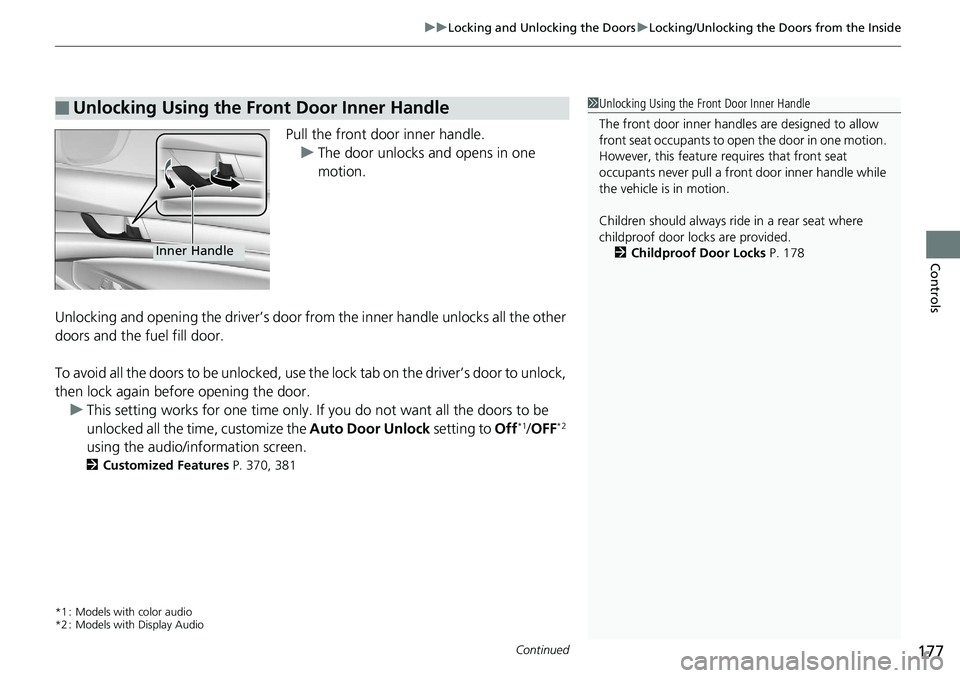
Pull the front door inner handle.
u The door unlocks and opens in one
motion.
Unlocking and opening the driver’s door from the inner handle unlocks all the other
doors and the fuel fill door.
To avoid all the doors to be unlocked, use the lock tab on the driver’s door to unlock,
then lock again before opening the door. u This setting works for one time only. If you do not want all the doors to be
unlocked all the ti me, customize the Auto Door Unlock setting to Off
*1/OFF*2
using the audio/information screen.
2 Customized Features P. 370, 381
*1 : Models with color audio
*2 : Models with Display Audio
■Unlocking Using the Front Door Inner Handle1Unlocking Using the Front Door Inner Handle
The front door inne r handles are designed to allow
front seat occupants to open the door in one motion.
However, this feature requires that front seat
occupants never pull a front door inner handle while
the vehicle is in motion.
Children should always ride in a rear seat where
childproof door locks are provided.
2 Childproof Door Locks P. 178
Inner Handle
Page 181 of 727
179
uuLocking and Unlocking the Doors uAuto Door Locking/Unlocking
Controls
Auto Door Locking/Unlocking
Your vehicle locks or unlocks all doors automatically when a certain condition is met.
■Drive lock mode
All doors lock when the vehicle’s speed reaches about 10 mph (15 km/h).
■Driver’s door open mode
All doors unlock when the driver’s door is opened.
■Auto Door Locking
■Auto Door Unlocking
1 Auto Door Locking/Unlocking
You can turn off or cha nge to another auto door
locking/unlocking sett ing using the audio/
information screen. 2 Customized Features P. 370, 381
Page 185 of 727
183
Controls
Security System
Immobilizer System
The immobilizer system prevents a key that has not been pre-registered from
starting the engine. Each key contains electronic transmitters that use electronic
signals to verify the key.
Pay attention to the follo wing when pressing the ENGINE START/STOP button:
• Do not allow objects that emit strong radio waves near the ENGINE START/
STOP button.
• Make sure the key is not covered by or touching a metal object.
• Do not bring a key from another vehicle’s immobilizer system near the ENGINE
START/STOP button.
• Do not put the key near magnetic items. El ectronic device, such as televisions and
audio systems emit strong magnetic fiel ds. Note that even a key chain can
become magnetic.1 Immobilizer System
NOTICE
Leaving the key in the vehicl e can result in theft or
accidental movement of the vehicle.
Always take the key with you whenever you leave the
vehicle unattended.
Do not alter the system or add other devices to it.
Doing so may damage the system and make your
vehicle inoperable.
Apply and hold the brake pedal before turning the
vehicle on the first time after the battery has been
disconnected.
Canadian models
Page 192 of 727
190
Controls
Operating the Switches Around the Steering Wheel
ENGINE START/STOP Button
*1 : Manual transmission models
*2 : Continuously variable transmission models for Canadian models
*3 : U.S. models
*4 : Automatic transmission models
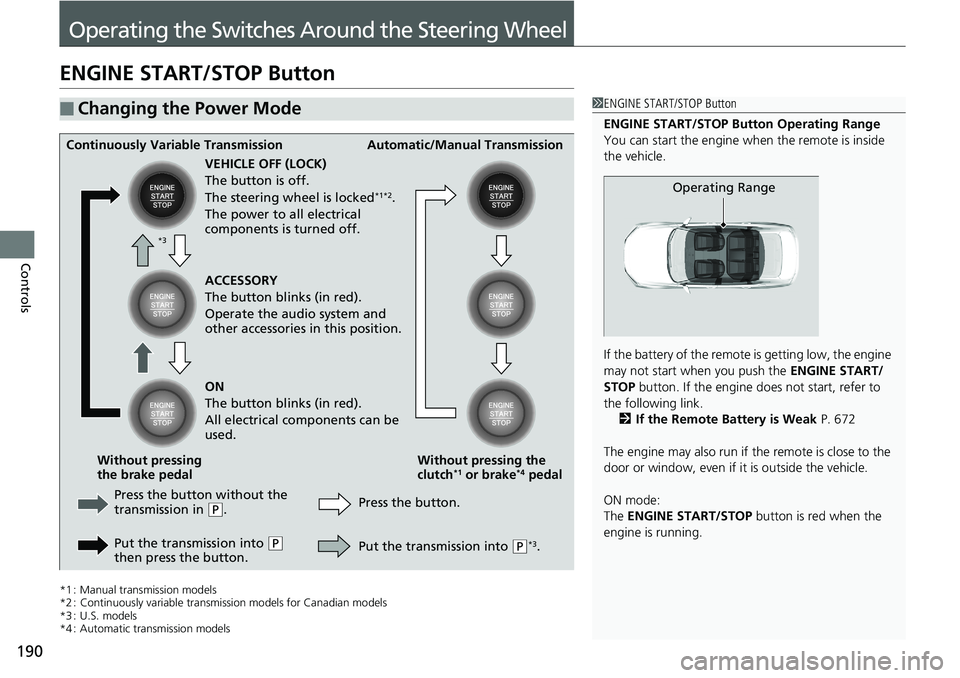
■Changing the Power Mode1 ENGINE START/STOP Button
ENGINE START/STOP Button Operating Range
You can start the engine wh en the remote is inside
the vehicle.
If the battery of the remote is getting low, the engine
may not start when you push the ENGINE START/
STOP button. If the engine do es not start, refer to
the following link. 2 If the Remote Battery is Weak P. 672
The engine may also run if the remote is close to the
door or window, even if it is outside the vehicle.
ON mode:
The ENGINE START/STOP button is red when the
engine is running.
Operating Range
Continuously Variable Transmission Automatic/Manual Transmission
VEHICLE OFF (LOCK)
The button is off.
The steering wheel is locked
*1*2.
The power to all electrical
components is turned off.
Press the button without the
transmission in
( P.
Put the transmission into
( P
then press the button. Press the button.
Without pressing the
clutch
*1 or brake*4 pedal
Without pressing
the brake pedal ACCESSORY
The button blinks (in red).
Operate the audio system and
other accessories in this position.
ON
The button blinks (in red).
All electrical components can be
used.
Put the transmission into
(P*3.
*3
Page 207 of 727
205
uuOperating the Switches Around the Steering Wheel uDriving Position Memory System*
Continued
Controls
Driving Position Memory System*
You can store two driver’s seat positions (except for power lumbar) with the driving
position memory system.
When you unlock and open the driver's door with a remote transmitter, or smart
entry system to one of the two preset po sitions and the seat adjusts to retracted
positions of one of the two preset positions automatically.
The seat will move to the stored position when you set the power mode to
ACCESSORY.
When you enter the vehicle, the driver information interface briefly shows you which
remote transmitter you used to unlock the vehicle.
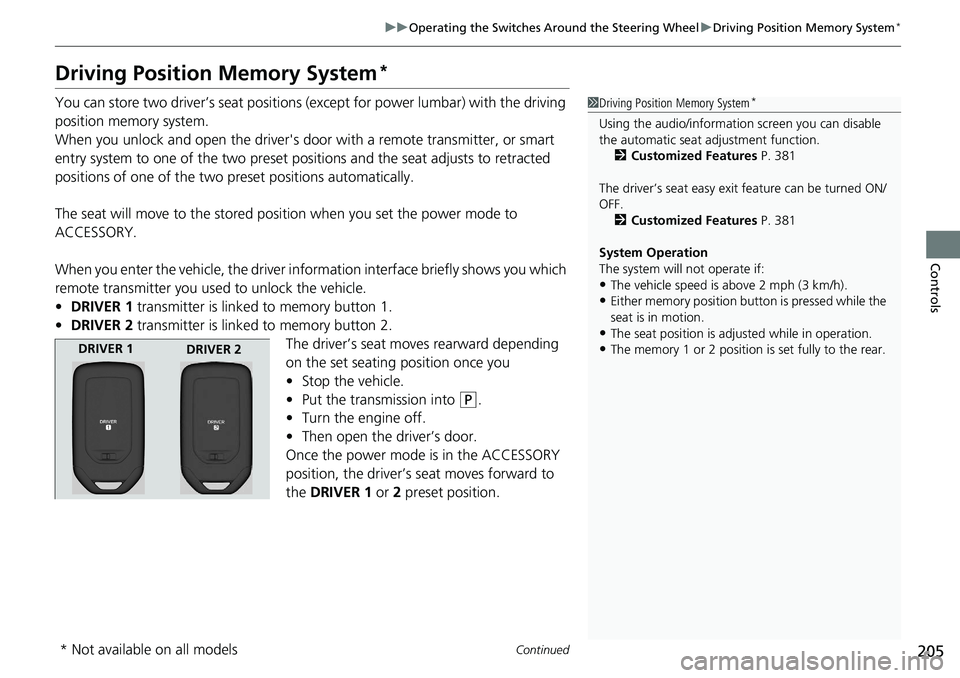
• DRIVER 1 transmitter is linked to memory button 1.
• DRIVER 2 transmitter is linked to memory button 2.
The driver’s seat moves rearward depending
on the set seating position once you
•Stop the vehicle.
• Put the transmission into
(P.
• Turn the engine off.
• Then open the driver’s door.
Once the power mode is in the ACCESSORY
position, the driver’s seat moves forward to
the DRIVER 1 or 2 preset position.
1 Driving Position Memory System*
Using the audio/informati on screen you can disable
the automatic seat adjustment function. 2 Customized Features P. 381
The driver’s seat easy exit feature can be turned ON/
OFF. 2 Customized Features P. 381
System Operation
The system will not operate if:
•The vehicle speed is above 2 mph (3 km/h).
•Either memory position button is pressed while the
seat is in motion.
•The seat position is adju sted while in operation.
•The memory 1 or 2 position is set fully to the rear.DRIVER 1
DRIVER 2
* Not available on all models
Page 232 of 727
uuInterior Lights/Interior Convenience Items uInterior Convenience Items
230
Controls
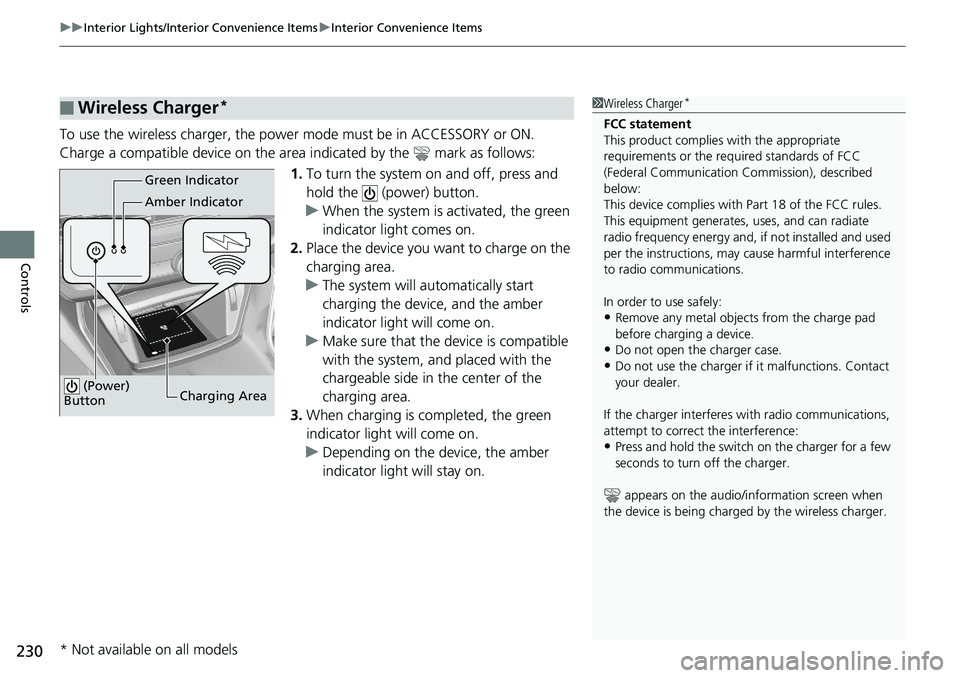
To use the wireless charger, the power mode must be in ACCESSORY or ON.
Charge a compatible device on the ar ea indicated by the mark as follows:
1. To turn the system on and off, press and
hold the (power) button.
u When the system is activated, the green
indicator light comes on.
2. Place the device you want to charge on the
charging area.
u The system will automatically start
charging the device, and the amber
indicator light will come on.
u Make sure that the device is compatible
with the system, and placed with the
chargeable side in the center of the
charging area.
3. When charging is completed, the green
indicator light will come on.
u Depending on the device, the amber
indicator light will stay on.
■Wireless Charger*1Wireless Charger*
FCC statement
This product complies with the appropriate
requirements or the requ ired standards of FCC
(Federal Communication Commission), described
below:
This device complies with Part 18 of the FCC rules.
This equipment generates, uses, and can radiate
radio frequency energy and, if not installed and used
per the instructions, may cause harmful interference
to radio communications.
In order to use safely:
•Remove any metal objects from the charge pad
before charging a device.
•Do not open the charger case.
•Do not use the charger if it malfunctions. Contact
your dealer.
If the charger interferes with radio communications,
attempt to correct the interference:
•Press and hold the switch on the charger for a few
seconds to turn off the charger.
appears on the audio/information screen when
the device is being charge d by the wireless charger.
Green Indicator
Amber Indicator
Charging Area
(Power)
Button
* Not available on all models