2019 GENESIS G80 SPORT ECO mode
[x] Cancel search: ECO modePage 10 of 88
10
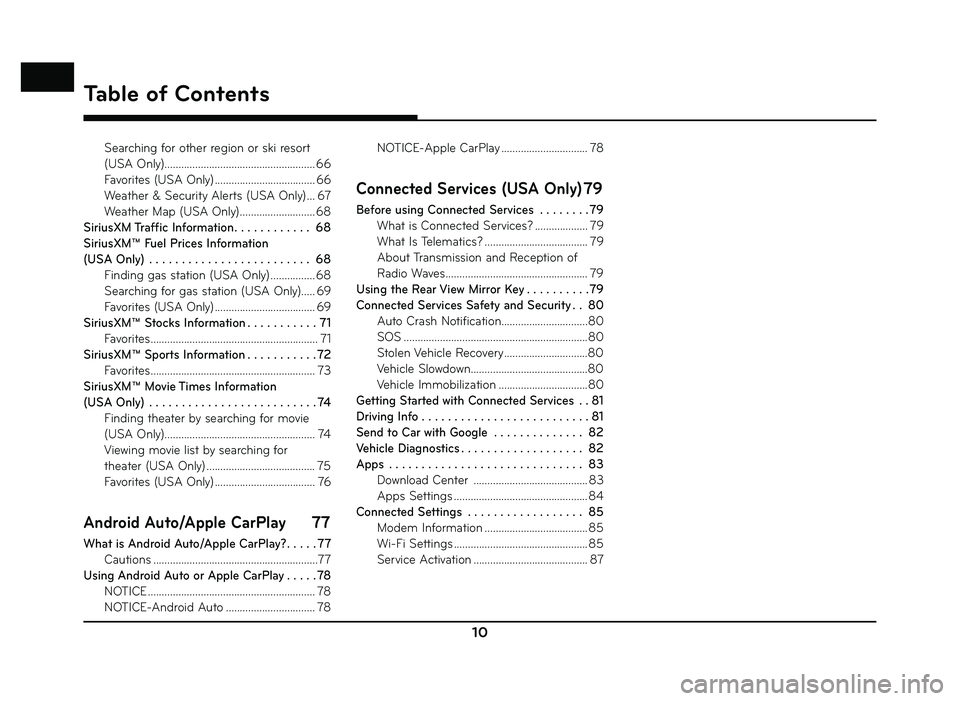
Table of Contents
Searching for other region or ski resort
(USA Only) ...................................................... 66
Favorites (USA Only) .................................... 66
Weather & Security Alerts (USA Only) ... 67
Weather Map (USA Only) ........................... 68
SiriusXM Traffic Information . . . . . . . . . . . . 68
SiriusXM™ Fuel Prices Information
(USA Only) . . . . . . . . . . . . . . . . . . . . . . . . . 68 Finding gas station (USA Only) ................ 68
Searching for gas station (USA Only)..... 69
Favorites (USA Only) .................................... 69
SiriusXM™ Stocks Information . . . . . . . . . . . 71 Favorites ............................................................ 71
SiriusXM™ Sports Information . . . . . . . . . . . 72 Favorites ........................................................... 73
SiriusXM™ Movie Times Information
(USA Only) . . . . . . . . . . . . . . . . . . . . . . . . . . 74 Finding theater by searching for movie
(USA Only) ...................................................... 74
Viewing movie list by searching for
theater (USA Only) ....................................... 75
Favorites (USA Only) .................................... 76
Android Auto/Apple CarPlay 77
What is Android Auto/Apple CarPlay? . . . . . 77
Cautions ...........................................................77
Using Android Auto or Apple CarPlay . . . . . 78 NOTICE ............................................................ 78
NOTICE-Android Auto ................................ 78 NOTICE-Apple CarPlay ............................... 78
Connected Services (USA Only) 79
Before using Connected Services . . . . . . . .79
What is Connected Services? ................... 79
What Is Telematics? ..................................... 79
About Transmission and Reception of
Radio Waves ................................................... 79
Using the Rear View Mirror Key . . . . . . . . . .79
Connected Services Safety and Security . . 80 Auto Crash Notification...............................80
SOS ..................................................................80
Stolen Vehicle Recovery ..............................80
Vehicle Slowdown..........................................80
Vehicle Immobilization ................................80
Getting Started with Connected Services . . 81
Driving Info . . . . . . . . . . . . . . . . . . . . . . . . . . 81
Send to Car with Google . . . . . . . . . . . . . . 82
Vehicle Diagnostics . . . . . . . . . . . . . . . . . . . 82
Apps . . . . . . . . . . . . . . . . . . . . . . . . . . . . . . 83 Download Center ......................................... 83
Apps Settings ................................................ 84
Connected Settings . . . . . . . . . . . . . . . . . . 85 Modem Information ..................................... 85
Wi-Fi Settings ................................................ 85
Service Activation ......................................... 87
Page 15 of 88
15
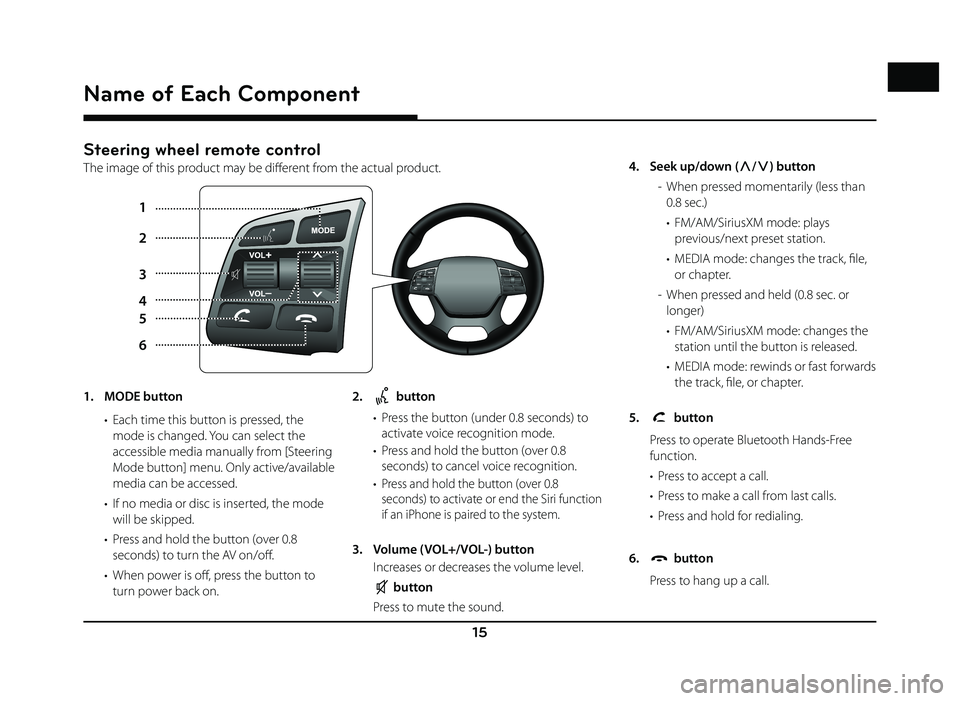
Steering wheel remote control
The image of this product may be diff erent from the actual product.
1
5
6 2
3
4
Name of Each Component
1. MODE button • Each time this button is pressed, the mode is changed. You can select the
accessible media manually from [Steering
Mode button] menu. Only active/available
media can be accessed.
• If no media or disc is inserted, the mode will be skipped.
• Press and hold the button (over 0.8 seconds) to turn the AV on/off .
• When power is off , press the button to turn power back on. 2. button
• Press the button (under 0.8 seconds) to activate voice recognition mode.
• Press and hold the button (over 0.8 seconds) to cancel voice recognition.
•
Press and hold the button (over 0.8
seconds) to activate or end the Siri function
if an iPhone is paired to the system.
3. Volume (VOL+/VOL-) button
Increases or decreases the volume level.
button
Press to mute the sound. 4. Seek up/down (
W/
S ) button
- When pressed momentarily (less than 0.8 sec.)
• FM/AM/SiriusXM mode: plays previous/next preset station.
• MEDIA mode: changes the track, fi le, or chapter.
- When pressed and held (0.8 sec. or longer)
• FM/AM/SiriusXM mode: changes the station until the button is released.
• MEDIA mode: rewinds or fast forwards the track, fi le, or chapter.
5.
button
Press to operate Bluetooth Hands-Free function.
• Press to accept a call.
• Press to make a call from last calls.
• Press and hold for redialing.
6.
button
Press to hang up a call.
Page 17 of 88
17
Radio Operation (FM/AM)
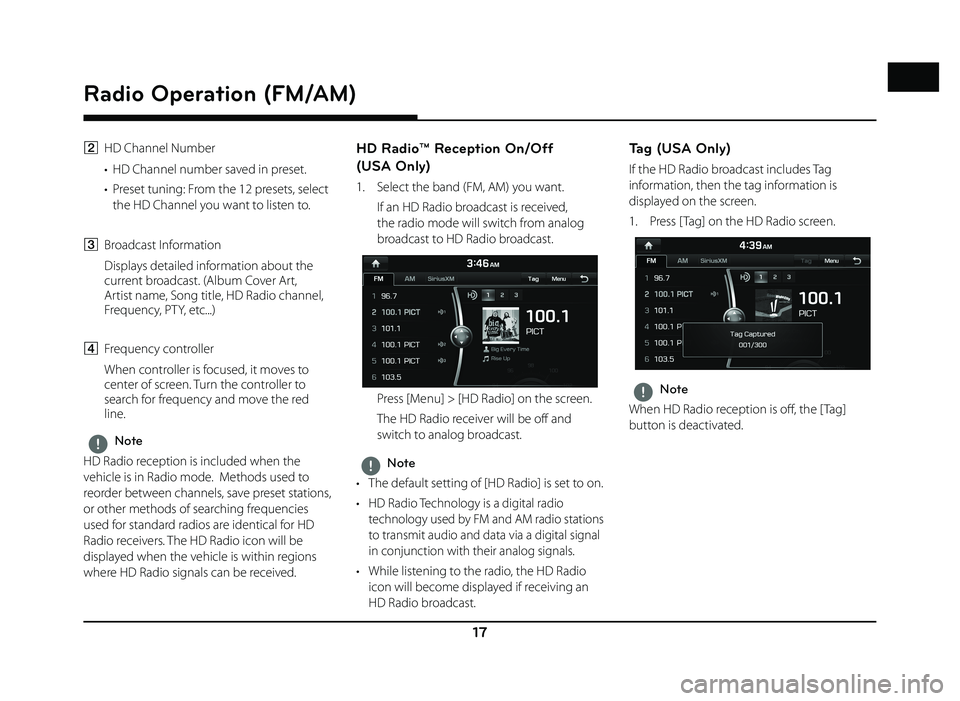
B HD Channel Number
• HD Channel number saved in preset.
• Preset tuning: From the 12 presets, select the HD Channel you want to listen to.
C Broadcast Information
Displays detailed information about the current broadcast. (Album Cover Art,
Artist name, Song title, HD Radio channel,
Frequency, PTY, etc...)
D Frequency controller
When controller is focused, it moves to center of screen. Turn the controller to
search for frequency and move the red
line.
,Note
HD Radio reception is included when the
vehicle is in Radio mode. Methods used to
reorder between channels, save preset stations,
or other methods of searching frequencies
used for standard radios are identical for HD
Radio receivers. The HD Radio icon will be
displayed when the vehicle is within regions
where HD Radio signals can be received.
HD Radio™ Reception On/Off
(USA Only)
1. Select the band (FM, AM) you want.
If an HD Radio broadcast is received, the radio mode will switch from analog
broadcast to HD Radio broadcast.
Press [Menu] > [HD Radio] on the screen.
The HD Radio receiver will be off and switch to analog broadcast.
,Note
• The default setting of [HD Radio] is set to on.
• HD Radio Technology is a digital radio technology used by FM and AM radio stations
to transmit audio and data via a digital signal
in conjunction with their analog signals.
• While listening to the radio, the HD Radio icon will become displayed if receiving an
HD Radio broadcast.
Tag (USA Only)
If the HD Radio broadcast includes Tag
information, then the tag information is
displayed on the screen.
1. Press [ Tag] on the HD Radio screen.
,Note
When HD Radio reception is off , the [ Tag]
button is deactivated.
Page 23 of 88
23
DVD/VCD Operation
Playing a DVD/VCD
Insert a disc into the disc slot, with the label
facing up.
Playback will start automatically. In some cases,
the disc menu might appear.
,Note
• To play the DVD or VCD while a diff erent
source is playing, press [HOME] > [Media] >
[DVD] or [ VCD].
• If a menu screen is displayed, select the desired option by using the controller.
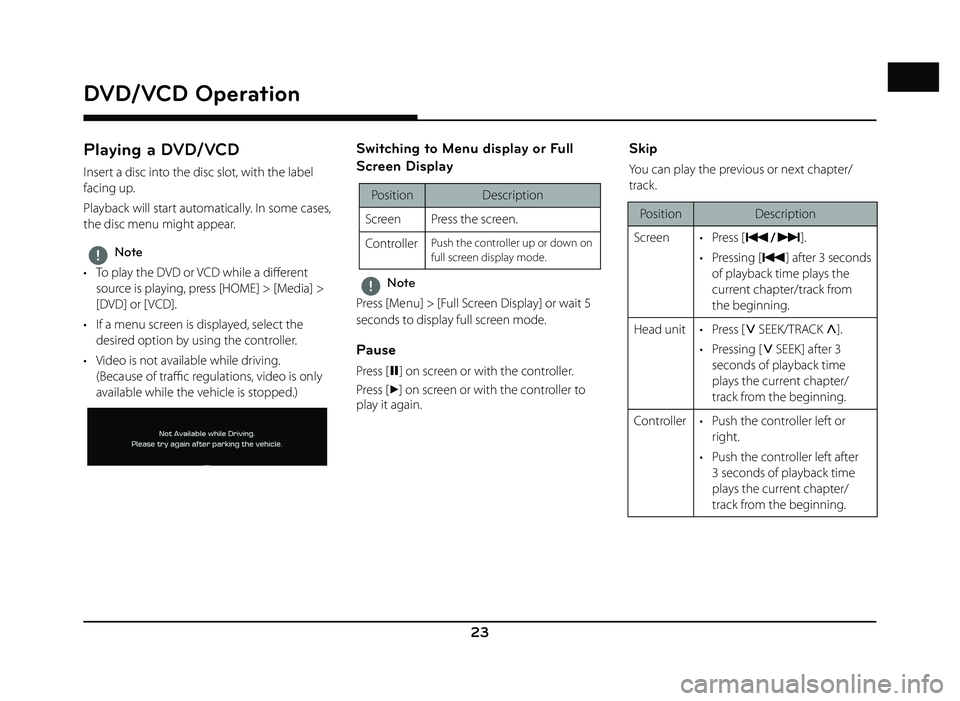
• Video is not available while driving. (Because of traffi c regulations, video is only
available while the vehicle is stopped.)
Switching to Menu display or Full
Screen Display
Position Description
Screen Press the screen.
Controller
Push the controller up or down on
full screen display mode.
,Note
Press [Menu] > [Full Screen Display] or wait 5
seconds to display full screen mode.
Pause
Press [ M] on screen or with the controller.
Press [
d] on screen or with the controller to
play it again.
Skip
You can play the previous or next chapter/
track.
Position Description
Screen • Press [
C/V].
• Pressing [
C] after 3 seconds
of playback time plays the
current chapter/track from
the beginning.
Head unit • Press [
S SEEK/TRACK W].
• Pressing [
S SEEK] after 3
seconds of playback time
plays the current chapter/
track from the beginning.
Controller • Push the controller left or right.
• Push the controller left after 3 seconds of playback time
plays the current chapter/
track from the beginning.
DVD/VCD Operation
Page 27 of 88
27
Jukebox Operation
Playing Jukebox Video
You can play the video fi les saved in Jukebox.
If there is no video fi le in Jukebox, copy the
desired video to Jukebox. For more details,
refer to “Copying the USB video fi le to Jukebox”
on page 33.
1. Press [HOME] > [Media].
2. Press [Jukebox Video].
The Jukebox Video is played.
,Note
• If there are no videos, Jukebox Video won’t be available in the [Media] menu screen.
• Video is not available while driving. (Because of traffi c regulations, video is only
available while the vehicle is stopped.)
Switching to Menu display or Full
Screen Display
Position Description
Screen Press the screen.
Controller
Push the controller up or down on
full screen display mode.
,Note
Press [Menu] > [Full Screen Display] or wait 5
seconds to display full screen mode.
Pause
You can pause the playing fi le.
For more details, refer to “Pause” on page 20.
Skip
You can play the previous or next fi le.
For more details, refer to “Skip” on page 20.
Search
You can rewind/fast forward to a specifi c point
of a fi le.
For more details, refer to “Search” on page 20.
Seek
You can play the fi le directly by searching for
the desired fi le.
For more details, refer to “Seek” on page 21.
List
You can play the desired fi le by searching the
fi le list included in Jukebox.
For more details, refer to “List” on page 26.
Shuffle
All fi les can be played randomly.
For more details, refer to “ Shuffl e” on page 21.
Repeat
The current playing fi le is played repeatedly.
For more details, refer to “ Repeat” on page 26.
Page 28 of 88
28
Jukebox Operation
Viewing Jukebox Image
You can view the image fi les saved in Jukebox.
If there is no image fi le in Jukebox, copy the
desired image to Jukebox. For more details,
refer to “Copying the USB image fi le to
Jukebox” on page 34.
1. Press [HOME] > [Media].
2. Press [Jukebox Image].
The Jukebox Image is viewed.
,Note
• If there are no images, Jukebox image won’t be available in the [Media] menu screen.
• Image is not available while driving. (Based on the traffi c regulation, Image is
only available whenever vehicle is in stop
condition with parking gear.)
Switching to Menu display or Full
Screen Display
Position Description
Screen Press the screen.
Controller
Push the controller up or down on
full screen display mode.
,Note
Press [Menu] > [Full Screen Display] or wait 5
seconds to display full screen mode.
Skip
You can view the previous or next image.
Position Description
Screen Press [
C/V].
Controller Push the controller left or right.
Zoom in/out
1. Turn the controller left or right.
2. Push the controller up, down, left or right to move the image.
Page 32 of 88
32
USB Operation
Playing USB Video
You can play video fi les saved in a USB memory
device.
Connect a USB device to the USB port and
playback starts automatically.
,Note
• To play USB Video while a diff erent source
is playing, press [HOME] > [Media] > [USB
Video].
• Video is not available while driving. (Because of traffi c regulations, video is only
available while the vehicle is stopped.)
Switching to Menu display or Full
Screen Display
Position Description
Screen Press the screen.
Controller
Push the controller up or down on
full screen display mode.
,Note
Press [Menu] > [Full Screen Display] or wait 5
seconds to display full screen mode.
Pause
You can pause the playing fi le.
For more details, refer to “Pause” on page 20.
Skip
You can play the previous or next fi le.
For more details, refer to “Skip” on page 20.
Search
You can rewind/fast forward to a specifi c point
of a fi le.
For more details, refer to “Search” on page 20.
Seek
You can play the fi le directly by searching for
the desired fi le.
For more details, refer to “Seek” on page 21.
Page 34 of 88
![GENESIS G80 SPORT 2019 Quick Reference Guide 34
USB Operation
Viewing USB Image
You can play image fi les saved in a USB
memory device.
1. Connect a USB device to the USB port.
2. Press [HOME] > [Media] > [USB Image].
,Note
Image is not av GENESIS G80 SPORT 2019 Quick Reference Guide 34
USB Operation
Viewing USB Image
You can play image fi les saved in a USB
memory device.
1. Connect a USB device to the USB port.
2. Press [HOME] > [Media] > [USB Image].
,Note
Image is not av](/manual-img/46/35634/w960_35634-33.png)
34
USB Operation
Viewing USB Image
You can play image fi les saved in a USB
memory device.
1. Connect a USB device to the USB port.
2. Press [HOME] > [Media] > [USB Image].
,Note
Image is not available while driving. (Based on
the traffi c regulation, Image is only available
whenever vehicle is in stop condition with
parking gear.)
Switching to Menu display or Full
Screen Display
Position Description
Screen Press the screen.
Controller
Push the controller up or down on
full screen display mode.
,Note
Press [Menu] > [Full Screen Display] or wait 5
seconds to display full screen mode.
Skip
You can view the previous or next image.
For more details, refer to “Skip” on page 28.
Zoom in/out
Turn the controller left or right.
For more details, refer to “Zoom in/out” on
page 28.
Slideshow
You can set the slideshow.
For more details, refer to “Slideshow” on page
29.
List
You can view the desired image by searching
the image list included in USB.
For more details, refer to “List” on page 29.
Slideshow Settings
You can set the slideshow interval. The slideshow
is played according to the time interval.
For more details, refer to “Slideshow Settings”
on page 29.
Copying the USB image file to Jukebox
You can copy the desired fi les to Jukebox.
1. Press [Menu] > [Copy to Jukebox].
2. Select the desired file, then press [Copy]. • [Copy]: Copies the selected file.
• [Copy All]: Copies all the files.
• [Unmark All]: Unmarks all the files.
• [Cancel]: Cancels the copy function.
,Note
During fi le copy, the icon is displayed on the
top right side of the screen. When the copy is
completed, the icon disappears automatically.