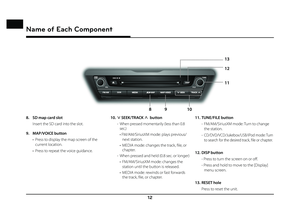
Page 49 of 88
49
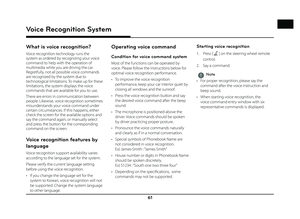
Using the Route Menu
Edit Route
This feature allows you to travel through the
searched routes by editing the current route.
Waypoints can be added/deleted/edited and
the order can be changed.
Adding waypoints
1. Press [NAV ] > [Route] > [Edit Route].
2. Press [Add Waypoint].
3. Add the waypoint through destination search function.
4. If you want to add an waypoint, follow steps 2~3.
5. Press [Done] > [Start Guidance].
Reordering Route
1. Press [NAV ] > [Route] > [Edit Route].
2. Press the desired item from the list.
3. Move the selected item up and down. Or Drag it to the desired position.
4. Press [Done] > [Start Guidance]. Deleting Route
1. Press [NAV ] > [Route] > [Edit Route].
2. Press [Menu] > [Delete].
3. Select the desired item, then press [Delete].
• [Delete]: Deletes the selected items.
• [Delete All]: Cancels the route.
• [Unmark All]: Unmarks all items.
• [Cancel]: Exits delete screen.
Page 50 of 88
![GENESIS G80 2019 Quick Reference Guide 50
Using the Route Menu
Route Info / Avoid
This allows you to check the route information
and search for new route by avoiding the
selected street(s).
1. Press [NAV ] > [Route] > [ Route Info](/manual-img/46/35634/w960_35634-49.png "GENESIS G80 2019 Quick Reference Guide 50
Using the Route Menu
Route Info / Avoid
This allows you to check the route information
and search for new route by avoiding the
selected street(s).
1. Press [NAV ] > [Route] > [ Route Info")
50
Using the Route Menu
Route Info / Avoid
This allows you to check the route information
and search for new route by avoiding the
selected street(s).
1. Press [NAV ] > [Route] > [ Route Info / Avoid].
2. Press [Avoid] to select he street(s) that you want to avoid.
3. Press [Done] to plan new route.
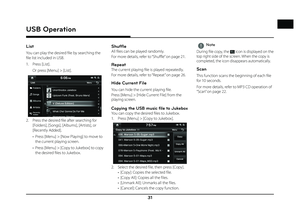
Route Overview
You can check the entire route between your
current location and your destination.
1. Press [NAV ] > [Route] > [Route Overview].
2. Press the desired item. • [Start Guidance]: Starts the route guidance.
• Press [Route Options] to set the route option. For more details, refer to “Route
Options” on page 48.
• Press [Route Info / Avoid] to check route information and set a route to be
avoided. For more details, refer to “Route
Info / Avoid” on page 50.
• Press [Edit Route] to edit the route. For more
details, refer to “Edit Route” on page 49.
• Press [Cancel Route] to cancel the route. For more details, refer to “Cancel Route”
on page 48.
Route Preview
This allows you to check the detailed turn-by-
turn list.
1. Press [NAV ] > [Route] > [Route Preview].
2. Press the desired item.
• [
]: Move to the departure location.
• [
]: Move to the previous position.
• [
]: Move to the next position.
• [
]: Move to the destination location.
• [
]: Quick move to the
specifi c position.
• [
]: Close the route preview.
Page 51 of 88

51
Bluetooth® Wireless Technology
Before Using the Bluetooth
Handsfree
What is Bluetooth Wireless
Technology?
• Bluetooth Wireless Technology refers to a short-distance wireless networking technology
which uses a 2.45GHz frequency to connect
various devices within a certain distance.
• Supported within PCs, external devices, Bluetooth phones, PDAs, various electronic
devices, and automotive environments,
Bluetooth Wireless Technology to be
transmitted at high speeds without having to
use a connector cable.
• Bluetooth Handsfree refers to a device which allows the user to conveniently make phone
calls with Bluetooth mobile phones through
the system.
• The Bluetooth Handsfree feature may not be supported in some mobile phones.
Precautions for Safe Driving
• Bluetooth is a feature that enables drivers to use handsfree while driving. Connecting the
head unit with a Bluetooth phone allows the
user to conveniently make calls, receive calls,
and manage the phone book. Before using
Bluetooth Wireless Technology, carefully
read the contents of this user’s manual.
• Excessive use or operations while driving may lead to negligent driving practices and
be the cause of accidents. Do not operate
the device excessively while driving.
• Viewing the screen for prolonged periods of time is dangerous and may lead to
accidents. When driving, view the screen
only for short periods of time.
Cautions upon Connecting Bluetooth
Phone
• Before connecting the head unit with the mobile phone, check to see that the mobile
phone supports Bluetooth features.
• If you do not want automatic connection with your Bluetooth device, turn the
Bluetooth feature off of the Bluetooth
device. • Park the vehicle when pairing the head unit
with the mobile phone.
• Some Bluetooth features may occasionally not operate properly depending on the
fi rmware version of your mobile phone.
If such features can be operated after
receiving a S/W upgrade from your mobile
phone manufacturer, unpair all devices and
pair again before use.
• When pairing and the head unit with the iPhone for the fi rst time while your iPhone
is connected to the USB port with iPhone
cable, error message may be displayed on
your iPhone. But, this is intended operation.
You may ignore it if your iPhone has been
connected to the head unit.
Pairing and connecting the
unit and a Bluetooth phone
To use the Bluetooth feature, make sure the
Bluetooth on your phone is turned on. Refer to
your phone’s user guide.
Bluetooth® Wireless Technology
Page 52 of 88
![GENESIS G80 2019 Quick Reference Guide 52
Bluetooth® Wireless Technology
When no phones have been paired
1. Press [PHONE] on the remote control for head unit or [
] on the steering wheel
remote control.
2. On your phone, initiate a se](/manual-img/46/35634/w960_35634-51.png "GENESIS G80 2019 Quick Reference Guide 52
Bluetooth® Wireless Technology
When no phones have been paired
1. Press [PHONE] on the remote control for head unit or [
] on the steering wheel
remote control.
2. On your phone, initiate a se")
52
Bluetooth® Wireless Technology
When no phones have been paired
1. Press [PHONE] on the remote control for head unit or [
] on the steering wheel
remote control.
2. On your phone, initiate a search for Bluetooth devices. ( The default vehicle
name is GENESIS G80.)
3. 1) If the SSP (Secure Simple Pairing) is not supported, input the passkey on your
Bluetooth device. ( The default passkey
is 0000.)
2) If the SSP (Secure Simple Pairing) is supported, press [Yes] on the pop-up
screen of the your Bluetooth device.
( The pop-up screen may diff er from the
actual information of the Bluetooth
device.)
4. Press [Yes] to connect automatically to the unit and a Bluetooth phone preferentially
after ignition switch is in ON position.
When you approve in the mobile phone, the mobile phone contacts and the latest
call list are downloaded.
5. When your phone is successfully
connected, the phone screen is displayed
on the screen. When the connection fails, a
failure message is displayed on the screen.
Once Bluetooth connection is successful, the name of the connected mobile phone
will become displayed on the phone
screen and Bluetooth handsfree functions
will operate.
Page 53 of 88
![GENESIS G80 2019 Quick Reference Guide 53
Bluetooth® Wireless Technology
When a phone is already paired
1. Press [HOME] > [Setup] > [Phone] > [Bluetooth Connection].
2. 1) Select the device you want to connect.
2) If there is no devi](/manual-img/46/35634/w960_35634-52.png "GENESIS G80 2019 Quick Reference Guide 53
Bluetooth® Wireless Technology
When a phone is already paired
1. Press [HOME] > [Setup] > [Phone] > [Bluetooth Connection].
2. 1) Select the device you want to connect.
2) If there is no devi")
53
Bluetooth® Wireless Technology
When a phone is already paired
1. Press [HOME] > [Setup] > [Phone] > [Bluetooth Connection].
2. 1) Select the device you want to connect.
2) If there is no device you want to connect, press [Add New device].
3. On your phone, initiate a search for Bluetooth devices. ( The default vehicle
name is GENESIS G80.)
4. 1) If the SSP (Secure Simple Pairing) is not
supported, input the passkey on your
Bluetooth device. ( The default passkey
is 0000.)
2) If the SSP (Secure Simple Pairing) is supported, press [Yes] on the pop-up
screen of the your Bluetooth device.
( The pop-up screen may diff er from
the actual information of the Bluetooth
device.)
5. Press [Yes] to connect automatically to the
unit and a Bluetooth phone preferentially
after ignition switch is in ON position.
When you approve in the mobile phone, the mobile phone contacts and the latest
call list are downloaded.
6. When your phone is successfully connected, the Bluetooth settings screen
is displayed on the screen. When the
connection fails, a failure message is
displayed on the screen.
Page 54 of 88

54
Bluetooth® Wireless Technology
,Note
• For safety reasons, pairing a Bluetooth phone is not possible when the vehicle is in
motion. Park the vehicle in a safe location to
pair a Bluetooth phone. It is possible to pair
up to 5 mobile phones. In order to pair a
new phone when there are already 5 mobile
phones paired, you must fi rst delete one of
the previously paired phones.
• Some functions may not be supported due to limited Bluetooth compatibility between
the car system and mobile phone.
• When a Bluetooth device is connected, a new device cannot be paired. If you want
to pair a new phone, fi rst disconnect the
connected Bluetooth device.
Change Device
You can connect the head unit and another
Bluetooth device already paired.
1. Press [Menu] > [Change Device] on the phone screen.
2. Press the desired Bluetooth device on the
pop-up.
,Note
You can use the Change Device function by
pressing [
] on the screen.
Disconnecting the connected phone
1. Press [HOME] > [Setup] > [Phone] > [Bluetooth Connection].
2. Select the connected phone.
,Note
If you want to connect the disconnected
phone again, select the disconnected phone.
Deleting Bluetooth Devices
If you no longer need to use a phone, you
can delete the Bluetooth devices. Note that
deleting a Bluetooth device will delete all call
history and contact entries.
1. Press [HOME] > [Setup] > [Phone] > [Bluetooth Connection]. 2. Press [Menu] > [Delete] on the Bluetooth
settings screen.
3. Select the phone you want to delete and press [Delete].
• [Delete]: Deletes the selected items.
• [Delete All]: Deletes all items.
• [Unmark All]: Unmarks all items.
• [Cancel]: Exits delete screen.
4. Press [Yes] on the pop-up screen.
Page 55 of 88

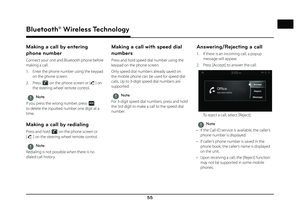
55
Bluetooth® Wireless Technology
Making a call by entering
phone number
Connect your unit and Bluetooth phone before
making a call.
1. Enter the phone number using the keypad on the phone screen.
2. Press [
] on the phone screen or [] on
the steering wheel remote control.
,Note
If you press the wrong number, press [
]
to delete the inputted number one digit at a
time.
Making a call by redialing
Press and hold [] on the phone screen or
[
] on the steering wheel remote control.
,Note
Redialing is not possible when there is no
dialed call history.
Making a call with speed dial
numbers
Press and hold speed dial number using the
keypad on the phone screen.
Only speed dial numbers already saved on
the mobile phone can be used for speed dial
calls. Up to 3-digit speed dial numbers are
supported.
,Note
For 3-digit speed dial numbers, press and hold
the 3rd digit to make a call to the speed dial
number.
Answering/Rejecting a call
1. If there is an incoming call, a popup message will appear.
2. Press [Accept] to answer the call.
To reject a call, select [Reject].
,Note
• If the Call-ID service is available, the caller’s phone number is displayed.
• If caller’s phone number is saved in the phone book, the caller’s name is displayed
on the unit.
• Upon receiving a call, the [Reject] function may not be supported in some mobile
phones.
Page 56 of 88
![GENESIS G80 2019 Quick Reference Guide 56
Bluetooth® Wireless Technology
Responding with messages
1. If there is an incoming call, a popup message will appear.
2. Press [Message] to respond with messages.
3. Select the desired message](/manual-img/46/35634/w960_35634-55.png "GENESIS G80 2019 Quick Reference Guide 56
Bluetooth® Wireless Technology
Responding with messages
1. If there is an incoming call, a popup message will appear.
2. Press [Message] to respond with messages.
3. Select the desired message")
56
Bluetooth® Wireless Technology
Responding with messages
1. If there is an incoming call, a popup message will appear.
2. Press [Message] to respond with messages.
3. Select the desired message and press [Send].
,Note
Depending on the mobile phone model, the
[Message] function may not be supported.
Switching call to the mobile
phone
1. If you want to switch the call to the mobile phone while talking on the car handsfree,
press [Use Private].
As shown below, the call is switched to the mobile phone.
2. If you want to switch the call to the car handsfree while talking on the mobile
phone, press [Use Handsfree].
The call is switched to the car handsfree.
Ending a call
1. To end a call, press [End] on the phone
screen or [
] on the steering wheel
remote control.
2. The call is ended.
Using the menu during a phone
call
When making a call, you can use the following
menu items.
A
C
B
Position Description
A Outgoing
volumeDisplays the Mic Volume
settings. You can adjust the
in-call volume that the other
party hears (level 1 - 5).
B Mic On/
Off Turns the Mic On/Off.
C Keypad Moves to a screen for
entering ARS numbers.