2019 FORD EXPLORER fuel type
[x] Cancel search: fuel typePage 99 of 571
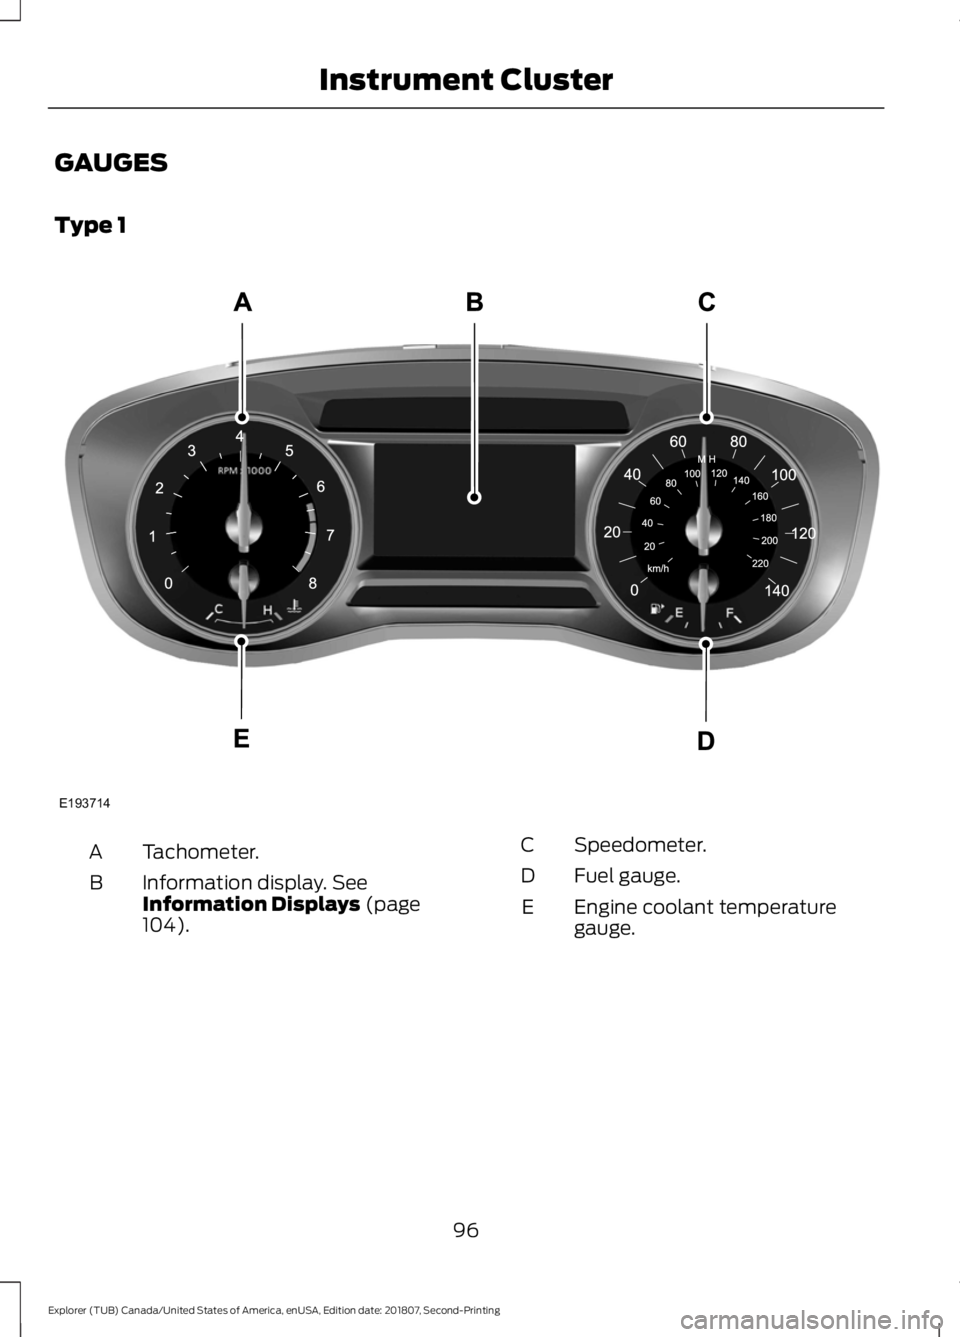
GAUGES
Type 1
Tachometer.
A
Information display. See
Information Displays (page
104).
B
Speedometer.
C
Fuel gauge.
D
Engine coolant temperature
gauge.
E
96
Explorer (TUB) Canada/United States of America, enUSA, Edition date: 201807, Second-Printing Instrument ClusterE193714
Page 101 of 571

Type 3
Tachometer.
A
Information display. See
Information Displays (page
104).
B
Speedometer.
C
Fuel gauge.
D
Engine coolant temperature
gauge.
E
Information Display
Odometer
Located in the bottom of the information
display. Registers the accumulated
distance your vehicle has traveled. Compass
Displays the vehicle's heading direction.
Trip Computer
See
General Information (page 104).
Vehicle Settings and Personalization
See
General Information (page 104).
98
Explorer (TUB) Canada/United States of America, enUSA, Edition date: 201807, Second-Printing Instrument ClusterE203205
Page 111 of 571
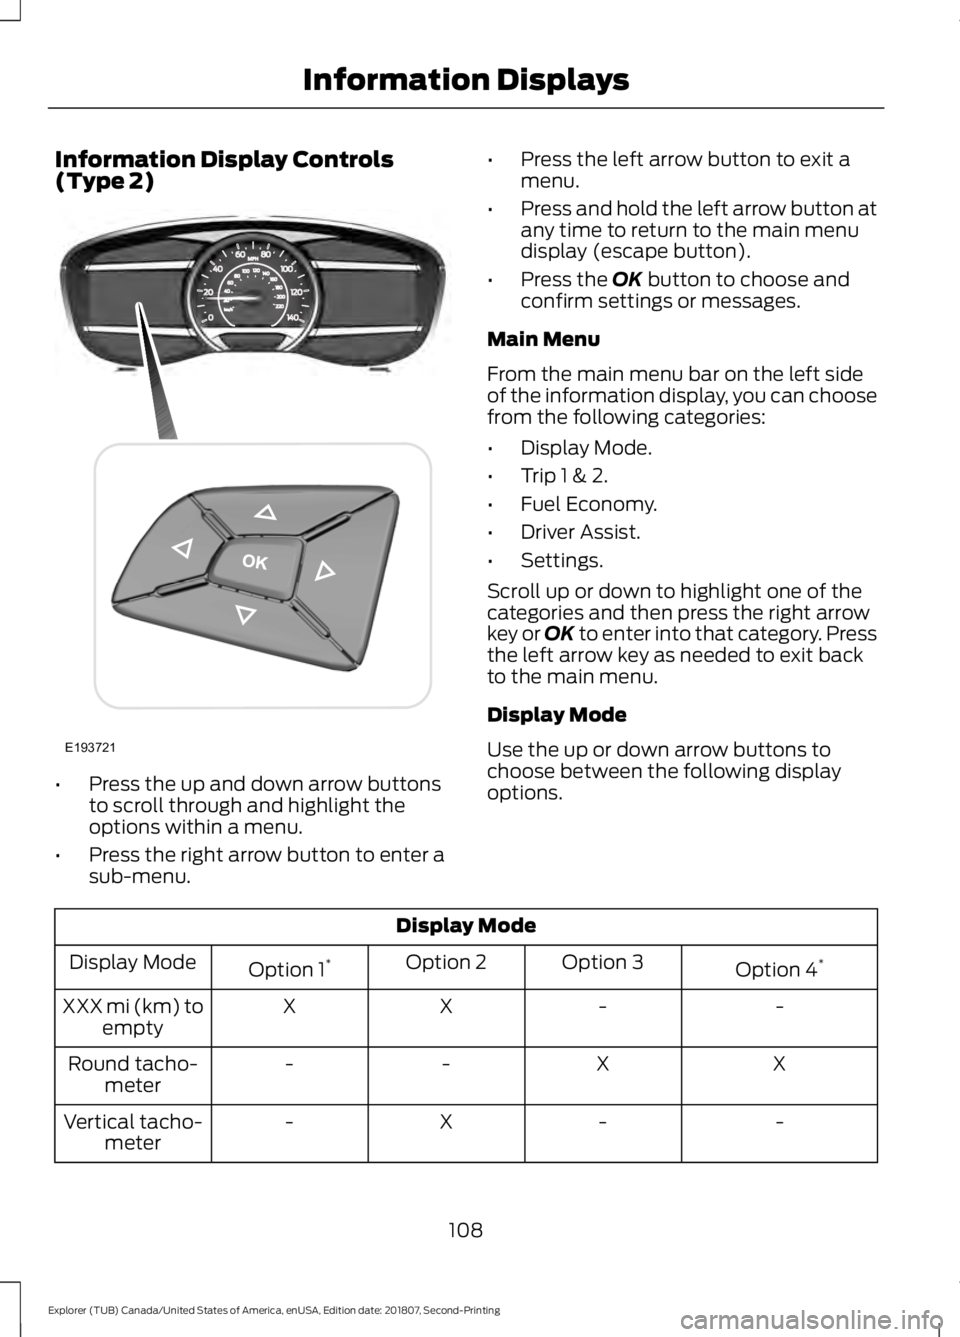
Information Display Controls
(Type 2)
•
Press the up and down arrow buttons
to scroll through and highlight the
options within a menu.
• Press the right arrow button to enter a
sub-menu. •
Press the left arrow button to exit a
menu.
• Press and hold the left arrow button at
any time to return to the main menu
display (escape button).
• Press the OK button to choose and
confirm settings or messages.
Main Menu
From the main menu bar on the left side
of the information display, you can choose
from the following categories:
• Display Mode.
• Trip 1 & 2.
• Fuel Economy.
• Driver Assist.
• Settings.
Scroll up or down to highlight one of the
categories and then press the right arrow
key or OK to enter into that category. Press
the left arrow key as needed to exit back
to the main menu.
Display Mode
Use the up or down arrow buttons to
choose between the following display
options. Display Mode
Option 4*
Option 3
Option 2
Option 1 *
Display Mode
-
-
X
X
XXX mi (km) to
empty
X
X
-
-
Round tacho-
meter
-
-
X
-
Vertical tacho-
meter
108
Explorer (TUB) Canada/United States of America, enUSA, Edition date: 201807, Second-Printing Information DisplaysE193721
Page 115 of 571
Settings
Enter the submenu and select your setting
Max Speed
Volume Limiter
Hold OK to Clear All MyKeys
Clear MyKeys
Enter the submenu and select your setting
Distance
Display Setup
Enter the submenu and select your setting
Temperature
Enter the submenu and select your setting
Gauge Display
Enter the submenu and select your setting
Tire Pressure
Enter the submenu and select your setting
Language
Note: Some MyKey items only appear if a
MyKey is set.
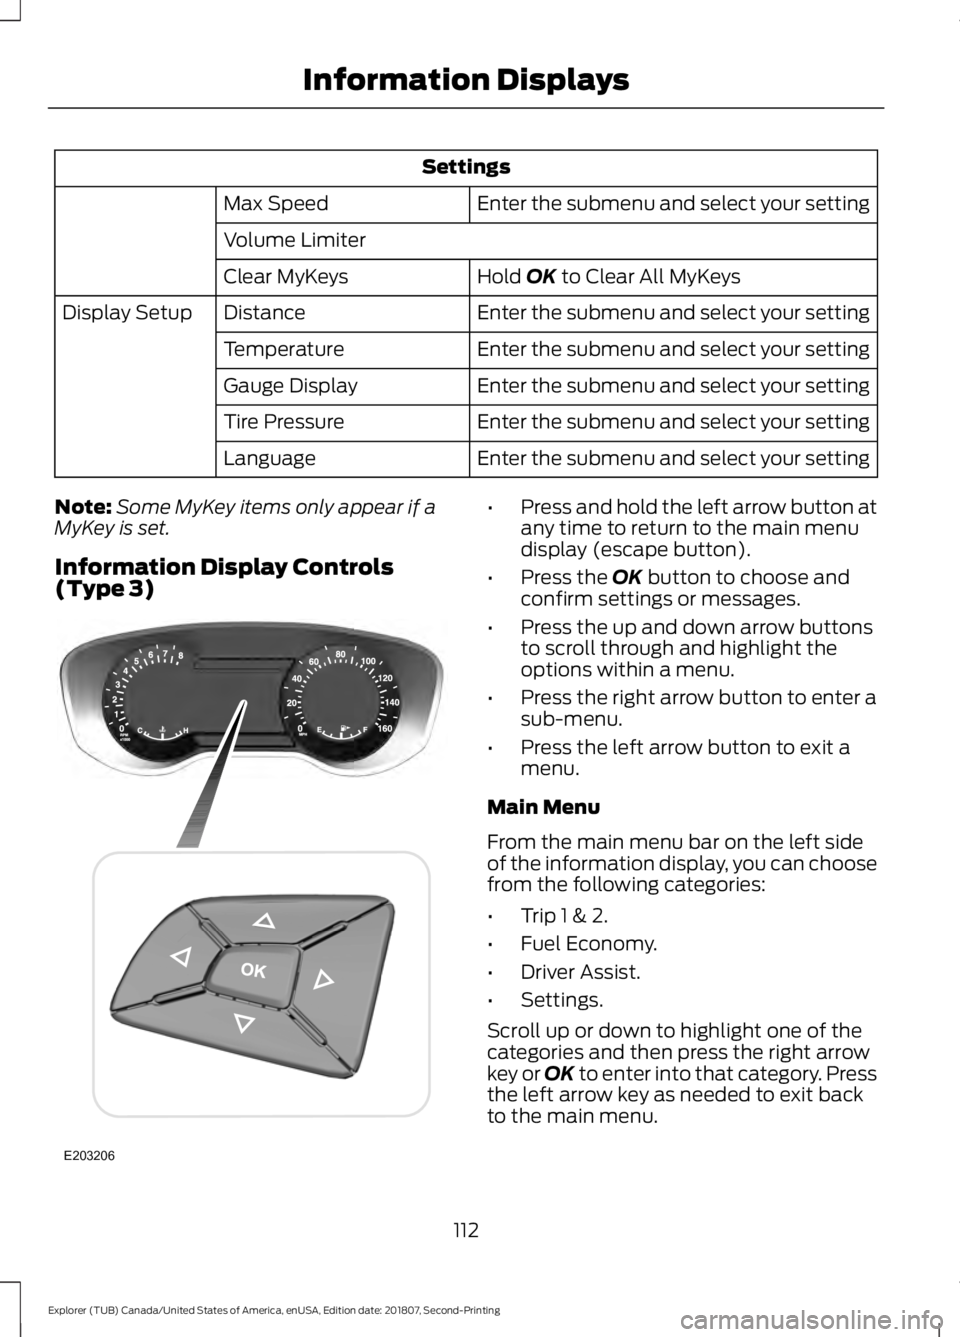
Information Display Controls
(Type 3) •
Press and hold the left arrow button at
any time to return to the main menu
display (escape button).
• Press the
OK button to choose and
confirm settings or messages.
• Press the up and down arrow buttons
to scroll through and highlight the
options within a menu.
• Press the right arrow button to enter a
sub-menu.
• Press the left arrow button to exit a
menu.
Main Menu
From the main menu bar on the left side
of the information display, you can choose
from the following categories:
• Trip 1 & 2.
• Fuel Economy.
• Driver Assist.
• Settings.
Scroll up or down to highlight one of the
categories and then press the right arrow
key or OK to enter into that category. Press
the left arrow key as needed to exit back
to the main menu.
112
Explorer (TUB) Canada/United States of America, enUSA, Edition date: 201807, Second-Printing Information DisplaysE203206
Page 254 of 571
Trailer Brakes
WARNING: Do not connect a
trailer's hydraulic brake system directly
to your vehicle's brake system. Your
vehicle may not have enough braking
power and your chances of having a
collision greatly increase.
Electric brakes and manual, automatic or
surge-type trailer brakes are safe if you
install them properly and adjust them to
the manufacturer's specifications. The
trailer brakes must meet local and federal
regulations.
The rating for the tow vehicle's braking
system operation is at the gross vehicle
weight rating, not the gross combined
weight rating.
Separate functioning brake systems are
required for safe control of towed vehicles
and trailers weighing more than
1,500 lb
(680 kg) when loaded.
Trailer Lamps WARNING:
Never connect any
trailer lamp wiring to the vehicle's tail
lamp wiring; this may damage the
electrical system resulting in fire. Contact
your authorized dealer as soon as
possible for assistance in proper trailer
tow wiring installation. Additional
electrical equipment may be required.
Trailer lamps are required on most towed
vehicles. Make sure all running lights, brake
lights, turn signals and hazard lights are
working. Before Towing a Trailer
Practice turning, stopping and backing up
to get the feel of your vehicle-trailer
combination before starting on a trip.
When turning, make wider turns so the
trailer wheels clear curbs and other
obstacles.
When Towing a Trailer
•
Do not drive faster than
70 mph
(113 km/h) during the first 500 mi
(800 km).
• Do not make full-throttle starts.
• Check your hitch, electrical connections
and trailer wheel lug nuts thoroughly
after you have traveled 50 mi (80 km).
• When stopped in congested or heavy
traffic during hot weather, place the
gearshift in park (P) to aid engine and
transmission cooling and to help A/C
performance.
• Turn off the speed control with heavy
loads or in hilly terrain. The speed
control may turn off automatically
when you are towing on long, steep
grades.
• Shift to a lower gear when driving down
a long or steep hill. Do not apply the
brakes continuously, as they may
overheat and become less effective.
• If your transmission is equipped with a
Grade Assist or Tow/Haul feature, use
this feature when towing. This provides
engine braking and helps eliminate
excessive transmission shifting for
optimum fuel economy and
transmission cooling.
• Allow more distance for stopping with
a trailer attached. Anticipate stops and
brake gradually.
• Avoid parking on a grade. However, if
you must park on a grade:
1. Turn the steering wheel to point your vehicle tires away from traffic flow.
251
Explorer (TUB) Canada/United States of America, enUSA, Edition date: 201807, Second-Printing Towing
Page 317 of 571
GENERAL INFORMATION
Use only approved wheel and tire sizes,
using other sizes could damage your
vehicle. If you change the diameter of the
tires from that fitted at the factory, the
speedometer may not display the correct
speed. If you intend to change the size of
the wheels from that fitted by the
manufacturer, you can check the suitability
with an authorized dealer.
Additional information related to the
functionality and maintenance of your tires
can be found later in this chapter. See Tire
Care (page 316).
You can find the recommended tire
inflation pressures can on the Tire Label,
which is on the B-pillar or the edge of the
driver door. You can also find this
information on the Safety Compliance
Certification Label, affixed to either the
door hinge pillar, door-latch post, or the
door edge that meets the door latch post;
next to the driver seating position.
We strongly recommend maintaining these
tire pressures at all times. Failure to follow
the tire pressure recommendations can
cause uneven treadwear patterns, reduced
fuel economy, and adversely affect the
way your vehicle handles.
Note: Check and set the tire pressure at the
ambient temperature in which you are
intending to drive your vehicle and when the
tires are cold.
Note: Check your tire pressures at least
once per month.
If your vehicle has a spare tire, set the
pressure to the highest value given for your
vehicle and tire size combination. Notice to utility vehicle and truck
owners WARNING:
Utility vehicles have a
significantly higher rollover rate than
other types of vehicles. WARNING: Vehicles with a higher
center of gravity (utility and four-wheel
drive vehicles) handle differently than
vehicles with a lower center of gravity
(passenger cars). Avoid sharp turns,
excessive speed and abrupt steering in
these vehicles. Failure to drive cautiously
increases the risk of losing control of your
vehicle, vehicle rollover, personal injury
and death. WARNING:
In a rollover crash, an
unbelted person is significantly more
likely to die than a person wearing a
seatbelt. WARNING:
Do not become
overconfident in the ability of four-wheel
drive vehicles. Although a four-wheel
drive vehicle may accelerate better than
a two-wheel drive vehicle in low traction
situations, it won't stop any faster than
two-wheel drive vehicles. Always drive
at a safe speed.
Utility vehicles and trucks handle
differently than passenger cars in the
various driving conditions that are
encountered on streets, highways and
off-road. Utility vehicles and trucks are not
designed for cornering at speeds as high
as passenger cars any more than low-slung
sports cars are designed to perform
satisfactorily under off-road conditions.
314
Explorer (TUB) Canada/United States of America, enUSA, Edition date: 201807, Second-Printing Wheels and Tires
Page 456 of 571
3D city models are complete 3D models
of entire city areas including navigable
roads, parks, rivers and rendered buildings.
3D landmarks and city models appear in
3D map mode only. Coverage of these
varies and improves with updated map
releases.
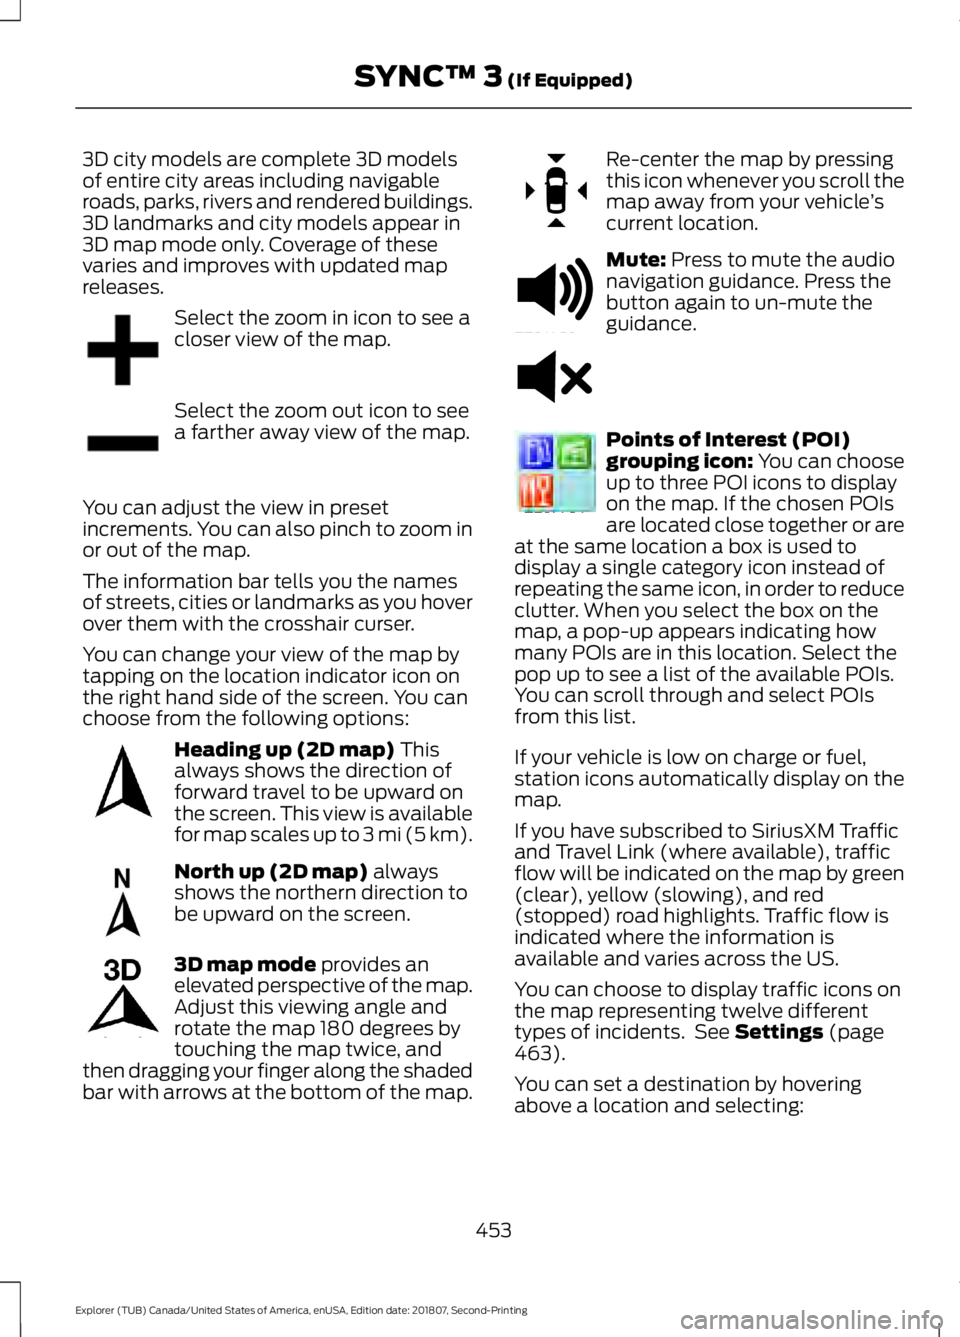
Select the zoom in icon to see a
closer view of the map.
Select the zoom out icon to see
a farther away view of the map.
You can adjust the view in preset
increments. You can also pinch to zoom in
or out of the map.
The information bar tells you the names
of streets, cities or landmarks as you hover
over them with the crosshair curser.
You can change your view of the map by
tapping on the location indicator icon on
the right hand side of the screen. You can
choose from the following options: Heading up (2D map) This
always shows the direction of
forward travel to be upward on
the screen. This view is available
for map scales up to
3 mi (5 km). North up (2D map)
always
shows the northern direction to
be upward on the screen. 3D map mode
provides an
elevated perspective of the map.
Adjust this viewing angle and
rotate the map 180 degrees by
touching the map twice, and
then dragging your finger along the shaded
bar with arrows at the bottom of the map. Re-center the map by pressing
this icon whenever you scroll the
map away from your vehicle
’s
current location. Mute:
Press to mute the audio
navigation guidance. Press the
button again to un-mute the
guidance. Points of Interest (POI)
grouping icon: You can choose
up to three POI icons to display
on the map. If the chosen POIs
are located close together or are
at the same location a box is used to
display a single category icon instead of
repeating the same icon, in order to reduce
clutter. When you select the box on the
map, a pop-up appears indicating how
many POIs are in this location. Select the
pop up to see a list of the available POIs.
You can scroll through and select POIs
from this list.
If your vehicle is low on charge or fuel,
station icons automatically display on the
map.
If you have subscribed to SiriusXM Traffic
and Travel Link (where available), traffic
flow will be indicated on the map by green
(clear), yellow (slowing), and red
(stopped) road highlights. Traffic flow is
indicated where the information is
available and varies across the US.
You can choose to display traffic icons on
the map representing twelve different
types of incidents. See
Settings (page
463).
You can set a destination by hovering
above a location and selecting:
453
Explorer (TUB) Canada/United States of America, enUSA, Edition date: 201807, Second-Printing SYNC™ 3
(If Equipped)E207752 E207753 E207750 E207749 E207748 E207751 E251780 E251779 E207754
Page 563 of 571

Flat Tire
See: Changing a Road Wheel....................... 334
Floor Mats......................................................256
Fog Lamps - Front See: Front Fog Lamps........................................ 88
Foot Pedals See: Adjusting the Pedals.................................. 81
Ford Credit
..........................................................11
US Only...................................................................... 11
Ford Protect
...................................................493
Ford Protect Extended Service Plan
(CANADA ONLY).......................................... 494
Ford Protect Extended Service Plans (U.S. Only).................................................................. 493
Four-Wheel Drive
.........................................188
Principle of Operation...................................... 188
Front Fog Lamps............................................88
Front Parking Aid.........................................203 Obstacle Distance Indicator......................... 204
Front Passenger Sensing System............46
Fuel and Refueling........................................172
Fuel Consumption
........................................179
Advertised Capacity........................................... 179
Fuel Economy....................................................... 179
Fuel Filler Funnel Location........................174
Fuel Quality - E85.........................................173 Choosing the Right Fuel - Flex Fuel
Vehicles.............................................................. 173
Switching Between E85 and Gasoline............................................................. 174
Fuel Quality - Gasoline................................172 Choosing the Right Fuel................................... 172
Fuel Shutoff
...................................................259
Fuses..................................................................271
Fuse Specification Chart............................271
Passenger Compartment Fuse Panel........276
Power Distribution Box..................................... 271
G
Garage Door Opener....................................157
Garage Door Opener See: Universal Garage Door Opener............157
Gauges...............................................................96 Engine Coolant Temperature Gauge............99
Fuel Gauge............................................................. 99
Information Display............................................. 98
Type 1........................................................................\
96Type 2........................................................................\
97
Type 3....................................................................... 98
Gearbox See: Transmission.............................................. 184
General Information on Radio Frequencies...................................................53
Intelligent Access................................................. 53
General Maintenance Information.......495 Multi-Point Inspection..................................... 497
Owner Checks and Services......................... 496
Protecting Your Investment.......................... 495
Why Maintain Your Vehicle?......................... 495
Why Maintain Your Vehicle at Your Dealership?..................................................... 495
Getting Assistance Outside the U.S. and Canada
..........................................................267
Getting the Services You Need..............264 Away From Home............................................. 264
Global Opening................................................91 Moonroof.................................................................. 91
Remote Control Front Windows..................... 91
H
Handbrake See: Parking Brake............................................. 194
Hazard Flashers
...........................................259
HDC See: Using Hill Descent Control................... 200
Headlamp Adjusting See: Adjusting the Headlamps.................... 299
Headlamp Exit Delay....................................86
Headrest See: Head Restraints......................................... 139
Head Restraints
............................................139
Adjusting the Head Restraint........................ 140
Tilting Head Restraints ..................................... 141
Heated Exterior Mirrors
...............................137
Heated Rear Window..................................137
Heated Seats.................................................154 Front Seats............................................................ 154
Second Row Heated Seats............................. 155
Heated Steering Wheel...............................80
Heating See: Climate Control......................................... 129
Hill Start Assist..............................................194 Switching the System On and Off...............195
Using Hill Start Assist....................................... 194
560
Explorer (TUB) Canada/United States of America, enUSA, Edition date: 201807, Second-Printing Index