2019 FORD EXPLORER window
[x] Cancel search: windowPage 138 of 571
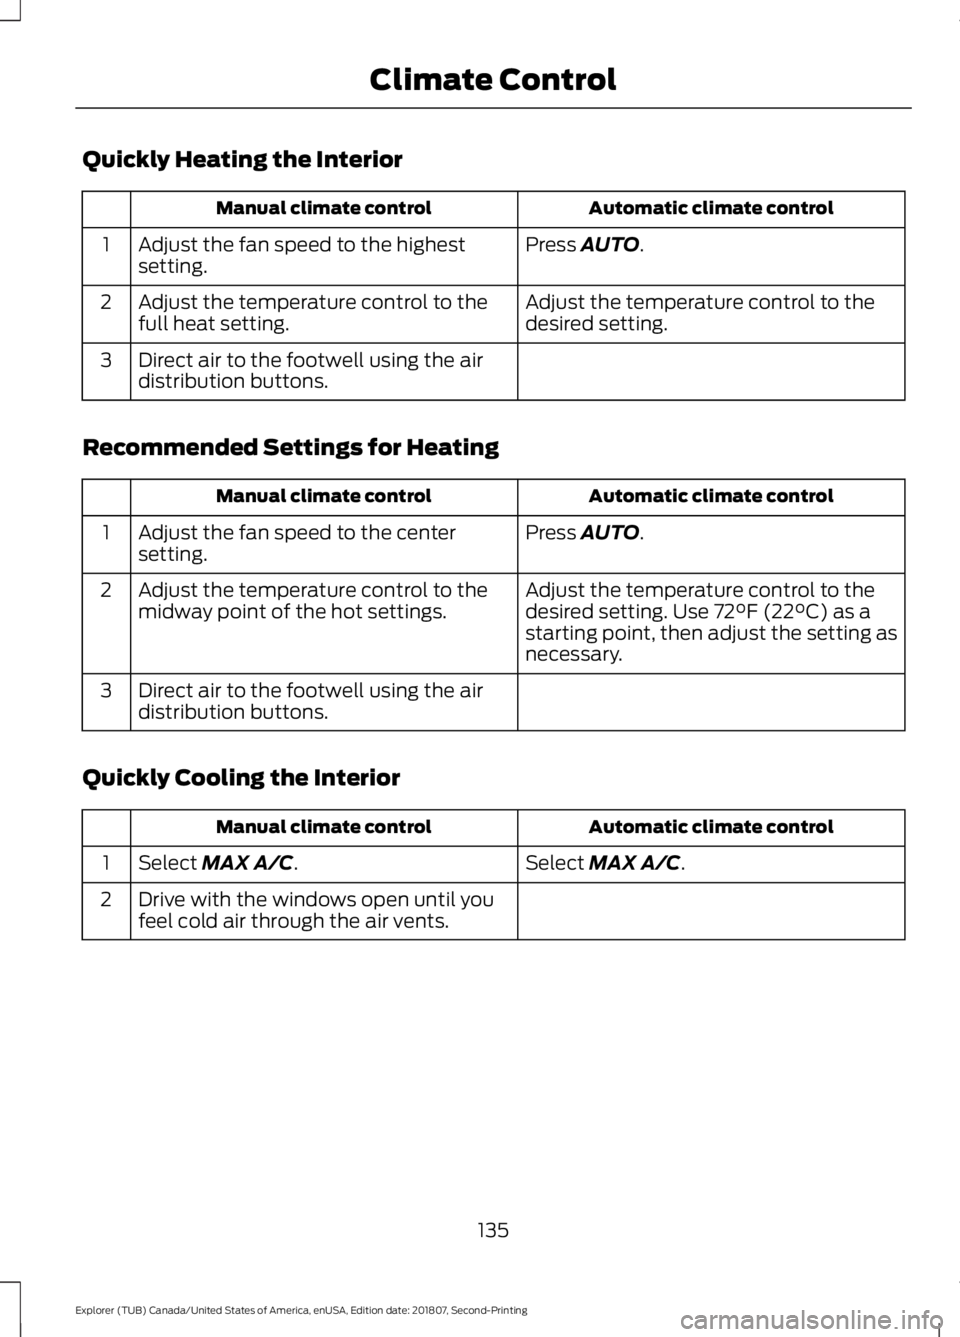
Quickly Heating the Interior
Automatic climate control
Manual climate control
Press AUTO.
Adjust the fan speed to the highest
setting.
1
Adjust the temperature control to the
desired setting.
Adjust the temperature control to the
full heat setting.
2
Direct air to the footwell using the air
distribution buttons.
3
Recommended Settings for Heating Automatic climate control
Manual climate control
Press
AUTO.
Adjust the fan speed to the center
setting.
1
Adjust the temperature control to the
desired setting. Use
72°F (22°C) as a
starting point, then adjust the setting as
necessary.
Adjust the temperature control to the
midway point of the hot settings.
2
Direct air to the footwell using the air
distribution buttons.
3
Quickly Cooling the Interior Automatic climate control
Manual climate control
Select
MAX A/C.
Select MAX A/C.
1
Drive with the windows open until you
feel cold air through the air vents.
2
135
Explorer (TUB) Canada/United States of America, enUSA, Edition date: 201807, Second-Printing Climate Control
Page 139 of 571
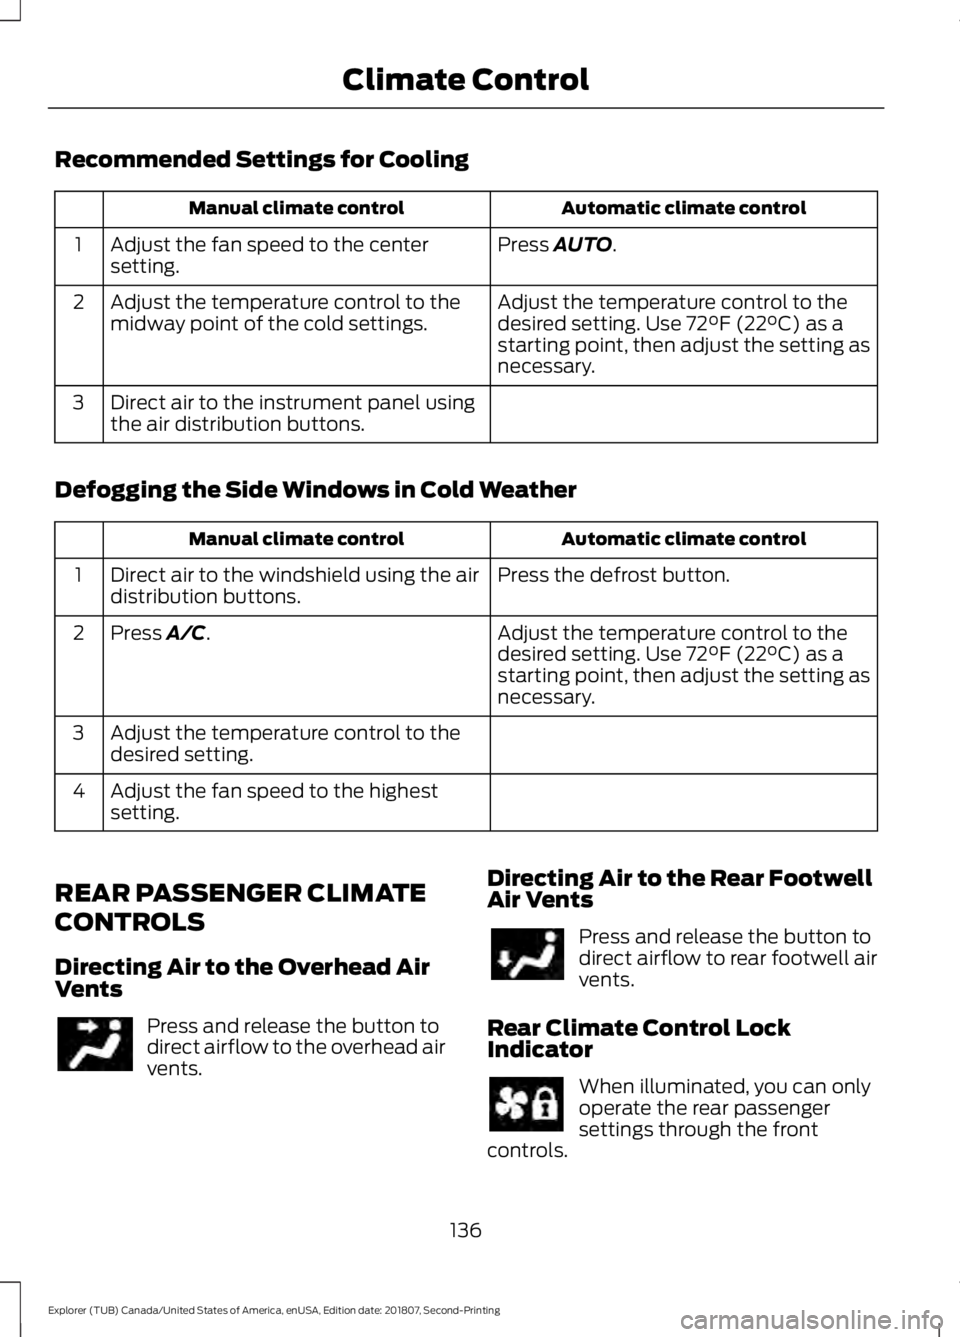
Recommended Settings for Cooling
Automatic climate control
Manual climate control
Press AUTO.
Adjust the fan speed to the center
setting.
1
Adjust the temperature control to the
desired setting. Use
72°F (22°C) as a
starting point, then adjust the setting as
necessary.
Adjust the temperature control to the
midway point of the cold settings.
2
Direct air to the instrument panel using
the air distribution buttons.
3
Defogging the Side Windows in Cold Weather Automatic climate control
Manual climate control
Press the defrost button.
Direct air to the windshield using the air
distribution buttons.
1
Adjust the temperature control to the
desired setting. Use
72°F (22°C) as a
starting point, then adjust the setting as
necessary.
Press A/C.
2
Adjust the temperature control to the
desired setting.
3
Adjust the fan speed to the highest
setting.
4
REAR PASSENGER CLIMATE
CONTROLS
Directing Air to the Overhead Air
Vents Press and release the button to
direct airflow to the overhead air
vents.
Directing Air to the Rear Footwell
Air Vents Press and release the button to
direct airflow to rear footwell air
vents.
Rear Climate Control Lock
Indicator When illuminated, you can only
operate the rear passenger
settings through the front
controls.
136
Explorer (TUB) Canada/United States of America, enUSA, Edition date: 201807, Second-Printing Climate Control
Page 140 of 571
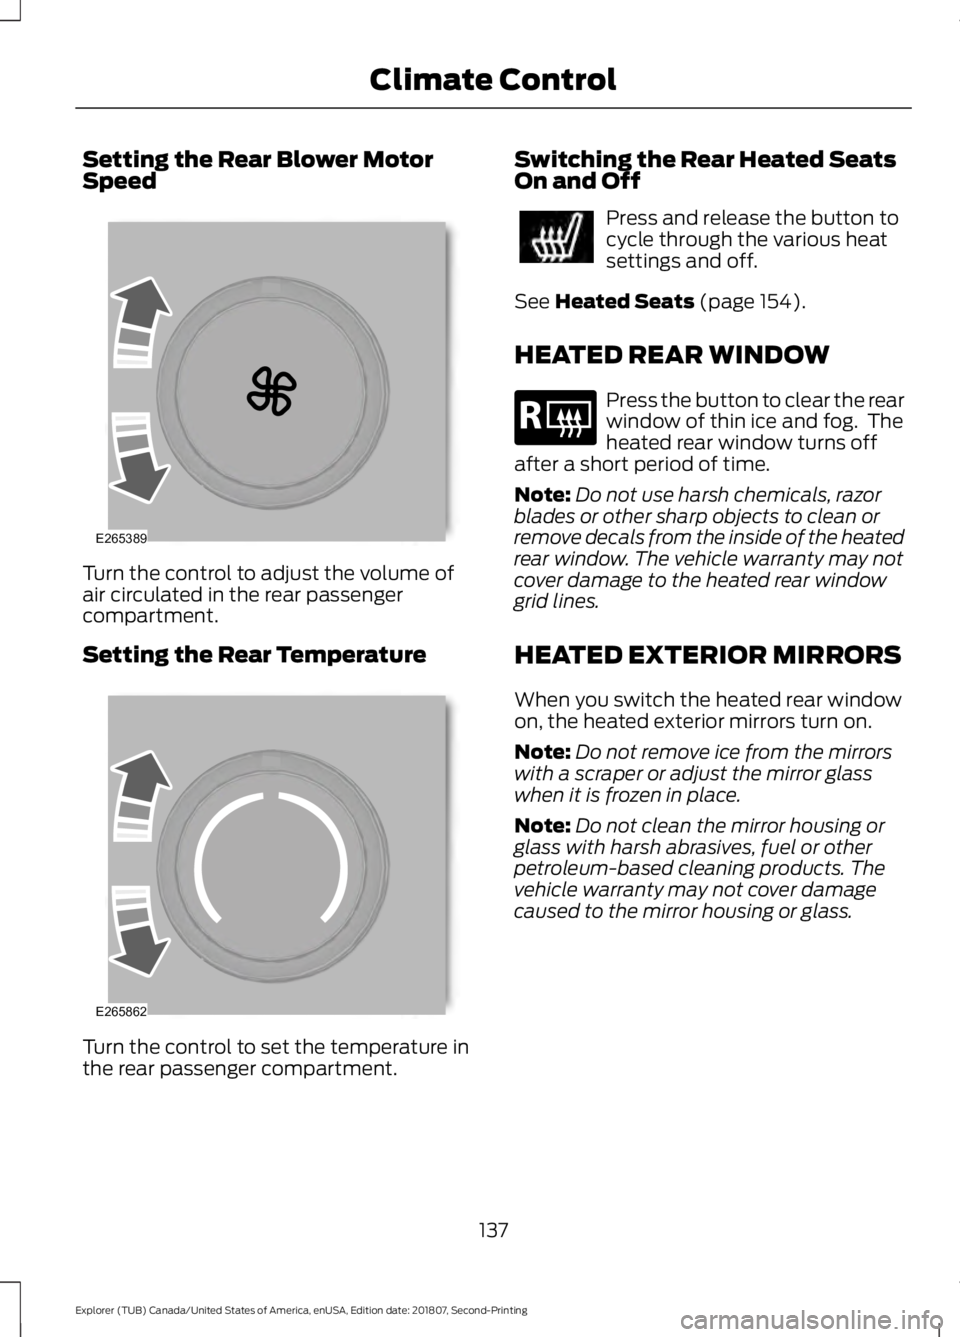
Setting the Rear Blower Motor
Speed
Turn the control to adjust the volume of
air circulated in the rear passenger
compartment.
Setting the Rear Temperature
Turn the control to set the temperature in
the rear passenger compartment. Switching the Rear Heated Seats
On and Off Press and release the button to
cycle through the various heat
settings and off.
See Heated Seats (page 154).
HEATED REAR WINDOW Press the button to clear the rear
window of thin ice and fog. The
heated rear window turns off
after a short period of time.
Note: Do not use harsh chemicals, razor
blades or other sharp objects to clean or
remove decals from the inside of the heated
rear window. The vehicle warranty may not
cover damage to the heated rear window
grid lines.
HEATED EXTERIOR MIRRORS
When you switch the heated rear window
on, the heated exterior mirrors turn on.
Note: Do not remove ice from the mirrors
with a scraper or adjust the mirror glass
when it is frozen in place.
Note: Do not clean the mirror housing or
glass with harsh abrasives, fuel or other
petroleum-based cleaning products. The
vehicle warranty may not cover damage
caused to the mirror housing or glass.
137
Explorer (TUB) Canada/United States of America, enUSA, Edition date: 201807, Second-Printing Climate ControlE265389 E265862 E184884
Page 141 of 571
CABIN AIR FILTER
Your vehicle is equipped with a cabin air
filter, which gives you and your passengers
the following benefits:
•
It improves your driving comfort by
reducing particle concentration.
• It improves the interior compartment
cleanliness.
• It protects the climate control
components from particle deposits.
You can locate the cabin air filter behind
the glove box.
Note: Make sure you have a cabin air filter
installed at all times. This prevents foreign
objects from entering the system. Running
the system without a filter in place could
result in degradation or damage to the
system.
Replace the filter at regular intervals. See
Scheduled Maintenance (page 495).
For additional cabin air filter information,
or to replace the filter, see an authorized
dealer.
REMOTE START
The climate control system adjusts the
interior temperature during remote start.
You can switch this feature on or off and
adjust the settings using the information
display controls. See
Information
Displays (page 104).
You cannot adjust the climate control
setting during remote start operation.
Switch the ignition on to make
adjustments. Based on your remote start settings, the
following vehicle-dependent features may
or may not remain on after remote starting
your vehicle:
•
Climate controlled seats.
• Heated steering wheel.
• Heated mirrors.
• Heated rear window.
• Windshield wiper de-icer.
Note: For dual zone climate controlled
seats, the passenger seat setting defaults
to match the driver seat during remote start.
Automatic Settings
If
Auto is on, the system sets the interior
temperature to 72°F (22°C) and heats or
cools the vehicle interior as required to
achieve comfort.
Note: In cold weather, the heated rear
window and heated mirrors turn on.
Last Settings
If
Last Settings is on, the system uses the
settings last selected before you turned
off the vehicle.
Heated and Cooled Features
In Auto mode, certain heated features may
switch on during cold weather, and cooled
features during hot weather.
138
Explorer (TUB) Canada/United States of America, enUSA, Edition date: 201807, Second-Printing Climate Control
Page 173 of 571
3.
Press and hold the push button ignition
switch, or press it three times within
two seconds.
4. Apply the parking brake.
Guarding Against Exhaust Fumes WARNING: If you smell exhaust
fumes inside your vehicle, have your
vehicle checked by your authorized
dealer immediately. Do not drive your
vehicle if you smell exhaust fumes.
Carbon monoxide is present in exhaust
fumes. Take precautions to avoid its
dangerous effects.
Important Ventilating Information
If you stop your vehicle and then leave the
engine idling for long periods, we
recommend that you do one of the
following:
• Open the windows at least 1 in (3 cm).
• Set your climate control to outside air.
SWITCHING OFF THE ENGINE
Vehicles With a Turbocharger WARNING:
Do not switch the
engine off when it is running at high
speed. If you do, the turbocharger will
continue running after the engine oil
pressure has dropped to zero. This will
lead to premature turbocharger bearing
wear.
Release the accelerator pedal. Wait until
the engine has reached idle speed and then
switch it off. ENGINE BLOCK HEATER
(IF
EQUIPPED) WARNING:
Failure to follow
engine block heater instructions could
result in property damage or serious
personal injury. WARNING:
Do not use your heater
with ungrounded electrical systems or
two-pronged adapters. There is a risk of
electrical shock. WARNING:
Do not fully close the
hood, or allow it to drop under its own
weight when using the engine block
heater. This could damage the power
cable and may cause an electrical short
resulting in fire, injury and property
damage.
Note: The heater is most effective when
outdoor temperatures are below
0°F
(-18°C).
The heater acts as a starting aid by
warming the engine coolant. This allows
the climate control system to respond
quickly. The equipment includes a heater
element (installed in the engine block) and
a wire harness. You can connect the
system to a grounded 120-volt AC
electrical source.
We recommend that you do the following
for a safe and correct operation:
• Use a 16-gauge outdoor extension cord
that is product certified by
Underwriter ’s Laboratory (UL) or
Canadian Standards Association
(CSA). This extension cord must be
suitable for use outdoors, in cold
170
Explorer (TUB) Canada/United States of America, enUSA, Edition date: 201807, Second-Printing Starting and Stopping the Engine
Page 216 of 571
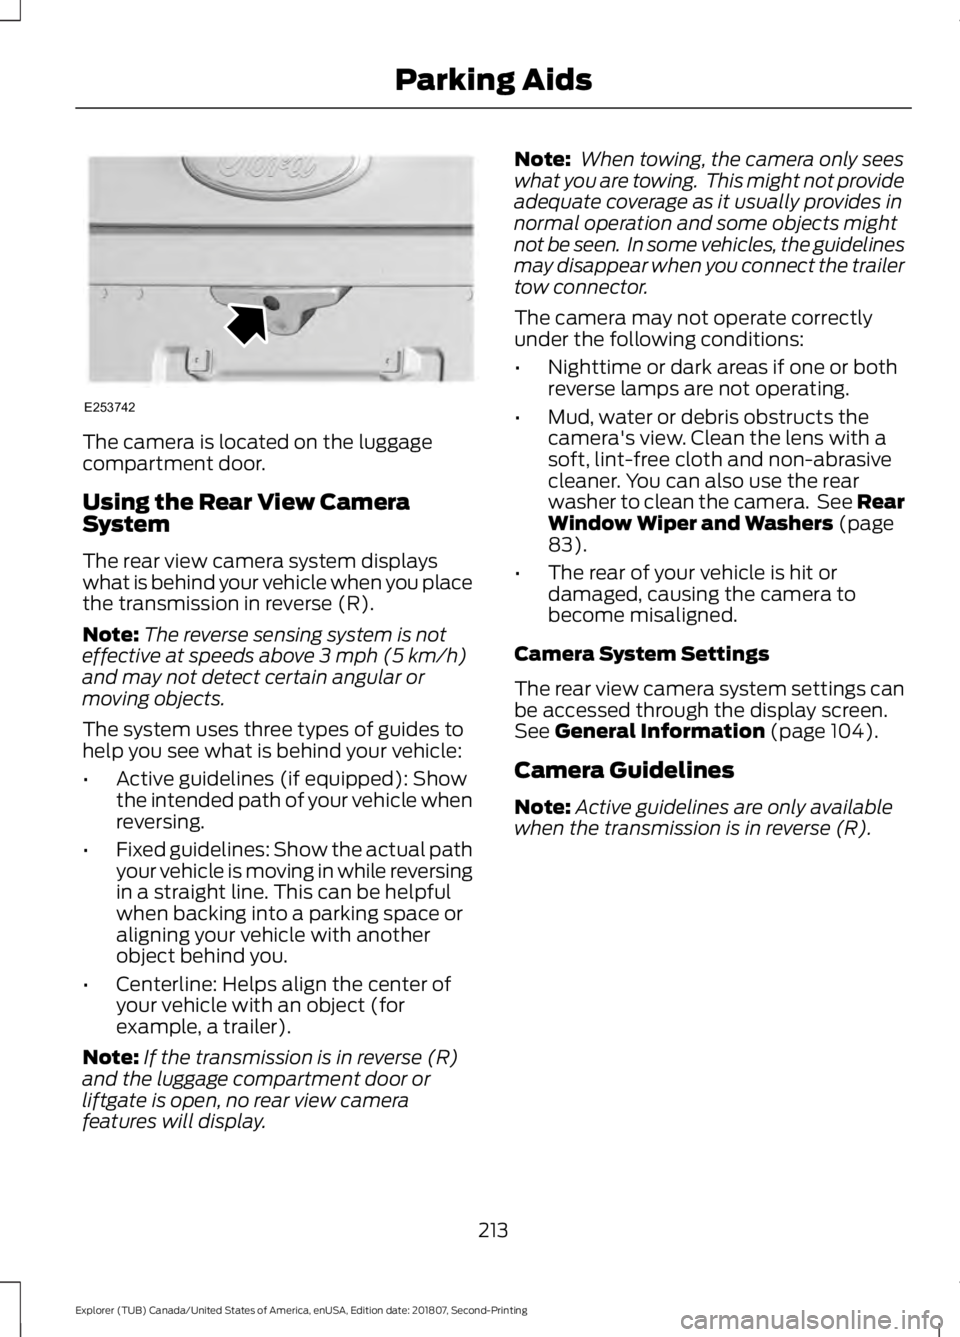
The camera is located on the luggage
compartment door.
Using the Rear View Camera
System
The rear view camera system displays
what is behind your vehicle when you place
the transmission in reverse (R).
Note:
The reverse sensing system is not
effective at speeds above 3 mph (5 km/h)
and may not detect certain angular or
moving objects.
The system uses three types of guides to
help you see what is behind your vehicle:
• Active guidelines (if equipped): Show
the intended path of your vehicle when
reversing.
• Fixed guidelines: Show the actual path
your vehicle is moving in while reversing
in a straight line. This can be helpful
when backing into a parking space or
aligning your vehicle with another
object behind you.
• Centerline: Helps align the center of
your vehicle with an object (for
example, a trailer).
Note: If the transmission is in reverse (R)
and the luggage compartment door or
liftgate is open, no rear view camera
features will display. Note:
When towing, the camera only sees
what you are towing. This might not provide
adequate coverage as it usually provides in
normal operation and some objects might
not be seen. In some vehicles, the guidelines
may disappear when you connect the trailer
tow connector.
The camera may not operate correctly
under the following conditions:
• Nighttime or dark areas if one or both
reverse lamps are not operating.
• Mud, water or debris obstructs the
camera's view. Clean the lens with a
soft, lint-free cloth and non-abrasive
cleaner. You can also use the rear
washer to clean the camera. See Rear
Window Wiper and Washers
(page
83).
• The rear of your vehicle is hit or
damaged, causing the camera to
become misaligned.
Camera System Settings
The rear view camera system settings can
be accessed through the display screen.
See
General Information (page 104).
Camera Guidelines
Note: Active guidelines are only available
when the transmission is in reverse (R).
213
Explorer (TUB) Canada/United States of America, enUSA, Edition date: 201807, Second-Printing Parking AidsE253742
Page 258 of 571
BREAKING-IN
You need to break in new tires for
approximately 300 mi (480 km). During
this time, your vehicle may exhibit some
unusual driving characteristics.
Avoid driving too fast during the first
1,000 mi (1,600 km)
. Vary your speed
frequently and change up through the
gears early. Do not labor the engine.
Do not tow during the first
1,000 mi
(1,600 km).
ECONOMICAL DRIVING
Your fuel economy is affected by several
things, such as how you drive, the
conditions you drive under, and how you
maintain your vehicle.
You may improve your fuel economy by
keeping these things in mind:
• Accelerate and slow down in a smooth,
moderate fashion.
• Drive at steady speeds without
stopping.
• Anticipate stops; slowing down may
eliminate the need to stop.
• Combine errands and minimize
stop-and-go driving.
• Close the windows for high-speed
driving.
• Drive at reasonable speeds (traveling
at 55 mph [88 km/h] uses 15% less
fuel than traveling at 65 mph [105
km/h]).
• Keep the tires properly inflated and use
only the recommended size.
• Use the recommended engine oil.
• Perform all regularly scheduled
maintenance. Avoid these actions; they reduce your fuel
economy:
•
Sudden accelerations or hard
accelerations.
• Revving the engine before turning it off.
• Idle for periods longer than one minute.
• Warm up your vehicle on cold
mornings.
• Use the air conditioner or front
defroster.
• Use the speed control in hilly terrain.
• Rest your foot on the brake pedal while
driving.
• Drive a heavily loaded vehicle or tow a
trailer.
• Carry unnecessary weight
(approximately 1 mpg [0.4 km/L] is
lost for every 400 lb [180 kilogram] of
weight carried).
• Driving with the wheels out of
alignment.
Conditions
• Heavily loading a vehicle or towing a
trailer may reduce fuel economy at any
speed.
• Adding certain accessories to your
vehicle (for example bug deflectors,
rollbars, light bars, running boards, ski
racks or luggage racks) may reduce
fuel economy.
• To maximize the fuel economy, drive
with the tonneau cover installed (if
equipped).
• Using fuel blended with alcohol may
lower fuel economy.
• Fuel economy may decrease with lower
temperatures during the first
5–10 mi
(12 –16 km) of driving.
• Driving on flat terrain offers improved
fuel economy as compared to driving
on hilly terrain.
255
Explorer (TUB) Canada/United States of America, enUSA, Edition date: 201807, Second-Printing Driving Hints
Page 259 of 571
•
Transmissions give their best fuel
economy when operated in the top
cruise gear and with steady pressure
on the gas pedal.
• Four-wheel-drive operation (if
equipped) is less fuel efficient than
two-wheel-drive operation.
• Close the windows for high-speed
driving.
DRIVING THROUGH WATER WARNING: Do not drive through
flowing or deep water as you may lose
control of your vehicle.
Note: Driving through standing water can
cause vehicle damage.
Note: Engine damage can occur if water
enters the air filter.
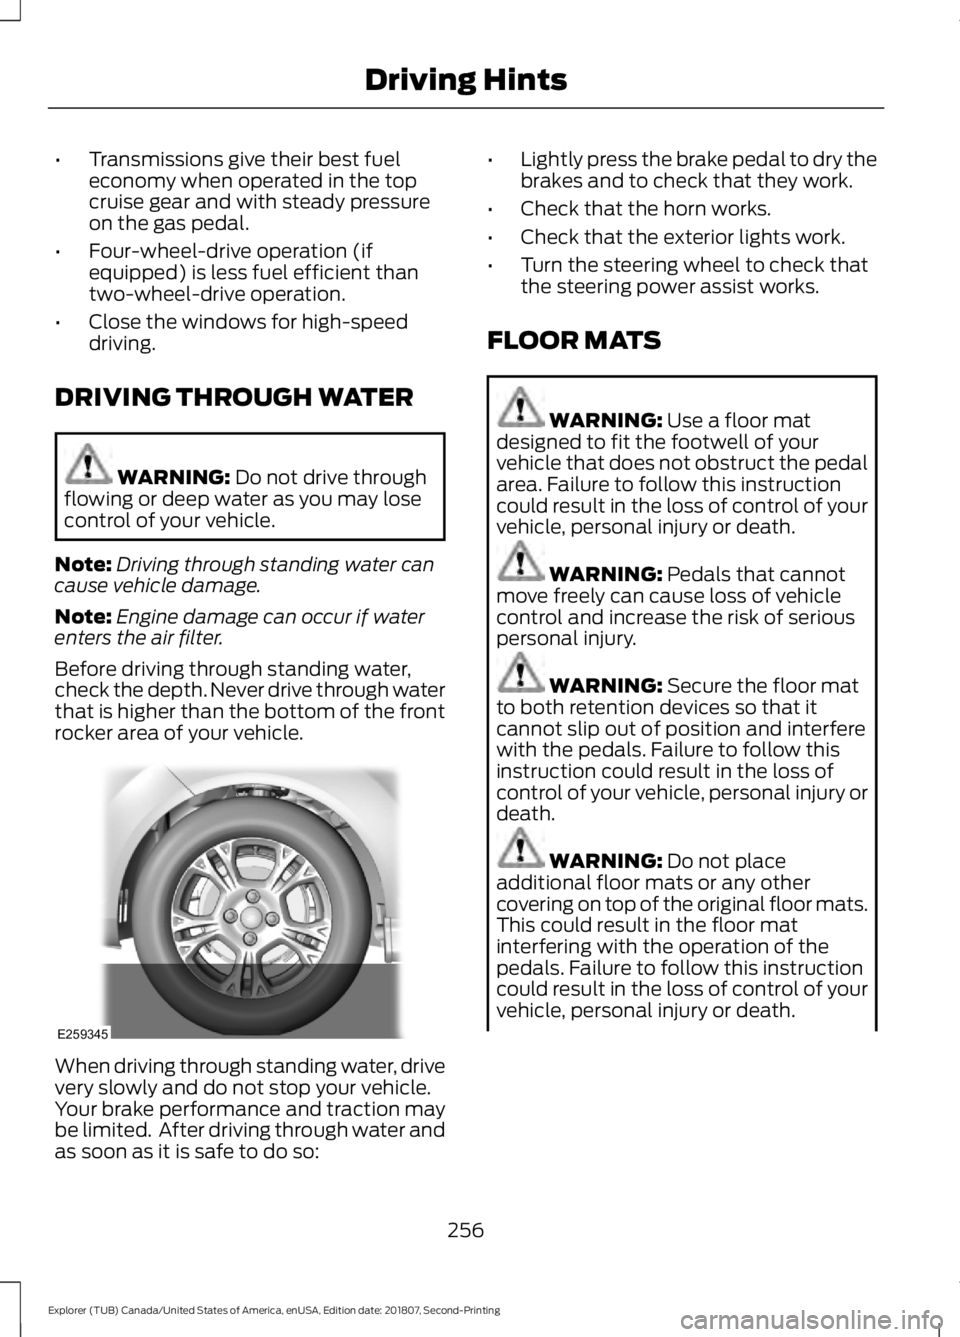
Before driving through standing water,
check the depth. Never drive through water
that is higher than the bottom of the front
rocker area of your vehicle. When driving through standing water, drive
very slowly and do not stop your vehicle.
Your brake performance and traction may
be limited. After driving through water and
as soon as it is safe to do so: •
Lightly press the brake pedal to dry the
brakes and to check that they work.
• Check that the horn works.
• Check that the exterior lights work.
• Turn the steering wheel to check that
the steering power assist works.
FLOOR MATS WARNING:
Use a floor mat
designed to fit the footwell of your
vehicle that does not obstruct the pedal
area. Failure to follow this instruction
could result in the loss of control of your
vehicle, personal injury or death. WARNING:
Pedals that cannot
move freely can cause loss of vehicle
control and increase the risk of serious
personal injury. WARNING:
Secure the floor mat
to both retention devices so that it
cannot slip out of position and interfere
with the pedals. Failure to follow this
instruction could result in the loss of
control of your vehicle, personal injury or
death. WARNING:
Do not place
additional floor mats or any other
covering on top of the original floor mats.
This could result in the floor mat
interfering with the operation of the
pedals. Failure to follow this instruction
could result in the loss of control of your
vehicle, personal injury or death.
256
Explorer (TUB) Canada/United States of America, enUSA, Edition date: 201807, Second-Printing Driving HintsE259345