2019 FORD E SERIES warning
[x] Cancel search: warningPage 156 of 329

WARNING: For E-350 and E-450vehicles with the Hydro-Boost BrakeSystem, do not press the brake pedalafter the engine has been turned off.Pressing the brake pedal after the enginehas been turned off will give a falsepower steering fluid level reading.
Only use fluid that meets Fordspecifications. See Capacities andSpecifications (page 203).
To top up the power steering fluid level dothe following.
1. Start the engine and let it run until itreaches normal operating temperature.
2. Make sure the fluid is within the MINand MAX range.
3. If the fluid level is low, add fluid to bewithin the MIN and MAX range. Do notoverfill.
4.While the engine idles, turn the steeringwheel left and right several times.
5. Recheck the fluid level in the reservoir.
Note:Do not operate the vehicle with a lowpower steering pump fluid level.
WASHER FLUID CHECK
WARNING: If you operate yourvehicle in temperatures below 40°F(5°C), use washer fluid with antifreezeprotection. Failure to use washer fluidwith antifreeze protection in coldweather could result in impairedwindshield vision and increase the riskof injury or accident.
Add fluid to fill the reservoir if the level islow. Only use a washer fluid that meetsFord specifications. See Capacities andSpecifications (page 198).
State or local regulations on volatileorganic compounds may restrict the useof methanol, a common windshield washerantifreeze additive. Washer fluidscontaining non-methanol antifreezeagents should be used only if they providecold weather protection without damagingthe vehicle’s paint finish, wiper blades orwasher system.
CHANGING THE 12V BATTERY
WARNING: This vehicle may befitted with more than one battery,removal of cable from only one batterydoes not disconnect the vehicleelectrical system. Be sure to disconnectcables from all batteries whendisconnecting power. Failure to do somay cause serious personal injury orproperty damage.
WARNING: Batteries normallyproduce explosive gases which cancause personal injury. Therefore, do notallow flames, sparks or lightedsubstances to come near the battery.When working near the battery, alwaysshield your face and protect your eyes.Always provide proper ventilation.
WARNING: When lifting aplastic-cased battery, excessive pressureon the end walls could cause acid to flowthrough the vent caps, resulting inpersonal injury and/or damage to thevehicle or battery. Lift the battery with abattery carrier or with your hands onopposite corners.
153
E-Series (TE4) Canada/United States of America, enUSA, Edition date: 201804, Second-Printing
Maintenance
Page 157 of 329

WARNING: Keep batteries out ofreach of children. Batteries containsulfuric acid. Avoid contact with skin,eyes or clothing. Shield your eyes whenworking near the battery to protectagainst possible splashing of acidsolution. In case of acid contact with skinor eyes, flush immediately with water fora minimum of 15 minutes and get promptmedical attention. If acid is swallowed,call a physician immediately.
WARNING: Battery posts,terminals and related accessoriescontain lead and lead compounds. Washhands after handling.
Note:If your vehicle battery has a cover,make sure it is reinstalled after the batteryhas been cleaned or replaced.
Note:Electrical or electronic accessoriesor components added to the vehicle by thedealer or the owner may adversely affectbattery performance and durability.
Your vehicle is fitted with a Motorcraft®maintenance-free battery which normallydoes not require additional water duringits life of service.
For longer, trouble-free operation, keep thetop of the battery clean and dry. Also,make certain the battery cables are alwaystightly fastened to the battery terminals.
If you see any corrosion on the battery orterminals, remove the cables from theterminals and clean with a wire brush. Youcan neutralize the acid with a solution ofbaking soda and water.
Always dispose of automotive batteries ina responsible manner. Follow your localauthorized standards for disposal. Call yourlocal authorized recycling center to findout more about recycling automotivebatteries.
Reconnecting the Battery
Because your vehicle’s engine iselectronically controlled by a computer,some control conditions are maintainedby power from the battery. When thebattery is disconnected or a new batteryis installed, the engine must relearn its idleand fuel trim strategy for optimumdriveability and performance. Flexible fuelvehicles (FFV) must also relearn theethanol content of the fuel for optimumdriveability and performance.
To begin this process.
1.Switch off all accessories and start theengine.
2. Run the engine until it reaches normaloperating temperature.
3.Allow the engine to idle for at least oneminute.
4. Turn the A/C on and allow the engineto idle for at least one minute.
5. Fully press the foot brake. Release theparking brake. Shift the gearshift leverto Drive (D) and allow the engine toidle for at least one minute.
6. Drive the vehicle for approximately10 mi (16 km) to complete therelearning process.
Note:If you do not carry out the aboveprocess, the idle quality of your vehicle maybe adversely affected until the idle trim iseventually relearned.
Flexible fuel vehicles operating on E85 mayexperience poor starts and driveabilityproblems until the fuel trim and ethanolcontent have been relearned.
When the battery is disconnected or a newbattery installed, the transmission mustlearn its adaptive strategy. As a result ofthis, the transmission may shift firmly. Thisoperation is considered normal and fullyupdates transmission operation to its
154
E-Series (TE4) Canada/United States of America, enUSA, Edition date: 201804, Second-Printing
Maintenance
Page 160 of 329
6.Repeat steps 3 through 5 to adjust theother headlamp.
7. Close the hood and switch off thelamps.
REMOVING A HEADLAMP
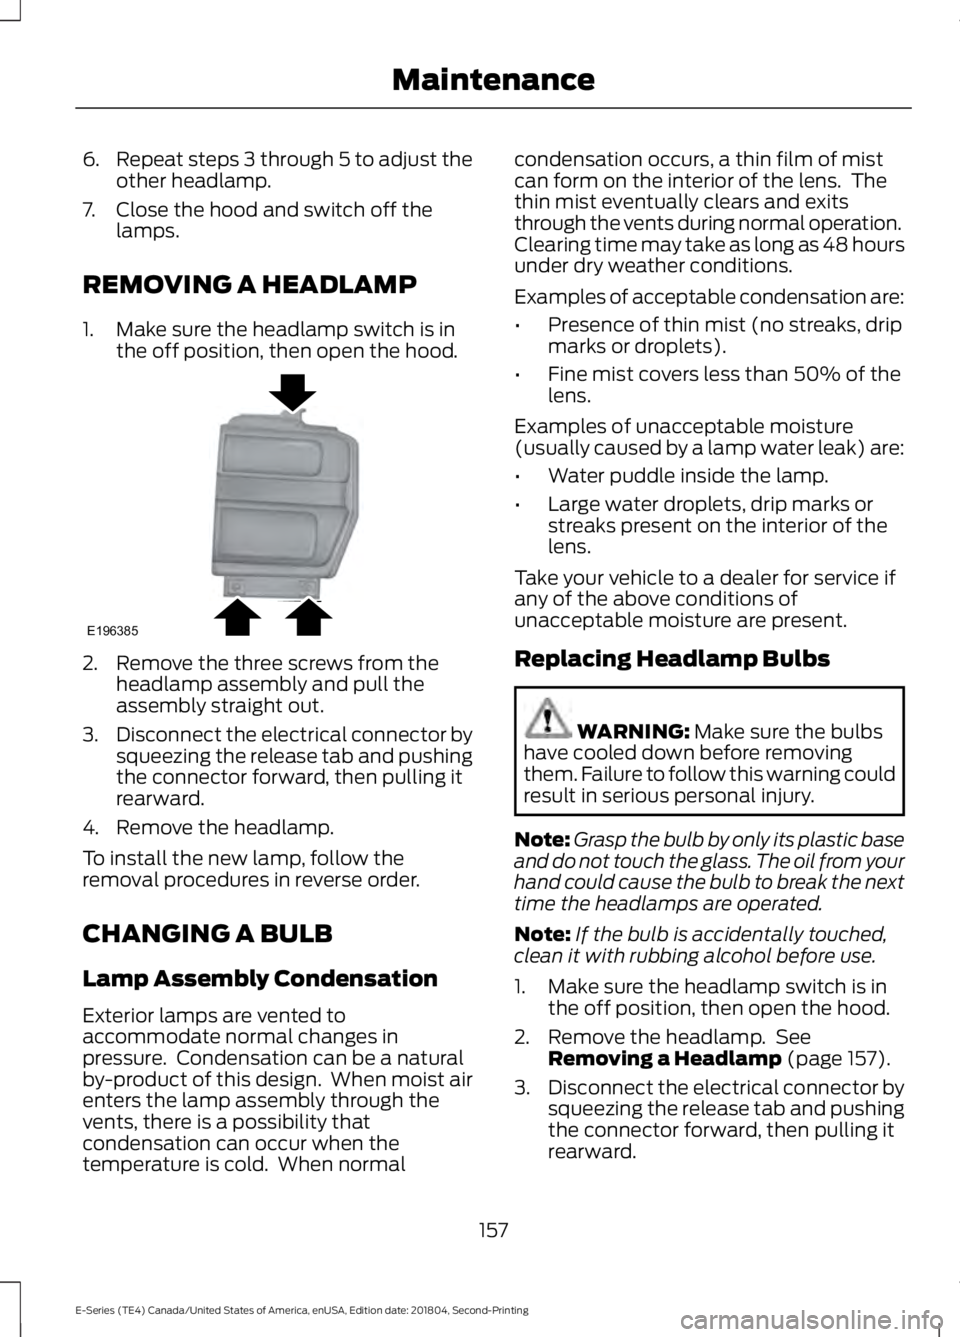
1. Make sure the headlamp switch is inthe off position, then open the hood.
2. Remove the three screws from theheadlamp assembly and pull theassembly straight out.
3.Disconnect the electrical connector bysqueezing the release tab and pushingthe connector forward, then pulling itrearward.
4. Remove the headlamp.
To install the new lamp, follow theremoval procedures in reverse order.
CHANGING A BULB
Lamp Assembly Condensation
Exterior lamps are vented toaccommodate normal changes inpressure. Condensation can be a naturalby-product of this design. When moist airenters the lamp assembly through thevents, there is a possibility thatcondensation can occur when thetemperature is cold. When normal
condensation occurs, a thin film of mistcan form on the interior of the lens. Thethin mist eventually clears and exitsthrough the vents during normal operation.Clearing time may take as long as 48 hoursunder dry weather conditions.
Examples of acceptable condensation are:
•Presence of thin mist (no streaks, dripmarks or droplets).
•Fine mist covers less than 50% of thelens.
Examples of unacceptable moisture(usually caused by a lamp water leak) are:
•Water puddle inside the lamp.
•Large water droplets, drip marks orstreaks present on the interior of thelens.
Take your vehicle to a dealer for service ifany of the above conditions ofunacceptable moisture are present.
Replacing Headlamp Bulbs
WARNING: Make sure the bulbshave cooled down before removingthem. Failure to follow this warning couldresult in serious personal injury.
Note:Grasp the bulb by only its plastic baseand do not touch the glass. The oil from yourhand could cause the bulb to break the nexttime the headlamps are operated.
Note:If the bulb is accidentally touched,clean it with rubbing alcohol before use.
1. Make sure the headlamp switch is inthe off position, then open the hood.
2. Remove the headlamp. SeeRemoving a Headlamp (page 157).
3.Disconnect the electrical connector bysqueezing the release tab and pushingthe connector forward, then pulling itrearward.
157
E-Series (TE4) Canada/United States of America, enUSA, Edition date: 201804, Second-Printing
MaintenanceE196385
Page 162 of 329

2. Remove the four screws and the lamplens from the lamp assembly.
3. Carefully pull the bulb straight out ofthe socket and push in the new bulb.
CHANGING THE ENGINE AIR
FILTER
WARNING: To reduce the risk ofvehicle damage or personal injury, do notstart the engine with the air filterremoved and do not remove it while theengine is running.
Note:Failure to use the correct air filterelement may result in severe enginedamage. The customer warranty may bevoid for any damage to the engine if thecorrect air filter element is not used.
When changing the air filter element, useonly the air filter element listed. SeeMotorcraft Parts (page 199). The air filterelement should be replaced at theappropriate intervals. See NormalScheduled Maintenance (page 279).
Note:Failure to use the correct air filterelement may result in severe enginedamage. Resulting component damage maynot be covered by the vehicle Warranty.
1.Disconnect the fresh air inlet tube fromthe radiator support.
2. Open the clamp that secures the twohalves of the air filter housing together.
3. Carefully separate the two halves ofthe air filter housing.
4.Remove the air filter element from thehousing.
5. Install a new air filter element. Becareful not to crimp the filter elementedges between the air filter housing.This could cause filter damage andallow unfiltered air to enter the engineif not properly seated.
6. Replace the two halves of the air filterhousing and secure the clamp.
7. Connect the fresh air inlet tube to theradiator support.
159
E-Series (TE4) Canada/United States of America, enUSA, Edition date: 201804, Second-Printing
MaintenanceE197063 E197064
Page 166 of 329
To clean the windshield and wiper blades:
•Clean the windshield with anon-abrasive glass cleaner. Whencleaning the interior of the windshield,avoid getting any glass cleaner on theinstrument panel or door panels. Wipeany glass cleaner off these surfacesimmediately.
•For windshields contaminated withtree sap, chemicals, wax or bugs, cleanthe entire windshield using steel wool(no greater than 0000 grade) in acircular motion and rinse with water.
•Clean the wiper blades with isopropylrubbing alcohol or windshield washerconcentrate.
Note: Do not use razor blades or othersharp objects to clean or remove decalsfrom the inside of the heated rear window.The vehicle warranty does not coverdamage caused to the heated rear windowgrid lines.
CLEANING THE INTERIOR
WARNING: Do not use cleaningsolvents, bleach or dye on the vehicle'sseatbelts, as these actions may weakenthe belt webbing.
WARNING: On vehicles equippedwith seat-mounted airbags, do not usechemical solvents or strong detergents.Such products could contaminate theside airbag system and affectperformance of the side airbag in a crash.
For fabric, carpets, cloth seats and seatsequipped with side airbags:
•Remove dust and loose dirt with avacuum cleaner.
•Remove light stains and soil withMotorcraft Professional StrengthCarpet & Upholstery Cleaner.
•If grease or tar is present on thematerial, spot-clean the area first withMotorcraft Spot and Stain Remover. InCanada, use Motorcraft Multi-PurposeCleaner.
•If a ring forms on the fabric after spotcleaning, clean the entire areaimmediately (but do not oversaturate)or the ring will set.
•Do not use household cleaningproducts or glass cleaners, which canstain and discolor the fabric and affectthe flame retardant abilities of the seatmaterials.
Mirrors
Do not clean the housing or glass of anymirror with harsh abrasives, fuel or otherpetroleum or ammonia-based cleaningproducts.
CLEANING THE INSTRUMENT
PANEL AND INSTRUMENT
CLUSTER LENS
WARNING: Do not use chemicalsolvents or strong detergents whencleaning the steering wheel orinstrument panel to avoid contaminationof the airbag system.
Note:Follow the same procedure ascleaning leather seats for cleaning leatherinstrument panels and leather interior trimsurfaces. See Cleaning Leather Seats(page 164).
163
E-Series (TE4) Canada/United States of America, enUSA, Edition date: 201804, Second-Printing
Vehicle Care
Page 171 of 329
GENERAL INFORMATION
Notice to Utility Vehicle, Van andTruck Owners
WARNING: Utility vehicles have asignificantly higher rollover rate thanother types of vehicles. To reduce therisk of serious injury or death from arollover or other crash you must avoidsharp turns and abrupt maneuvers, driveat safe speeds for the conditions, keeptires properly inflated, never overload orimproperly load your vehicle, and makesure every passenger is properlyrestrained.
WARNING: In a rollover crash, anunbelted person is significantly morelikely to die than a person wearing a seatbelt. All occupants must wear seat belts.Children and infants must useappropriate restraints to minimize therisk of injury or ejection.
Utility vehicles and trucks handledifferently than passenger cars in thevarious driving conditions that areencountered on streets, highways andoff-road. Utility vehicles and trucks are notdesigned for cornering at speeds as highas passenger cars any more than low-slungsports cars are designed to performsatisfactorily under off-road conditions.
How Your Vehicle Differs fromOther Vehicles
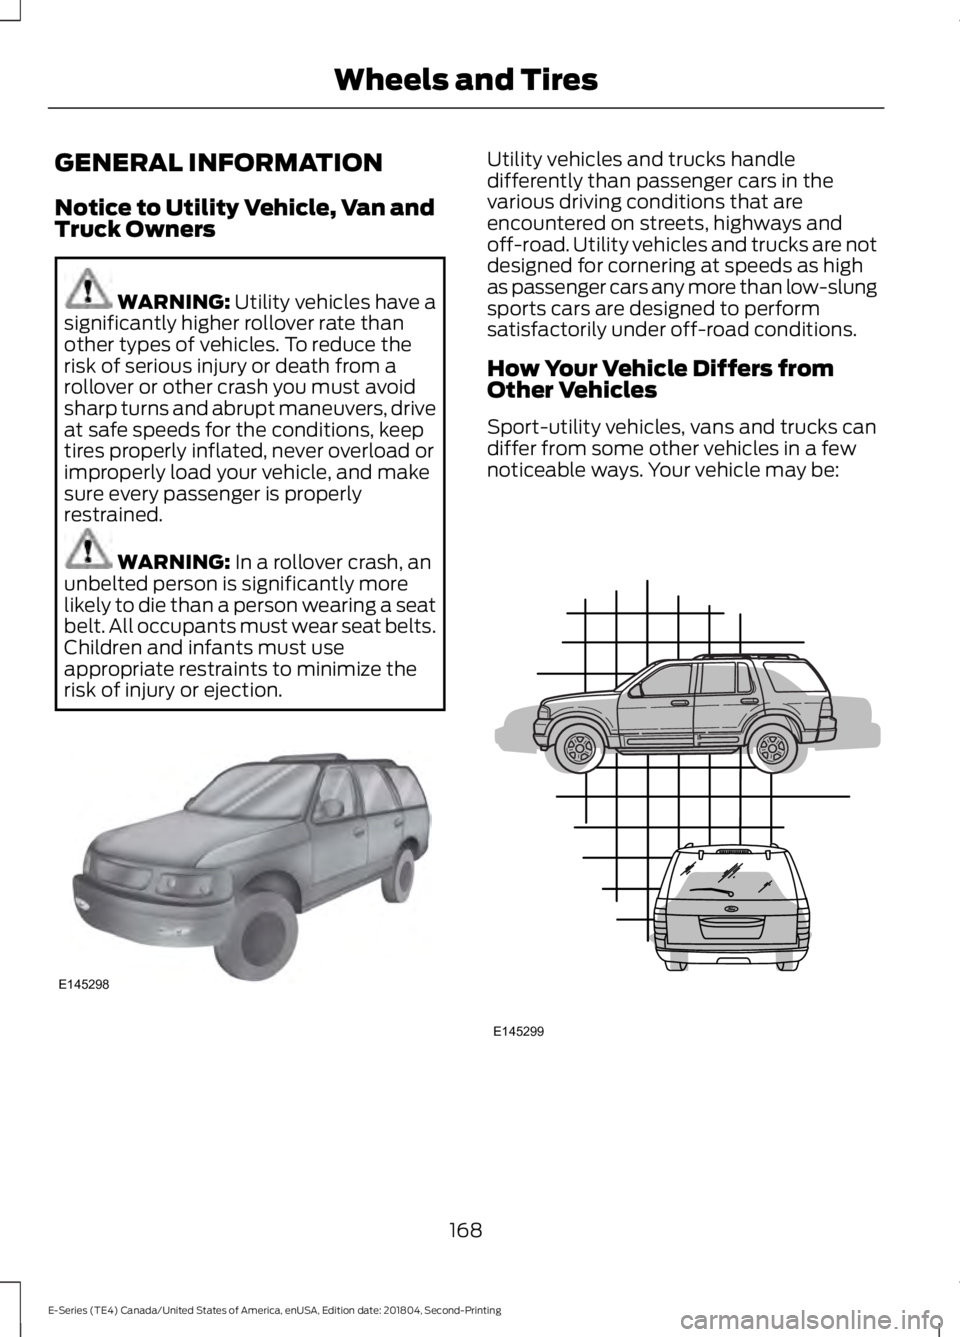
Sport-utility vehicles, vans and trucks candiffer from some other vehicles in a fewnoticeable ways. Your vehicle may be:
168
E-Series (TE4) Canada/United States of America, enUSA, Edition date: 201804, Second-Printing
Wheels and TiresE145298 E145299
Page 173 of 329
U.S. Department ofTransportation Tire qualitygrades: The U.S. Department ofTransportation requires FordMotor Company to give you thefollowing information about tiregrades exactly as the governmenthas written it.
Treadwear
The treadwear grade is acomparative rating based on thewear rate of the tire when testedunder controlled conditions on aspecified government test course.For example, a tire graded 150would wear one and one-half (1½) times as well on thegovernment course as a tiregraded 100. The relativeperformance of tires depends
upon the actual conditions of theiruse, however, and may departsignificantly from the norm due tovariations in driving habits, servicepractices, and differences in roadcharacteristics and climate.
Traction AA A B C
WARNING: The tractiongrade assigned to this tire isbased on straight-ahead brakingtraction tests, and does notinclude acceleration, cornering,hydroplaning or peak tractioncharacteristics.
The traction grades, from highestto lowest are AA, A, B, and C. Thegrades represent the tire’s abilityto stop on wet pavement asmeasured under controlledconditions on specifiedgovernment test surfaces ofasphalt and concrete. A tiremarked C may have poor tractionperformance.
Temperature A B C
WARNING: Thetemperature grade for this tire isestablished for a tire that isproperly inflated and notoverloaded. Excessive speed,underinflation, or excessiveloading, either separately or incombination, can cause heatbuildup and possible tire failure.
The temperature grades are A(the highest), B and C,representing the tire’s resistanceto the generation of heat and itsability to dissipate heat whentested under controlled conditionson a specified indoor laboratorytest wheel. Sustained hightemperature can cause thematerial of the tire to degenerateand reduce tire life, and excessivetemperature can lead to suddentire failure. The grade Ccorresponds to a level ofperformance which all passengercar tires must meet under the
170
E-Series (TE4) Canada/United States of America, enUSA, Edition date: 201804, Second-Printing
Wheels and Tires
Page 178 of 329
The tire suppliers may haveadditional markings, notes orwarnings such as standard loador radial tubeless.
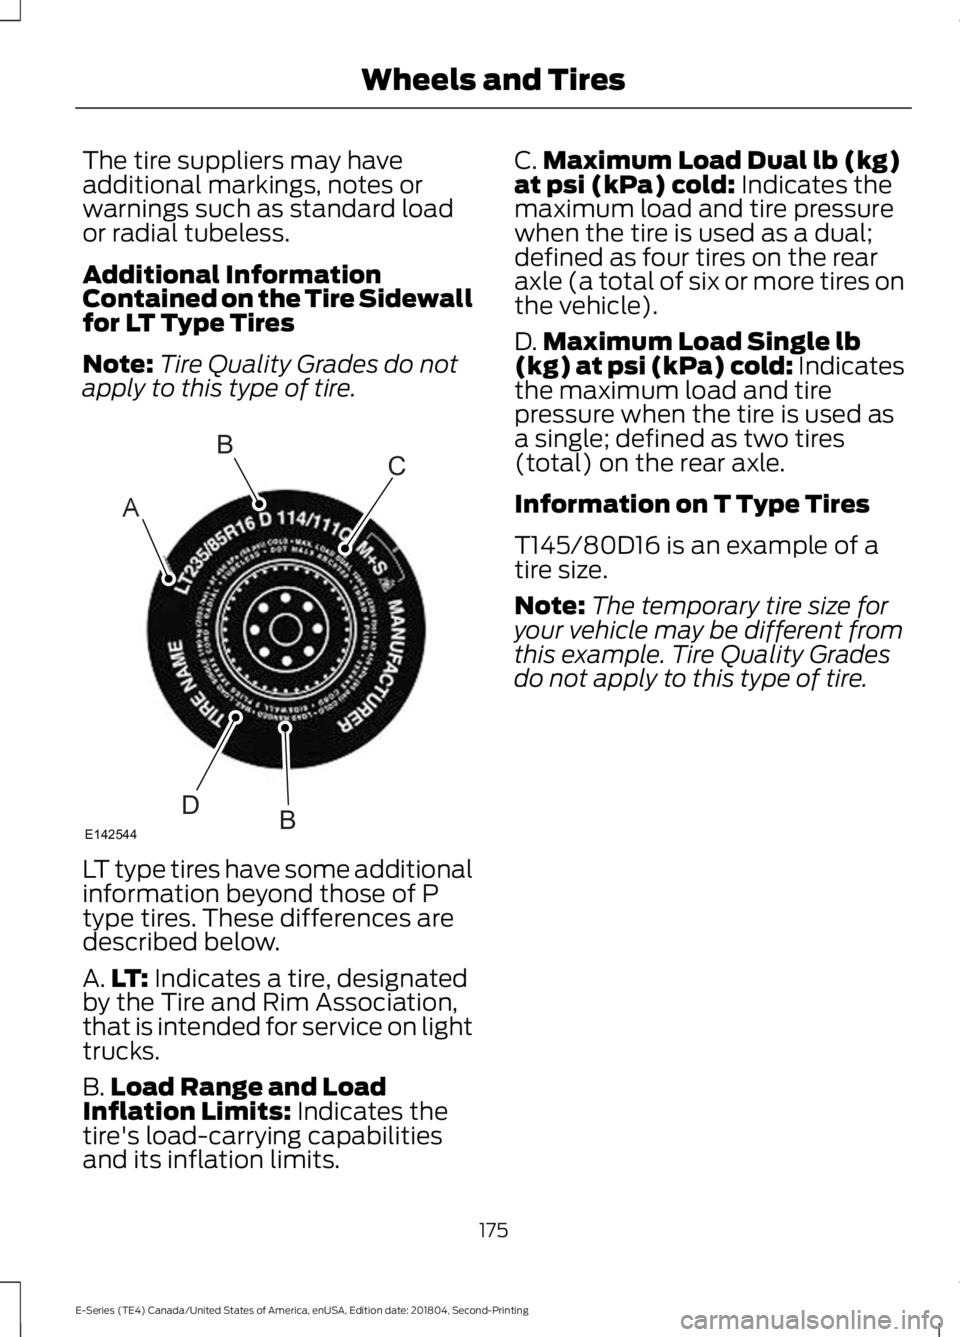
Additional InformationContained on the Tire Sidewallfor LT Type Tires
Note:Tire Quality Grades do notapply to this type of tire.
LT type tires have some additionalinformation beyond those of Ptype tires. These differences aredescribed below.
A.LT: Indicates a tire, designatedby the Tire and Rim Association,that is intended for service on lighttrucks.
B.Load Range and LoadInflation Limits: Indicates thetire's load-carrying capabilitiesand its inflation limits.
C.Maximum Load Dual lb (kg)at psi (kPa) cold: Indicates themaximum load and tire pressurewhen the tire is used as a dual;defined as four tires on the rearaxle (a total of six or more tires onthe vehicle).
D.Maximum Load Single lb(kg) at psi (kPa) cold: Indicatesthe maximum load and tirepressure when the tire is used asa single; defined as two tires(total) on the rear axle.
Information on T Type Tires
T145/80D16 is an example of atire size.
Note:The temporary tire size foryour vehicle may be different fromthis example. Tire Quality Grades
do not apply to this type of tire.
175
E-Series (TE4) Canada/United States of America, enUSA, Edition date: 201804, Second-Printing
Wheels and TiresA
BC
BDE142544