Page 100 of 490
GARAGE DOOR OPENER — IF EQUIPPED
HomeLink replaces up to three remote controls (hand-held
transmitters) that operate devices such as garage door
openers, motorized gates, lighting or home security sys-
tems. The HomeLink unit operates off your vehicle’s
battery.
The HomeLink buttons, located on either the overhead
console, headliner or sunvisor, designate the three different
HomeLink channels. The HomeLink indicator is located
above the center button.NOTE:HomeLink is disabled when the Vehicle Security
Alarm is active.
Before You Begin Programming HomeLink
Be sure that your vehicle is parked outside of the garage
before you begin programming.
For more efficient programming and accurate transmission
of the radio-frequency signal, it is recommended that a new
battery be placed in the hand-held transmitter of the device
that is being programmed to the HomeLink system.
HomeLink Buttons/Overhead Consoles
HomeLink Buttons/Sunvisor/Headliner
98 GETTING TO KNOW YOUR VEHICLE
Page 107 of 490
To open the upper compartment, push in the release button
located on the left side of the upper door. The door will
automatically open.
To close the compartment door, push downward on the
door’s surface to latch the door closed.
To open the lower compartment, pull the release handle.NOTE:
The lower compartment is equipped with a lock
that is a part of the compartment handle.
Center Console Features
There are two consoles available: Basic and Super.
WARNING!
Do not operate this vehicle with a console compart-
ment lid in the open position. Driving with the console
compartment lid open may result in injury in a colli-
sion.
Upper Compartment Release Button
Lower Compartment Release Handle
3
GETTING TO KNOW YOUR VEHICLE 105
Page 108 of 490

Basic Console
The Basic Console consists of the following features:
•The Basic Console profile allows vehicle occupants to
easily pass through the first row to the second.
• Four cupholders accept up to extra large size beverage
cups or 20 oz (0.6 L) plastic bottles. Cupholders are
dishwasher safe for cleaning.
• The cupholders are removable to access a large storage
bin.
• The Basic Console is removable from the vehicle for
additional floor space by removing the anchor cup plug
and clip at the console base, sliding the console base
forward while lifting slightly to clear the rear load floor
hook. To reinstall the Basic Console:
1. Position the console at a slight angle (front slightly
higher than the rear).
2. Slide the console rearward into the floor bracket/hook.
3. Align the console until the front anchor cup plug hole is centered on the winch hole.
4. Reinstall the clip first and then while pushing down- ward on the console with slight pressure, reinstall the
cover plug.
5. Pull up on the console to be sure it is firmly latched.
WARNING!
In an accident, serious injury could result if the remov-
able floor console is not properly installed. Always be
sure the removable floor console is fully latched.
106 GETTING TO KNOW YOUR VEHICLE
Page 115 of 490
Cupholders
Instrument Panel Cupholders
The instrument panel cupholders are located in a pull-out
drawer just above the lower storage bin.
Pull the drawer out firmly until it stops, and place the
container to be held in either one of the cupholder wells.
The cupholders are designed to accommodate a wide
variety of container types and sizes. Push down on the
container to engage the cupholder retention features.
Super Console — If Equipped
On models equipped with the Super Console, there are two
cupholders located in the center of the console.
Front Cupholders
Super Console Cupholders
3
GETTING TO KNOW YOUR VEHICLE 113
Page 118 of 490

CAUTION!
•Do not exceed the maximum power of 160 Watts (13
Amps) at 12 Volts. If the 160 Watt (13 Amp) power
rating is exceeded the fuse protecting the system will
need to be replaced.
•
Power outlets are designed for accessory plugs only.
Do not insert any other object in the power outlets as
this will damage the outlet and blow the fuse. Im-
proper use of the power outlet can cause damage not
covered by your New Vehicle Limited Warranty.
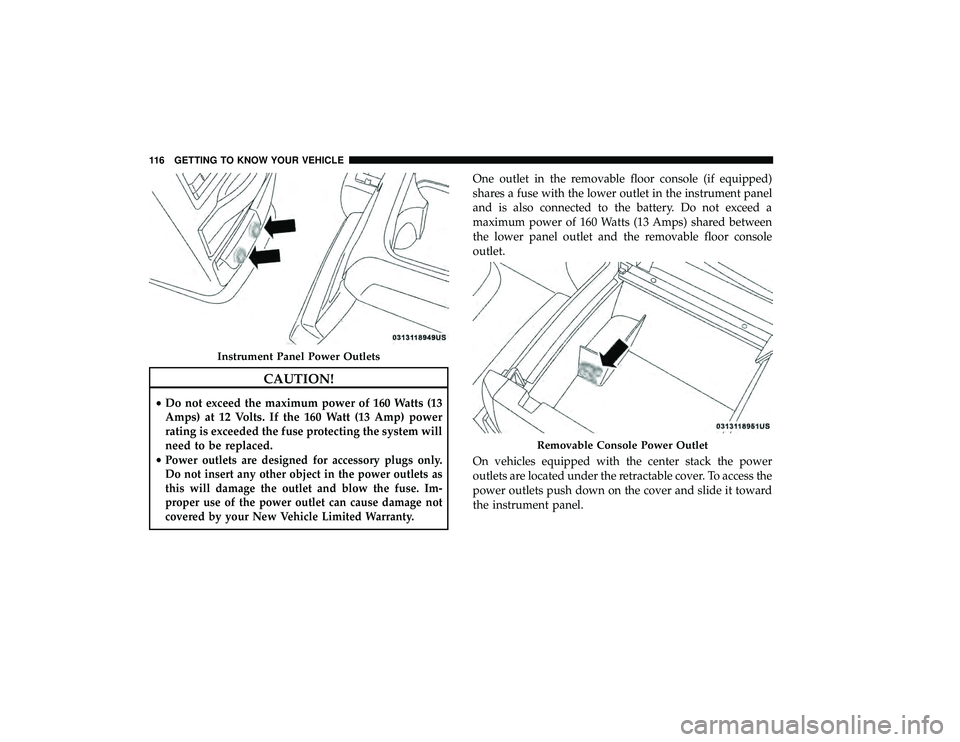
One outlet in the removable floor console (if equipped)
shares a fuse with the lower outlet in the instrument panel
and is also connected to the battery. Do not exceed a
maximum power of 160 Watts (13 Amps) shared between
the lower panel outlet and the removable floor console
outlet.
On vehicles equipped with the center stack the power
outlets are located under the retractable cover. To access the
power outlets push down on the cover and slide it toward
the instrument panel.
Instrument Panel Power Outlets
Removable Console Power Outlet
116 GETTING TO KNOW YOUR VEHICLE
Page 122 of 490
Smoker’s Package Kit — If Equipped
With the optional authorized dealer installed Smoker’s
Package Kit, a removable ash receiver is inserted into one
of the two cupholders in the center front instrument panel.
To install the ash receiver, align the receiver so the thumb
grip on the lid is facing rearward. Push the ash receiver
into either of the cup wells to secure. Pull upward on the
ash receiver to remove for cleaning and/or storage.
The left rear trim panel cupholder is designed to accom-
modate a second ash receiver, if desired.
Sunglass Storage Bin — If Equipped
At the front of the overhead console, a compartment is
provided for the storage of two pairs of sunglasses.
From the closed position, push the door latch to open the
compartment.
Over Door Latch
120 GETTING TO KNOW YOUR VEHICLE
Page 289 of 490
BULB REPLACEMENT
Replacement Bulbs
Interior Bulbs
Bulb Number
Center & Rear Dome Lamp 578
Center & Rear Reading Lamps 578
Front Door Courtesy Lamp 578
Front Header Reading Lamps – If Equipped 578
Instrument Cluster Lamps PC74
Liftgate Lamp(s) 578
Overhead Console Reading Lamps PC579
Removable Console Lamp – If Equipped 194
Visor Vanity Lamps 6501966
NOTE: For lighted switches, see an authorized dealer for
replacement instructions.
7
IN CASE OF EMERGENCY 287
Page 296 of 490
CavityCartridge Fuse Mini-Fuse Description
J15 40 Amp Green –Front Blower
J17 40 Amp Green –Starter Solenoid
J18 20 Amp Blue –Powertrain Control Module Trans Range
J19 60 Amp Yellow –Radiator Fan
J20 30 Amp Pink –Front Wiper LO/HI
J21 20 Amp Blue –Front/Rear Washer
J22 25 Amp Clear –Sunroof Module
M1 –15 Amp Blue Rear Center Brake Lamp/Brake Switch
M2 –20 Amp Yellow Front Fog Lamps
M3 –20 Amp Yellow Vacuum Pump Motor
M5 –25 Amp Clear Inverter
M6 –20 Amp Yellow Power Outlet #1 (ACC), Rain Sensor, Cigar
Lighter (Instrument Panel or with ConsoleRear)
M7 –20 Amp Yellow Power Outlet #2 (BATT/ACC SELECT) –
Center Seat or with Console Rear
M8 –20 Amp Yellow Front Heated Seat — If Equipped
M9 –20 Amp Yellow Rear Heated Seat — If Equipped
294 IN CASE OF EMERGENCY