2019 DODGE GRAND CARAVAN radio
[x] Cancel search: radioPage 181 of 490
To deactivate the TPMS, first, replace all four wheel and
tire assemblies (road tires) with tires not equipped with
Tire Pressure Monitoring (TPM) Sensors. Then, drive the
vehicle for 20 minutes above 15 mph (24 km/h). The TPMS
will chime, the TPMS Warning Light will flash on and off
for 75 seconds and then remain on.
Beginning with the next ignition cycle, the TPMS will no
longer chime or flash the TPMS Warning Light.
To reactivate the TPMS, replace all four wheel and tire
assemblies (road tires) with tires equipped with TPM sen-
sors. Then, drive the vehicle for up to 20 minutes above
15 mph (24 km/h). The TPMS will chime, the TPMS Warning
Light will flash on and off for 75 seconds and then turn off.
General Information
The following regulatory statement applies to all radio
frequency (RF) devices equipped in this vehicle:
This device complies with Part 15 of the FCC Rules and
with Industry Canada license-exempt RSS standard(s).
Operation is subject to the following two conditions:
(1) This device may not cause harmful interference, and
(2) This device must accept any interference received,
including interference that may cause undesired operation.NOTE:
Changes or modifications not expressly approved
by the party responsible for compliance could void the
user ’s authority to operate the equipment.
OCCUPANT RESTRAINT SYSTEMS
Some of the most important safety features in your vehicle
are the restraint systems:
Occupant Restraint Systems Features
• Seat Belt Systems
• Supplemental Restraint Systems (SRS) Air Bags
• Supplemental Active Head Restraints
• Child Restraints
Some of the safety features described in this section may be
standard equipment on some models, or may be optional
equipment on others. If you are not sure, ask an authorized
dealer.
Important Safety Precautions
Please pay close attention to the information in this section.
It tells you how to use your restraint system properly, to
keep you and your passengers as safe as possible.
5
SAFETY 179
Page 203 of 490
Seat belts are necessary for your protection in all collisions,
and also are needed to help keep you in position, away
from an inflating air bag.
When the ORC detects a collision requiring the front air
bags, it signals the inflator units. A large quantity of
non-toxic gas is generated to inflate the front air bags.
The steering wheel hub trim cover and the upper passen-
ger side of the instrument panel separate and fold out of
the way as the air bags inflate to their full size. The front air
bags fully inflate in less time than it takes to blink your
eyes. The front air bags then quickly deflate while helping
to restrain the driver and front passenger.
Knee Impact Bolsters
The Knee Impact Bolsters help protect the knees of the
driver and front passenger, and position the front occu-
pants for improved interaction with the front air bags.
WARNING!
•Do not drill, cut, or tamper with the knee impact
bolsters in any way.
• Do not mount any accessories to the knee impact
bolsters such as alarm lights, stereos, citizen band
radios, etc.
Supplemental Driver Knee Air Bag
This vehicle is equipped with a Supplemental Driver Knee
Air Bag mounted in the instrument panel below the
steering column. The Supplemental Driver Knee Air Bag
provides enhanced protection during a frontal impact by
working together with the seat belts, pretensioners, and
front air bags.
Supplemental Side Air Bags
Supplemental Seat-Mounted Side Air Bags (SABs)
This vehicle is equipped with Supplemental Seat-Mounted
Side Air Bags (SABs).
Supplemental Seat-Mounted Side Air Bags (SABs) are
located in the outboard side of the front seats. The SABs are
marked with “SRS AIRBAG” or “AIRBAG” on a label or on
the seat trim on the outboard side of the seats.
5
SAFETY 201
Page 264 of 490
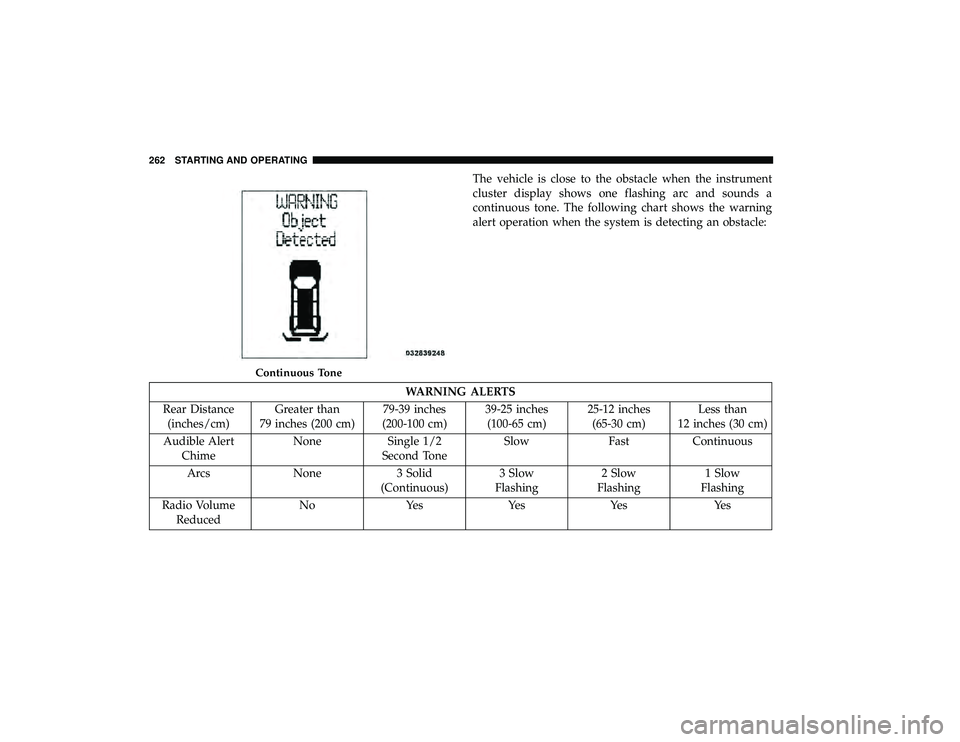
The vehicle is close to the obstacle when the instrument
cluster display shows one flashing arc and sounds a
continuous tone. The following chart shows the warning
alert operation when the system is detecting an obstacle:
WARNING ALERTS
Rear Distance (inches/cm) Greater than
79 inches (200 cm) 79-39 inches
(200-100 cm) 39-25 inches
(100-65 cm) 25-12 inches
(65-30 cm) Less than
12 inches (30 cm)
Audible Alert Chime None Single 1/2
Second Tone Slow Fast Continuous
Arcs None 3 Solid (Continuous)3 Slow
Flashing 2 Slow
Flashing 1 Slow
Flashing
Radio Volume Reduced No Yes Yes Yes Yes
Continuous Tone
262 STARTING AND OPERATING
Page 265 of 490
NOTE:ParkSense will reduce the radio volume, if on,
when the system is sounding an audio tone.
Enabling/Disabling ParkSense
ParkSense can be enabled and disabled through the
Customer-Programmable Features section of the instru-
ment cluster display. The available choices are: OFF, Sound
Only, or Sound and Display.
When ParkSense is disabled, the instrument cluster will
display the “PARK ASSIST SYSTEM OFF” message for
approximately five seconds. When the gear selector is
moved to REVERSE and the system is disabled, the instru-
ment cluster display will display the “PARK ASSIST SYS-
TEM OFF” message for as long as the vehicle is in
REVERSE.
Refer to “Instrument Cluster Display” in “Getting To Know
Your Instrument Panel” for further information.
Service The ParkSense Rear Park Assist System
During vehicle start up, when the ParkSense Rear Park
Assist System has detected a faulted condition, the instru-
ment cluster will actuate a single chime, once per ignition
cycle, and it will display the “SERVICE PARK ASSIST
SYSTEM” message. When the gear selector is moved to
REVERSE and the system has detected a faulted condition, the instrument cluster display will display the “SERVICE
PARK ASSIST SYSTEM” message for as long as the vehicle
is in REVERSE. Under this condition, ParkSense will not
operate.
Refer to “Instrument Cluster Display” in “Getting To Know
Your Instrument Panel” for further information.
If “SERVICE PARK ASSIST SYSTEM” appears in the in-
strument cluster display after making sure the rear fascia/
bumper is free from snow, ice, mud, dirt and debris, see
your authorized dealer.
Cleaning The ParkSense System
Clean the ParkSense sensors with water, car wash soap and
a soft cloth. Do not use rough or hard cloths. Do not scratch
or poke the sensors. Otherwise, you could damage the
sensors.
ParkSense System Usage Precautions
NOTE:
•
Ensure that the rear bumper is free of snow, ice, mud,
dirt and debris to keep the ParkSense system operating
properly.
• Jackhammers, large trucks, and other vibrations could
affect the performance of ParkSense.
6
STARTING AND OPERATING 263
Page 266 of 490
•When you turn ParkSense off, the instrument cluster
will display “PARKSENSE OFF.” Furthermore, once you
turn ParkSense off, it remains off until you turn it on
again, even if you cycle the ignition.
• When you move the gear selector to the REVERSE
position and ParkSense is turned off, the instrument
cluster display will display “PARKSENSE OFF” mes-
sage for as long as the vehicle is in REVERSE.
• ParkSense, when on, will reduce the volume of the radio
when it is sounding a tone.
•
Clean the ParkSense sensors regularly, taking care not to
scratch or damage them. The sensors must not be covered
with ice, snow, slush, mud, dirt or debris. Failure to do so
can result in the system not working properly. The
ParkSense system might not detect an obstacle behind the
fascia/bumper, or it could provide a false indication that
an obstacle is behind the fascia/bumper.
• Use the ParkSense switch to turn the ParkSense system
off if objects such as bicycle carriers, trailer hitches, etc.
are placed within 12 inches (30 cm) from the rear
fascia/bumper. Failure to do so can result in the system
misinterpreting a close object as a sensor problem,
causing the “PARKSENSE UNAVAILABLE SERVICE REQUIRED” message to be displayed in the instrument
cluster display.
WARNING!
•
Drivers must be careful when backing up even when
using ParkSense. Always check carefully behind
your vehicle, look behind you, and be sure to check
for pedestrians, animals, other vehicles, obstructions,
and blind spots before backing up. You are respon-
sible for safety and must continue to pay attention to
your surroundings. Failure to do so can result in
serious injury or death.
• Before using ParkSense, it is strongly recommended
that the ball mount and hitch ball assembly is
disconnected from the vehicle when the vehicle is
not used for towing. Failure to do so can result in
injury or damage to vehicles or obstacles because the
hitch ball will be much closer to the obstacle than the
rear fascia when the loudspeaker sounds the con-
tinuous tone. Also, the sensors could detect the ball
mount and hitch ball assembly, depending on its size
and shape, giving a false indication that an obstacle
is behind the vehicle.
264 STARTING AND OPERATING
Page 297 of 490

CavityCartridge Fuse Mini-Fuse Description
M10 –15 Amp Blue Ignition Off Draw — Video System, Satellite
Radio, DVD, Hands-Free Module, UniversalGarage Door Opener, Vanity Lamp, Stream- ing Video Module — If Equipped
M11 –10 Amp Red Climate Control System
M12 –30 Amp Green Amplifier/Radio
M13 –20 Amp Yellow Instrument Cluster, SIREN, Clock Module,
Multifunction Control Switch – If Equipped
M14 –20 Amp Yellow Trailer Tow — If Equipped
M15 –20 Amp Yellow Rear View Mirror, Instrument Cluster, Multi-
function Control Switch, Tire Pressure Moni-tor
M16 –10 Amp Red Airbag Module/Occupant Classification
Module
M17 –15 Amp Blue Left Tail/License/Park Lamp, Running
Lamps
M18 –15 Amp Blue Right Tail/Park/Run Lamp
M19 –25 Amp Clear Powertrain
M20 –15 Amp Blue Instrument Cluster Interior Light, Switch
Bank, Steering Column Module, SwitchSteering Wheel
7
IN CASE OF EMERGENCY 295
Page 327 of 490

Preparations For Jump Start
The battery in your vehicle is located on the left side of the
engine compartment.
WARNING!
•Take care to avoid the radiator cooling fan whenever
the hood is raised. It can start anytime the ignition
switch is ON. You can be injured by moving fan
blades.
(Continued)
WARNING! (Continued)
•Remove any metal jewelry such as rings, watch
bands and bracelets that could make an inadvertent
electrical contact. You could be seriously injured.
• Batteries contain sulfuric acid that can burn your
skin or eyes and generate hydrogen gas which is
flammable and explosive. Keep open flames or
sparks away from the battery.
1. Apply the parking brake, shift the automatic transmis- sion into PARK and turn the ignition to OFF/LOCK.
2. Turn off the heater, radio, and all unnecessary electrical accessories.
3. If using another vehicle to jump start the battery, park the vehicle within the jumper cables reach, set the
parking brake and make sure the ignition is in the
OFF/LOCK position.
WARNING!
Do not allow vehicles to touch each other as this could
establish a ground connection and personal injury
could result.
Positive Battery Post
7
IN CASE OF EMERGENCY 325
Page 386 of 490
WARNING!
A frayed or torn belt could rip apart in a collision and
leave you with no protection. Inspect the belt system
periodically, checking for cuts, frays, or loose parts.
Damaged parts must be replaced immediately. Do not
disassemble or modify the system. Seat belt assemblies
must be replaced after a collision if they have been
damaged (i.e., bent retractor, torn webbing, etc.).
Plastic And Coated Parts
Use Mopar Total Clean to clean vinyl upholstery.
CAUTION!
•Direct contact of air fresheners, insect repellents,
suntan lotions, or hand sanitizers to the plastic,
painted, or decorated surfaces of the interior may
cause permanent damage. Wipe away immediately.
• Damage caused by these type of products may not be
covered by your New Vehicle Limited Warranty.
Cleaning Plastic Instrument Cluster Lenses
The lenses in front of the instruments in this vehicle are
molded in clear plastic. When cleaning the lenses, care
must be taken to avoid scratching the plastic.
1. Clean with a wet soft cloth. A mild soap solution may be used, but do not use high alcohol content or abrasive
cleaners. If soap is used, wipe clean with a clean damp
cloth.
2. Dry with a soft cloth.
Glass Surfaces
All glass surfaces should be cleaned on a regular basis with
Mopar Glass Cleaner, or any commercial household-type
glass cleaner. Never use an abrasive type cleaner. Use
caution when cleaning the inside rear window equipped
with electric defrosters or windows equipped with radio
antennas. Do not use scrapers or other sharp instruments
that may scratch the elements.
When cleaning the rear view mirror, spray cleaner on the
towel or cloth that you are using. Do not spray cleaner
directly on the mirror.
384 SERVICING AND MAINTENANCE