Page 293 of 490
WARNING!(Continued)
•If a general protection fuse for safety systems (air
bag system, braking system), power unit systems
(engine system, transmission system) or steering
system blows, contact an authorized dealer.
General Information
The fuses protect electrical systems against excessive cur-
rent.
When a device does not work, you must check the fuse
element inside the blade fuse for a break/melt.
Also, please be aware that when using power outlets for
extended periods of time with the engine off may result in
vehicle battery discharge.
Blade Fuses
1 — Fuse Element
2 — Blade Fuse with a good/functional fuse element.
3 — Blade fuse with a NOT functional / BAD fuse element (blown
fuse).
7
IN CASE OF EMERGENCY 291
Page 297 of 490
CavityCartridge Fuse Mini-Fuse Description
M10 –15 Amp Blue Ignition Off Draw — Video System, Satellite
Radio, DVD, Hands-Free Module, UniversalGarage Door Opener, Vanity Lamp, Stream- ing Video Module — If Equipped
M11 –10 Amp Red Climate Control System
M12 –30 Amp Green Amplifier/Radio
M13 –20 Amp Yellow Instrument Cluster, SIREN, Clock Module,
Multifunction Control Switch – If Equipped
M14 –20 Amp Yellow Trailer Tow — If Equipped
M15 –20 Amp Yellow Rear View Mirror, Instrument Cluster, Multi-
function Control Switch, Tire Pressure Moni-tor
M16 –10 Amp Red Airbag Module/Occupant Classification
Module
M17 –15 Amp Blue Left Tail/License/Park Lamp, Running
Lamps
M18 –15 Amp Blue Right Tail/Park/Run Lamp
M19 –25 Amp Clear Powertrain
M20 –15 Amp Blue Instrument Cluster Interior Light, Switch
Bank, Steering Column Module, SwitchSteering Wheel
7
IN CASE OF EMERGENCY 295
Page 322 of 490

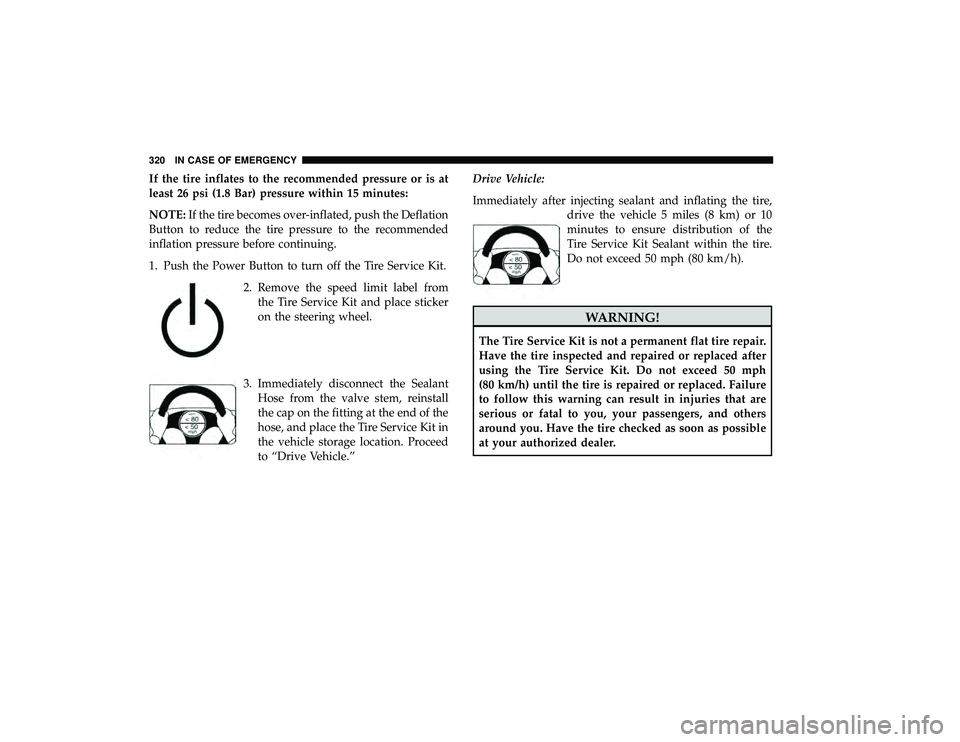
If the tire inflates to the recommended pressure or is at
least 26 psi (1.8 Bar) pressure within 15 minutes:
NOTE:If the tire becomes over-inflated, push the Deflation
Button to reduce the tire pressure to the recommended
inflation pressure before continuing.
1. Push the Power Button to turn off the Tire Service Kit.
2. Remove the speed limit label fromthe Tire Service Kit and place sticker
on the steering wheel.
3. Immediately disconnect the Sealant Hose from the valve stem, reinstall
the cap on the fitting at the end of the
hose, and place the Tire Service Kit in
the vehicle storage location. Proceed
to “Drive Vehicle.” Drive Vehicle:
Immediately after injecting sealant and inflating the tire,
drive the vehicle 5 miles (8 km) or 10
minutes to ensure distribution of the
Tire Service Kit Sealant within the tire.
Do not exceed 50 mph (80 km/h).
WARNING!
The Tire Service Kit is not a permanent flat tire repair.
Have the tire inspected and repaired or replaced after
using the Tire Service Kit. Do not exceed 50 mph
(80 km/h) until the tire is repaired or replaced. Failure
to follow this warning can result in injuries that are
serious or fatal to you, your passengers, and others
around you. Have the tire checked as soon as possible
at your authorized dealer.
320 IN CASE OF EMERGENCY
Page 324 of 490

If the tire pressure is 19 psi (1.3 Bar) or higher:
1. Push the Power Button to turn on Tire Service Kit andinflate the tire to the cold tire inflation
pressure found on the tire and load-
ing information label located in the
driver-side door opening.
NOTE: If the tire becomes over-inflated,
push the Deflation Button to reduce the
tire pressure to the recommended infla-
tion pressure before continuing.
2. Disconnect the Tire Service Kit from the valve stem, reinstall the cap on the valve stem and unplug from 12
Volt outlet.
3. Place the Tire Service Kit in its proper storage area in the vehicle.
4. Have the tire inspected and repaired or replaced at the earliest opportunity at an authorized dealer or tire
service center.
5. Remove the Speed Limit sticker from the steering wheel after the tire has been repaired.
6. Replace the Sealant Bottle at an authorized dealer as soon as possible. Refer to “Sealant Bottle Replacement”. NOTE:
When having the tire serviced, advise the autho-
rized dealer or service center that the tire has been sealed
using the Tire Service Kit.
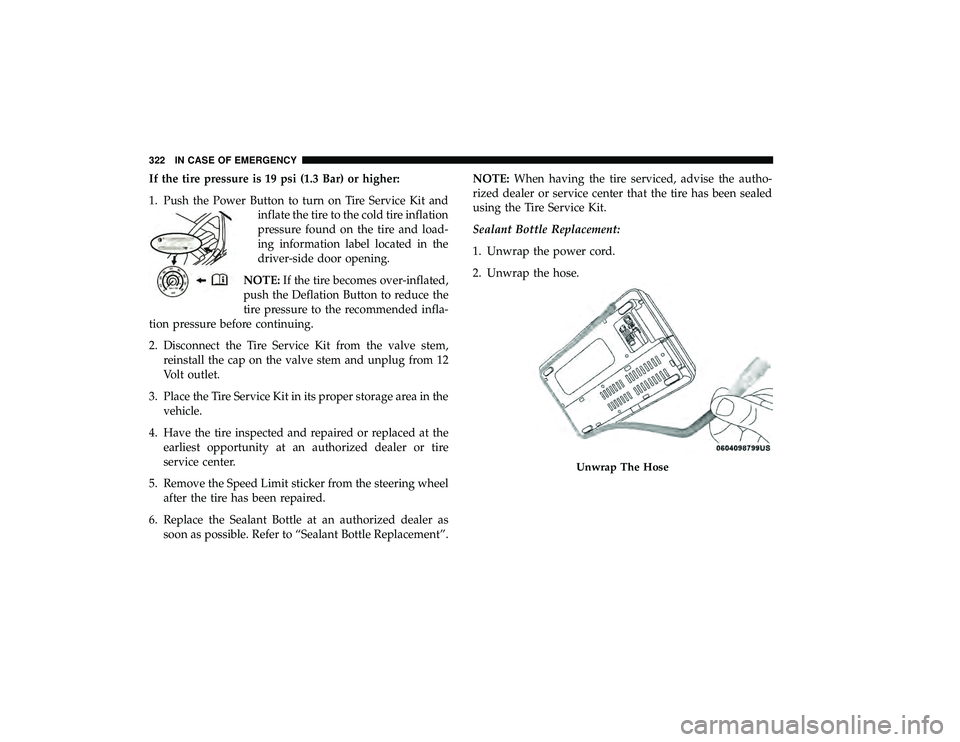
Sealant Bottle Replacement:
1. Unwrap the power cord.
2. Unwrap the hose.
Unwrap The Hose
322 IN CASE OF EMERGENCY
Page 337 of 490

SCHEDULED SERVICING
Your vehicle is equipped with an automatic oil change
indicator system. The oil change indicator system will
remind you that it is time to take your vehicle in for
scheduled maintenance.
Based on engine operation conditions, the oil change
indicator message will illuminate. This means that service
is required for your vehicle. Operating conditions such as
frequent short-trips, trailer tow, extremely hot or cold
ambient temperatures, and E85 fuel usage will influence
when the “Oil Change Required” message is displayed.
Severe Operating Conditions can cause the change oil
message to illuminate as early as 3,500 miles (5,600 km)
since last reset. Have your vehicle serviced as soon as
possible, within the next 500 miles (805 km).
Your authorized dealer will reset the oil change indicator
message after completing the scheduled oil change. If a
scheduled oil change is performed by someone other than
your authorized dealer, the message can be reset by
referring to the steps described under “Instrument Cluster
Display” in “Getting To Know Your Instrument Panel” for
further information.NOTE:
Under no circumstances should oil change inter-
vals exceed 10,000 miles (16,000 km), 12 months or 350
hours of engine run time, whichever comes first. The 350
hours of engine run or idle time is generally only a concern
for fleet customers.
Severe Duty All Models
Change engine oil at 4,000 miles (6,500 km) if the vehicle is
operated in a dusty and off road environment or is
operated predominately at idle or only very low engine
RPM’s. This type of vehicle use is considered Severe Duty.
Once A Month Or Before A Long Trip:
• Check engine oil level.
• Check windshield washer fluid level.
• Check tire pressure and look for unusual wear or
damage. Rotate tires at the first sign of irregular wear,
even if it occurs before the oil indicator system turns on.
• Check the fluid levels of the coolant reservoir, brake
master cylinder, and power steering and fill as needed.
• Check function of all interior and exterior lights.
8
SERVICING AND MAINTENANCE 335
Page 341 of 490
ENGINE COMPARTMENT
Engine Compartment — 3.6L
1 — Air Filter6 — Engine Coolant Reservoir
2 — Power Steering Fluid Reservoir 7 — Engine Oil Dipstick
3 — Brake Fluid Reservoir 8 — Engine Oil Fill
4 — Battery 9 — Coolant Pressure Cap
5 — Totally Integrated Power Module (Fuses) 10 — Washer Fluid Reservoir
8
SERVICING AND MAINTENANCE 339
Page 402 of 490
Chassis
ComponentFluid, Lubricant, Or Genuine Part
Automatic Transmission Use only ATF+4 Automatic Transmission Fluid meeting the
requirements of FCA Material Standard MS-9602. Failure to
use ATF+4 fluid may affect the function or performance of
your transmission. We recommend Mopar ATF+4 Fluid.
Brake Master Cylinder We recommend you use Mopar DOT 3 meeting the require-
ments of FCA Material Standard MS.90039.
Power Steering Reservoir We recommend you use Mopar Power Steering Fluid +4,
Mopar ATF+4 Automatic Transmission Fluid meeting the
requirements of FCA Material Standard MS-9602.
400 TECHNICAL SPECIFICATIONS
Page 475 of 490

Automatic Headlights........................62
Automatic Transmission ..................245, 357
Adding Fluid ....................... .357, 400
Fluid And Filter Change ...................357
Fluid Change .......................... .357
Fluid Level Check .................... .356, 357
Fluid Type ......................... .356, 400
Gear Ranges ........................... .248
Special Additives ........................ .356
Torque Converter ....................... .253
Axle Fluid .............................. .400
Axle Lubrication .......................... .400
Battery .............................. .146, 340
Charging System Light ................... .146
Jump Starting .......................... .324
Keyless Key Fob Replacement ................18
Battery Saver Feature .........................64
Belts, Seat ............................... .235
Body Mechanism Lubrication ..................347
B-Pillar Location .......................... .363
Brake Assist System ........................ .160
Brake Control System, Electronic ................159
Brake Fluid .............................. .400
Brake System ......................... .354, 388Anti-Lock (ABS)
........................ .388
Fluid Check ........................ .355, 400
Parking .............................. .243
Warning Light .......................... .145
Brake/Transmission Interlock ..................246
Bulb Replacement ......................... .287
Bulbs, Light .......................... .237, 287
Calibration Compass ............................. .138
Camera, Rear ............................ .265
Capacities, Fluid .......................... .397
Caps, Filler Oil (Engine) ........................... .339
Power
Steering ......................... .254
Radiator (Coolant Pressure) .................353
Carbon Monoxide Warning ................234, 393
Cargo Vehicle Loading ..........................97
Cargo Area Cover ...........................97
Cargo Compartment .........................97
Luggage Carrier ........................ .122
Car Washes .............................. .382
Cellular Phone ........................ .432, 456
Center High Mounted Stop Light ...............290
12
INDEX 473