2019 DODGE GRAND CARAVAN change time
[x] Cancel search: change timePage 138 of 490

Fuel Economy
Push and release theupordown arrow button until “Fuel
Economy” displays highlighted in the instrument cluster
display and push the rightarrow button. The following
Fuel Economy functions display in the instrument cluster
display:
• Average Fuel Economy (MPG or L/100 km)
• Distance To Empty (mi or km)
• Current Fuel Economy (MPG or L/100 km)
Vehicle Speed
Push and release the upordown arrow button until
“Vehicle Speed” displays highlighted in the instrument
cluster display and push the rightarrow button. Push and
release the rightarrow button to display the current speed
in mph or km/h. Pushing the rightarrow button a second
time will toggle the unit of measure between mph
or km/h.
NOTE: Changing the unit of measure in the Vehicle Speed
menu will not change the unit of measure in the instrument
cluster display.
Trip Info
Push and release the upordown arrow button until “Trip
Info” is highlighted in the instrument cluster display and
push the rightbutton. Push and release the upordown
arrow button to highlight one of the following functions:
• Trip A
• Trip B
• Elapsed Time
• Trip Reset
Tire Pressure
Push and release the upordown arrow button until “Tire
PSI:” displays highlighted in the instrument cluster dis-
play. Push and release the rightarrow button to view a
graphic of the vehicle with a tire pressure value at each
corner of the graphic.
Units
Push and release the upordown arrow button until
“Units” displays highlighted in the instrument cluster
display and push the rightarrow button. The instrument
cluster display, odometer, and navigation system (if
equipped) can be changed between English and Metric
units of measure. To make your selection, scroll up or
136 GETTING TO KNOW YOUR INSTRUMENT PANEL
Page 164 of 490
Towing With HSA
HSA will also provide assistance to mitigate roll back while
towing a trailer.
WARNING!
•If you use a trailer brake controller with your trailer,
the trailer brakes may be activated and deactivated
with the brake switch. If so, there may not be enough
brake pressure to hold both the vehicle and the
trailer on a hill when the brake pedal is released. In
order to avoid rolling down an incline while resum-
ing acceleration, manually activate the trailer brake
or apply more vehicle brake pressure prior to releas-
ing the brake pedal.
• HSA is not a parking brake. Always apply the
parking brake fully when exiting your vehicle. Also,
be certain to place the transmission in PARK.
• Failure to follow these warnings can result in a
collision or serious personal injury.
Disabling And Enabling HSA
This feature can be turned on or turned off. To change the
current setting, proceed as follows:
• For vehicles equipped with the instrument cluster dis-
play, refer to “Instrument Cluster Display” in “Getting
To Know Your Instrument Panel” for further informa-
tion.
For vehicles not equipped with the instrument cluster
display, perform the following steps:
1. Center the steering wheel (front wheels pointing straight forward).
2. Shift the transmission into PARK.
3. Apply the parking brake.
4. Start the engine.
5. Rotate the steering wheel slightly more than one-half turn to the left.
6. Push the “ESC Off” button located in the lower switch bank below the climate control four times within twenty
seconds. The “ESC Off Indicator Light” should turn on
and turn off two times.
162 SAFETY
Page 168 of 490
“ESC Activation/Malfunction Indicator Light” also flashes
when TCS is active. If the “ESC Activation/Malfunction
Indicator Light” begins to flash during acceleration, ease
up on the accelerator and apply as little throttle as possible.
Be sure to adapt your speed and driving to the prevailing
road conditions.
NOTE:
•The “ESC Activation/Malfunction Indicator Light” and
the “ESC OFF Indicator Light” come on momentarily
each time the ignition is turned ON.
• Each time the ignition is turned ON, the ESC system will
be on even if it was turned off previously.
• The ESC system will make buzzing or clicking sounds
when it is active. This is normal; the sounds will stop
when ESC becomes inactive following the maneuver
that caused the ESC activation.
The “ESC OFF Indicator Light” indicates the
customer has elected to have the Electronic Sta-
bility Control (ESC) in a reduced mode.Electronic Roll Mitigation (ERM)
This system anticipates the potential for wheel lift by
monitoring the driver ’s steering wheel input and the speed
of the vehicle. When ERM determines that the rate of
change of the steering wheel angle and vehicle’s speed are
sufficient to potentially cause wheel lift, it then applies the
appropriate brake and may also reduce engine power to
lessen the chance that wheel lift will occur. ERM can only
reduce the chance of wheel lift occurring during severe or
evasive driving maneuvers; it cannot prevent wheel lift
due to other factors, such as road conditions, leaving the
roadway, or striking objects or other vehicles.
WARNING!
Many factors, such as vehicle loading, road conditions
and driving conditions, influence the chance that
wheel lift or rollover may occur. ERM cannot prevent
all wheel lift or roll overs, especially those that involve
leaving the roadway or striking objects or other ve-
hicles. The capabilities of an ERM-equipped vehicle
must never be exploited in a reckless or dangerous
manner which could jeopardize the user’s safety or the
safety of others.
166 SAFETY
Page 170 of 490
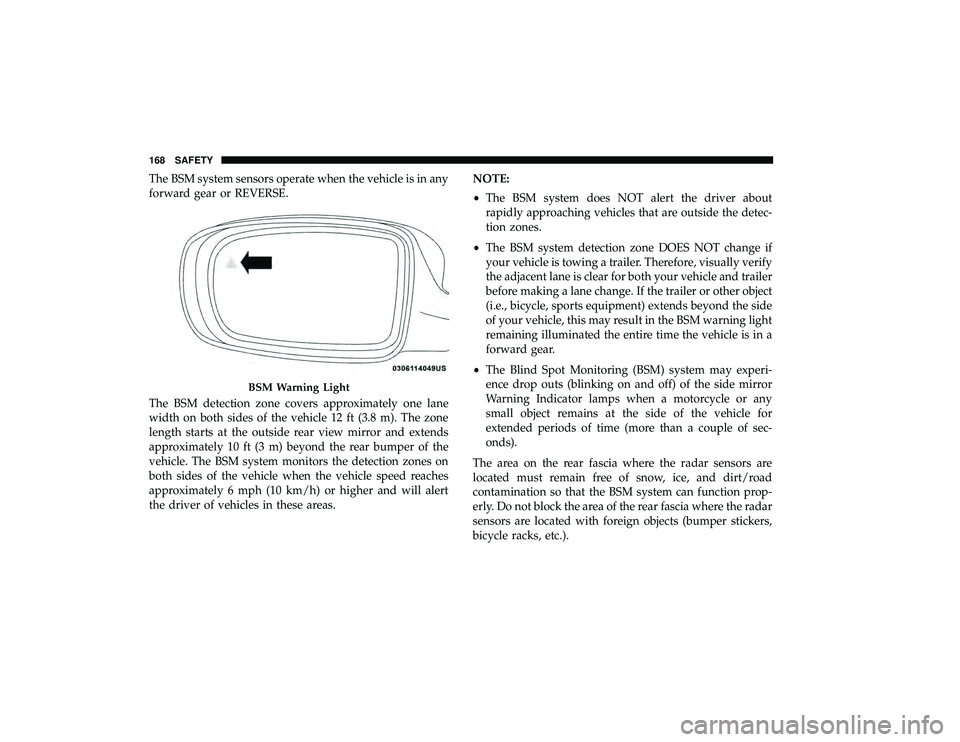
The BSM system sensors operate when the vehicle is in any
forward gear or REVERSE.
The BSM detection zone covers approximately one lane
width on both sides of the vehicle 12 ft (3.8 m). The zone
length starts at the outside rear view mirror and extends
approximately 10 ft (3 m) beyond the rear bumper of the
vehicle. The BSM system monitors the detection zones on
both sides of the vehicle when the vehicle speed reaches
approximately 6 mph (10 km/h) or higher and will alert
the driver of vehicles in these areas.NOTE:
•
The BSM system does NOT alert the driver about
rapidly approaching vehicles that are outside the detec-
tion zones.
• The BSM system detection zone DOES NOT change if
your vehicle is towing a trailer. Therefore, visually verify
the adjacent lane is clear for both your vehicle and trailer
before making a lane change. If the trailer or other object
(i.e., bicycle, sports equipment) extends beyond the side
of your vehicle, this may result in the BSM warning light
remaining illuminated the entire time the vehicle is in a
forward gear.
• The Blind Spot Monitoring (BSM) system may experi-
ence drop outs (blinking on and off) of the side mirror
Warning Indicator lamps when a motorcycle or any
small object remains at the side of the vehicle for
extended periods of time (more than a couple of sec-
onds).
The area on the rear fascia where the radar sensors are
located must remain free of snow, ice, and dirt/road
contamination so that the BSM system can function prop-
erly. Do not block the area of the rear fascia where the radar
sensors are located with foreign objects (bumper stickers,
bicycle racks, etc.).
BSM Warning Light
168 SAFETY
Page 176 of 490
NOTE:
•Whenever an audible alert is requested by the BSM
system, the radio volume is reduced.
• If the hazard flashers are on, the system will request the
appropriate visual alert only.
When the system is in RCP, the system shall respond with
both visual and audible alerts when a detected object is
present. Whenever an audible alert is requested, the radio
volume is reduced. Turn/hazard signal status is ignored;
the RCP state always requests the chime.
Blind Spot Alert Off
When the BSM system is turned off there will be no visual
or audible alerts from either the BSM or RCP systems.
NOTE: The BSM system will store the current operating
mode when the vehicle is shut off. Each time the vehicle is
started the previously stored mode will be recalled and
used.General Information
The following regulatory statement applies to all Radio
Frequency (RF) devices equipped in this vehicle:
This device complies with Part 15 of the FCC Rules and
with Industry Canada license-exempt RSS standard(s).
Operation is subject to the following two conditions:
1. This device may not cause harmful interference.
2. This device must accept any interference received, in- cluding interference that may cause undesired opera-
tion.
NOTE: Changes or modifications not expressly approved
by the party responsible for compliance could void the
user ’s authority to operate the equipment.
Tire Pressure Monitor System (TPMS)
The Tire Pressure Monitor System (TPMS) will warn the
driver of a low tire pressure based on the vehicle recom-
mended cold placard pressure.
174 SAFETY
Page 237 of 490
Whenever a change is noticed in the sound of the exhaust
system, when exhaust fumes can be detected inside the
vehicle, or when the underside or rear of the vehicle is
damaged, have a competent mechanic inspect the complete
exhaust system and adjacent body areas for broken, dam-
aged, deteriorated, or mispositioned parts. Open seams or
loose connections could permit exhaust fumes to seep into
the passenger compartment. In addition, inspect the ex-
haust system each time the vehicle is raised for lubrication
or oil change. Replace as required.
Safety Checks You Should Make Inside The Vehicle
Seat Belts
Inspect the seat belt system periodically, checking for cuts,
frays, and loose parts. Damaged parts must be replaced
immediately. Do not disassemble or modify the system.
Front seat belt assemblies must be replaced after a collision.
Rear seat belt assemblies must be replaced after a collision
if they have been damaged (i.e., bent retractor, torn web-
bing, etc.). If there is any question regarding seat belt or
retractor condition, replace the seat belt.
Air Bag Warning Light
The Air Bag warning lightwill turn on for four to
eight seconds as a bulb check when the ignition switch
is first turned to ON/RUN. If the light is either not on
during starting, stays on, or turns on while driving,
have the system inspected at an authorized dealer as
soon as possible. After the bulb check, this light will
illuminate with a single chime when a fault with the Air
Bag System has been detected. It will stay on until the
fault is removed. If the light comes on intermittently or
remains on while driving, have an authorized dealer
service the vehicle immediately.
Refer to “Occupant Restraint Systems” in “Safety” for
further information.
Defroster
Check operation by selecting the defrost mode and place
the blower control on high speed. You should be able to
feel the air directed against the windshield. See an autho-
rized dealer for service if your defroster is inoperable.
5
SAFETY 235
Page 245 of 490
Drive moderately during the first 300 miles (500 km). After
the initial 60 miles (100 km), speeds up to 50 or 55 mph (80
or 90 km/h) are desirable.
While cruising, brief full-throttle acceleration within the
limits of local traffic laws contributes to a good break-in.
Wide-open throttle acceleration in low gear can be detri-
mental and should be avoided.
The engine oil installed in the engine at the factory is a
high-quality energy conserving type lubricant. Oil changes
should be consistent with anticipated climate conditions
under which vehicle operations will occur. For the recom-
mended viscosity and quality grades, refer to “Dealer
Service” in “Servicing And Maintenance”.
CAUTION!
Never use Non-Detergent Oil or Straight Mineral Oil
in the engine or damage may result.
NOTE: A new engine may consume some oil during its
first few thousand miles (kilometers) of operation. This
should be considered a normal part of the break-in and not
interpreted as a problem.
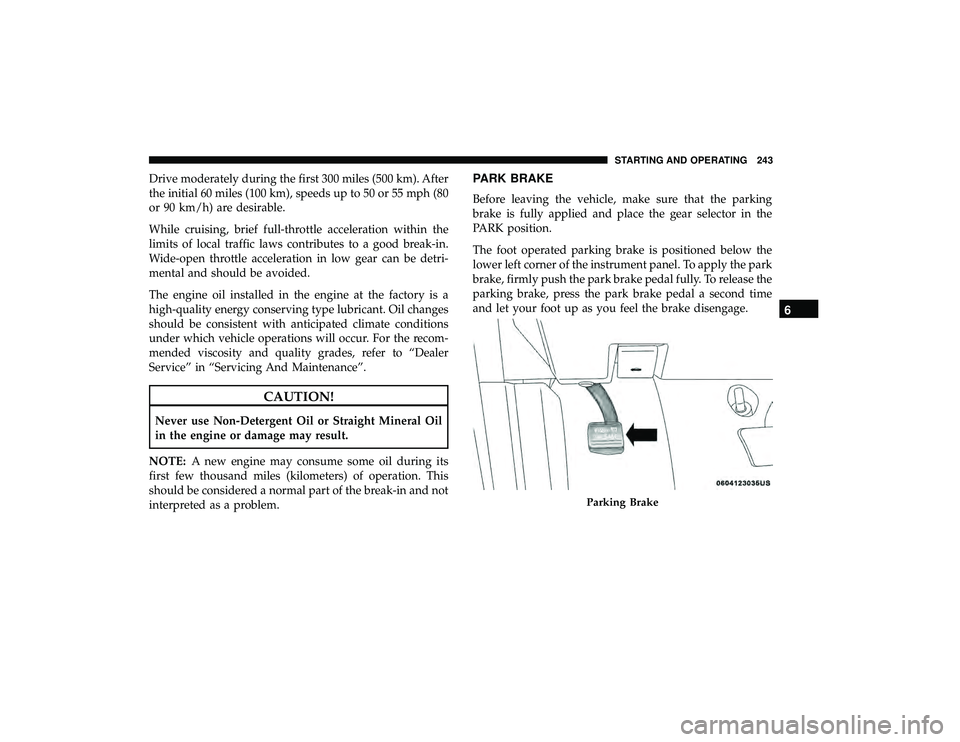
PARK BRAKE
Before leaving the vehicle, make sure that the parking
brake is fully applied and place the gear selector in the
PARK position.
The foot operated parking brake is positioned below the
lower left corner of the instrument panel. To apply the park
brake, firmly push the park brake pedal fully. To release the
parking brake, press the park brake pedal a second time
and let your foot up as you feel the brake disengage.
Parking Brake
6
STARTING AND OPERATING 243
Page 337 of 490

SCHEDULED SERVICING
Your vehicle is equipped with an automatic oil change
indicator system. The oil change indicator system will
remind you that it is time to take your vehicle in for
scheduled maintenance.
Based on engine operation conditions, the oil change
indicator message will illuminate. This means that service
is required for your vehicle. Operating conditions such as
frequent short-trips, trailer tow, extremely hot or cold
ambient temperatures, and E85 fuel usage will influence
when the “Oil Change Required” message is displayed.
Severe Operating Conditions can cause the change oil
message to illuminate as early as 3,500 miles (5,600 km)
since last reset. Have your vehicle serviced as soon as
possible, within the next 500 miles (805 km).
Your authorized dealer will reset the oil change indicator
message after completing the scheduled oil change. If a
scheduled oil change is performed by someone other than
your authorized dealer, the message can be reset by
referring to the steps described under “Instrument Cluster
Display” in “Getting To Know Your Instrument Panel” for
further information.NOTE:
Under no circumstances should oil change inter-
vals exceed 10,000 miles (16,000 km), 12 months or 350
hours of engine run time, whichever comes first. The 350
hours of engine run or idle time is generally only a concern
for fleet customers.
Severe Duty All Models
Change engine oil at 4,000 miles (6,500 km) if the vehicle is
operated in a dusty and off road environment or is
operated predominately at idle or only very low engine
RPM’s. This type of vehicle use is considered Severe Duty.
Once A Month Or Before A Long Trip:
• Check engine oil level.
• Check windshield washer fluid level.
• Check tire pressure and look for unusual wear or
damage. Rotate tires at the first sign of irregular wear,
even if it occurs before the oil indicator system turns on.
• Check the fluid levels of the coolant reservoir, brake
master cylinder, and power steering and fill as needed.
• Check function of all interior and exterior lights.
8
SERVICING AND MAINTENANCE 335