2019 DODGE CHARGER SRT flat tire
[x] Cancel search: flat tirePage 209 of 496
WARNING!(Continued)
•NEVER place any objects under the floor mat (e.g.,
towels, keys, etc.). These objects could change the
position of the floor mat and may cause interference
with the accelerator, brake, or clutch pedals.
• If the vehicle carpet has been removed and re-
installed, always properly attach carpet to the floor
and check the floor mat fasteners are secure to the
vehicle carpet. Fully depress each pedal to check for
interference with the accelerator, brake, or clutch
pedals then re-install the floor mats.
• It is recommended to only use mild soap and water
to clean your floor mats. After cleaning, always check
your floor mat has been properly installed and is
secured to your vehicle using the floor mat fasteners
by lightly pulling mat.
Periodic Safety Checks You Should Make Outside
The Vehicle
Tires
Examine tires for excessive tread wear and uneven wear
patterns. Check for stones, nails, glass, or other objects
lodged in the tread or sidewall. Inspect the tread for cuts
and cracks. Inspect sidewalls for cuts, cracks, and bulges.
Check the wheel nuts for tightness. Check the tires (includ-
ing spare) for proper cold inflation pressure.
Lights
Have someone observe the operation of brake lights and
exterior lights while you work the controls. Check turn
signal and high beam indicator lights on the instrument
panel.
Door Latches
Check for proper closing, latching, and locking.
5
SAFETY 207
Page 280 of 496
Acceleration
Rapid acceleration on snow covered, wet, or other slippery
surfaces may cause the driving wheels to pull erratically to
the right or left. This phenomenon occurs when there is a
difference in the surface traction under the rear (driving)
wheels.
WARNING!
Rapid acceleration on slippery surfaces is dangerous.
Unequal traction can cause sudden pulling of the rear
wheels. You could lose control of the vehicle and
possibly have a collision. Accelerate slowly and care-
fully whenever there is likely to be poor traction (ice,
snow, wet, mud, loose sand, etc.).
Traction
When driving on wet or slushy roads, it is possible for a
wedge of water to build up between the tire and road
surface. This is known as hydroplaning and may causepartial or complete loss of vehicle control and stopping
ability. To reduce this possibility, the following precautions
should be observed:
•
Slow down during rainstorms or when the roads are
slushy.
• Slow down if the road has standing water or puddles.
• Replace tires when tread wear indicators first become
visible.
• Keep tires properly inflated.
• Maintain sufficient distance between your vehicle and
the vehicle in front of you to avoid a collision in a
sudden stop.
Your vehicle may be equipped with a Limited Slip Differ-
ential (LSD) that reduces, but does not eliminate, the
amount of wheel slip across a given axle for improved
handling.
278 STARTING AND OPERATING
Page 286 of 496
WARNING!
ALWAYS obey traffic laws and pay attention to the
road. ALWAYS drive safely with your hands on the
steering wheel. You have full responsibility and as-
sume all risks related to the use of the Uconnect and
SiriusXM Guardian features and applications in this
vehicle. Only use Uconnect features and SiriusXM
Guardian services when it is safe to do so. Failure to do
so may result in an accident involving serious injury or
death.
NOTE:
• Your vehicle may be transmitting data as authorized by
the subscriber.
• The SOS and ASSIST buttons will only function if you
are connected to an operable LTE (voice/data) or 4G
(data) network. Other Uconnect services will only be
operable if your SiriusXM Guardian service is active and
you are connected to an operable LTE (voice/data) or 4G
(data) network. ASSIST Call
The ASSIST Button is used to automatically connect you to
any one of the following support centers:
•
Roadside Assistance – If you get a flat tire, or need a tow,
just push the ASSIST button and you will be connected
to a representative for assistance. Roadside Assistance
will know what vehicle you’re driving and its location.
Additional fees may apply for roadside Assistance.
• SiriusXM Guardian Customer Care – In-vehicle support
for SiriusXM Guardian.
• Vehicle Customer Care – Total support for all other
vehicle issues.
SOS Call
1. Push the SOS Call button on the Rearview Mirror.
NOTE: In case the SOS Call button is pushed in error, there
will be a ten second delay before the SOS Call system
initiates a call to a SOS operator. To cancel the SOS Call
connection, push the SOS call button on the Rearview
Mirror or press the cancellation button on the Device
Screen. Termination of the SOS Call will turn off the green
LED light on the Rearview Mirror.
284 IN CASE OF EMERGENCY
Page 304 of 496
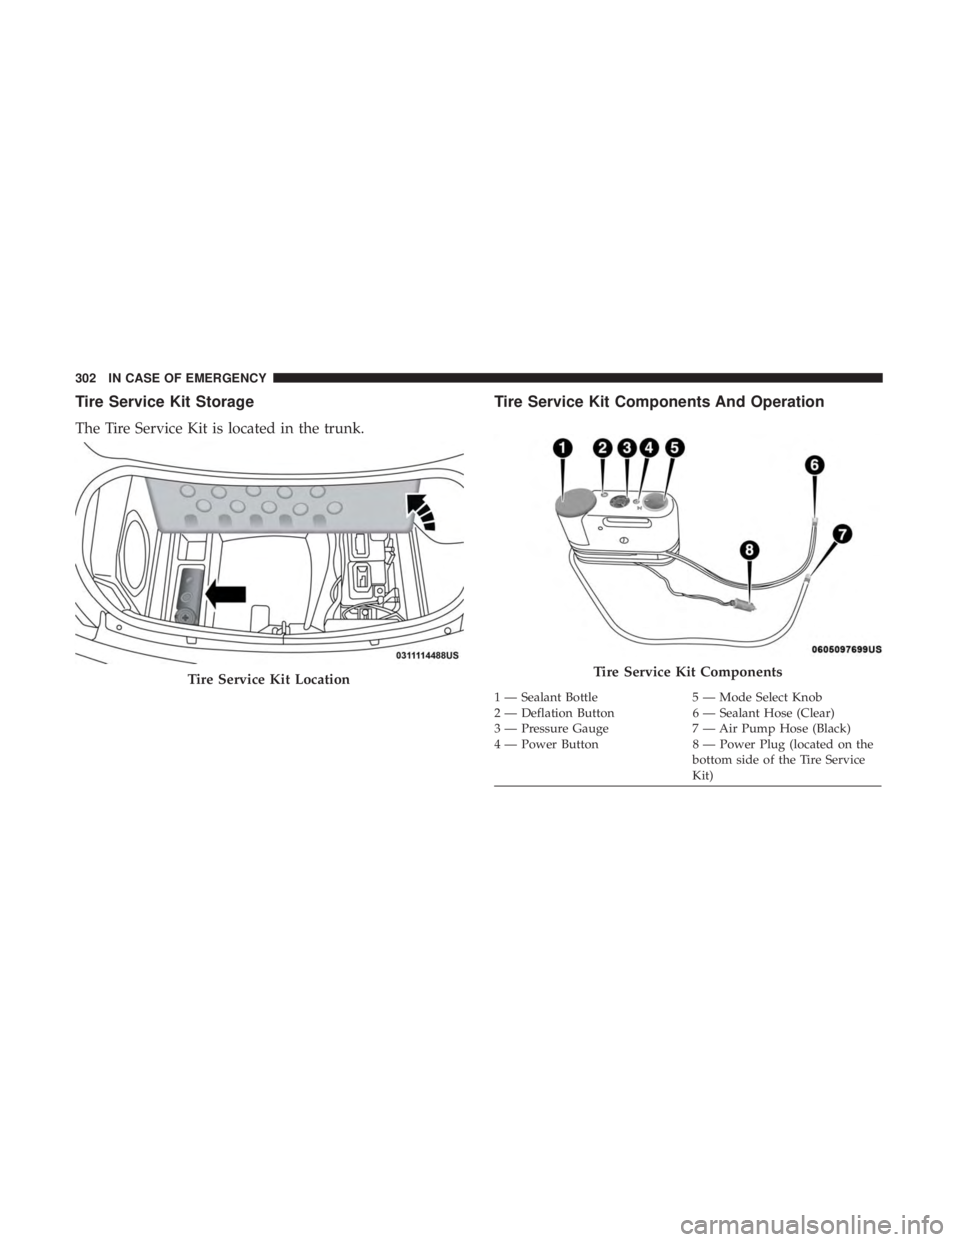
Tire Service Kit Storage
The Tire Service Kit is located in the trunk.
Tire Service Kit Components And Operation
Tire Service Kit LocationTire Service Kit Components
1 — Sealant Bottle5 — Mode Select Knob
2 — Deflation Button 6 — Sealant Hose (Clear)
3 — Pressure Gauge 7 — Air Pump Hose (Black)
4 — Power Button 8 — Power Plug (located on the
bottom side of the Tire Service
Kit)
302 IN CASE OF EMERGENCY
Page 305 of 496
Using The Mode Select Knob And Hoses
Your Tire Service Kit is equipped with the following
symbols to indicate the air or sealant mode.
Selecting Air ModePush in the Mode Select Knob (5) and turn to this
position for air pump operation only. Use the Black
Air Pump Hose (7) when selecting this mode.
Selecting Sealant Mode
Push in the Mode Select Knob (5) and turn to this
position to inject the Tire Service Kit Sealant and to
inflate the tire. Use the Sealant Hose (clear hose) (6) when
selecting this mode.
Using The Power Button
Push and release the Power Button (4) once to turn
on the Tire Service Kit. Push and release the Power Button
(4) again to turn Off the Tire Service Kit.
Using The Deflation Button
Push the Deflation Button (2) to reduce the air
pressure in the tire if it becomes over-inflated.
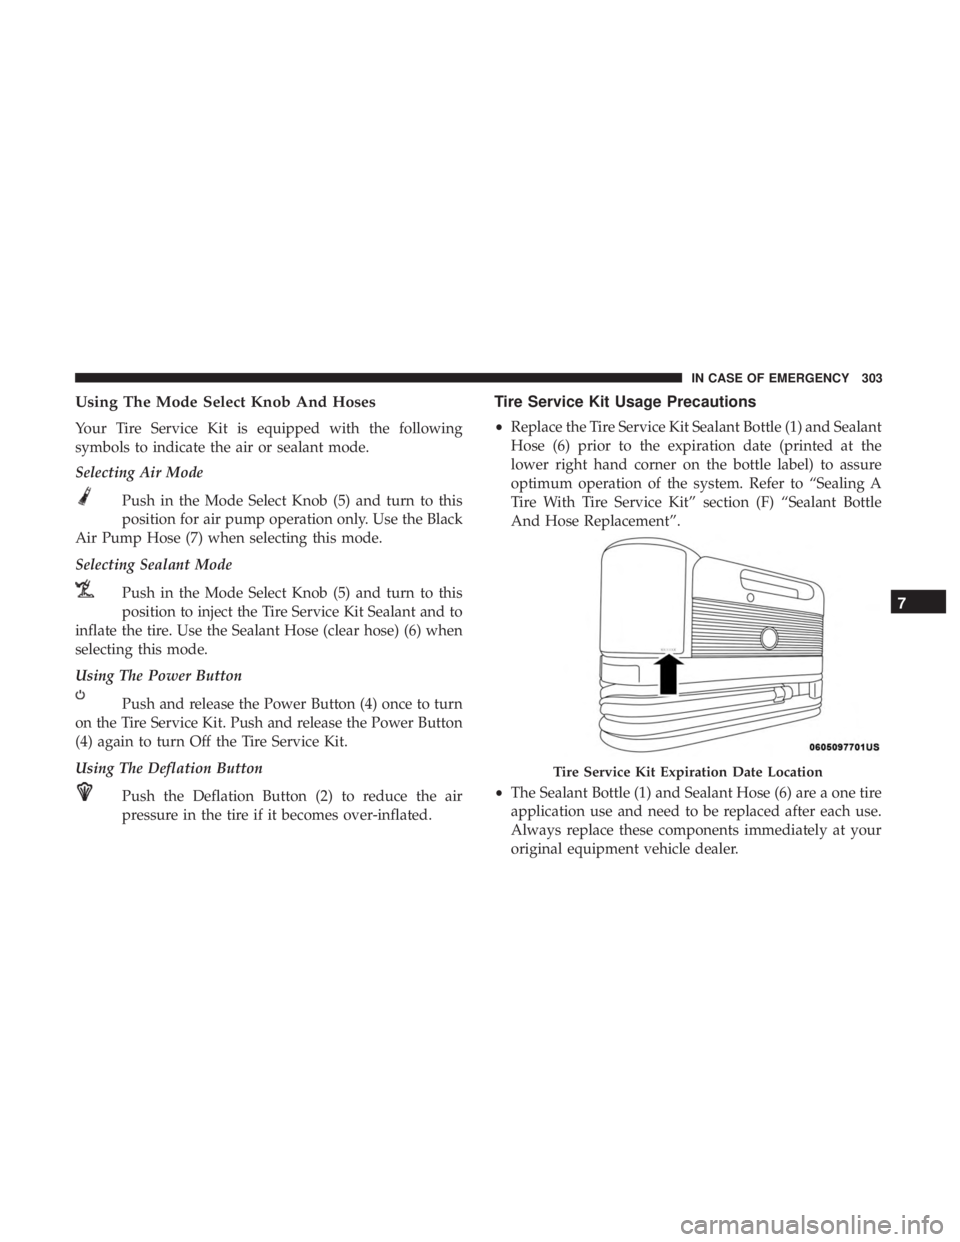
Tire Service Kit Usage Precautions
•Replace the Tire Service Kit Sealant Bottle (1) and Sealant
Hose (6) prior to the expiration date (printed at the
lower right hand corner on the bottle label) to assure
optimum operation of the system. Refer to “Sealing A
Tire With Tire Service Kit” section (F) “Sealant Bottle
And Hose Replacement”.
• The Sealant Bottle (1) and Sealant Hose (6) are a one tire
application use and need to be replaced after each use.
Always replace these components immediately at your
original equipment vehicle dealer.
Tire Service Kit Expiration Date Location
7
IN CASE OF EMERGENCY 303
Page 306 of 496
•When the Tire Service Kit sealant is in a liquid form,
clean water and a damp cloth will remove the material
from the vehicle or tire and wheel components. Once the
sealant dries, it can easily be peeled off and properly
discarded.
• For optimum performance, make sure the valve stem on
the wheel is free of debris before connecting the Tire
Service Kit.
• You can use the Tire Service Kit air pump to inflate
bicycle tires. The kit also comes with two needles,
located in the Accessory Storage Compartment (on the
bottom of the air pump) for inflating sport balls, rafts, or
similar inflatable items. However, use only the Air Pump
Hose (7) and make sure the Mode Select Knob (5) is in
the Air Mode when inflating such items to avoid inject-
ing sealant into them. The Tire Service Kit Sealant is only
intended to seal punctures less than 1/4 inch (6 mm)
diameter in the tread of your tire.
• Do not lift or carry the Tire Service Kit by the hoses.WARNING!
•Do not attempt to seal a tire on the side of the vehicle
closest to traffic. Pull far enough off the road to avoid
the danger of being hit when using the Tire Service
Kit.
• Do not use Tire Service Kit or drive the vehicle under
the following circumstances:
– If the puncture in the tire tread is approximately 1/4 inch (6 mm) or larger.
– If the tire has any sidewall damage.
– If the tire has any damage from driving with extremely low tire pressure.
– If the tire has any damage from driving on a flat tire.
– If the wheel has any damage.
– If you are unsure of the condition of the tire or the wheel.
• Keep Tire Service Kit away from open flames or heat
source.
(Continued)
304 IN CASE OF EMERGENCY
Page 307 of 496
WARNING!(Continued)
•A loose Tire Service Kit thrown forward in a colli-
sion or hard stop could endanger the occupants of
the vehicle. Always stow the Tire Service Kit in the
place provided. Failure to follow these warnings can
result in injuries that are serious or fatal to you, your
passengers, and others around you.
• Take care not to allow the contents of Tire Service Kit
to come in contact with hair, eyes, or clothing. Tire
Service Kit sealant is harmful if inhaled, swallowed,
or absorbed through the skin. It causes skin, eye, and
respiratory irritation. Flush immediately with plenty
of water if there is any contact with eyes or skin.
Change clothing as soon as possible, if there is any
contact with clothing.
• Tire Service Kit Sealant solution contains latex. In
case of an allergic reaction or rash, consult a physi-
cian immediately. Keep Tire Service Kit out of reach
of children. If swallowed, rinse mouth immediately
with plenty of water and drink plenty of water. Do
not induce vomiting! Consult a physician immedi-
ately.
Sealing A Tire With Tire Service Kit
(A) Whenever You Stop To Use Tire Service Kit:
1. Pull over to a safe location and turn on the vehicle’s Hazard Warning flashers.
2. Verify that the valve stem (on the wheel with the deflated tire) is in a position that is near to the ground.
This will allow the Tire Service Kit Hoses (6) and (7) to
reach the valve stem and keep the Tire Service Kit flat on
the ground. This will provide the best positioning of the
kit when injecting the sealant into the deflated tire and
running the air pump. Move the vehicle as necessary to
place the valve stem in this position before proceeding.
3. Place the transmission in PARK (auto transmission) or in Gear (manual transmission) and place the ignition in the
OFF position.
4. Apply the parking brake.
(B) Setting Up To Use Tire Service Kit:
1. Push in the Mode Select Knob (5) and turn to the Sealant Mode position.
2. Uncoil the Sealant Hose (6) and then remove the cap from the fitting at the end of the hose.
7
IN CASE OF EMERGENCY 305
Page 308 of 496
3. Place the Tire Service Kit flat on the ground next to thedeflated tire.
4. Remove the cap from the valve stem and then screw the fitting at the end of the Sealant Hose (6) onto the valve
stem.
5. Uncoil the Power Plug (8) and insert the plug into the vehicle’s 12 Volt power outlet.
NOTE: Do not remove foreign objects (e.g., screws or
nails) from the tire.
(C) Injecting Tire Service Kit Sealant Into The
Deflated Tire:
• Always start the engine before turning ON the Tire
Service Kit.
NOTE: Manual transmission vehicles must have the park-
ing brake engaged and the gear selector in NEUTRAL.
• After pushing the Power Button (4), the sealant (white
fluid) will flow from the Sealant Bottle (1) through the
Sealant Hose (6) and into the tire.
NOTE: Sealant may leak out through the puncture in the
tire. If the sealant (white fluid) does not flow within0–10
seconds through the Sealant Hose (6):
1. Push the Power Button (4) to turn Off the Tire Service
Kit. Disconnect the Sealant Hose (6) from the valve stem.
Make sure the valve stem is free of debris. Reconnect the
Sealant Hose (6) to the valve stem. Check that the Mode
Select Knob (5) is in the Sealant Mode position and not
Air Mode. Push the Power Button (4) to turn On the Tire
Service Kit.
2. Connect the Power Plug (8) to a different 12 Volt power outlet in your vehicle or another vehicle, if available.
Make sure the engine is running before turning ON the
Tire Service Kit.
3. The Sealant Bottle (1) may be empty due to previous use. Call for assistance.
NOTE: If the Mode Select Knob (5) is on Air Mode and the
pump is operating, air will dispense from the Air Pump
Hose (7) only, not the Sealant Hose (6).
306 IN CASE OF EMERGENCY