Page 224 of 560

WARNING!(Continued)
•ONLY use the driver ’s side floor mat on the driver ’s
side floor area. To check for interference, with the
vehicle properly parked with the engine off, fully
depress the accelerator, the brake, and the clutch pedal
(if present) to check for interference. If your floor mat
interferes with the operation of any pedal, or is not
secure to the floor, remove the floor mat from the
vehicle and place the floor mat in your trunk.
• ONLY use the passenger ’s side floor mat on the
passenger ’s side floor area.
• ALWAYS make sure objects cannot fall or slide into
the driver ’s side floor area when the vehicle is
moving. Objects can become trapped under accelera-
tor, brake, or clutch pedals and could cause a loss of
vehicle control.
• NEVER place any objects under the floor mat (e.g.,
towels, keys, etc.). These objects could change the
position of the floor mat and may cause interference
with the accelerator, brake, or clutch pedals.
(Continued)
WARNING! (Continued)
•If the vehicle carpet has been removed and re-
installed, always properly attach carpet to the floor
and check the floor mat fasteners are secure to the
vehicle carpet. Fully depress each pedal to check for
interference with the accelerator, brake, or clutch
pedals then re-install the floor mats.
• It is recommended to only use mild soap and water
to clean your floor mats. After cleaning, always check
your floor mat has been properly installed and is
secured to your vehicle using the floor mat fasteners
by lightly pulling mat.
Periodic Safety Checks You Should Make Outside
The Vehicle
Tires
Examine tires for excessive tread wear and uneven wear
patterns. Check for stones, nails, glass, or other objects
lodged in the tread or sidewall. Inspect the tread for cuts
and cracks. Inspect sidewalls for cuts, cracks, and bulges.
Check the wheel nuts for tightness. Check the tires (includ-
ing spare) for proper cold inflation pressure.
222 SAFETY
Page 290 of 560
2. Open the fuel filler door.
NOTE:In certain cold conditions, ice may prevent the fuel
door from opening. If this occurs, lightly push on the fuel
door to break the ice buildup and re-release the fuel door
using the inside release button. Do not pry on the door. 3. There is no fuel filler cap. A flapper door inside the pipe
seals the system.
4. Insert the fuel nozzle fully into the filler pipe – the nozzle opens and holds the flapper door while refuel-
ing.
NOTE: Only the correct size nozzle opens the latches
allowing the flapper door to open.
5. Fill the vehicle with fuel – when the fuel nozzle “clicks” or shuts off the fuel tank is full.
6. Maintain nozzle in filler for 5 seconds to allow nozzle to drain.
7. Remove the fuel nozzle and close the fuel door.
NOTE: A funnel is provided (located in the trunk in the
spare tire area) to open the flapper door to allow for
emergency refueling with a gas can.
Fuel Filler Door
288 STARTING AND OPERATING
Page 292 of 560
Emergency Fuel Filler Door Release
If you are unable to open the fuel filler door, use the fuel
filler door emergency release located in the trunk.
Follow the steps below to open the fuel door in case of an
emergency:
1. Open the trunk.
2. Remove the access cover (located on the left side innertrim panel). 3. Pull the release cable.
Access Cover
Release Cable
290 STARTING AND OPERATING
Page 314 of 560

NOTE:
•Your vehicle may be transmitting data as authorized by
the subscriber.
• Never place anything on or near the vehicle’s LTE
(voice/data) or 4G (data) and GPS antennas. You could
prevent LTE (voice/data) or 4G (data) and GPS signal
reception, which can prevent your vehicle from placing
an emergency call. An operable LTE (voice/data) or 4G
(data) network connection and a GPS signal is required
for the SOS Call system to function properly.
General Information
This device complies with Part 15 of the FCC Rules.
Operation is subject to the following two conditions: (1)
This device may not cause harmful interference, and (2)
this device must accept any interference received, includ-
ing interference that may cause undesired operation.
NOTE: Changes or modifications not expressly approved
by the party responsible for compliance could void the
user’s authority to operate the equipment.CAUTION!
To avoid damage to the mirror during cleaning, never
spray any cleaning solution directly onto the mirror.
Apply the solution onto a clean cloth and wipe the
mirror clean.
BULB REPLACEMENT
Replacement Bulbs
All of the interior bulbs are glass wedge base or glass
cartridge types. Aluminum base bulbs are not approved
and should not be used for replacement.
Interior Bulbs
Bulb Number
Rear Courtesy/Reading
Lamps W5W
Rear Compartment
(Trunk) Lamp 562
Overhead Console
Reading Lamp 578
312 IN CASE OF EMERGENCY
Page 322 of 560
Cavity Cartridge FuseMini-FuseDescription
51 –20 Amp Yellow Vacuum Pump
52 –5 Amp Tan Adaptive Cruise – If Equipped
53 – – Fuse – Spare
Rear Interior Fuses
There is also a power distribution center located in the trunk
under the spare tire access panel. This center contains fuses
and relays. Fuse cavity location and descriptions are printed
on the inside of the power distribution center cover.
Opening The Access Cover
Rear Power Distribution Center
320 IN CASE OF EMERGENCY
Page 328 of 560
Jack Location/Spare Tire Stowage
The jack and spare tire are both stowed under an access
cover in the trunk. Follow these steps to access the jack and
spare tire.
NOTE:The spare tire must be removed in order to access
the jack.
1. Open the trunk.
2. Lift the access cover using the pull strap. 3. Rotate the fastener securing the spare tire counterclock-
wise to remove it.
4. Remove the spare tire.
Opening The Access Panel
Spare Tire Fastener
326 IN CASE OF EMERGENCY
Page 335 of 560

WARNING!
To avoid the risk of forcing the vehicle off the jack, do
not tighten the wheel nuts fully until the vehicle has
been lowered. Failure to follow this warning may
result in serious injury.
3. Lower the vehicle to the ground by turning the jack handle counterclockwise.
4. Refer to “Torque Specifications” in “Technical Specifica- tions” for proper lug nut torque.
5. After 25 miles (40 km), check the lug nut torque with a torque wrench to ensure that all lug nuts are properly
seated against the wheel.
TIRE SERVICE KIT — IF EQUIPPED
Small punctures up to 1/4 inch (6 mm) in the tire tread can
be sealed with Tire Service Kit. Foreign objects (e.g., screws
or nails) should not be removed from the tire. Tire Service
Kit can be used in outside temperatures down to approxi-
mately -4°F (-20°C). This kit will provide a temporary tire seal, allowing you to
drive your vehicle up to 100 miles (160 km) with a
maximum speed of 50 mph (80 km/h).
Tire Service Kit Storage
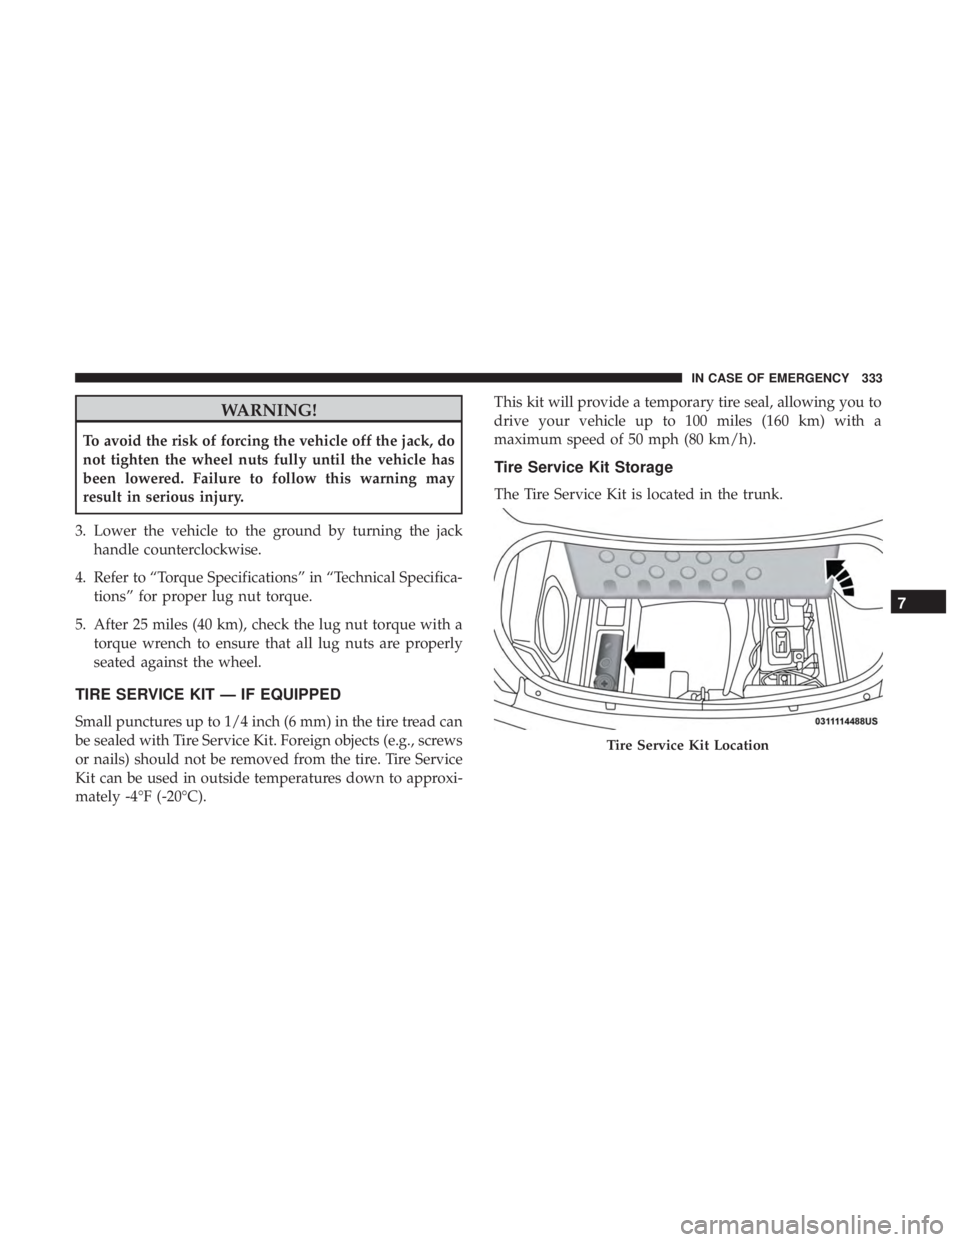
The Tire Service Kit is located in the trunk.
Tire Service Kit Location
7
IN CASE OF EMERGENCY 333
Page 343 of 560

5. Position the new Sealant Bottle (1) in the housing so thatthe Sealant Hose (6) aligns with the hose slot in the front
of the housing. Push the bottle into the housing. An
audible click will be heard indicating the bottle is locked
into place.
6. Verify that the cap is installed on the fitting at the end of the Sealant Hose (6) and return the hose to its storage
area (located on the bottom of the air pump).
7. Return the Tire Service Kit to its storage location in the vehicle.
TIRE SERVICE KIT — IF EQUIPPED
Small punctures up to 1/4 inch (6 mm) in the tire tread can
be sealed with Tire Service Kit. Foreign objects (e.g., screws
or nails) should not be removed from the tire. Tire Service
Kit can be used in outside temperatures down to approxi-
mately -4°F (-20°C).
This kit will provide a temporary tire seal, allowing you to
drive your vehicle up to 100 miles (160 km) with a
maximum speed of 50 mph (80 km/h).
Tire Service Kit Storage
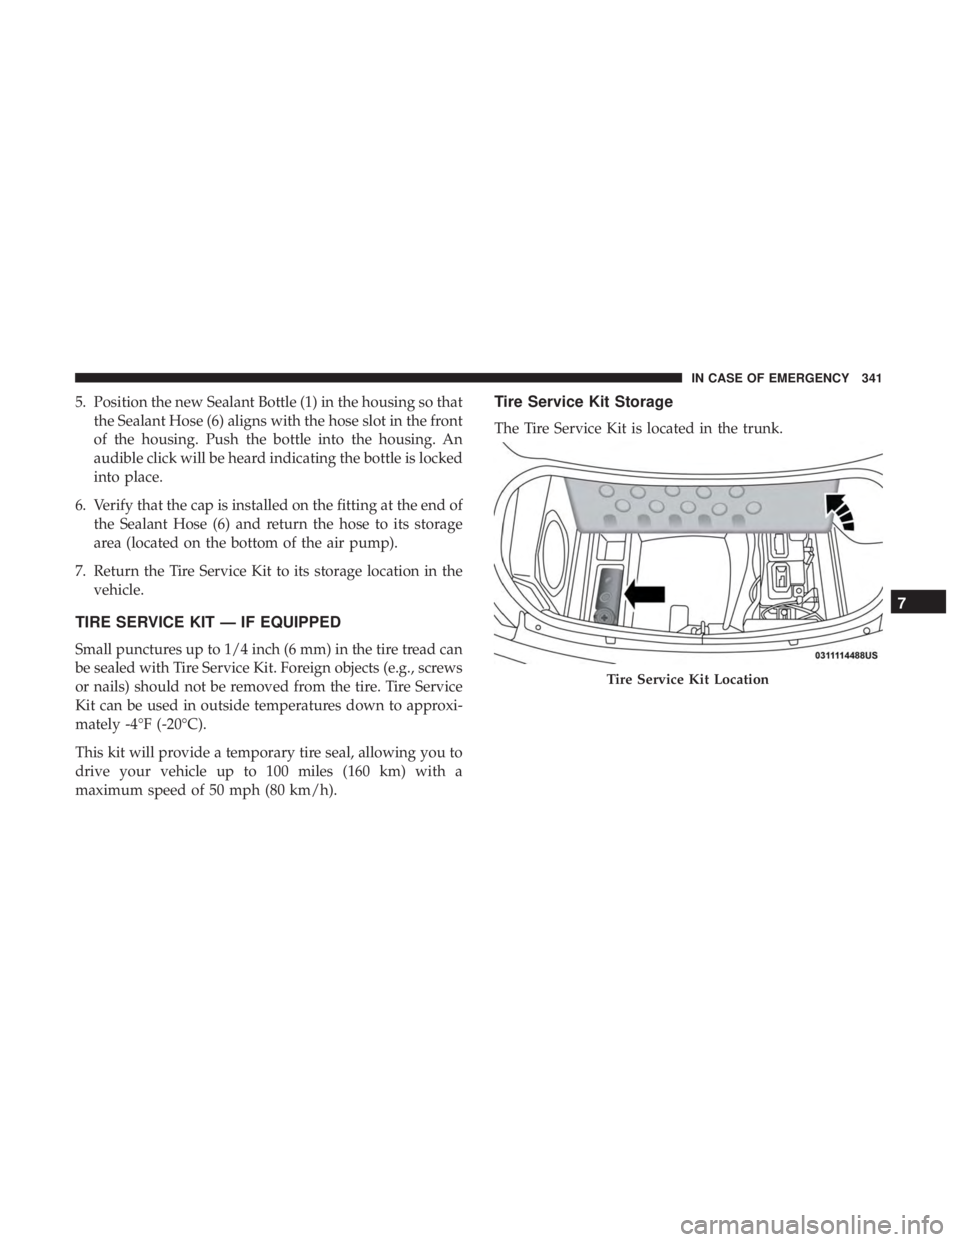
The Tire Service Kit is located in the trunk.
Tire Service Kit Location
7
IN CASE OF EMERGENCY 341