2019 CHRYSLER 300 clock
[x] Cancel search: clockPage 68 of 492
EXTERIOR LIGHTS
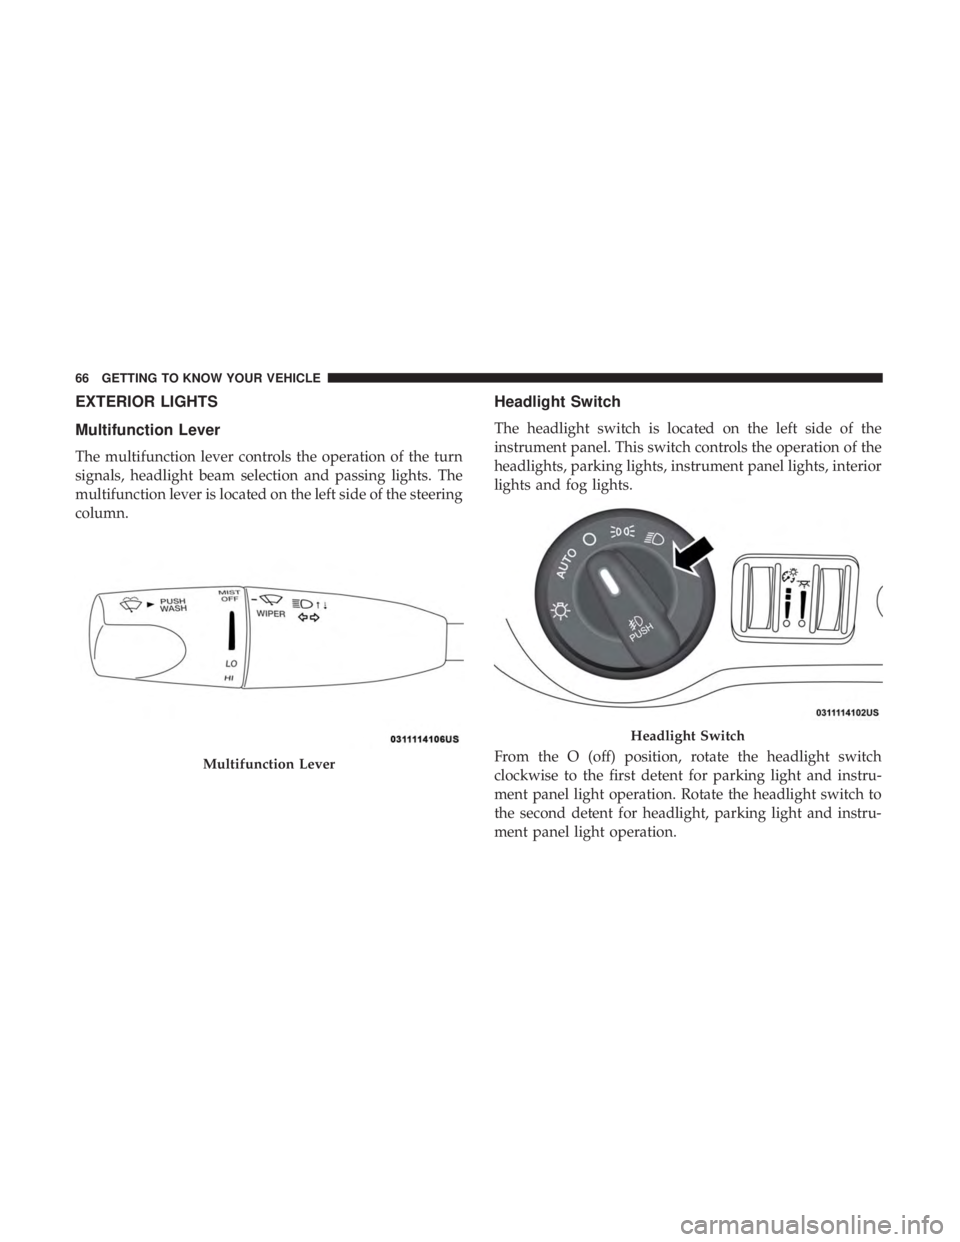
Multifunction Lever
The multifunction lever controls the operation of the turn
signals, headlight beam selection and passing lights. The
multifunction lever is located on the left side of the steering
column.
Headlight Switch
The headlight switch is located on the left side of the
instrument panel. This switch controls the operation of the
headlights, parking lights, instrument panel lights, interior
lights and fog lights.
From the O (off) position, rotate the headlight switch
clockwise to the first detent for parking light and instru-
ment panel light operation. Rotate the headlight switch to
the second detent for headlight, parking light and instru-
ment panel light operation.
Multifunction Lever
Headlight Switch
66 GETTING TO KNOW YOUR VEHICLE
Page 70 of 492
To Deactivate
1. Pull the multifunction lever toward you (or rearward invehicle) to manually deactivate the system (normal
operation of low beams).
2. Push back on the multifunction lever to reactivate the system.
The Automatic High Beams can also be deactivated
through the Uconnect system. Refer to “Uconnect Settings”
in “Multimedia” for further information.
Flash-To-Pass
You can signal another vehicle with your headlights by
lightly pulling the multifunction lever toward you. This
will cause the high beam headlights to turn on, and remain
on, until the lever is released.
Automatic Headlights
This system automatically turns the headlights on or off
according to ambient light levels. To turn the system on,
rotate the headlight switch counterclockwise to the AUTO
position. When the system is on, the headlight time delay
feature is also on. This means the headlights will stay on for up to 90 seconds after you place the ignition into the
OFF position. The headlight time delay can be pro-
grammed 0/30/60/90 seconds.
Refer to “Uconnect Settings” in “Multimedia” for further
information.
To turn the automatic system off, move the headlight
switch out of the AUTO position.
NOTE:
The engine must be running before the headlights
will come on in the automatic mode.
Parking Lights
Turn the headlight switch knob to the first detent to turn
the parking lights on. This also turns on all instrument
panel lighting.
Headlights On With Wipers
When this feature is active, the headlights will turn on after
the wipers are turned on if the headlight switch is placed in
the AUTO position and programmable feature is set to on.
In addition, the headlights will turn off when the wipers
are turned off if they were turned on by this feature.
68 GETTING TO KNOW YOUR VEHICLE
Page 84 of 492
IconDescription
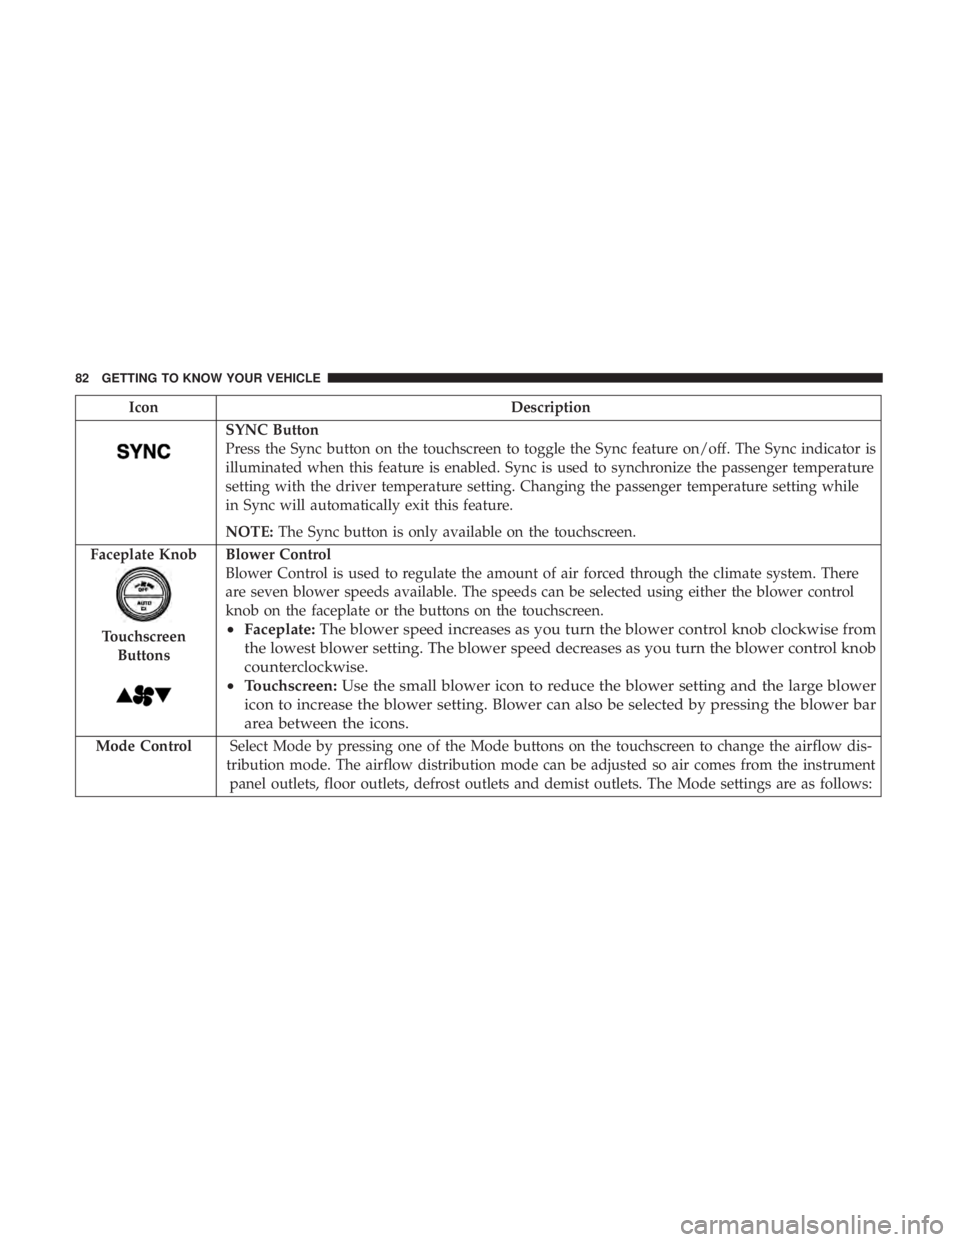
SYNC Button
Press the Sync button on the touchscreen to toggle the Sync feature on/off. The Sync indicator is
illuminated when this feature is enabled. Sync is used to synchronize the passenger temperature
setting with the driver temperature setting. Changing the passenger temperature setting while
in Sync will automatically exit this feature.
NOTE:The Sync button is only available on the touchscreen.
Faceplate Knob
Touchscreen Buttons
Blower Control
Blower Control is used to regulate the amount of air forced through the climate system. There
are seven blower speeds available. The speeds can be selected using either the blower control
knob on the faceplate or the buttons on the touchscreen.
• Faceplate: The blower speed increases as you turn the blower control knob clockwise from
the lowest blower setting. The blower speed decreases as you turn the blower control knob
counterclockwise.
• Touchscreen: Use the small blower icon to reduce the blower setting and the large blower
icon to increase the blower setting. Blower can also be selected by pressing the blower bar
area between the icons.
Mode Control Select Mode by pressing one of the Mode buttons on the touchscreen to change the airflow dis-
tribution mode. The airflow distribution mode can be adjusted so air comes from the instrument panel outlets, floor outlets, defrost outlets and demist outlets. The Mode settings are as follows:
82 GETTING TO KNOW YOUR VEHICLE
Page 237 of 492
WARNING!
Do not coast in NEUTRAL and never turn off the
ignition to coast down a hill. These are unsafe practices
that limit your response to changing traffic or road
conditions. You might lose control of the vehicle and
have a collision.
CAUTION!
Towing the vehicle, coasting, or driving for any other
reason with the transmission in NEUTRAL can cause
severe transmission damage.
Refer to “Recreational Towing” in “Starting And Op-
erating” and “Towing A Disabled Vehicle” in “In Case
Of Emergency” for further information.
DRIVE (D)
This range should be used for most city and highway
driving. It provides the smoothest upshifts and downshifts,
and the best fuel economy. The transmission automatically
upshifts through all forward gears. The DRIVE position
provides optimum driving characteristics under all normal
operating conditions. When frequent transmission shifting occurs (such as when
operating the vehicle under heavy loading conditions, in
hilly terrain, traveling into strong head winds, or while
towing a heavy trailer), use the AutoStick shift control (if
equipped, refer to “AutoStick” in this section for further
information) to select a lower gear. Under these conditions,
using a lower gear will improve performance and extend
transmission life by reducing excessive shifting and heat
buildup.
During extremely cold temperatures (-22°F [-30°C] or be-
low), transmission operation may be modified depending
on engine and transmission temperature as well as vehicle
speed. Normal operation will resume once the transmis-
sion temperature has risen to a suitable level.
SPORT (S) — If Equipped
This mode alters the transmission’s automatic shift sched-
ule for sportier driving. Upshift speeds are increased to
make full use of available engine power.
To access SPORT mode, push down on the gear selector
and rotate it fully clockwise, or push the SPORT button in
the center stack.
6
STARTING AND OPERATING 235
Page 238 of 492
LOW (L) — If Equipped
Use this range for engine braking when descending very
steep grades. In this range, the transmission will downshift
for increased engine braking. To access the LOW position,
push down on the gear selector and rotate it fully clock-
wise.
Transmission Limp Home Mode
Transmission function is monitored electronically for ab-
normal conditions. If a condition is detected that could
result in transmission damage, Transmission Limp Home
Mode is activated. In this mode, the transmission may
operate only in certain gears, or may not shift at all. Vehicle
performance may be severely degraded and the engine
may stall. In some situations, the transmission may not
re-engage if the engine is turned off and restarted. The
Malfunction Indicator Light (MIL) may be illuminated. A
message in the instrument cluster will inform the driver of
the more serious conditions, and indicate what actions may
be necessary.
In the event of a momentary problem, the transmission can
be reset to regain all forward gears by performing the
following steps:NOTE:
In cases where the instrument cluster message
indicates the transmission may not re-engage after engine
shutdown, perform this procedure only in a desired loca-
tion (preferably, at an authorized dealer).
1. Stop the vehicle.
2. Shift the transmission into PARK, if possible. If not, shift the transmission to NEUTRAL.
3. Push and hold the ignition switch until the engine turns OFF.
4. Wait approximately 30 seconds.
5. Restart the engine.
6. Shift into the desired gear range. If the problem is no longer detected, the transmission will return to normal
operation.
NOTE: Even if the transmission can be reset, we recom-
mend that you visit an authorized dealer at your earliest
possible convenience. An authorized dealer has diagnostic
equipment to assess the condition of your transmission.
If the transmission cannot be reset, authorized dealer
service is required.
236 STARTING AND OPERATING
Page 310 of 492
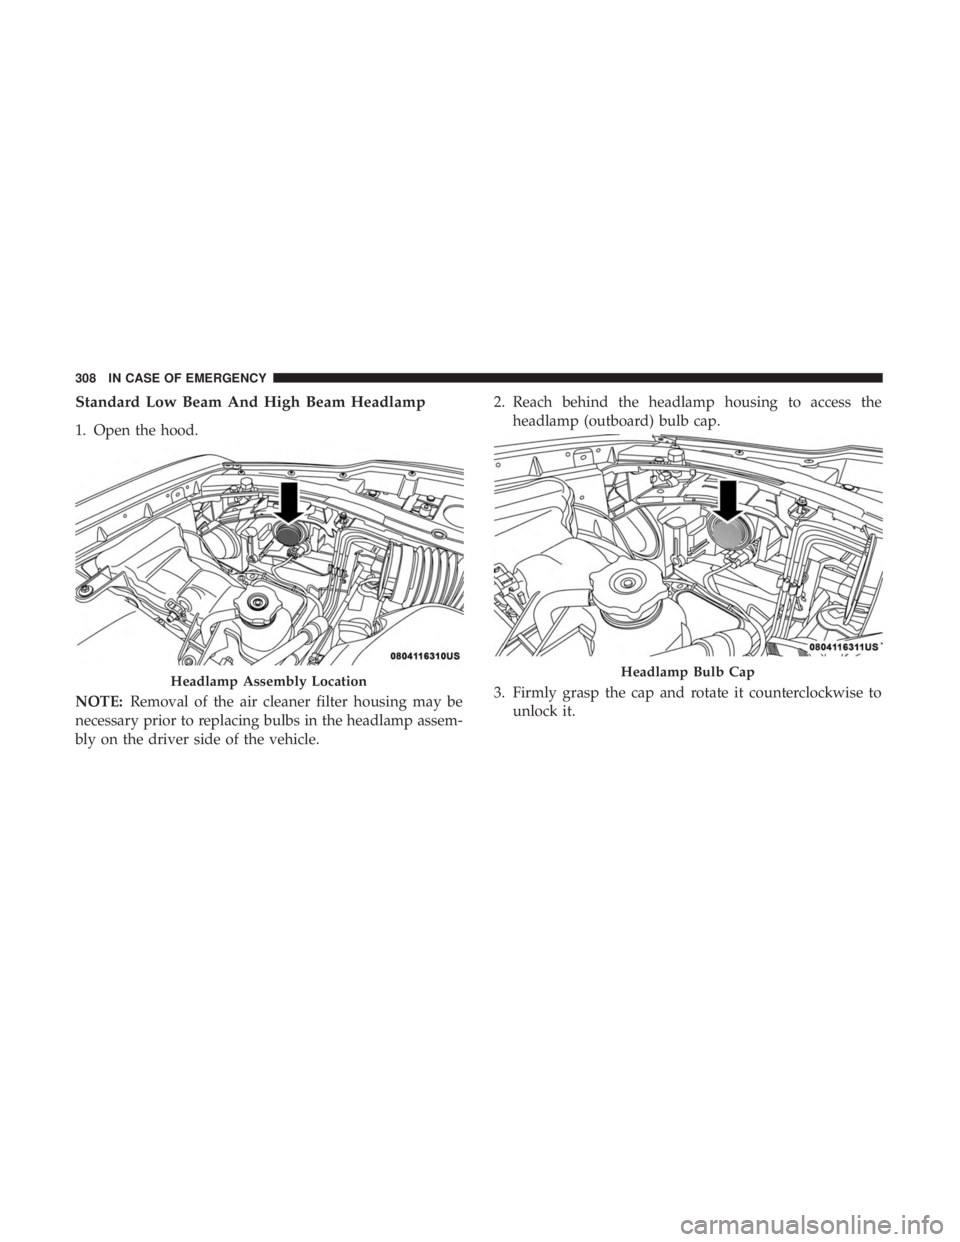
Standard Low Beam And High Beam Headlamp
1. Open the hood.
NOTE:Removal of the air cleaner filter housing may be
necessary prior to replacing bulbs in the headlamp assem-
bly on the driver side of the vehicle. 2. Reach behind the headlamp housing to access the
headlamp (outboard) bulb cap.
3. Firmly grasp the cap and rotate it counterclockwise to unlock it.
Headlamp Assembly LocationHeadlamp Bulb Cap
308 IN CASE OF EMERGENCY
Page 311 of 492
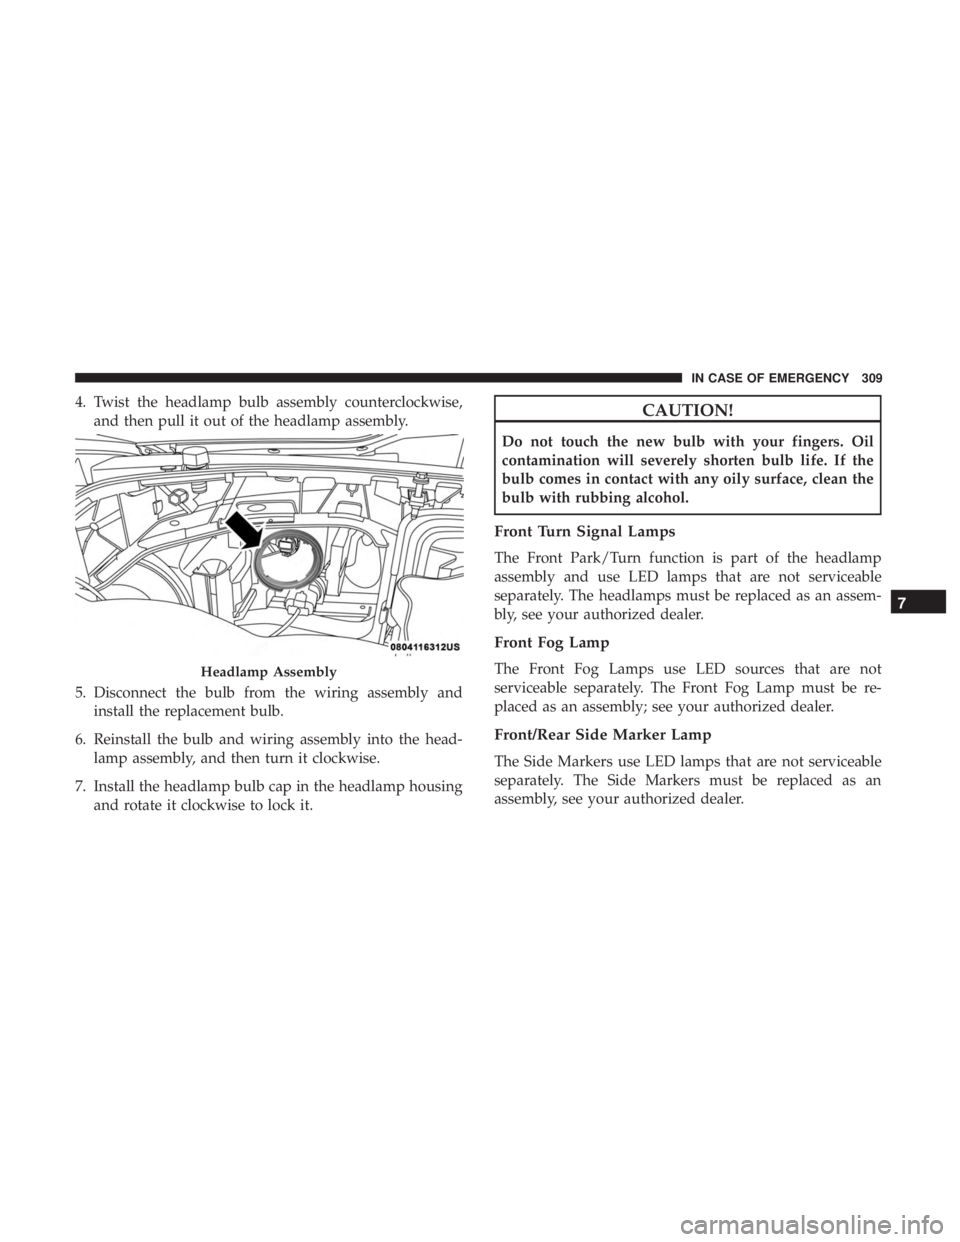
4. Twist the headlamp bulb assembly counterclockwise,and then pull it out of the headlamp assembly.
5. Disconnect the bulb from the wiring assembly and install the replacement bulb.
6. Reinstall the bulb and wiring assembly into the head- lamp assembly, and then turn it clockwise.
7. Install the headlamp bulb cap in the headlamp housing and rotate it clockwise to lock it.CAUTION!
Do not touch the new bulb with your fingers. Oil
contamination will severely shorten bulb life. If the
bulb comes in contact with any oily surface, clean the
bulb with rubbing alcohol.
Front Turn Signal Lamps
The Front Park/Turn function is part of the headlamp
assembly and use LED lamps that are not serviceable
separately. The headlamps must be replaced as an assem-
bly, see your authorized dealer.
Front Fog Lamp
The Front Fog Lamps use LED sources that are not
serviceable separately. The Front Fog Lamp must be re-
placed as an assembly; see your authorized dealer.
Front/Rear Side Marker Lamp
The Side Markers use LED lamps that are not serviceable
separately. The Side Markers must be replaced as an
assembly, see your authorized dealer.
Headlamp Assembly
7
IN CASE OF EMERGENCY 309
Page 321 of 492
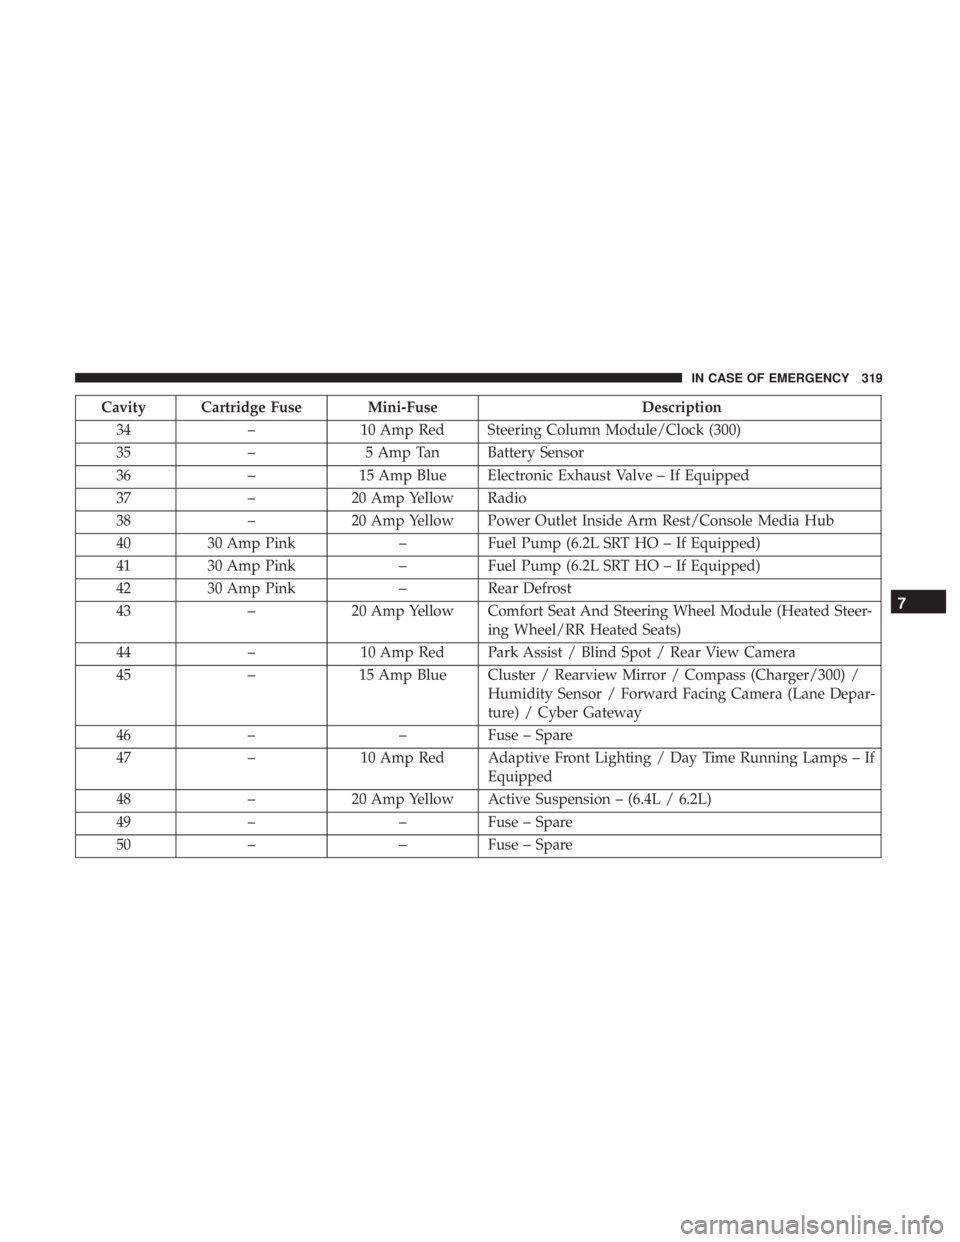
Cavity Cartridge Fuse Mini-FuseDescription
34 –10 Amp Red Steering Column Module/Clock (300)
35 –5 Amp Tan Battery Sensor
36 –15 Amp Blue Electronic Exhaust Valve – If Equipped
37 –20 Amp Yellow Radio
38 –20 Amp Yellow Power Outlet Inside Arm Rest/Console Media Hub
40 30 Amp Pink –Fuel Pump (6.2L SRT HO – If Equipped)
41 30 Amp Pink –Fuel Pump (6.2L SRT HO – If Equipped)
42 30 Amp Pink –Rear Defrost
43 –20 Amp Yellow Comfort Seat And Steering Wheel Module (Heated Steer-
ing Wheel/RR Heated Seats)
44 –10 Amp Red Park Assist / Blind Spot / Rear View Camera
45 –15 Amp Blue Cluster / Rearview Mirror / Compass (Charger/300) /
Humidity Sensor / Forward Facing Camera (Lane Depar-
ture) / Cyber Gateway
46 – –Fuse – Spare
47 –10 Amp Red Adaptive Front Lighting / Day Time Running Lamps – If
Equipped
48 –20 Amp Yellow Active Suspension – (6.4L / 6.2L)
49 – –Fuse – Spare
50 – –Fuse – Spare
7
IN CASE OF EMERGENCY 319