2019 CHEVROLET MALIBU automatic transmission
[x] Cancel search: automatic transmissionPage 246 of 382
Chevrolet Malibu Owner Manual (GMNA-Localizing-U.S./Canada/Mexico-
12461813) - 2019 - crc - 12/11/18
246 Vehicle Care
2. PressVon the DIC controls
and hold down for a few
seconds to clear the CHANGE
ENGINE OIL SOON message
and reset the oil life at 100%.
Be careful not to reset the oil
life display accidentally at any
time other than after the oil is
changed. It cannot be reset
accurately until the next oil
change.
The system is reset when the
CHANGE ENGINE OIL SOON
message is off and the REMAINING
OIL LIFE message is displayed.
If the CHANGE ENGINE OIL SOON
message comes back on when the
vehicle is started, the engine oil life
system has not been reset. Repeat
the procedure.
Automatic Transmission
Fluid
It is not necessary to check the
transmission fluid level.
A transmission fluid leak is the only
reason for fluid loss. If a leakoccurs, take the vehicle to your
dealer and have it repaired as soon
as possible.
Caution
Use of the incorrect automatic
transmission fluid may damage
the vehicle, and the damage may
not be covered by the vehicle
warranty. Always use the correct
automatic transmission fluid. See
Recommended Fluids and
Lubricants0338.
Change the fluid at the intervals
listed inMaintenance Schedule
0329, and be sure to use the fluid
listed inRecommended Fluids and
Lubricants0338.
Engine Air Filter Life
System
When to Change Engine Air
Filter
If equipped, this feature provides an
indication of when to change the
engine air filter. It is based on
driving conditions, which can cause
when to change to vary greatly. It is
possible an air filter change may not
be indicated for up to four years.
When the "Replace at Next Oil
Change" message displays, the
engine air filter should be replaced
at the time of the next engine oil
change. When the "Replace Engine
Air Filter Now" message displays,
the engine air filter should be
replaced as soon as possible. Reset
the engine air filter life system after
the engine air filter is replaced. See
your dealer for service and to reset
the system.
Page 260 of 382
Chevrolet Malibu Owner Manual (GMNA-Localizing-U.S./Canada/Mexico-
12461813) - 2019 - crc - 12/11/18
260 Vehicle Care
For vehicles equipped with the 2.0L
engine:
1. Install the negative battery
cable clamp to the negative
battery post.
2. Tighten the negative battery
cable nut.
3. Turn the ignition on.
Starter Switch Check
{Warning
When you are doing this
inspection, the vehicle could
move suddenly. If the vehicle
moves, you or others could be
injured.
1. Before starting this check, be
sure there is enough room
around the vehicle.
2. Apply both the parking brake
and the regular brake.Do not use the accelerator
pedal, and be ready to turn off
the engine immediately if it
starts.
3. Try to start the engine in each
gear. The vehicle should start
only in P (Park) or N (Neutral).
If the vehicle starts in any other
position, contact your dealer for
service.
Automatic Transmission
Shift Lock Control
Function Check
{Warning
When you are doing this
inspection, the vehicle could
move suddenly. If the vehicle
moves, you or others could be
injured.
1. Before starting this check, be
sure there is enough room
around the vehicle. It should be
parked on a level surface.2. Apply the parking brake. Be
ready to apply the regular
brake immediately if the vehicle
begins to move.
3. With the engine off, turn the
ignition on, but do not start the
engine. Without applying the
regular brake, try to move the
shift lever out of P (Park) with
normal effort. If the shift lever
moves out of P (Park), contact
your dealer for service.
Park Brake and P (Park)
Mechanism Check
{Warning
When you are doing this check,
the vehicle could begin to move.
You or others could be injured
and property could be damaged.
Make sure there is room in front
of the vehicle in case it begins to
roll. Be ready to apply the regular
brake at once should the vehicle
begin to move.
Page 271 of 382
Chevrolet Malibu Owner Manual (GMNA-Localizing-U.S./Canada/Mexico-
12461813) - 2019 - crc - 12/11/18
Vehicle Care 271
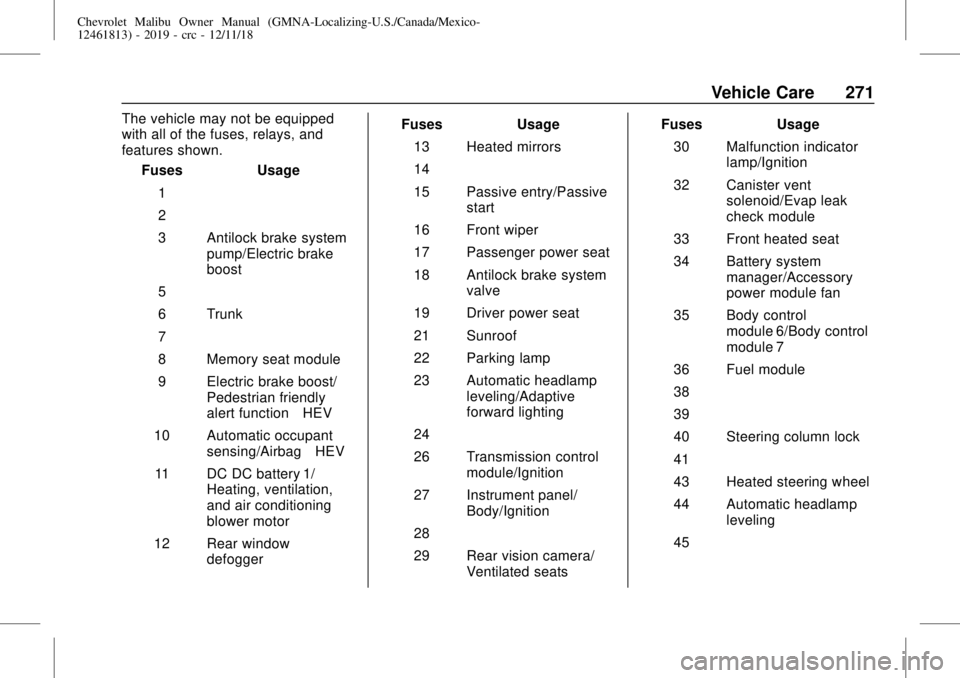
The vehicle may not be equipped
with all of the fuses, relays, and
features shown.
Fuses Usage
1–
2–
3 Antilock brake system
pump/Electric brake
boost
5–
6 Trunk
7–
8 Memory seat module
9 Electric brake boost/
Pedestrian friendly
alert function–HEV
10 Automatic occupant
sensing/Airbag–HEV
11 DC DC battery 1/
Heating, ventilation,
and air conditioning
blower motor
12 Rear window
defoggerFuses Usage
13 Heated mirrors
14–
15 Passive entry/Passive
start
16 Front wiper
17 Passenger power seat
18 Antilock brake system
valve
19 Driver power seat
21 Sunroof
22 Parking lamp
23 Automatic headlamp
leveling/Adaptive
forward lighting
24–
26 Transmission control
module/Ignition
27 Instrument panel/
Body/Ignition
28–
29 Rear vision camera/
Ventilated seatsFuses Usage
30 Malfunction indicator
lamp/Ignition
32 Canister vent
solenoid/Evap leak
check module
33 Front heated seat
34 Battery system
manager/Accessory
power module fan
35 Body control
module 6/Body control
module 7
36 Fuel module
38–
39–
40 Steering column lock
41–
43 Heated steering wheel
44 Automatic headlamp
leveling
45–
Page 272 of 382
Chevrolet Malibu Owner Manual (GMNA-Localizing-U.S./Canada/Mexico-
12461813) - 2019 - crc - 12/11/18
272 Vehicle Care
Fuses Usage
46 Engine control
module/Ignition
47–
48 Electric brake
boost–HEV/
Cooling fan
49 DC DC battery 2
50–
51–
52–
53–
54–
55–
56 Starter motor
57 Diesel exhaust fluid
heater
58–
59 High-beam
headlamps
60 Cooling fan
61–Fuses Usage
62–
63–
65 Air conditioning–HEV
67–
68–
69–
70–
72 Starter pinion
74–
75 Engine control
module main
76 Engine control module
sense
78 Horn
79 Washer pump
81 Transmission control
module/Engine control
module
82–
83 Ignition coil
84 Powertrain on engineFuses Usage
85 Shunt
86 Shunt
87–
88 Aeroshutter
89–
91–
92 Traction power
inverter module/Motor
generator unit
pump–HEV/
Transmission oil
pump–non HEV
93 Automatic headlamp
leveling
95–
96–
97–
99 Coolant pump
Relays Usage
4–
Page 281 of 382
Chevrolet Malibu Owner Manual (GMNA-Localizing-U.S./Canada/Mexico-
12461813) - 2019 - crc - 12/11/18
Vehicle Care 281
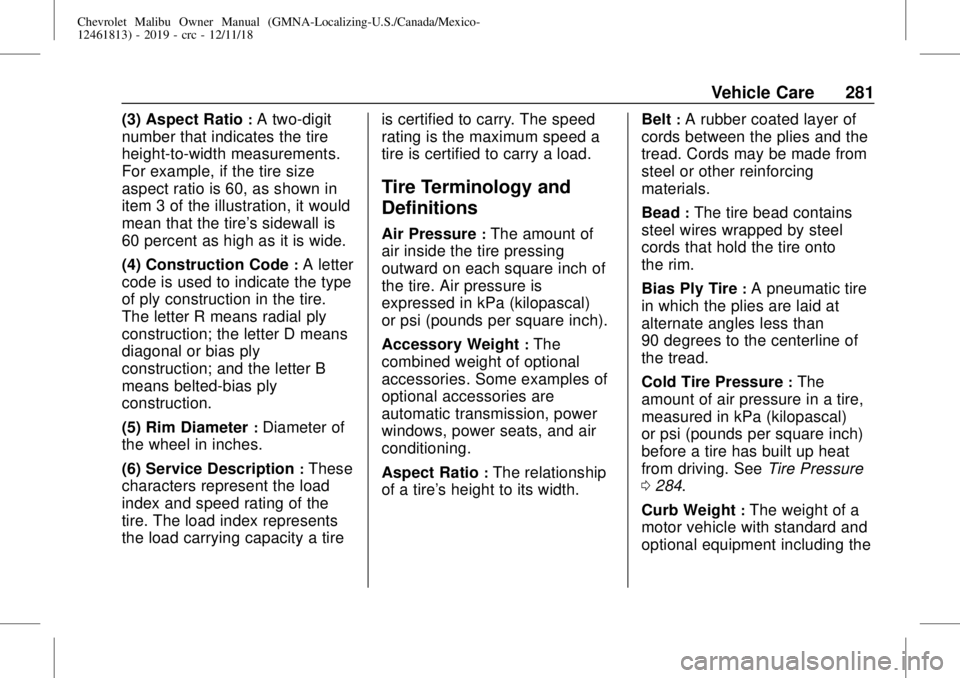
(3) Aspect Ratio:A two-digit
number that indicates the tire
height-to-width measurements.
For example, if the tire size
aspect ratio is 60, as shown in
item 3 of the illustration, it would
mean that the tire's sidewall is
60 percent as high as it is wide.
(4) Construction Code
:A letter
code is used to indicate the type
of ply construction in the tire.
The letter R means radial ply
construction; the letter D means
diagonal or bias ply
construction; and the letter B
means belted-bias ply
construction.
(5) Rim Diameter
:Diameter of
the wheel in inches.
(6) Service Description
:These
characters represent the load
index and speed rating of the
tire. The load index represents
the load carrying capacity a tireis certified to carry. The speed
rating is the maximum speed a
tire is certified to carry a load.
Tire Terminology and
Definitions
Air Pressure:The amount of
air inside the tire pressing
outward on each square inch of
the tire. Air pressure is
expressed in kPa (kilopascal)
or psi (pounds per square inch).
Accessory Weight
:The
combined weight of optional
accessories. Some examples of
optional accessories are
automatic transmission, power
windows, power seats, and air
conditioning.
Aspect Ratio
:The relationship
of a tire's height to its width.Belt
:A rubber coated layer of
cords between the plies and the
tread. Cords may be made from
steel or other reinforcing
materials.
Bead
:The tire bead contains
steel wires wrapped by steel
cords that hold the tire onto
the rim.
Bias Ply Tire
:A pneumatic tire
in which the plies are laid at
alternate angles less than
90 degrees to the centerline of
the tread.
Cold Tire Pressure
:The
amount of air pressure in a tire,
measured in kPa (kilopascal)
or psi (pounds per square inch)
before a tire has built up heat
from driving. SeeTire Pressure
0284.
Curb Weight
:The weight of a
motor vehicle with standard and
optional equipment including the
Page 299 of 382
Chevrolet Malibu Owner Manual (GMNA-Localizing-U.S./Canada/Mexico-
12461813) - 2019 - crc - 12/11/18
Vehicle Care 299
If a tire goes flat, avoid further tire
and wheel damage by driving slowly
to a level place, well off the road,
if possible. Turn on the hazard
warning flashers. SeeHazard
Warning Flashers0150.
{Warning
Changing a tire can be
dangerous. The vehicle can slip
off the jack and roll over or fall
causing injury or death. Find a
level place to change the tire. To
help prevent the vehicle from
moving:
1. Set the parking brake firmly.
2. Put an automatic
transmission in P (Park) or a
manual transmission in
1 (First) or R (Reverse).
3. Turn off the engine and do
not restart while the vehicle
is raised.
4. Do not allow passengers to
remain in the vehicle.
(Continued)
Warning (Continued)
5. Place wheel blocks,
if equipped, on both sides of
the tire at the opposite
corner of the tire being
changed.
This vehicle may come with a jack
and spare tire or a tire sealant and
compressor kit. To use the jacking
equipment to change a spare tire
safely, follow the instructions below.
Then seeTire Changing0306. To
use the tire sealant and compressor
kit, seeTire Sealant and
Compressor Kit0299.
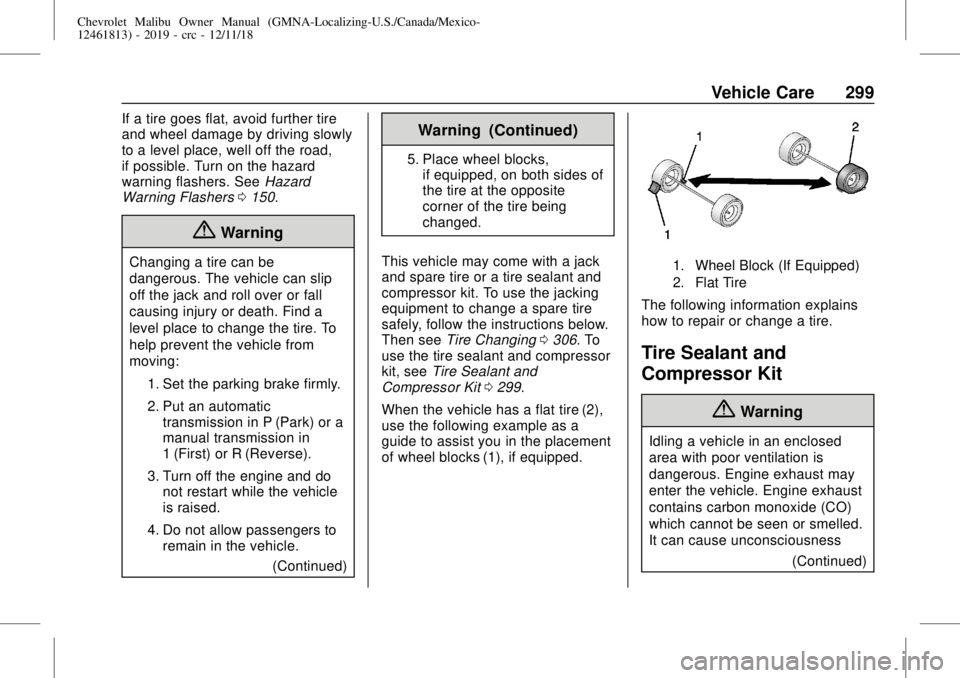
When the vehicle has a flat tire (2),
use the following example as a
guide to assist you in the placement
of wheel blocks (1), if equipped.
1. Wheel Block (If Equipped)
2. Flat Tire
The following information explains
how to repair or change a tire.
Tire Sealant and
Compressor Kit
{Warning
Idling a vehicle in an enclosed
area with poor ventilation is
dangerous. Engine exhaust may
enter the vehicle. Engine exhaust
contains carbon monoxide (CO)
which cannot be seen or smelled.
It can cause unconsciousness
(Continued)
Page 314 of 382
Chevrolet Malibu Owner Manual (GMNA-Localizing-U.S./Canada/Mexico-
12461813) - 2019 - crc - 12/11/18
314 Vehicle Care
3. Set the parking brake firmly on
both vehicles. Put an automatic
transmission in P (Park) or a
manual transmission in Neutral
before setting the parking
brake.
Caution
If any accessories are left on or
plugged in during the jump
starting procedure, they could be
damaged. The repairs would not
be covered by the vehicle
warranty. Whenever possible, turn
off or unplug all accessories on
either vehicle when jump starting.
4. Turn the ignition off and switch
off all lights and accessories in
both vehicles, except the
hazard warning flashers if
needed.
{Warning
An electric fan can start up even
when the engine is not running
and can injure you. Keep hands,
clothing, and tools away from any
underhood electric fan.
{Warning
Using a match near a battery can
cause battery gas to explode.
People have been hurt doing this,
and some have been blinded.
Use a flashlight if you need more
light.
Battery fluid contains acid that
can burn you. Do not get it on
you. If you accidentally get it in
your eyes or on your skin, flush
the place with water and get
medical help immediately.
{Warning
Fans or other moving engine
parts can injure you badly. Keep
your hands away from moving
parts once the engine is running.
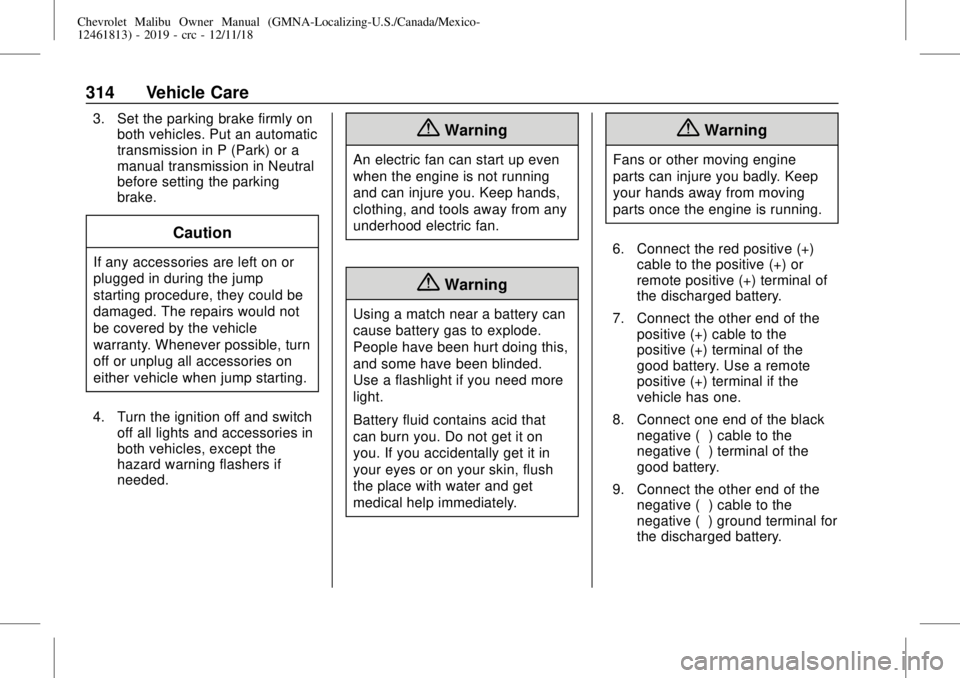
6. Connect the red positive (+)
cable to the positive (+) or
remote positive (+) terminal of
the discharged battery.
7. Connect the other end of the
positive (+) cable to the
positive (+) terminal of the
good battery. Use a remote
positive (+) terminal if the
vehicle has one.
8. Connect one end of the black
negative (−) cable to the
negative (−) terminal of the
good battery.
9. Connect the other end of the
negative (−) cable to the
negative (–) ground terminal for
the discharged battery.
Page 330 of 382

Chevrolet Malibu Owner Manual (GMNA-Localizing-U.S./Canada/Mexico-
12461813) - 2019 - crc - 12/11/18
330 Service and Maintenance
parts, or signs of wear at least
once a year. SeeExterior Care
0318.
.
Inspect power steering for
proper attachment, connections,
binding, leaks, cracks,
chafing, etc.
.
Visually inspect halfshafts and
drive shafts for excessive wear,
lubricant leaks, and/or damage
including: tube dents or cracks,
constant velocity joint or
universal joint looseness,
cracked or missing boots, loose
or missing boot clamps, center
bearing excessive looseness,
loose or missing fasteners, and
axle seal leaks.
.
Check restraint system
components. SeeSafety System
Check072.
.
Visually inspect fuel system for
damage or leaks.
.
Visually inspect exhaust system
and nearby heat shields for
loose or damaged parts..
Lubricate body components. See
Exterior Care0318.
.
Check starter switch. SeeStarter
Switch Check0260.
.
Check automatic transmission
shift lock control function. See
Automatic Transmission Shift
Lock Control Function Check
0260.
.
Check parking brake and
automatic transmission park
mechanism. SeePark Brake and
P (Park) Mechanism Check
0260.
.
Check accelerator pedal for
damage, high effort, or binding.
Replace if needed.
.
Visually inspect gas strut for
signs of wear, cracks, or other
damage. Check the hold open
ability of the strut. If the hold
open ability is low, service the
gas strut. SeeGas Strut(s)
0262.
.
Inspect sunroof track and seal,
if equipped. SeeSunroof051.