Page 17 of 20

17
DRIVER ASSISTANCE SYSTEMSF
REAR VISION CAMERA/SURROUND VISIONF
FRONT PEDESTRIAN BRAKING – During daytime driving, the system detects pedestrians directly ahead up to a distance of approximately 131 ft. and displays an\
amber indica-tor. When approaching a detected pedestrian too quickly, a red alert fl\
ashes on the wind-shield and the Safety Alert Seat pulses or rapid beeps sound (if select\
ed).The system may prepare the brakes or automatically brake the vehicle.
To set to Alert and Brake, Alert, or Off, go to Settings > Vehicle > Col\
lision/Detection Systems > Front Pedestrian Detection.
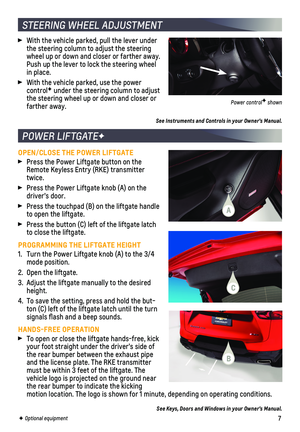
REAR PARK ASSIST – During low-speed park-ing maneuvers, the system provides “distance to closest object” information on the Driver Information Center, the Safety Alert Seat pulses or a beep sounds (if selected). When an object is very close, the Safety Alert Seat pulses or 5 beeps sound (if selected).
REAR CROSS TRAFFIC ALERT – When the vehi-cle is in Reverse, the system warns of cross-traffic coming in either direction by displaying a red alert on the in\
fotainment screen and pulsing the left or right side of the Safety Alert Seat or sounding beep\
s (if selected).
To turn only Rear Cross Traffic Alert on or off, go to Settings > Vehi\
cle > Collision/Detection Systems > Rear Cross Traffic Alert.
To turn Rear Park Assist and Rear Cross Traffic Alert on or off, press\
the Park Assist button (B) on the center console.
See Driving and Operating in your Owner’s Manual.
REAR VISION CAMERA
When the vehicle is in Reverse, a view of the area behind the vehicle displays on the infotainment screen. Vehicle speed must be below 8 mph.
SURROUND VISION
The Surround Vision system displays rear, front or side camera views along with a view of the area surrounding the vehicle on the infotain-ment screen when the vehicle is in Reverse or Drive. Vehicle speed must \
be below 8 mph. Camera view buttons are at the bottom of the screen.
Touch one of the Camera buttons on the infotainment screen to change the\
camera view.
Touch the Guidance Lines button to change the guidelines.
Touch the Top Down View button to display an image of the area surroundi\
ng the vehicle along with the rear camera view.
See Driving and Operating in your Owner’s Manual.
F Optional equipment
A
B
Page 18 of 20

18
The rear camera mirror provides a wider, less obstructed field of view\
to assist when driving, changing lanes and checking traffic conditions.
A. On/Off
Pull or push the lever at the bottom of the mirror to turn the video display on or off.
B. Selection Control
Press and release the button to select the brightness, tilt or zoom feature.
C. < >
Press and release either button to adjust the selected feature setting.
See Keys, Doors and Windows in your Owner’s Manual.
REAR CAMERA MIRRORF
CRUISE CONTROL
SETTING CRUISE CONTROL
Press the On/Off button. The Cruise Control symbol will illuminate in white on the instrument cluster.
When traveling at the desired speed, press the thumbwheel down to the SE\
T position to set the speed. The symbol will illuminate in green on the instrument cluster.
ADJUSTING CRUISE CONTROL
+ RES Resume/Accelerate
Press the thumbwheel up to resume a set speed. When active, press up to increase speed 1 mph; press and hold to continue increasing speed.
– SET Set/Coast
When active, press the thumbwheel down to decrease speed 1 mph; press and hold to continue decreasing speed.
Cancel
Press the button, or press the brake pedal, to cancel Cruise Control without eras\
ing the set speed from memory.
The set speed is erased when Cruise Control or the vehicle ignition is t\
urned off.
ADAPTIVE CRUISE CONTROLF
The system maintains the set speed and a following gap — the time bet\
ween your vehicle and a vehicle detected directly ahead — by accelerating or braking au\
tomatically while you continue to steer.
Press the Following Gap button to select a following gap setting of Far, Medium, or Near. This is also the Forward Collision AlertF setting.
Press and hold the Cancel button to switch between regular Cruise Control and Adaptive Cruise Control.
See Driving and Operating in your Owner’s Manual.F Optional equipment
CBA
Page 19 of 20

19
The Low Tire Pressure warning light on the instrument cluster illuminates wh\
en one or more of the vehicle’s tires is significantly underinflated. Fi\
ll the tires to the proper tire pressures listed on the Tire and Loading Information label, located belo\
w the driver’s door latch. Current tire pressures can be viewed on the Driver Informati\
on Center.
With the ignition On or in Accessory mode, the Tire Fill Alert will prov\
ide visual and audi-ble alerts when the Low Tire Pressure warning light is on to help when i\
nflating a tire to the recommended tire pressure (does not apply to spare tire). When the\
recommended pressure is reached, the horn sounds and the turn signals change from fl\
ashing to solid.
See Vehicle Care in your Owner’s Manual.
UNDERFLOOR REAR CARGO STORAGE
Lift up the rear cargo floor for additional storage space. Use the hook to hold up the floor cover while in use.
CARGO MANAGEMENT SYSTEMF
The cargo management system features a rail sys-tem and cargo fence that divides the cargo area for smaller items.
Adjust the Fence Position
1. Turn each knob on the posts to align the Unlock symbol with the button arrow.
2. Push the button and slide the fence to the desired position along each rail until it clicks into place.
3. Turn each knob to the Lock position.
Remove the Fence
1. Turn each knob on the posts to align the Unlock symbol with the button arrow.
2. Press the buttons on the rail sliders and pull up the posts to remove th\
e fence. Store the fence in front of the spare tire under the cargo floor.
3. Move the rail sliders to an open slot on the rail to remove the sliders.\
See Storage in your Owner’s Manual.
TIRE PRESSURE MONITOR
CARGO STORAGE FEATURES
F Optional equipment
The traction control system limits wheelspin in difficult driving cond\
itions. The system turns on automatically every time the vehicle is started. Turn off tract\
ion control if the vehicle is stuck and rocking the vehicle is required.
Press the Traction Control button on the center of the instrument panel to turn traction control off or on again. The Traction Control Off light illuminates on the instrument cluster when the system is off.
See Driving and Operating in your Owner’s Manual.
TRACTION CONTROL
Page 20 of 20
 TTY Users: 1-888-889-2438
As the owner of a new Chevrolet, you are automatically enrolled in the C\
hevr")
20
ROADSIDE ASSISTANCE
1-800-CHEV-USA (1-800-243-8872) TTY Users: 1-888-889-2438
As the owner of a new Chevrolet, you are automatically enrolled in the C\
hevrolet Roadside Assistance program for up to 5 years/60,000 miles, whichever occurs fi\
rst, at no expense to you. Chevrolet’s Roadside Assistance toll-free number is staffed b\
y a team of trained advisors who are available 24 hours a day, 365 days a year, to contact a\
service provider for light services (fuel delivery, jump-starts, flat tire and lock-ou\
ts) or make arrange-ments to tow your vehicle to the nearest Chevrolet dealer for any repair\
s.
OnStar® Roadside Assistance
If you have a current OnStar Safety & Security plan, push the blue OnStar button or red Emergency button to get the help you need. An OnStar advisor will use GP\
S technology to pinpoint your vehicle location and contact the nearest service provider.\
To learn more about OnStar services, push the blue OnStar button, visit \
onstar.com, call 1-888-4-ONSTAR (1-888-466-7827), or refer to your Owner’s Manual.
CHEVROLET OWNER CENTER
MYCHEVROLET MOBILE APP
Get to know your vehicle inside and out with the Chevrolet Owner Center.\
Check out personalized information, including an online Owner’s Manual and help\
ful how-to videos, track your service history and warranty status, manage your OnStar and C\
onnected Services vehicle plans, review your current Vehicle Diagnostics report (\
active service required) and more. Create an account today at my.chevrolet.com.
!84163664=A!
Certain restrictions, precautions and safety procedures apply to your ve\
hicle. Please read your Owner’s Manual for complete instructions. All information contained in this guide is ba\
sed on the latest information available at the time of printing and is subject to change without notice. Copyright \
2018 General Motors. All rights reserved.
We recommend always using ACDelco or genuine GM service parts.
Download the myChevrolet app to your compatible smartphone (or device)\
and, if your vehicle is properly equipped, you can start or turn off your engine, loc\
k or unlock your doors, view key diagnostic information, set parking information and more\
.
The app is available on select Apple and Android devices. Service availa\
bility, features and functionality vary by vehicle, device and data plan. Device data con\
nection required. Visit onstar.com for more details. Download the mobile app from your compatible mobile device’s app store.
84163664 A
Page:
< prev 1-8 9-16 17-24