Page 65 of 116

Periodic maintenance and adjustment
7-2
7
EAU17303
Emission controls not only function to
ensure cleaner air, but are also vital to
proper engine operation and maximum
performance. In the following periodic
maintenance charts, the services relat-
ed to emissions control are grouped
separately. These services require
specialized data, knowledge, and
equipment. Maintenance, replace-
ment, or repair of the emission control
devices and systems may be per-
formed by any repair establishment or
individual that is certified (if applicable).
Yamaha dealers are trained and
equipped to perform these particular
services.
EAU79250
Owner’s tool kit
The owner’s tool kit is located on the
bottom of the seat. (See page 3-9.)
The service information included in this
manual and the tools provided in the
owner’s tool kit are intended to assist
you in the performance of preventive
maintenance and minor repairs. How-
ever, additional tools such as a torque
wrench may be necessary to perform
certain maintenance work correctly.
TIP
If you do not have the tools or experi-
ence required for a particular job, have
a Yamaha dealer perform it for you.
1.
1
UBY3E0E0.book Page 2 Friday, September 15, 2017 3:59 PM
Page 66 of 116
, rep")
Periodic maintenance and adjustment
7-3
7
EAU71031
TIP
The annual checks must be performed every year, except if a distance-
based maintenance is performed instead.
From 50000 km (30000 mi), repeat the maintenance intervals starting from
10000 km (6000 mi).
Items marked with an asterisk should be performed by a Yamaha dealer as
they require special tools, data and technical skills.
EAU71071
Periodic maintenance chart for the emission control system
NO. ITEM
1*Fuel line• Check fuel hoses for cracks or
damage.
• Replace if necessary.√√√√√
2*Spark plug• Check condition.
• Adjust gap and clean.√√
• Replace.√√
3*Valve clearance• Check and adjust. Every 20000 km (12000 mi)
4*Fuel injection• Check engine idle speed.√√√√√√
5*Exhaust system• Check for leakage.
• Tighten if necessary.
• Replace gasket if necessary.√√√√√
6*Evaporative emis-
sion control sys-
tem• Check control system for dam-
age.
• Replace if necessary.√√X 1000 km CHECK OR
MAINTENANCE JOB
X 1000 miODOMETER
READINGS
ANNUAL CHECK
1 10203040
0.6 6 12 18 24
UBY3E0E0.book Page 3 Friday, September 15, 2017 3:59 PM
Page 67 of 116

Periodic maintenance and adjustment
7-4
7
EAU71372
General maintenance and lubrication chart
NO. ITEM
1*Diagnostic system
check• Perform dynamic inspection
using Yamaha diagnostic tool.
• Check the error codes.√√√√√√
2*Air filter element• Replace.√√
3*Pre air filter ele-
ment• Clean.√√
4*Sub air filter ele-
ment• Replace.√√
5Air filter case
check hose• Clean.√√√√√
6*V-belt case air fil-
ter element• Clean.
• Replace if necessary.√√√√√
7*Front brake• Check operation, fluid level,
and for fluid leakage.
• Replace brake pads if neces-
sary.√√√√√√
8*Rear brake• Check operation, fluid level,
and for fluid leakage.
• Replace brake pads if neces-
sary.√√√√√√
9*Brake hoses• Check for cracks or damage.√√√√√
• Replace. Every 4 years
10*Brake fluid• Change. Every 2 years
11*Wheels• Check runout and for damage.
• Replace if necessary.√√√√
12*Tires• Check tread depth and for
damage.
• Replace if necessary.
• Check air pressure.
• Correct if necessary.√√√√√
13*Wheel bearings• Check bearing for looseness or
damage.√√√√X 1000 km CHECK OR
MAINTENANCE JOB
X 1000 mi
ODOMETER
READINGS
ANNUAL CHECK
110203040
0.66121824
UBY3E0E0.book Page 4 Friday, September 15, 2017 3:59 PM
Page 68 of 116

Periodic maintenance and adjustment
7-5
7
14*Steering bearings• Check bearing assemblies for
looseness.√√ √
• Moderately repack with lithium-
soap-based grease.√√
15*Chassis fasteners• Make sure that all nuts, bolts
and screws are properly tight-
ened.√√√√√
16Front and rear
brake lever pivot
shaft• Lubricate with silicone grease.√√√√√
17Sidestand, center-
stand• Check operation.
• Lubricate with lithium-soap-
based grease.√√√√√
18*Sidestand switch• Check operation and replace if
necessary.√√√√√√
19*Front fork• Check operation and for oil
leakage.
• Replace if necessary.√√√√
20*Shock absorber
assemblies• Check operation and for oil
leakage.
• Replace if necessary.√√√√
21 Engine oil• Change (warm engine before
draining).
• Check oil level and vehicle for
oil leakage.At the initial interval and
when the oil change indi-
cator flashes or comes
on.√
22Engine oil filter el-
ement• Replace.√√√
23*Final transmission
oil• Check vehicle for oil leakage.√√√√√
• Change.√√√
24
*Cooling system• Check coolant level and vehicle
for coolant leakage.√√√√√
• Change. Every 3 years
25*V-belt• Replace.When the V-belt replacement
indicator flashes [every 20000
km (12000 mi)]
26*Front and rear
brake switches• Check operation.√√√√√√ NO. ITEM
X 1000 km CHECK OR
MAINTENANCE JOB
X 1000 miODOMETER
READINGS
ANNUAL CHECK
110203040
0.6 6 12 18 24
UBY3E0E0.book Page 5 Friday, September 15, 2017 3:59 PM
Page 69 of 116

Periodic maintenance and adjustment
7-6
7
EAU79370
TIP
Engine air filter and V-belt air filter
• This model’s engine air filter is equipped with a disposable oil-coated pa-
per element, which must not be cleaned with compressed air to avoid
damaging it.
• The engine air filter element and sub air filter element need to be replaced
and the V-belt air filter element needs to be serviced more frequently when
riding in unusually wet or dusty areas.
Hydraulic brake service
• After disassembling the brake master cylinders and calipers, always
change the fluid. Regularly check the brake fluid levels and fill the reser-
voirs as required.
• Every two years replace the internal components of the brake master cyl-
inders and calipers, and change the brake fluid.
• Replace the brake hoses every four years and if cracked or damaged.
27*Moving parts and
cables• Lubricate.√√√√√
28*Throttle grip hous-
ing and cable• Check operation and free play.
• Adjust the throttle cable free
play if necessary.
• Lubricate the throttle grip hous-
ing and cable.√√√√√
29*Lights, signals and
switches• Check operation.
• Adjust headlight beam.√√√√√√ NO. ITEM
X 1000 km CHECK OR
MAINTENANCE JOB
X 1000 mi
ODOMETER
READINGS
ANNUAL CHECK
110203040
0.66121824
UBY3E0E0.book Page 6 Friday, September 15, 2017 3:59 PM
Page 70 of 116
Periodic maintenance and adjustment
7-7
7
EAU18752
Removing and installing the
panel
The panel shown needs to be removed
to perform some of the maintenance
jobs described in this chapter. Refer to
this section each time the panel needs
to be removed and installed.
EAU78530
Panel A
To remove the panel
Remove the screws, and then pull the
panel outward and slide it forward as
shown.To install the panel
Place the panel in the original position,
and then install the screws.
1. Panel A
1. Screw
1
1
1
1. Panel A
ZAUM1507
1
UBY3E0E0.book Page 7 Friday, September 15, 2017 3:59 PM
Page 71 of 116

Periodic maintenance and adjustment
7-8
7
EAU19623
Checking the spark plug
The spark plug is an important engine
component, which should be checked
periodically, preferably by a Yamaha
dealer. Since heat and deposits will
cause any spark plug to slowly erode,
it should be removed and checked in
accordance with the periodic mainte-
nance and lubrication chart. In addi-
tion, the condition of the spark plug
can reveal the condition of the engine.
The porcelain insulator around the
center electrode of the spark plug
should be a medium-to-light tan (the
ideal color when the vehicle is ridden
normally). If the spark plug shows a
distinctly different color, the engine
could be operating improperly. Do not
attempt to diagnose such problems
yourself. Instead, have a Yamaha deal-
er check the vehicle.
If the spark plug shows signs of elec-
trode erosion and excessive carbon or
other deposits, it should be replaced.
Before installing a spark plug, the
spark plug gap should be measured
with a wire thickness gauge and, if
necessary, adjusted to specification.Clean the surface of the spark plug
gasket and its mating surface, and
then wipe off any grime from the spark
plug threads.
TIP
If a torque wrench is not available
when installing a spark plug, a good
estimate of the correct torque is 1/4…
1/2 turn past finger tight. However, the
spark plug should be tightened to the
specified torque as soon as possible.
Specified spark plug:
NGK/LMAR8A-9
1. Spark plug gap
Spark plug gap:
0.8–0.9 mm (0.031–0.035 in)
Tightening torque:
Spark plug:
12.5 N·m (1.25 kgf·m, 9.22 lb·ft)
UBY3E0E0.book Page 8 Friday, September 15, 2017 3:59 PM
Page 72 of 116

Periodic maintenance and adjustment
7-9
7
EAU36112
Canister
This model is equipped with a canister
to prevent the discharging of fuel vapor
into the atmosphere. Before operating
this vehicle, make sure to check the
following:
Check each hose connection.
Check each hose and canister for
cracks or damage. Replace if
damaged.
Make sure that the canister
breather is not blocked, and if
necessary, clean it.
EAUM3980
Engine oil and oil filter ele-
ment
The engine oil level should be checked
before each ride. In addition, the oil
must be changed and the oil filter ele-
ment replaced at the intervals specified
in the periodic maintenance and lubri-
cation chart.
To check the engine oil level
1. Place the vehicle on a level sur-
face and hold it in an upright posi-
tion. A slight tilt to the side can
result in a false reading.
2. Start the engine, warm it up for
several minutes, and then turn it
off.
3. Wait a few minutes until the oil set-
tles, and then check the oil level
through the check window locat-
ed at the bottom-right side of the
crankcase.
TIP
The engine oil should be between the
minimum and maximum level marks.
1. Canister
2. Canister breather hose
2
1
ZAUM1458
1. Engine oil level check window
2. Maximum level mark
3. Minimum level mark
3
1
2
UBY3E0E0.book Page 9 Friday, September 15, 2017 3:59 PM
 1
1 2
2 3
3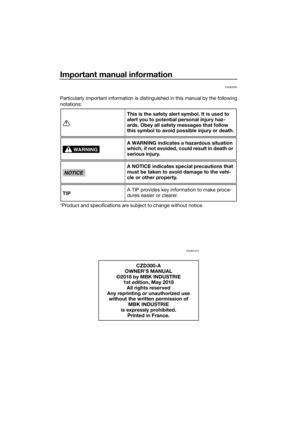 4
4 5
5 6
6 7
7 8
8 9
9 10
10 11
11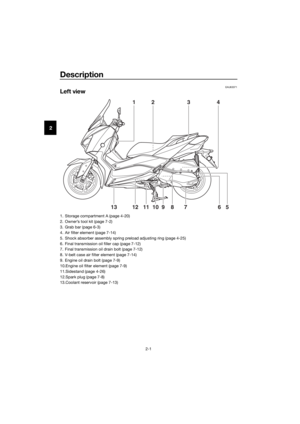 12
12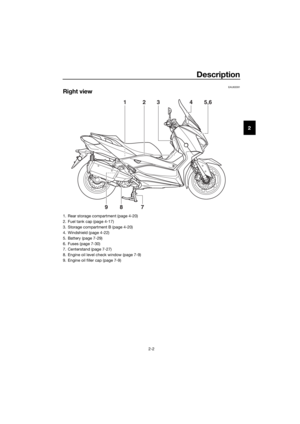 13
13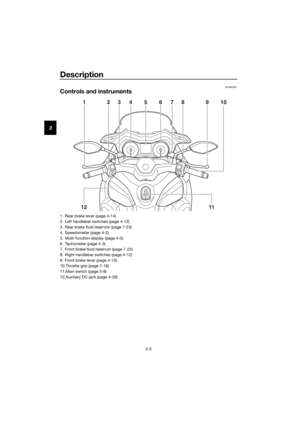 14
14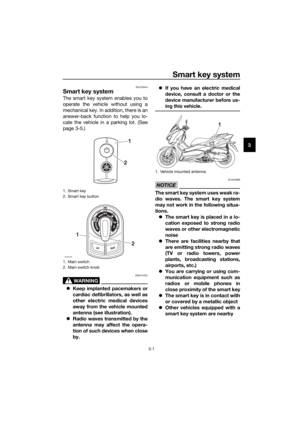 15
15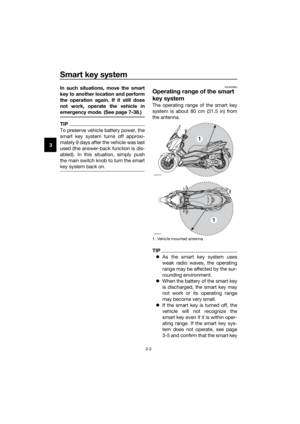 16
16 17
17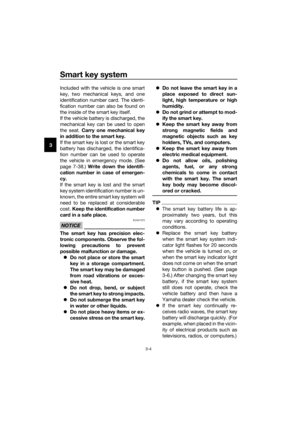 18
18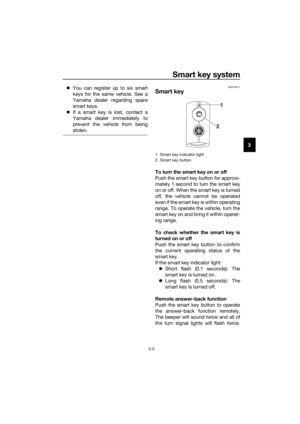 19
19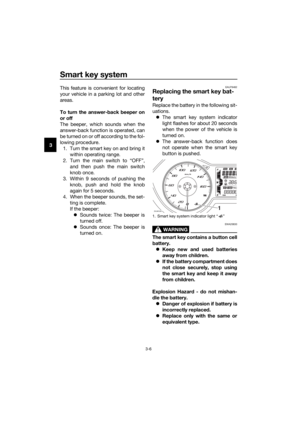 20
20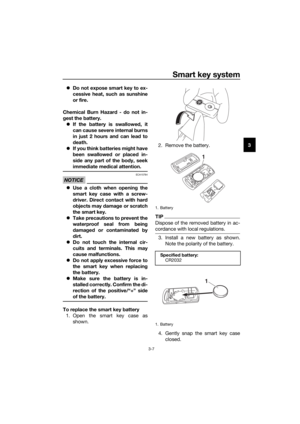 21
21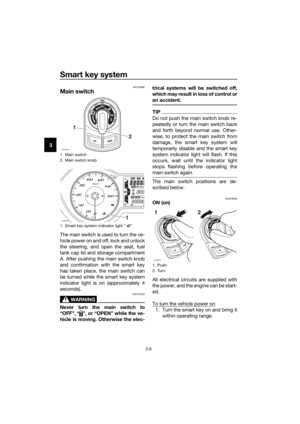 22
22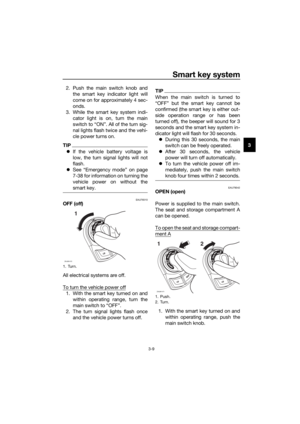 23
23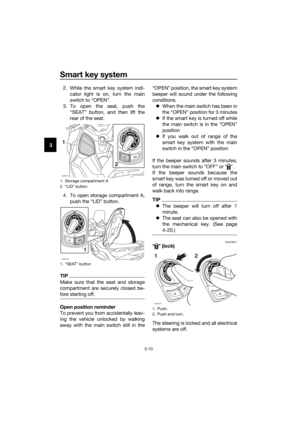 24
24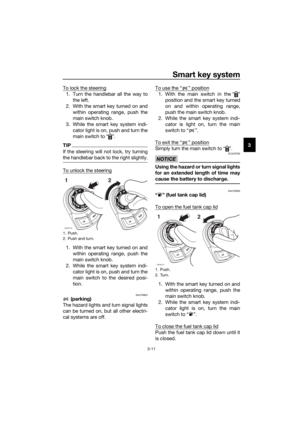 25
25 26
26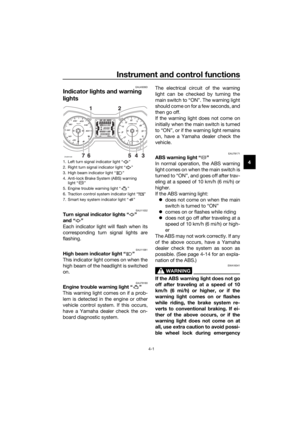 27
27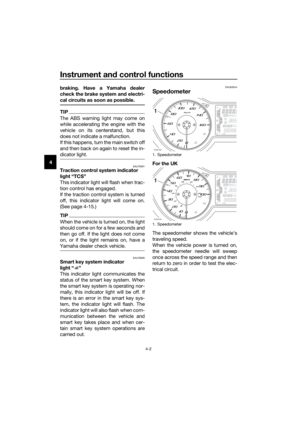 28
28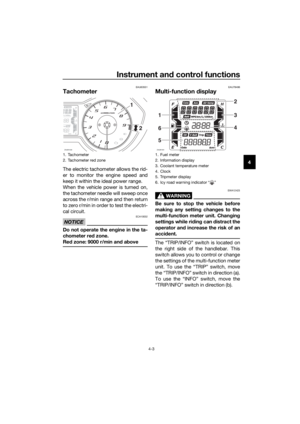 29
29 30
30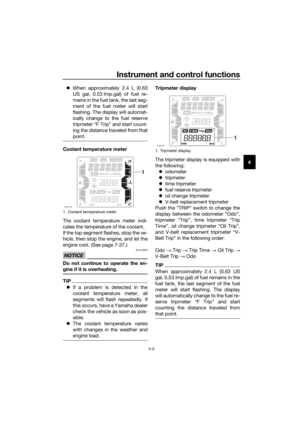 31
31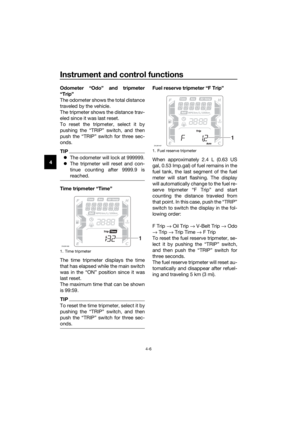 32
32 33
33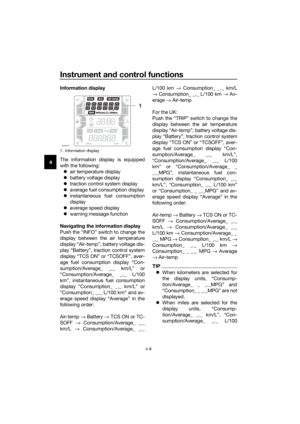 34
34 35
35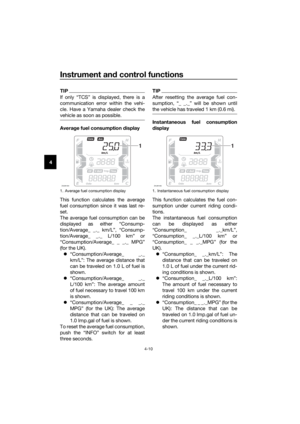 36
36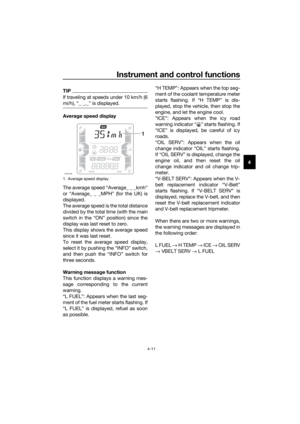 37
37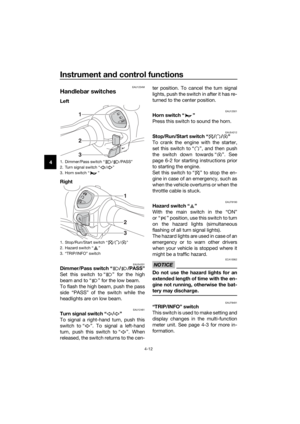 38
38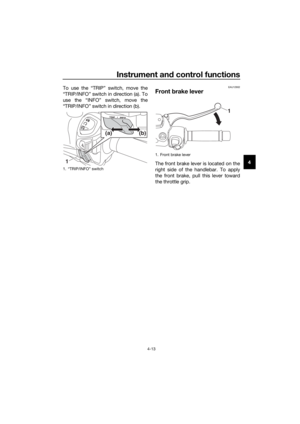 39
39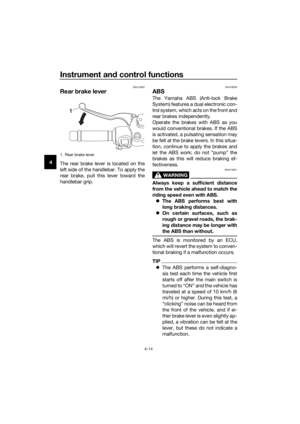 40
40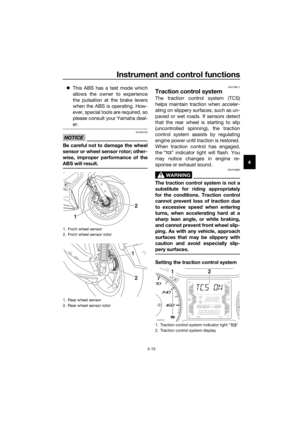 41
41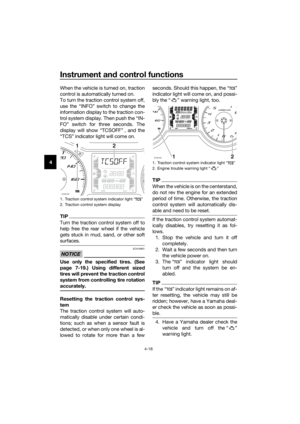 42
42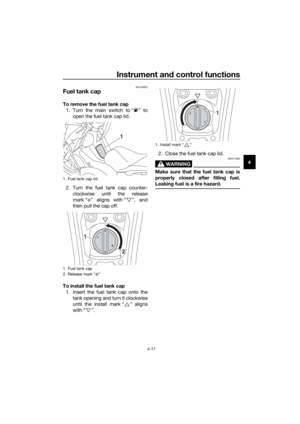 43
43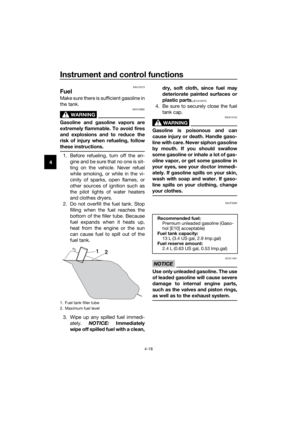 44
44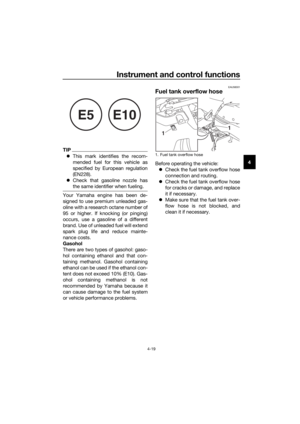 45
45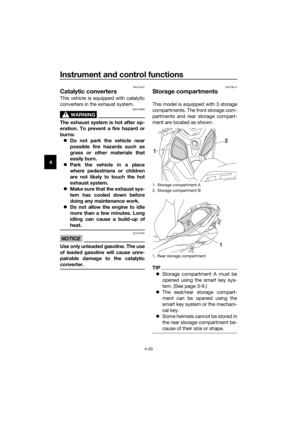 46
46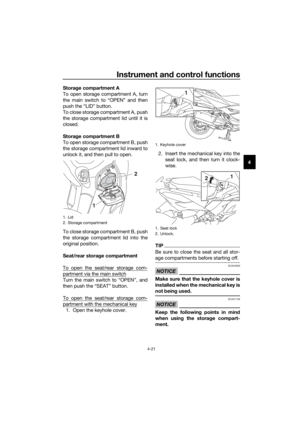 47
47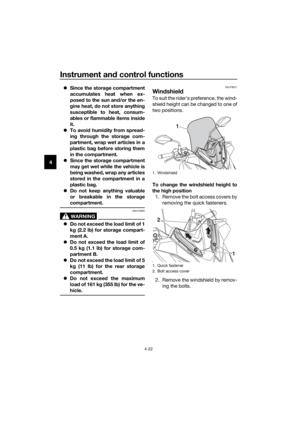 48
48 49
49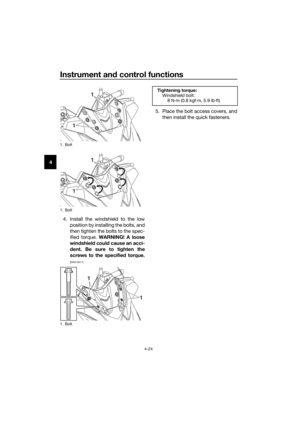 50
50 51
51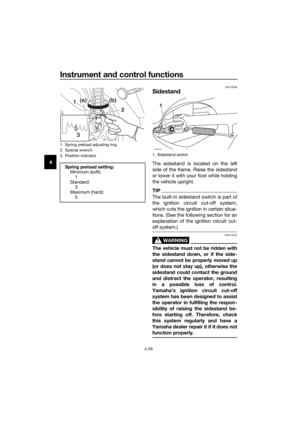 52
52 53
53 54
54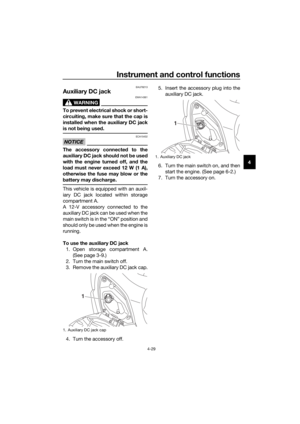 55
55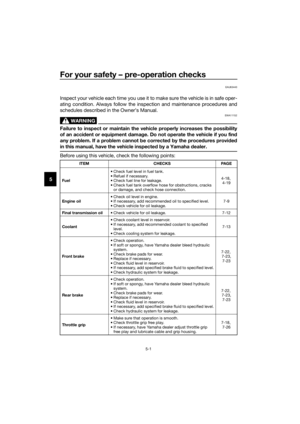 56
56 57
57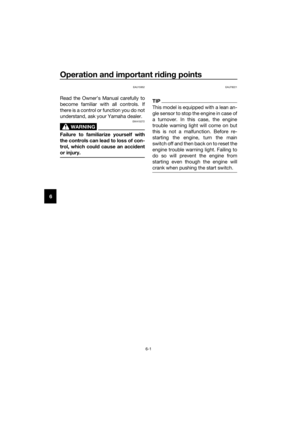 58
58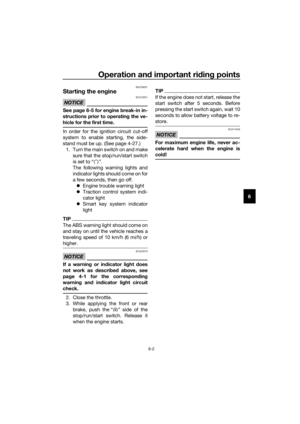 59
59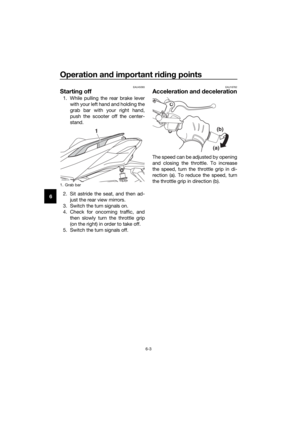 60
60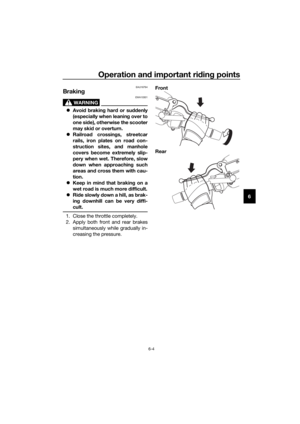 61
61 62
62 63
63 64
64 65
65 66
66 67
67 68
68 69
69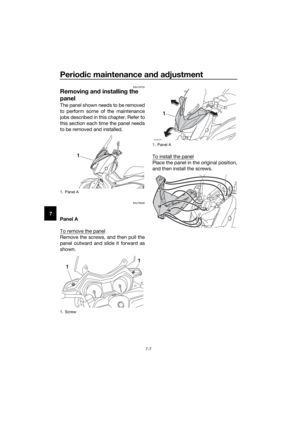 70
70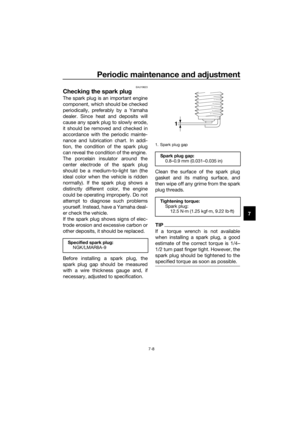 71
71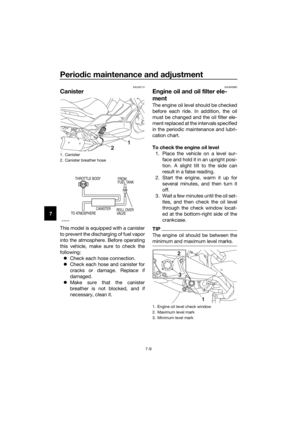 72
72 73
73 74
74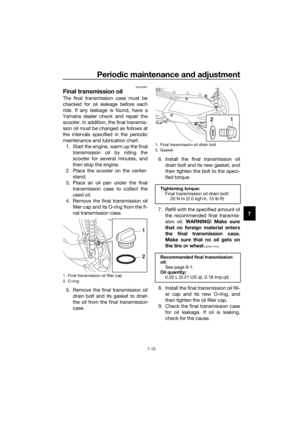 75
75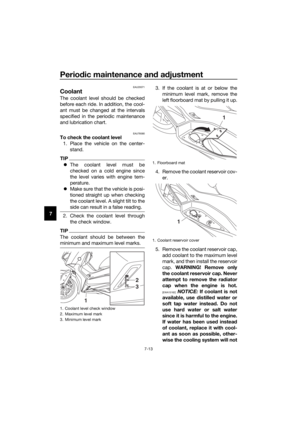 76
76 77
77 78
78 79
79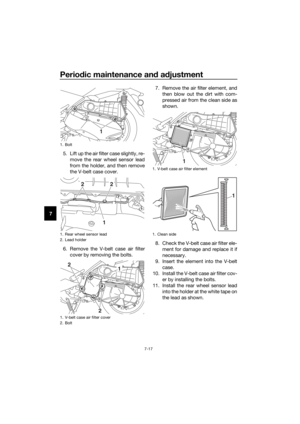 80
80 81
81 82
82 83
83 84
84 85
85 86
86 87
87 88
88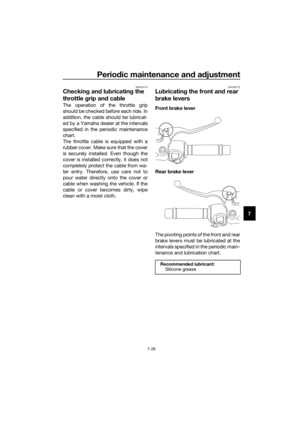 89
89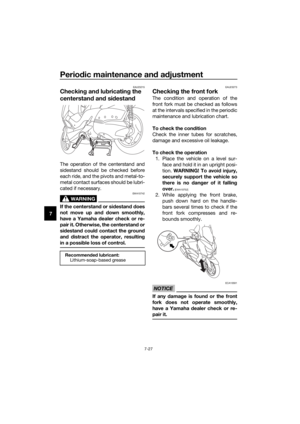 90
90 91
91 92
92 93
93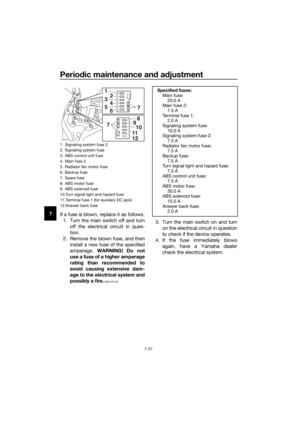 94
94 95
95 96
96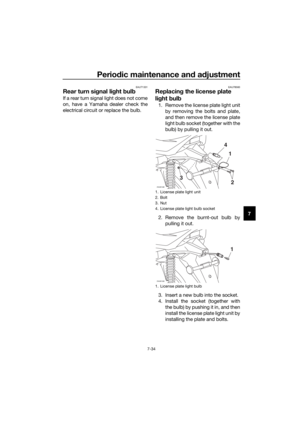 97
97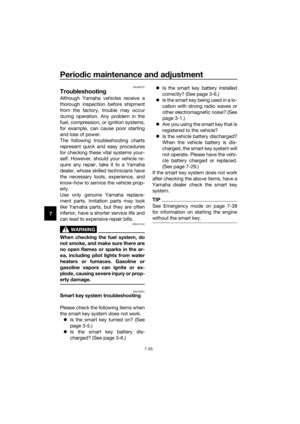 98
98 99
99 100
100 101
101 102
102 103
103 104
104 105
105 106
106 107
107 108
108 109
109 110
110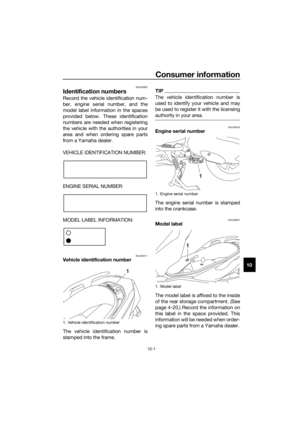 111
111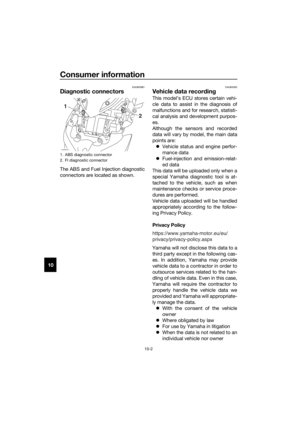 112
112 113
113 114
114 115
115