2018 YAMAHA NIKEN wheel
[x] Cancel search: wheelPage 37 of 106

Instrument and control functions
3-22
3
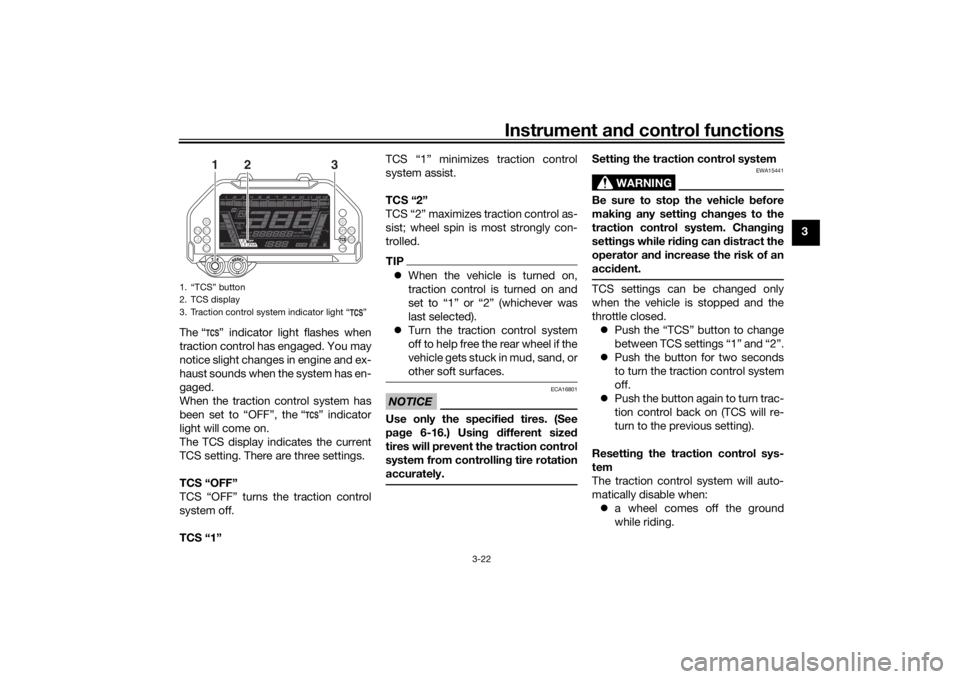
The “ ” indicator light flashes when
traction control has engaged. You may
notice slight changes in engine and ex-
haust sounds when the system has en-
gaged.
When the traction control system has
been set to “OFF”, the “ ” indicator
light will come on.
The TCS display indicates the current
TCS setting. There are three settings.
TCS “OFF”
TCS “OFF” turns the traction control
system off.
TCS “1” TCS “1” minimizes traction control
system assist.
TCS “2”
TCS “2” maximizes traction control as-
sist; wheel spin is most strongly con-
trolled.
TIP
When the vehicle is turned on,
traction control is turned on and
set to “1” or “2” (whichever was
last selected).
Turn the traction control system
off to help free the rear wheel if the
vehicle gets stuck in mud, sand, or
other soft surfaces.NOTICE
ECA16801
Use only the specifie d tires. (See
pa ge 6-16.) Usin g different sized
tires will prevent the traction control
system from controllin g tire rotation
accurately.
Settin g the traction control system
WARNING
EWA15441
Be sure to stop the vehicle before
makin g any settin g chan ges to the
traction control system. Chan gin g
settin gs while ri din g can d istract the
operator an d increase the risk of an
acci dent.TCS settings can be changed only
when the vehicle is stopped and the
throttle closed.
Push the “TCS” button to change
between TCS settings “1” and “2”.
Push the button for two seconds
to turn the traction control system
off.
Push the button again to turn trac-
tion control back on (TCS will re-
turn to the previous setting).
Resettin g the traction control sys-
tem
The traction control system will auto-
matically disable when: a wheel comes off the ground
while riding.
1. “TCS” button
2. TCS display
3. Traction control system indicator light “ ”
1
3
2
UBD5E0E0.book Page 22 Wednesday, April 25, 2018 2:23 PM
Page 38 of 106

Instrument and control functions
3-23
3
excessive rear wheel spin is de-
tected while riding.
a wheel is rotated by external forc-
es with the vehicle power on (such
as when performing mainte-
nance).
If the traction control system is dis-
abled, both the “ ” indicator light and
the “ ” warning light will come on.
Should this occur, try resetting the sys-
tem as follows. 1. Stop the vehicle and turn the vehi- cle off.
2. Wait a few seconds and then turn the vehicle back on. 3. The “ ” indicator light should
turn off and the system be en-
abled.
TIPIf the “ ” indicator light remains on af-
ter resetting, the vehicle may still be
ridden; however, have a Yamaha deal-
er check the vehicle as soon as possi-
ble.4. Have a Yamaha dealer check thevehicle and turn off the “ ”
warning light.
EAU13076
Fuel tank capTo open the fuel tank cap
Open the fuel tank cap lock cover, in-
sert the key into the lock, and then turn
it 1/4 turn clockwise. The lock will be
released and the fuel tank cap can be
opened.
To close the fuel tank cap
With the key still inserted in the lock,
push down the fuel tank cap. Turn the
key 1/4 turn counterclockwise, remove
it, and then close the lock cover.
1. Engine trouble warning light “ ”
2. TCS display
3. Traction control system indicator light “ ”
3
2
1
1. Fuel tank cap lock cover
2. Unlock.
1
2
UBD5E0E0.book Page 23 Wednesday, April 25, 2018 2:23 PM
Page 53 of 106

For your safety – pre-operation checks
4-2
4
Rear brake • Check operation.
• If soft or spongy, have Yamaha dealer bleed hydraulic system.
• Check brake pads for wear.
• Replace if necessary.
• Check fluid level in reservoir.
• If necessary, add specified brake fluid to specified level.
• Check hydraulic system for leakage. 6-20, 6-21
Clutch • Check operation.
• Lubricate cable if necessary.
• Check lever free play.
• Adjust if necessary.
6-19
Throttle grip • Make sure that operation is smooth.
• Check throttle grip free play.
• If necessary, have Yamaha dealer adjust throttle grip free play and lubricate ca-
ble and grip housing. 6-15, 6-25
Control ca bles • Make sure that operation is smooth.
• Lubricate if necessary. 6-25
Drive chain • Check chain slack.
• Adjust if necessary.
• Check chain condition.
• Lubricate if necessary.
6-23, 6-24
Wheels an d tires • Check for damage.
• Check tire condition and tread depth.
• Check air pressure.
• Correct if necessary.
6-16, 6-18
Brake an d shift pe dals • Make sure that operation is smooth.
• Lubricate pedal pivoting points if necessary. 6-26
Brake an d clutch levers • Make sure that operation is smooth.
• Lubricate lever pivoting points if necessary.
6-26
Si destan d • Make sure that operation is smooth.
• Lubricate pivot if necessary.
6-27
ITEM CHECKS PAGE
UBD5E0E0.book Page 2 Wednesday, April 25, 2018 2:23 PM
Page 63 of 106

Periodic maintenance an d a djustment
6-5
6
EAU71352
General maintenance an d lu brication chartNO. ITEM CHECK OR MAINTENANCE JOB ODOMETER READING
ANNUAL
CHECK
1000 km
(600 mi) 10000 km
(6000 mi) 20000 km
(12000 mi) 30000 km
(18000 mi) 40000 km
(24000 mi)
1 *Dia
gnostic system
check • Perform dynamic inspection us-
ing Yamaha diagnostic tool.
• Check the error codes. √√√√√√
2 *Air filter element • Replace. Every 40000 km (24000 mi)
3Clutch • Check operation.
•Adjust. √√√√√
4 *Front brake • Check operation, fluid level, and
for fluid leakage.
• Replace brake pads if necessary. √√√√√√
5 *Rear brake • Check operation, fluid level, and
for fluid leakage.
• Replace brake pads if necessary. √√√√√√
6 *Brake hoses • Check for cracks or damage.
√√√√√
• Replace. Every 4 years
7 *Brake flui d • Change. Every 2 years
8 *Wheels • Check runout and for damage.
• Replace if necessary.
√√√√
• Balance the front wheels. Whenever the tires or wheels have been changed or replaced.
9 *Tires • Check tread depth and for dam-
age.
• Replace if necessary.
• Check air pressure.
• Correct if necessary. √√√√√
10 *Wheel bearin gs • Check bearing for looseness or
damage. √√√√
UBD5E0E0.book Page 5 Wednesday, April 25, 2018 2:23 PM
Page 75 of 106

Periodic maintenance an d a djustment
6-17
6
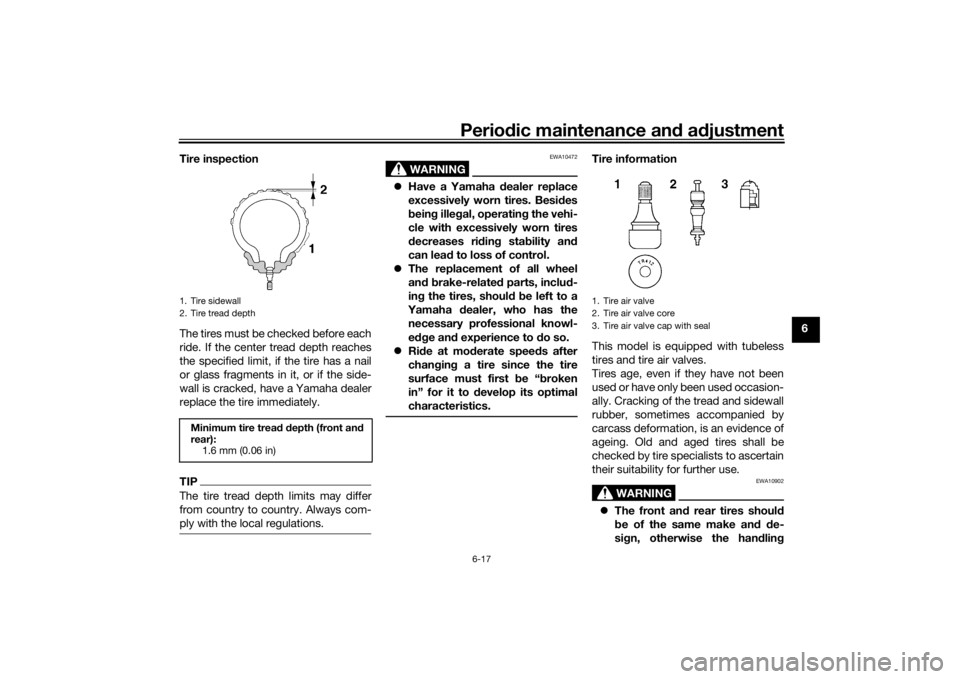
Tire inspection
The tires must be checked before each
ride. If the center tread depth reaches
the specified limit, if the tire has a nail
or glass fragments in it, or if the side-
wall is cracked, have a Yamaha dealer
replace the tire immediately.
TIPThe tire tread depth limits may differ
from country to country. Always com-
ply with the local regulations.
WARNING
EWA10472
Have a Yamaha d ealer replace
excessively worn tires. Besi des
b ein g ille gal, operatin g the vehi-
cle with excessively worn tires
d ecreases ri din g sta bility an d
can lea d to loss of control.
The replacement of all wheel
and b rake-relate d parts, inclu d-
in g the tires, shoul d b e left to a
Yamaha dealer, who has the
necessary professional knowl-
e dg e an d experience to do so.
Ride at mo derate spee ds after
chan gin g a tire since the tire
surface must first be “ broken
in” for it to d evelop its optimal
characteristics.
Tire information
This model is equipped with tubeless
tires and tire air valves.
Tires age, even if they have not been
used or have only been used occasion-
ally. Cracking of the tread and sidewall
rubber, sometimes accompanied by
carcass deformation, is an evidence of
ageing. Old and aged tires shall be
checked by tire specialists to ascertain
their suitability for further use.
WARNING
EWA10902
The front an d rear tires shoul d
b e of the same make an d d e-
si gn, otherwise the han dlin g
1. Tire sidewall
2. Tire tread depthMinimum tire trea d d epth (front an d
rear): 1.6 mm (0.06 in)
1. Tire air valve
2. Tire air valve core
3. Tire air valve cap with seal
UBD5E0E0.book Page 17 Wednesday, April 25, 2018 2:23 PM
Page 76 of 106

Periodic maintenance an d a djustment
6-18
6 characteristics of the motorcy-
cle may
be different, which
coul d lea d to an acci dent.
Always make sure that the valve
caps are securely installe d to
prevent air pressure leaka ge.
Use only the tire valves an d
valve cores listed below to
avoi d tire d eflation durin g a ri de.
After extensive tests, only the tires list-
ed below have been approved for this
model by Yamaha.
WARNING
EWA10601
This motorcycle is fitte d with super-
hi gh-spee d tires. Note the followin g
points in or der to make the most ef-
ficient use of these tires. Use only the specified replace-
ment tires. Other tires may run
the dan ger of burstin g at super
hi gh spee ds.
Bran d-new tires can have a rel-
atively poor g rip on certain roa d
surfaces until they have been
“ b roken in”. Therefore, it is a d-
visa ble before doin g any hi gh-
speed ridin g to ri de conserva-
tively for approximately 100 km
(60 mi) after installin g a new tire.
The tires must be warme d up
b efore a hi gh-spee d run.
Always a djust the tire air pres-
sure accor din g to the operating
con ditions.
EAU61160
Cast wheelsTo maximize the performance, durabil-
ity, and safe operation of your vehicle,
note the following points regarding the
specified wheels.
The wheel rims should be
checked for cracks, bends, warp-
age or other damage before each
ride. If any damage is found, have
a Yamaha dealer replace the
wheel. Do not attempt even the
smallest repair to the wheel. A de-
formed or cracked wheel must be
replaced.
The front wheels should be bal-
anced whenever either the tires or
wheels have been changed or re-
placed. An unbalanced wheel can
result in poor performance, ad-
verse handling characteristics,
and a shortened tire life.
Front tire:
Size:120/70 R 15 M/C 56V
Manufacturer/model: BRIDGESTONE/A41F M
Rear tire:
Size:190/55 R 17 M/C 75V
Manufacturer/model:
BRIDGESTONE/A41R M
FRONT an d REAR:
Tire air valve:
TR412
Valve core: #9100 (original)
UBD5E0E0.book Page 18 Wednesday, April 25, 2018 2:23 PM
Page 82 of 106

Periodic maintenance an d a djustment
6-24
6 2. To tighten the drive chain, turn the
drive chain slack adjusting bolt on
each side of the swingarm in di-
rection (a). To loosen the drive
chain, turn the adjusting bolt on
each side of the swingarm in di-
rection (b), and then push the rear
wheel forward.
TIPUsing the alignment marks on each
side of the swingarm, make sure that
both drive chain pullers are in the same
position for proper wheel alignment.
3. Tighten the axle nut, then the lock-nuts to their specified torques.
4. Make sure that the drive chain pullers are in the same position,
the drive chain slack is correct,
and the drive chain moves
smoothly.
EAU23026
Cleanin g an d lu bricatin g the
d rive chainThe drive chain must be cleaned and
lubricated at the intervals specified in
the periodic maintenance and lubrica-
tion chart, otherwise it will quickly wear
out, especially when riding in dusty or
wet areas. Service the drive chain as
follows.NOTICE
ECA10584
The drive chain must be lu bricated
after washin g the motorcycle, ri din g
in the rain or ri din g in wet areas.1. Clean the drive chain with kero-
sene and a small soft brush.
NOTICE: To prevent d amaging
the O-ring s, do not clean the
d rive chain with steam cleaners,
hi gh-pressure washers or inap-
propriate solvents.
[ECA11122]
2. Wipe the drive chain dry.
3. Thoroughly lubricate the drive chain with a special O-ring chain
lubricant. NOTICE: Do not use
en gine oil or any other lu bri-
cants for the drive chain, as they
1. Axle nut
2. Locknut
2
1
1. Drive chain slack adjusting bolt
2. Drive chain puller
3. Alignment markTi ghtenin g torques:
Axle nut:
150 N·m (15 kgf·m, 111 lb·ft)
Locknut: 16 N·m (1.6 kgf·m, 12 lb·ft)
(a)(b)
1
2
3
UBD5E0E0.book Page 24 Wednesday, April 25, 2018 2:23 PM
Page 87 of 106

Periodic maintenance an d a djustment
6-29
6
EAU84960
Lu bricatin g the steerin g b ear-
in gsThe steering bearings must be lubricat-
ed by a Yamaha dealer at the intervals
specified in the periodic maintenance
chart.
EAU84970
Checkin g the wheel bearin gsThe front and rear wheel bearings must
be checked by a Yamaha dealer at the
intervals specified in the periodic main-
tenance chart.
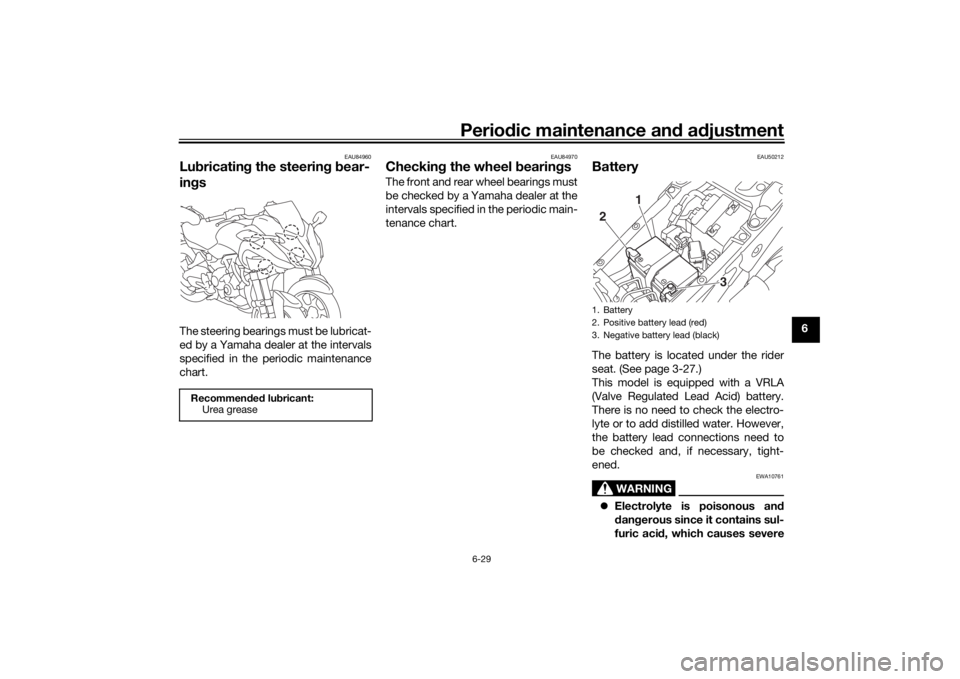
EAU50212
BatteryThe battery is located under the rider
seat. (See page 3-27.)
This model is equipped with a VRLA
(Valve Regulated Lead Acid) battery.
There is no need to check the electro-
lyte or to add distilled water. However,
the battery lead connections need to
be checked and, if necessary, tight-
ened.
WARNING
EWA10761
Electrolyte is poisonous an d
d an gerous since it contains sul-
furic aci d, which causes severe
Recommen ded lu bricant:
Urea grease
1. Battery
2. Positive battery lead (red)
3. Negative battery lead (black)2 1
3
UBD5E0E0.book Page 29 Wednesday, April 25, 2018 2:23 PM