2018 VOLVO XC60 T8 window
[x] Cancel search: windowPage 250 of 674

||
KEY, LOCKS AND ALARM
* Option/accessory.
248
Alternative unlocking method
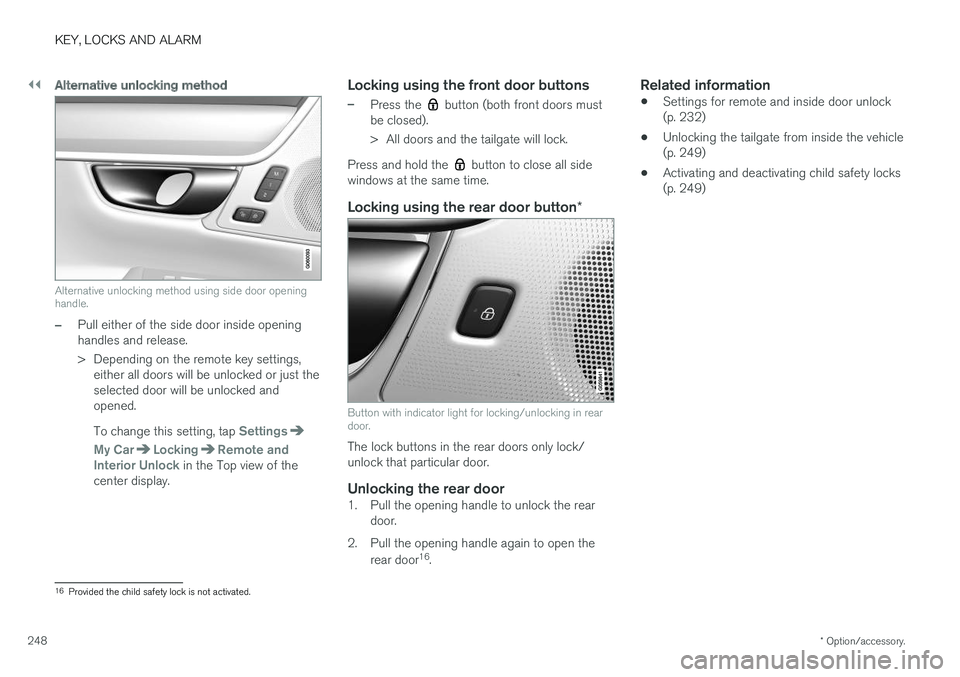
Alternative unlocking method using side door opening handle.
–Pull either of the side door inside opening handles and release.
> Depending on the remote key settings,
either all doors will be unlocked or just the selected door will be unlocked andopened. To change this setting, tap
Settings
My CarLockingRemote and
Interior Unlock in the Top view of the
center display.
Locking using the front door buttons
–Press the button (both front doors must
be closed).
> All doors and the tailgate will lock.
Press and hold the
button to close all side
windows at the same time.
Locking using the rear door button *
Button with indicator light for locking/unlocking in rear door.
The lock buttons in the rear doors only lock/ unlock that particular door.
Unlocking the rear door1. Pull the opening handle to unlock the rear
door.
2. Pull the opening handle again to open the rear door 16
.
Related information
• Settings for remote and inside door unlock(p. 232)
• Unlocking the tailgate from inside the vehicle(p. 249)
• Activating and deactivating child safety locks(p. 249)
16
Provided the child safety lock is not activated.
Page 252 of 674

||
KEY, LOCKS AND ALARM
2502. Press the button on the driver's door control
panel. >The message
Rear child lock Activatedwill be shown in the instrument panel and the indicator light will illuminate to showthat the child safety locks are activated.
When the electric child safety locks are activated:
• the rear windows can only be opened usingthe driver's door control panel
• the rear doors cannot be opened from theinside.
To deactivate the child safety locks:
–Press the button on the driver's door control panel. > The message
Rear child lock
Deactivated will be shown in the instru-
ment panel and the indicator light will go out to show that the child safety locks aredeactivated.
When the engine is turned off, the current settingwill be saved. If the locks were activated whenthe engine was turned off, they will remain acti-vated the next time the engine is started.
SymbolMessageMeaning
Rear child lock Acti-
vatedThe child safety locks are acti-vated.
Rear child lock Deacti-
vatedThe child safety locks are deacti-vated.
Activating and deactivating manual child safety locks
Manual child safety lock (this is not the manual door lock).
–Use the detachable key blade in the remote key to turn the control.
The door cannot be opened from the inside.
The door can be opened from both the out- side and the inside.
NOTE
• The door's knob control only locks that specific door, not both rear doors simulta-neously.
• There are no manual child safety locks onmodels equipped with electronic childsafety locks.
Related information
•Locking and unlocking from inside the vehi- cle (p. 247)
• Detachable key blade (p. 240)
Page 259 of 674

KEY, LOCKS AND ALARM
}}
* Option/accessory.257
Activating and deactivating privatelocking
Private locking is activated using the function button in the center display and a PIN code.
NOTE
For the valet lock function to be activated the car must be in at least ignition mode I.
Entering security code before initial useThe first time the function is used, a security code must be selected. This code can then beused to deactivate private locking if the selectedPIN code has been lost or forgotten. The securitycode functions as a PUK (security) code for allPIN codes used for private locking. Save the security code in a safe place.To create a security code:
1. Tap the button for private locking in Function
view.
> A pop-up window will appear. 2. Enter your security code.
> The security code is saved. The privatelocking function is now ready for activa- tion.
If the system has been reset, the above proce-dure will need to be repeated.
Activating private locking1. Tap the button for private locking in Function view.
> A pop-up window will appear.
2. Enter the code you would like to use to unlock the tailgate and tap
Confirm.
> The tailgate will lock. A green indicator light will illuminate next to the button in Function view to confirm locked status.
Deactivating private locking1. Tap the button for private locking in Function view.
> A pop-up window will appear.
2. Enter the code used for locking and tap
Confirm.
> The tailgate will unlock. The green indica- tor light next to the button in Function view will go out to confirm unlocked sta-tus.
NOTE
If you have forgotten or lost your PIN code or if the PIN code has been entered incorrectlymore than three times, the security code canbe used to deactivate private locking.
NOTE
If private locking is activated and the vehicle is unlocked using Volvo On Call * or the Volvo
On Call * app, private locking will be deacti-
vated automatically.
Page 321 of 674

DRIVER SUPPORT
319
High temperaturesIf the temperature in the passenger compartment is very high, the camera/radar sensor will switchoff temporarily for approx. 15 minutes after theengine is started to protect its electronic compo-nents. When the temperature has cooled suffi-ciently, the camera/radar sensor will automati-cally restart.Damaged windshield
CAUTION
If there are cracks, scratches or stone chips on the windshield in front of any of the cam-era and radar unit "windows" and this coversan area of about 0.5 × 3.0 mm(0.02 × 0.12 in.) or more, contact a workshopto have the windshield replaced – an author-ized Volvo workshop is recommended. Failure to take action could result in reduced performance for the driver support systemsthat use the camera and radar unit. It could cause functions to be reduced, deac- tivated completely or produce an incorrectfunction response. To avoid the risk of loss of function, malfunc- tion or reduced function of the driver supportsystems that use the radar unit, the followingalso apply:
• Volvo advises
against repairing cracks,
scratches or stone chips in the area infront of the camera and radar unit – theentire windshield should instead bereplaced.
• Before replacing the windshield, contactan authorized Volvo workshop to verifythat the right windshield has beenordered and installed.
• The same type of windshield wipers or wipers approved by Volvo should be usedfor replacement.
CAUTION
If the windshield is replaced, the camera and radar unit must be recalibrated by a workshopto help ensure proper functioning of all of thevehicle's camera and radar-based systems –an authorized Volvo workshop is recom-mended.
Related information
•Radar sensor (p. 316)
Page 325 of 674

DRIVER SUPPORT
}}}}
323
CauseAction
The area of the windshield in front of the camera/radar sensor is dirty or covered by ice or snow. Clean the windshield in front of the camera/radar sensor and remove dirt, ice andsnow.
Thick fog, heavy rain or snow is blocking the radar signals or thecamera's range of visibility. No action. Heavy precipitation may sometimes prevent the camera/radar sensor fromfunctioning.
Water or snow is spraying/swirling up and blocking the radar signalsor the camera's range of visibility. No action. Very wet or snow-covered roads may sometimes prevent the camera/radar sensor from functioning.
There is dirt between the inside of the windshield and the camera/radar sensor. Consult a workshop to have the area of the windshield on the inside of the camera'scasing cleaned. An authorized Volvo workshop is recommended.
Bright sunlight No action. The camera/radar sensor will reset automatically when lighting conditionsimprove.
NOTE
Keep the windshield in front of the camera and radar unit clean.
High temperaturesIf the temperature in the passenger compartment is very high, the camera/radar sensor will switchoff temporarily for approx. 15 minutes after theengine is started to protect its electronic compo-nents. When the temperature has cooled suffi-ciently, the camera/radar sensor will automati-cally restart.
Damaged windshield
CAUTION
If there are cracks, scratches or stone chips on the windshield in front of any of the cam-era and radar unit "windows" and this coversan area of about 0.5 × 3.0 mm(0.02 × 0.12 in.) or more, contact a workshopto have the windshield replaced – an author-ized Volvo workshop is recommended. Failure to take action could result in reduced performance for the driver support systemsthat use the camera and radar unit.
It could cause functions to be reduced, deac- tivated completely or produce an incorrectfunction response. To avoid the risk of loss of function, malfunc- tion or reduced function of the driver supportsystems that use the radar unit, the followingalso apply:
• Volvo advises
against repairing cracks,
scratches or stone chips in the area infront of the camera and radar unit – theentire windshield should instead bereplaced.
• Before replacing the windshield, contactan authorized Volvo workshop to verify
Page 390 of 674

||
DRIVER SUPPORT
388
NOTE
The distance between the vehicle and parking spots should be 0.5-1.5 meters (1.6-5.0 ft)when PAP is looking for parking.
ParkingPAP parks the vehicle using the following steps:
1. The system searches for and measurespotential parking spaces.
2. The vehicle is steered while it is backing into the parking space.
3. The vehicle is positioned in the parking space (the driver may be prompted to shift gears).
Searching for and measuring potential
parking spots
The function can be activated in the center display's Functionview. It can also be accessed from the camera views.
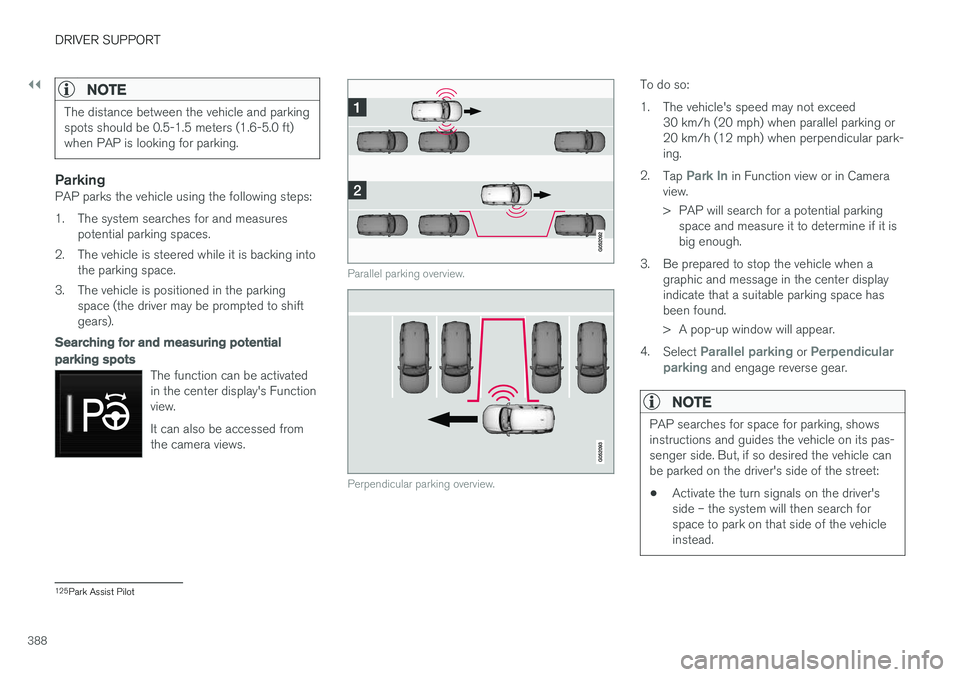
Parallel parking overview.
Perpendicular parking overview.
To do so:
1. The vehicle's speed may not exceed30 km/h (20 mph) when parallel parking or 20 km/h (12 mph) when perpendicular park-ing.
2. Tap
Park In in Function view or in Camera
view.
> PAP will search for a potential parking space and measure it to determine if it is big enough.
3. Be prepared to stop the vehicle when a graphic and message in the center displayindicate that a suitable parking space hasbeen found.
> A pop-up window will appear.
4. Select
Parallel parking or Perpendicular
parking and engage reverse gear.
NOTE
PAP searches for space for parking, shows instructions and guides the vehicle on its pas-senger side. But, if so desired the vehicle canbe parked on the driver's side of the street: • Activate the turn signals on the driver's side – the system will then search forspace to park on that side of the vehicleinstead.
125
Park Assist Pilot
Page 419 of 674

STARTING AND DRIVING
}}
* Option/accessory.417
•
Jump starting using another battery (p. 459)
• Selecting ignition mode (p. 418)
Ignition modes
The vehicle's ignition can be put in various modes (levels) to make different functions availa-ble.
To enable the use of a limited number of func- tions when the engine is not running, the ignition can be put in one of three different levels: 0, I
and II. These levels are referred to as "ignition
modes" in the Owner's Manual. The following table shows which functions are available in each ignition mode:
ModeFunctions
0 •The odometer, clock and tem- perature gauge are illuminated A
.
• The power seats
* can be
adjusted.
• The power windows can be used.
• The center display is activatedand can be used A
.
• The 12 V outlet in the cargo com- partment
* can be used.
• The infotainment system can be used A
.
In this ignition mode, the functions are available for a limited time and then switch off automatically.
I •The panoramic roof, power win-dows, 12 V outlet in passengercompartment, Bluetooth, naviga-tion, phone, blower and wind-shield wipers can be used.
• The power seats can be adjusted.
• The 12 V outlet in the cargo com-partment can be used.
Electrical current will be takenfrom the battery in this ignitionmode.
Page 420 of 674

||
STARTING AND DRIVING
418
ModeFunctions
II •The headlights illuminate.
• Warning/indicator lights illumi- nate for 5 seconds.
• A number of other systems areactivated. However, seat and rearwindow heating can only be acti-vated when the engine is running.
This ignition mode uses a lot ofcurrent from the battery andshould be avoided whenever pos-sible!
A Also activated when the door is opened.
Related information
• Starting the vehicle (p. 414)
• Adjusting the steering wheel (p. 193)
• Jump starting using another battery (p. 459)
• Selecting ignition mode (p. 418)
Selecting ignition mode
The vehicle's ignition can be put in various modes (levels) to make different functions availa-ble.
Selecting an ignition mode
Start knob in the tunnel console.
• Ignition mode 0
- Unlock the vehicle and
keep the remote key in the passenger com- partment.
NOTE
To set level I or II without engine start – do
not depress the brake pedal (or clutch pedal
for vehicles with manual transmission) when selecting this ignition mode.
• Ignition mode I
- Turn the start knob clock-
wise and release it. The control will automati- cally return to the original position.
• Ignition mode II
- Turn the start knob clock-
wise and hold it there for approx. 5 seconds.Release the knob, which will automaticallyreturn to its original position.
• Back to ignition mode 0
- To return to igni-
tion mode 0 from mode I and II, turn the start
knob clockwise and release it. The controlwill automatically return to the original posi-tion.
Related information
• Starting the vehicle (p. 414)
• Switching off the vehicle (p. 416)
• Ignition modes (p. 417)
• Adjusting the steering wheel (p. 193)
• Jump starting using another battery (p. 459)