2018 VOLVO XC60 T8 window
[x] Cancel search: windowPage 222 of 674

CLIMATE CONTROL
* Option/accessory.
220
Activating and deactivating airconditioning
The air conditioning cools and dehumidifies incoming air as needed.
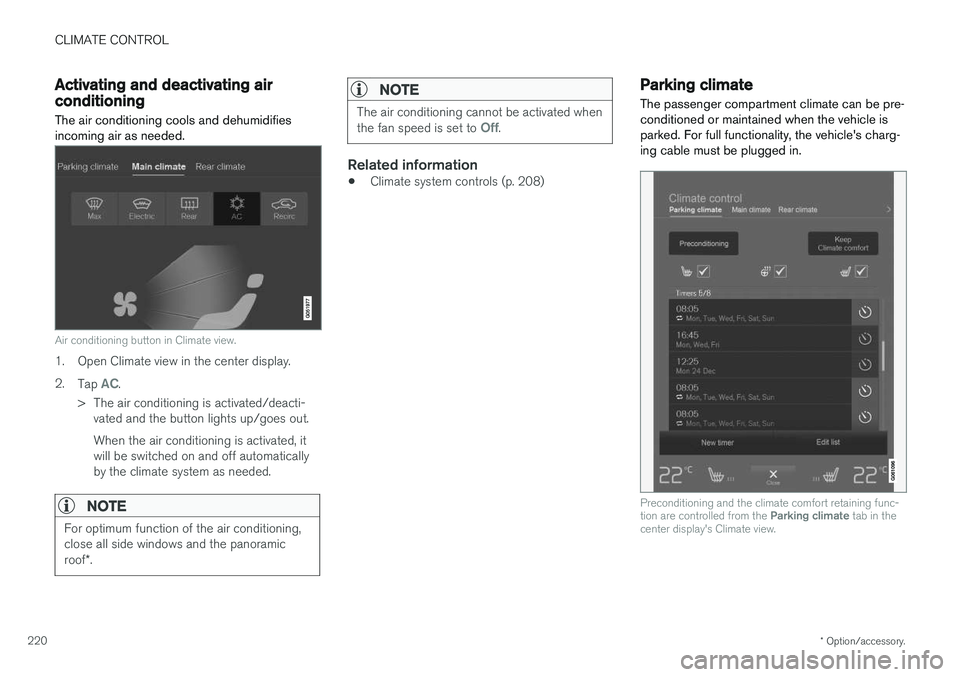
Air conditioning button in Climate view.
1. Open Climate view in the center display. 2. Tap
AC.
> The air conditioning is activated/deacti- vated and the button lights up/goes out. When the air conditioning is activated, it will be switched on and off automaticallyby the climate system as needed.
NOTE
For optimum function of the air conditioning, close all side windows and the panoramic roof *.
NOTE
The air conditioning cannot be activated when the fan speed is set to Off.
Related information
• Climate system controls (p. 208)
Parking climate
The passenger compartment climate can be pre- conditioned or maintained when the vehicle isparked. For full functionality, the vehicle's charg-ing cable must be plugged in.
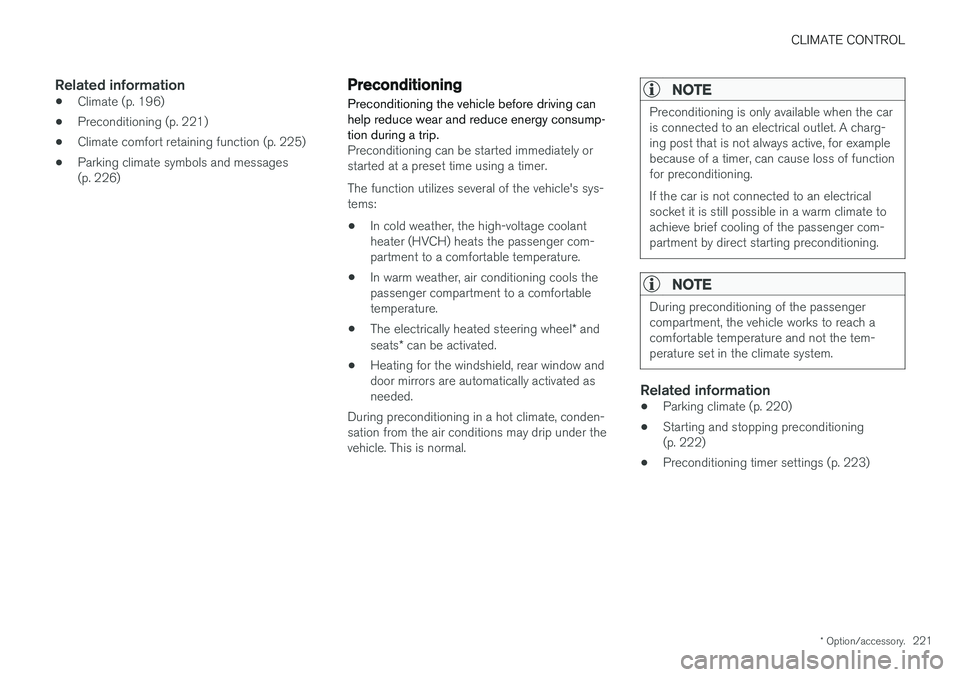
Preconditioning and the climate comfort retaining func- tion are controlled from the Parking climate tab in the
center display's Climate view.
Page 223 of 674

CLIMATE CONTROL
* Option/accessory.221
Related information
•Climate (p. 196)
• Preconditioning (p. 221)
• Climate comfort retaining function (p. 225)
• Parking climate symbols and messages (p. 226)
Preconditioning
Preconditioning the vehicle before driving can help reduce wear and reduce energy consump-tion during a trip.
Preconditioning can be started immediately or started at a preset time using a timer. The function utilizes several of the vehicle's sys- tems:
• In cold weather, the high-voltage coolantheater (HVCH) heats the passenger com-partment to a comfortable temperature.
• In warm weather, air conditioning cools thepassenger compartment to a comfortabletemperature.
• The electrically heated steering wheel
* and
seats * can be activated.
• Heating for the windshield, rear window anddoor mirrors are automatically activated asneeded.
During preconditioning in a hot climate, conden-sation from the air conditions may drip under thevehicle. This is normal.
NOTE
Preconditioning is only available when the car is connected to an electrical outlet. A charg-ing post that is not always active, for examplebecause of a timer, can cause loss of functionfor preconditioning. If the car is not connected to an electrical socket it is still possible in a warm climate toachieve brief cooling of the passenger com-partment by direct starting preconditioning.
NOTE
During preconditioning of the passenger compartment, the vehicle works to reach acomfortable temperature and not the tem-perature set in the climate system.
Related information
• Parking climate (p. 220)
• Starting and stopping preconditioning (p. 222)
• Preconditioning timer settings (p. 223)
Page 224 of 674

CLIMATE CONTROL
* Option/accessory.
222
Starting and stoppingpreconditioning
Preconditioning heats or cools the passenger compartment before driving. Preconditioningcan be started in the center display or from acellular phone.
Starting/stopping from the center display
Preconditioning button in the Parking climate tab in
Climate view.
1. Open Climate view in the center display. 2. Select the
Parking climate tab.
Window for seat/steering wheel heating in the Parking
climate tab in Climate view.
3. Tap the boxes to select if seat/steering
wheel heating should be activated along with preconditioning.
4. Tap
Preconditioning.
> Preconditioning starts/stops and the but- ton lights up/goes out.
NOTE
Preconditioning is only available when the car is connected to an electrical outlet. A charg-ing post that is not always active, for examplebecause of a timer, can cause loss of functionfor preconditioning. If the car is not connected to an electrical socket it is still possible in a warm climate toachieve brief cooling of the passenger com-partment by direct starting preconditioning.
NOTE
The vehicle doors and windows should be closed during preconditioning of the passen-ger compartment.
Starting from app *
A device with the Volvo On Call * app can be used
to start preconditioning or check settings. Pre- conditioning heats or cools the passenger com-partment (using the vehicle's air conditioning) toa comfortable temperature. The passenger compartment can also be precon- ditioned using the Engine Remote Start (ERS) 5
function using the Volvo On Call * app.
5
Certain markets only.
Page 225 of 674

CLIMATE CONTROL
}}
223
Related information
•Parking climate (p. 220)
• Preconditioning (p. 221)
• Preconditioning timer settings (p. 223)
Preconditioning timer settings
The timer can be set to finish preconditioning at a predetermined time.
The timer can store up to 8 preset times for:
• A time on a particular date
• A time on one or more days of the week, with or without the repeat function.
NOTE
Preconditioning is only available when the car is connected to an electrical outlet. A charg-ing post that is not always active, for examplebecause of a timer, can cause loss of functionfor preconditioning. If the car is not connected to an electrical socket it is still possible in a warm climate toachieve brief cooling of the passenger com-partment by direct starting preconditioning.
Related information
• Preconditioning (p. 221)
• Adding and editing timer setting for precon- ditioning (p. 223)
• Activating and deactivating preconditioningtimer settings (p. 224)
• Deleting preconditioning timer settings(p. 224)
Adding and editing timer setting forpreconditioning
The preconditioning timer can store up to 8 pre- set timer settings.
Adding a timer setting
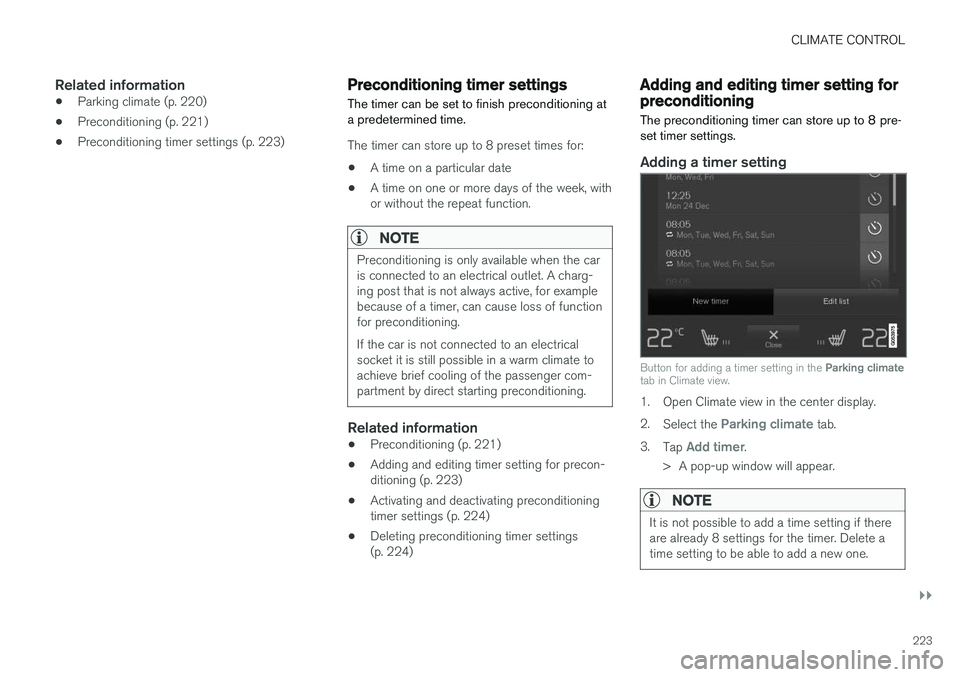
Button for adding a timer setting in the Parking climate
tab in Climate view.
1. Open Climate view in the center display. 2. Select the
Parking climate tab.
3. Tap
Add timer.
> A pop-up window will appear.
NOTE
It is not possible to add a time setting if there are already 8 settings for the timer. Delete atime setting to be able to add a new one.
Page 226 of 674

||
CLIMATE CONTROL
2244.
Tap
Date to set a time for a specific date.
Tap
Days to set a time for one or more days
of the week. With
Days: Activate/deactivate the repeat
function by selecting/deselecting the
Repeat weekly checkbox.
5. With
Date: Select a date for preconditioning
by scrolling in the date list using the arrows. With
Days: Select days of the week for pre-
conditioning by tapping the buttons for the days.
6. Set the time at which preconditioning should be completed by scrolling using the arrows inthe clock.
7. Tap
Confirm to add a timer setting.
> The timer setting will be added to the list and activated.
Editing a timer setting1. Open Climate view in the center display. 2. Select the
Parking climate tab.
3. Tap the timer setting you would like to change.
> A pop-up window will appear.
4. To edit a timer setting, follow the procedures described under the heading "Adding a timer setting" above.
Activating and deactivatingpreconditioning timer settings
Timer settings in the preconditioning timer can be activated or deactivated as needed.
Timer buttons in the Parking climate tab in Climate
view.
1. Open Climate view in the center display. 2. Select the
Parking climate tab.
3. Activate/deactivate a timer setting by tap- ping the timer button to the right of the set- ting.
> The timer setting is activated/deactivatedand the button lights up/goes out.
Deleting preconditioning timersettings
The button for editing a list/deleting a timer setting in the Parking climate tab in Climate view.
1. Open Climate view in the center display. 2.
Select the
Parking climate tab.
3. Tap
Edit list.
4. Tap the editing icon to the right in the list. >The icon will change to the text
Delete.
5. Tap
Delete to confirm.
> The timer setting will be deleted from the list.
Page 232 of 674

||
KEY, LOCKS AND ALARM
* Option/accessory.
230 The keyless system for locking/unlocking the doors and tailgate (Passive Entry
*) is available as
an option. This system has a range in a semicircle with a radius of approximately 1.5 meter (5 feet)out from the driver's door and approx. 1 meter(3 feet) out from the tailgate. With keyless start in combination with keyless locking and unlocking, the remote key can belocated anywhere in the passenger compartmentor cargo compartment in order to start theengine. Each remote key supplied with the vehicle can be linked to a driver profile with unique settings forthe vehicle. When a key with a specific profile isused, the vehicle settings are adjusted accordingto that profile.
Buttonless key, Key TagFor vehicles equipped with keyless locking and unlocking *, a smaller, lighter and button-less key
(Key Tag 3
) is also provided. It works the same
way as the regular remote key as regard keyless start and keyless locking and unlocking 4
. It does
not have a detachable key blade and its battery cannot be replaced.
Remote key buttons
The remote key has four buttons, one on the left side and three on the right.
Locking - Press once to lock the doors,
tailgate and fuel filler door and arm the alarm. Press and hold to close all windows.
Unlocking - Press once to unlock the
doors and tailgate and disarm the alarm. Press and hold to open all windows at the same time 5
.
Tailgate - Unlock and disarm the tailgate
only. On vehicles equipped with the power tailgate *, press and hold to automatically
open the tailgate. Press and hold to close an open tailgate (an audible warning signal will sound).
Panic alarm - Used to attract attention in
emergency situations. Press and hold the button for at least 3 seconds or press twicewithin 3 seconds to activate the turn signalsand horn. To deactivate, wait at least 5 sec-onds and press the button again. If no actionis taken, the panic alarm will deactivate auto-matically after 3 minutes.
WARNING
If anyone is left in the vehicle, make sure that power to the power windows and panoramic roof * is cut off by always taking the remote
key with you when you leave the vehicle.
NOTE
Be aware of the risk of locking the Key Tag in the vehicle. If the remote key/Key Tag is leftin the vehicle, it will be deactivated when thevehicle is locked and the alarm set usinganother valid key. The deactivated key will be reactivated when the vehicle is unlocked.
3 Även kallad sportnyckel.
4 The key is waterproof up to a depth of approx. 10 meters (30 feet) for up to 60 minutes, making it suitable for use in activities in and around water.
5 The total airing function can be used to e.g. quickly air out the vehicle in hot weather.
Page 247 of 674

KEY, LOCKS AND ALARM
* Option/accessory.245
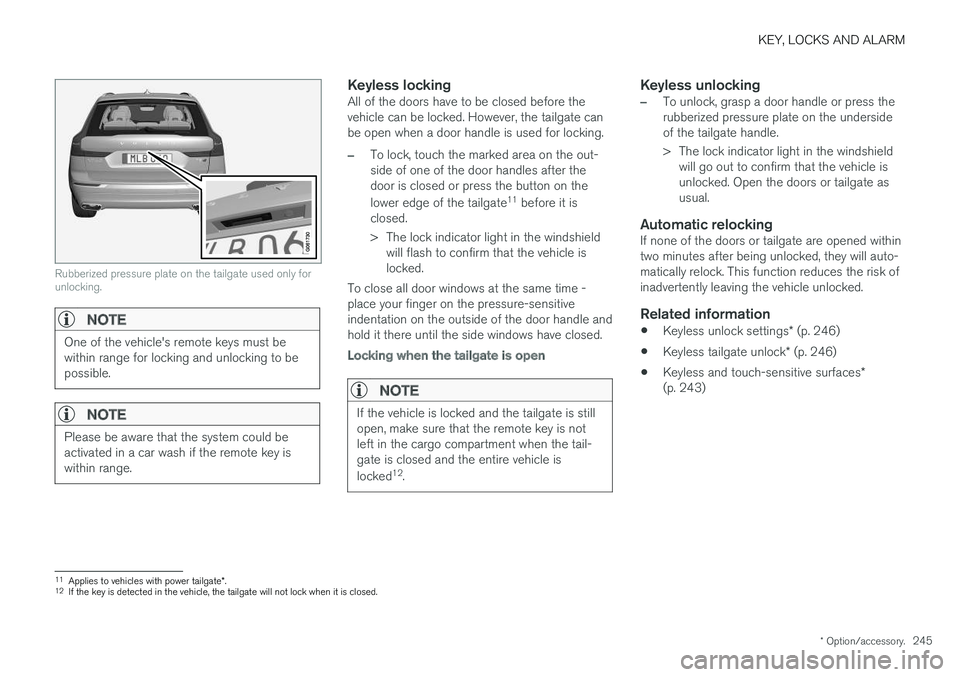
Rubberized pressure plate on the tailgate used only for unlocking.
NOTE
One of the vehicle's remote keys must be within range for locking and unlocking to bepossible.
NOTE
Please be aware that the system could be activated in a car wash if the remote key iswithin range.
Keyless lockingAll of the doors have to be closed before the vehicle can be locked. However, the tailgate canbe open when a door handle is used for locking.
–To lock, touch the marked area on the out- side of one of the door handles after thedoor is closed or press the button on the lower edge of the tailgate 11
before it is
closed.
> The lock indicator light in the windshield will flash to confirm that the vehicle is locked.
To close all door windows at the same time -place your finger on the pressure-sensitiveindentation on the outside of the door handle andhold it there until the side windows have closed.
Locking when the tailgate is open
NOTE
If the vehicle is locked and the tailgate is still open, make sure that the remote key is notleft in the cargo compartment when the tail-gate is closed and the entire vehicle is locked 12
.
Keyless unlocking
–To unlock, grasp a door handle or press the rubberized pressure plate on the undersideof the tailgate handle.
> The lock indicator light in the windshield
will go out to confirm that the vehicle is unlocked. Open the doors or tailgate asusual.
Automatic relockingIf none of the doors or tailgate are opened withintwo minutes after being unlocked, they will auto-matically relock. This function reduces the risk ofinadvertently leaving the vehicle unlocked.
Related information
• Keyless unlock settings
* (p. 246)
• Keyless tailgate unlock
* (p. 246)
• Keyless and touch-sensitive surfaces
*
(p. 243)
11 Applies to vehicles with power tailgate *.
12 If the key is detected in the vehicle, the tailgate will not lock when it is closed.
Page 249 of 674

KEY, LOCKS AND ALARM
}}
* Option/accessory.247
Antenna locations for the start andlock system
The vehicle is equipped with a keyless start and lock system 13
that uses a number of integrated
antennas positioned throughout the vehicle.
Under the cup holder in the front section of the tunnel console
In the upper front section of the left-side rear door 14
In the upper front section of the right-side rear door 14
In the cargo compartment 14
WARNING
Individuals with an implanted pacemaker should not allow the pacemaker to comecloser than 22 cm (9 in.) to the Keyless sys-tem antennas. The aim of this is to preventdisturbances between the pacemaker and theKeyless system.
Related information
•
Keyless and touch-sensitive surfaces
*
(p. 243)
• Remote key range (p. 233)
Locking and unlocking from insidethe vehicle
The doors and tailgate can be locked and unlocked from inside the vehicle using the cen-tral lock buttons in the front doors. The lock but- tons in the rear doors * can be used to lock/
unlock that particular door.
Central locking
Button with indicator light for locking and unlocking in front door.
Unlocking using the front door buttons
–Press the button to unlock all side doors
and the tailgate. Press and hold the
button to open all
side windows at the same time 15
.
13 The keyless lock system only applies to vehicles equipped with keyless locking and unlocking (Passive Entry *).
14 Only in vehicles equipped with keyless locking and unlocking (Passive Entry *).
15 The total airing function can be used to e.g. quickly air out the vehicle in hot weather.