2018 VOLVO XC60 T8 buttons
[x] Cancel search: buttonsPage 249 of 674

KEY, LOCKS AND ALARM
}}
* Option/accessory.247
Antenna locations for the start andlock system
The vehicle is equipped with a keyless start and lock system 13
that uses a number of integrated
antennas positioned throughout the vehicle.
Under the cup holder in the front section of the tunnel console
In the upper front section of the left-side rear door 14
In the upper front section of the right-side rear door 14
In the cargo compartment 14
WARNING
Individuals with an implanted pacemaker should not allow the pacemaker to comecloser than 22 cm (9 in.) to the Keyless sys-tem antennas. The aim of this is to preventdisturbances between the pacemaker and theKeyless system.
Related information
•
Keyless and touch-sensitive surfaces
*
(p. 243)
• Remote key range (p. 233)
Locking and unlocking from insidethe vehicle
The doors and tailgate can be locked and unlocked from inside the vehicle using the cen-tral lock buttons in the front doors. The lock but- tons in the rear doors * can be used to lock/
unlock that particular door.
Central locking
Button with indicator light for locking and unlocking in front door.
Unlocking using the front door buttons
–Press the button to unlock all side doors
and the tailgate. Press and hold the
button to open all
side windows at the same time 15
.
13 The keyless lock system only applies to vehicles equipped with keyless locking and unlocking (Passive Entry *).
14 Only in vehicles equipped with keyless locking and unlocking (Passive Entry *).
15 The total airing function can be used to e.g. quickly air out the vehicle in hot weather.
Page 250 of 674
||
KEY, LOCKS AND ALARM
* Option/accessory.
248
Alternative unlocking method
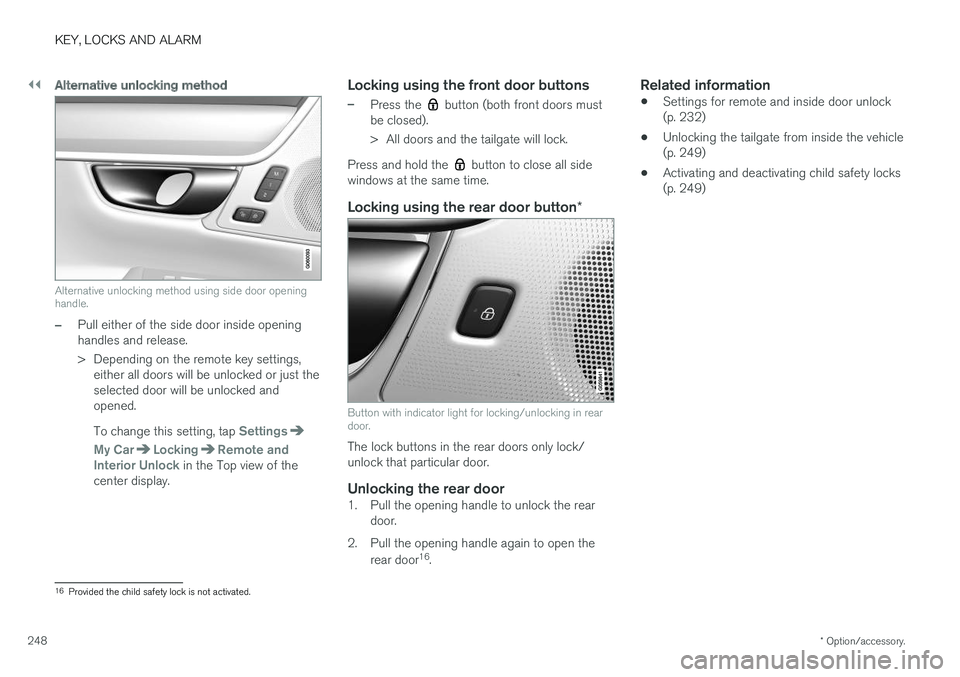
Alternative unlocking method using side door opening handle.
–Pull either of the side door inside opening handles and release.
> Depending on the remote key settings,
either all doors will be unlocked or just the selected door will be unlocked andopened. To change this setting, tap
Settings
My CarLockingRemote and
Interior Unlock in the Top view of the
center display.
Locking using the front door buttons
–Press the button (both front doors must
be closed).
> All doors and the tailgate will lock.
Press and hold the
button to close all side
windows at the same time.
Locking using the rear door button *
Button with indicator light for locking/unlocking in rear door.
The lock buttons in the rear doors only lock/ unlock that particular door.
Unlocking the rear door1. Pull the opening handle to unlock the rear
door.
2. Pull the opening handle again to open the rear door 16
.
Related information
• Settings for remote and inside door unlock(p. 232)
• Unlocking the tailgate from inside the vehicle(p. 249)
• Activating and deactivating child safety locks(p. 249)
16
Provided the child safety lock is not activated.
Page 270 of 674
DRIVER SUPPORT
268
Speed limiterA Speed Limiter (SL 11
) could be described as a
reverse cruise control. The driver regulates the vehicle's speed using the accelerator pedal, butis prevented by the Speed Limiter from inadver-tently exceeding a preset maximum speed.
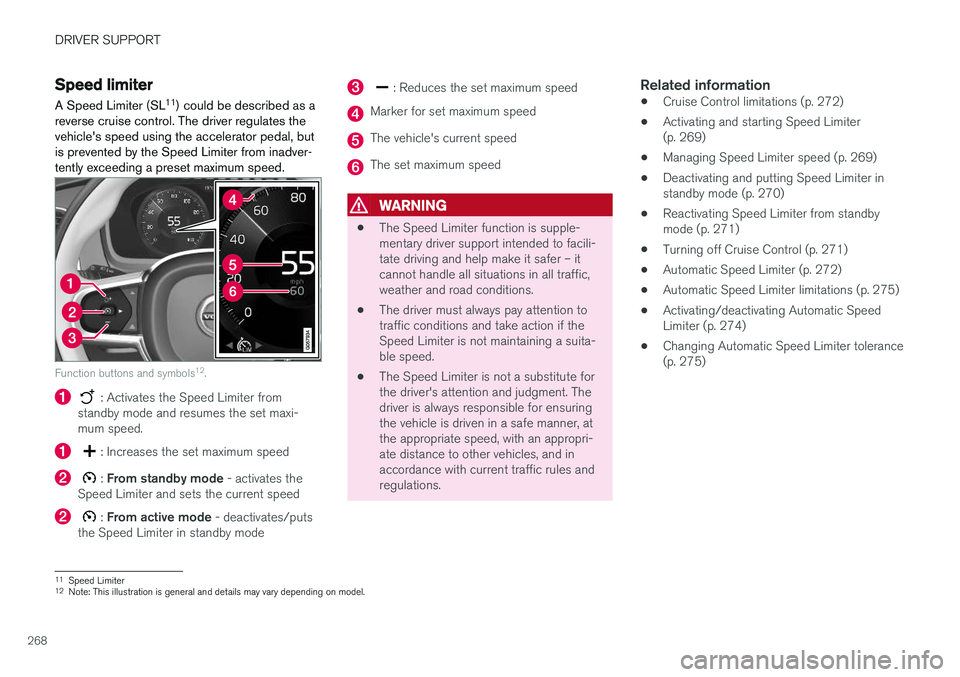
Function buttons and symbols 12
.
: Activates the Speed Limiter from
standby mode and resumes the set maxi- mum speed.
: Increases the set maximum speed
: From standby mode - activates the
Speed Limiter and sets the current speed
: From active mode - deactivates/puts
the Speed Limiter in standby mode
: Reduces the set maximum speed
Marker for set maximum speed
The vehicle's current speed
The set maximum speed
WARNING
• The Speed Limiter function is supple- mentary driver support intended to facili-tate driving and help make it safer – itcannot handle all situations in all traffic,weather and road conditions.
• The driver must always pay attention totraffic conditions and take action if theSpeed Limiter is not maintaining a suita-ble speed.
• The Speed Limiter is not a substitute forthe driver's attention and judgment. Thedriver is always responsible for ensuringthe vehicle is driven in a safe manner, atthe appropriate speed, with an appropri-ate distance to other vehicles, and inaccordance with current traffic rules andregulations.
Related information
•Cruise Control limitations (p. 272)
• Activating and starting Speed Limiter(p. 269)
• Managing Speed Limiter speed (p. 269)
• Deactivating and putting Speed Limiter instandby mode (p. 270)
• Reactivating Speed Limiter from standbymode (p. 271)
• Turning off Cruise Control (p. 271)
• Automatic Speed Limiter (p. 272)
• Automatic Speed Limiter limitations (p. 275)
• Activating/deactivating Automatic SpeedLimiter (p. 274)
• Changing Automatic Speed Limiter tolerance(p. 275)
11
Speed Limiter
12 Note: This illustration is general and details may vary depending on model.
Page 271 of 674
DRIVER SUPPORT
}}
269
Activating and starting SpeedLimiterThe Speed Limiter (SL 13
) function must be
selected and activated in order to regulate speed.
Putting Speed Limiter in standby mode
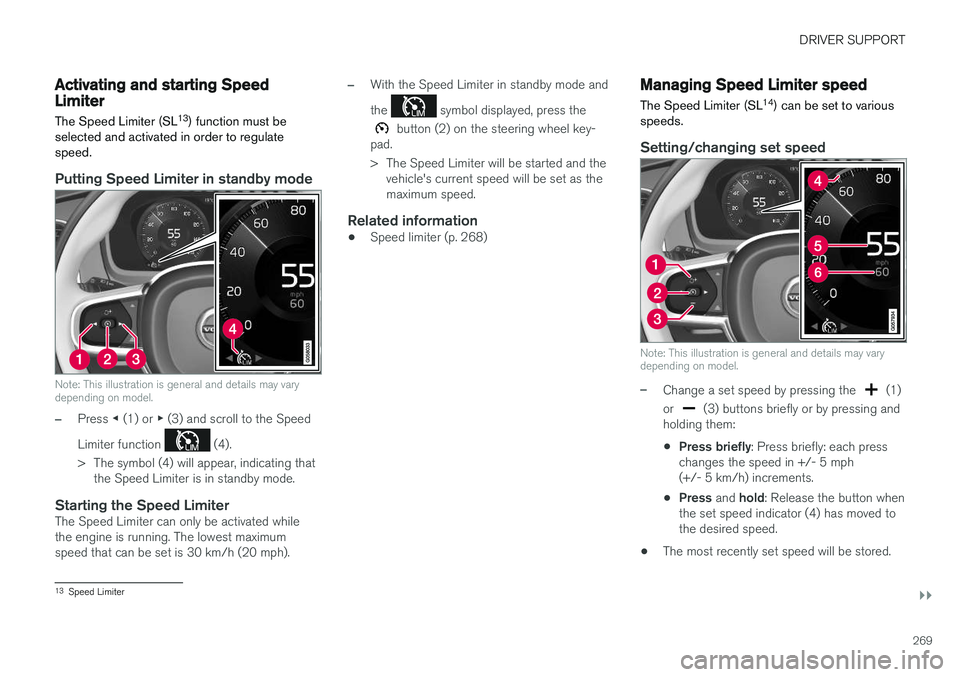
Note: This illustration is general and details may vary depending on model.
–Press ◀ (1) or ▶ (3) and scroll to the Speed
Limiter function
(4).
> The symbol (4) will appear, indicating that the Speed Limiter is in standby mode.
Starting the Speed LimiterThe Speed Limiter can only be activated while the engine is running. The lowest maximumspeed that can be set is 30 km/h (20 mph).
–With the Speed Limiter in standby mode and the
symbol displayed, press the
button (2) on the steering wheel key-
pad.
> The Speed Limiter will be started and the vehicle's current speed will be set as the maximum speed.
Related information
• Speed limiter (p. 268)
Managing Speed Limiter speed The Speed Limiter (SL 14
) can be set to various
speeds.
Setting/changing set speed
Note: This illustration is general and details may vary depending on model.
–Change a set speed by pressing the (1)
or
(3) buttons briefly or by pressing and
holding them:
• Press briefly
: Press briefly: each press
changes the speed in +/- 5 mph (+/- 5 km/h) increments.
• Press
and hold: Release the button when
the set speed indicator (4) has moved tothe desired speed.
• The most recently set speed will be stored.
13
Speed Limiter
Page 273 of 674
DRIVER SUPPORT
}}
271
Reactivating Speed Limiter fromstandby modeSpeed Limiter (SL 16
) can be reactivated after
having been temporarily deactivated and put in standby mode.
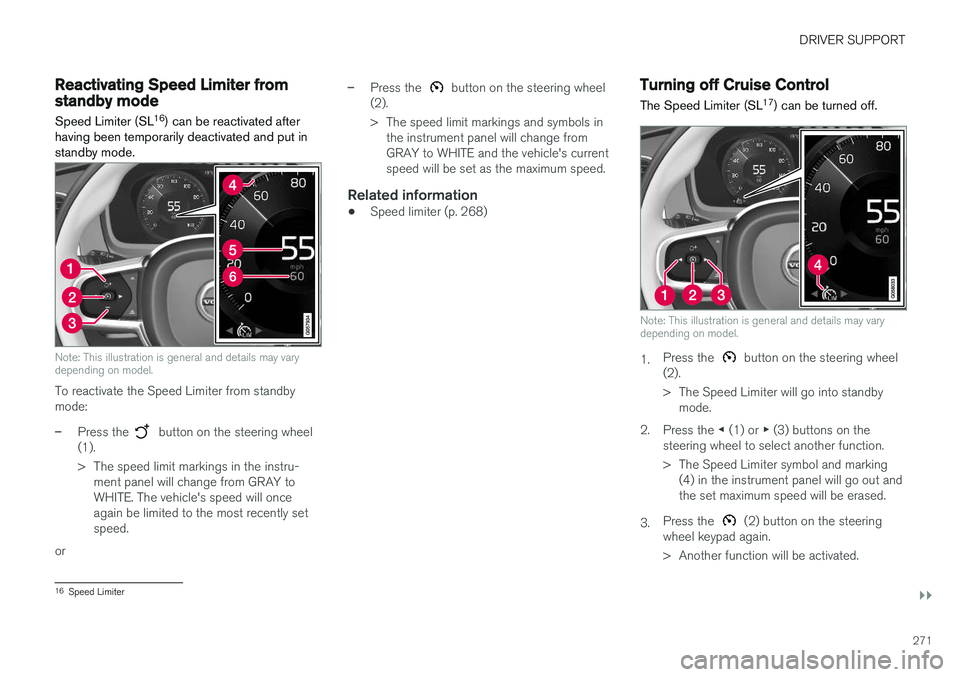
Note: This illustration is general and details may vary depending on model.
To reactivate the Speed Limiter from standby mode:
–Press the button on the steering wheel
(1).
> The speed limit markings in the instru- ment panel will change from GRAY to WHITE. The vehicle's speed will onceagain be limited to the most recently setspeed.
or
–Press the button on the steering wheel
(2).
> The speed limit markings and symbols in the instrument panel will change from GRAY to WHITE and the vehicle's currentspeed will be set as the maximum speed.
Related information
• Speed limiter (p. 268)
Turning off Cruise Control
The Speed Limiter (SL 17
) can be turned off.
Note: This illustration is general and details may vary depending on model.
1. Press the button on the steering wheel
(2).
> The Speed Limiter will go into standby mode.
2. Press the ◀ (1) or ▶ (3) buttons on the
steering wheel to select another function.
> The Speed Limiter symbol and marking (4) in the instrument panel will go out and the set maximum speed will be erased.
3. Press the
(2) button on the steering
wheel keypad again.
> Another function will be activated.
16 Speed Limiter
Page 277 of 674
DRIVER SUPPORT
* Option/accessory.275
Changing Automatic Speed Limitertolerance The Automatic Speed Limiter (ASL 23
) can be set
to different tolerance levels.
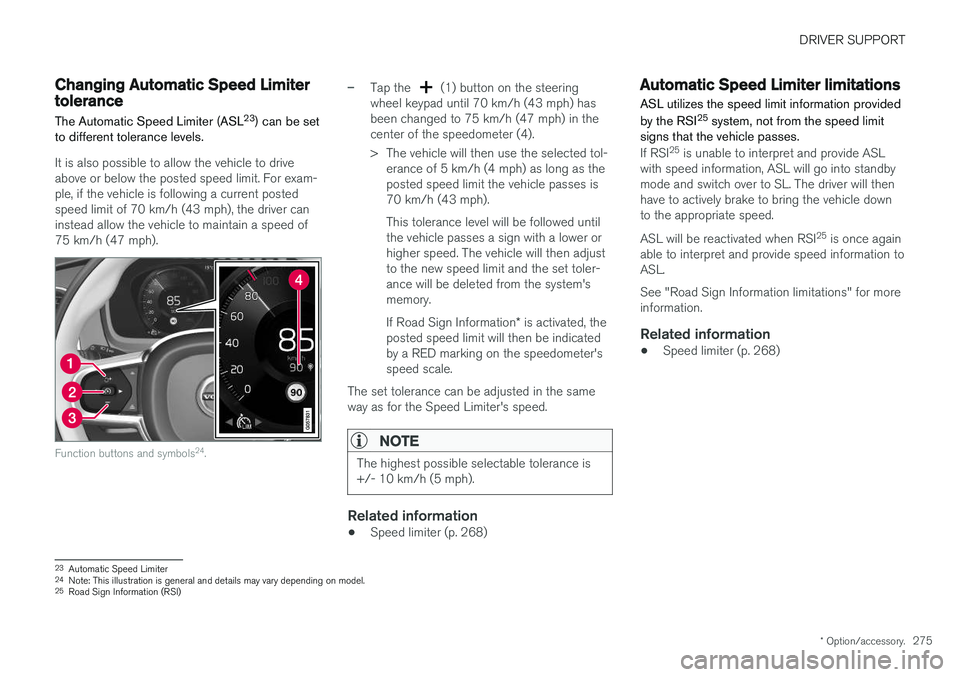
It is also possible to allow the vehicle to drive above or below the posted speed limit. For exam-ple, if the vehicle is following a current postedspeed limit of 70 km/h (43 mph), the driver caninstead allow the vehicle to maintain a speed of75 km/h (47 mph).
Function buttons and symbols 24
.
–Tap the (1) button on the steering
wheel keypad until 70 km/h (43 mph) has been changed to 75 km/h (47 mph) in thecenter of the speedometer (4).
> The vehicle will then use the selected tol- erance of 5 km/h (4 mph) as long as the posted speed limit the vehicle passes is70 km/h (43 mph). This tolerance level will be followed until the vehicle passes a sign with a lower orhigher speed. The vehicle will then adjustto the new speed limit and the set toler-ance will be deleted from the system'smemory. If Road Sign Information * is activated, the
posted speed limit will then be indicated by a RED marking on the speedometer'sspeed scale.
The set tolerance can be adjusted in the sameway as for the Speed Limiter's speed.
NOTE
The highest possible selectable tolerance is +/- 10 km/h (5 mph).
Related information
• Speed limiter (p. 268)
Automatic Speed Limiter limitations
ASL utilizes the speed limit information provided by the RSI 25
system, not from the speed limit
signs that the vehicle passes.
If RSI 25
is unable to interpret and provide ASL
with speed information, ASL will go into standby mode and switch over to SL. The driver will thenhave to actively brake to bring the vehicle downto the appropriate speed. ASL will be reactivated when RSI 25
is once again
able to interpret and provide speed information to ASL. See "Road Sign Information limitations" for more information.
Related information
• Speed limiter (p. 268)
23
Automatic Speed Limiter
24 Note: This illustration is general and details may vary depending on model.
25 Road Sign Information (RSI)
Page 278 of 674
DRIVER SUPPORT
* Option/accessory.
276
Cruise control
Cruise Control (CC 26
) helps the driver maintain
an even speed to provide a more relaxing driving experience on highways and long, straight roadswith even traffic flows.
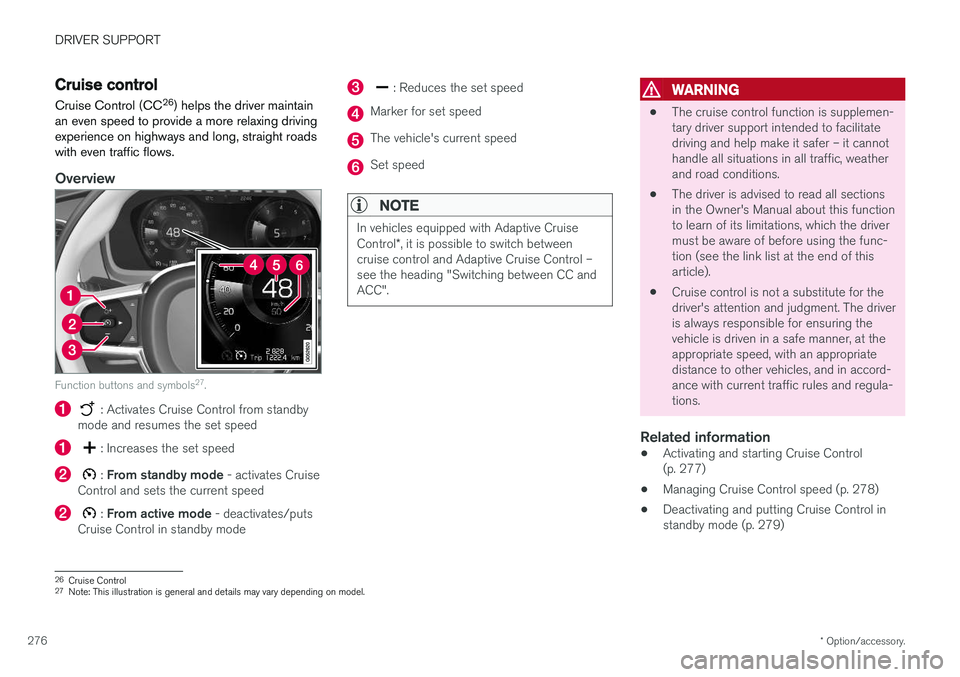
Overview
Function buttons and symbols 27
.
: Activates Cruise Control from standby
mode and resumes the set speed
: Increases the set speed
: From standby mode - activates Cruise
Control and sets the current speed
: From active mode - deactivates/puts
Cruise Control in standby mode
: Reduces the set speed
Marker for set speed
The vehicle's current speed
Set speed
NOTE
In vehicles equipped with Adaptive Cruise Control *, it is possible to switch between
cruise control and Adaptive Cruise Control – see the heading "Switching between CC andACC".
WARNING
• The cruise control function is supplemen- tary driver support intended to facilitatedriving and help make it safer – it cannothandle all situations in all traffic, weatherand road conditions.
• The driver is advised to read all sectionsin the Owner's Manual about this functionto learn of its limitations, which the drivermust be aware of before using the func-tion (see the link list at the end of thisarticle).
• Cruise control is not a substitute for thedriver's attention and judgment. The driveris always responsible for ensuring thevehicle is driven in a safe manner, at theappropriate speed, with an appropriatedistance to other vehicles, and in accord-ance with current traffic rules and regula-tions.
Related information
• Activating and starting Cruise Control(p. 277)
• Managing Cruise Control speed (p. 278)
• Deactivating and putting Cruise Control instandby mode (p. 279)
26
Cruise Control
27 Note: This illustration is general and details may vary depending on model.
Page 280 of 674
DRIVER SUPPORT
278
Managing Cruise Control speedCruise Control (CC 29
) can be set to various
speeds.
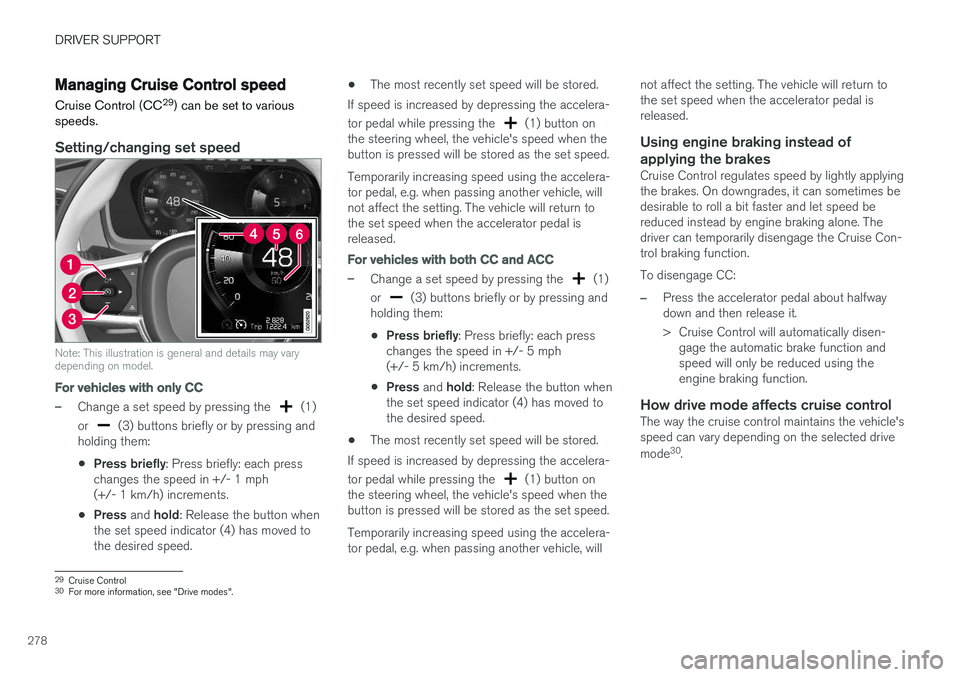
Setting/changing set speed
Note: This illustration is general and details may vary depending on model.
For vehicles with only CC
–Change a set speed by pressing the (1)
or
(3) buttons briefly or by pressing and
holding them:
• Press briefly
: Press briefly: each press
changes the speed in +/- 1 mph (+/- 1 km/h) increments.
• Press
and hold: Release the button when
the set speed indicator (4) has moved tothe desired speed. •
The most recently set speed will be stored.
If speed is increased by depressing the accelera- tor pedal while pressing the
(1) button on
the steering wheel, the vehicle's speed when the button is pressed will be stored as the set speed. Temporarily increasing speed using the accelera- tor pedal, e.g. when passing another vehicle, willnot affect the setting. The vehicle will return tothe set speed when the accelerator pedal isreleased.
For vehicles with both CC and ACC
–Change a set speed by pressing the (1)
or
(3) buttons briefly or by pressing and
holding them:
• Press briefly
: Press briefly: each press
changes the speed in +/- 5 mph (+/- 5 km/h) increments.
• Press
and hold: Release the button when
the set speed indicator (4) has moved tothe desired speed.
• The most recently set speed will be stored.
If speed is increased by depressing the accelera- tor pedal while pressing the
(1) button on
the steering wheel, the vehicle's speed when the button is pressed will be stored as the set speed. Temporarily increasing speed using the accelera- tor pedal, e.g. when passing another vehicle, will not affect the setting. The vehicle will return tothe set speed when the accelerator pedal isreleased.
Using engine braking instead of
applying the brakes
Cruise Control regulates speed by lightly applyingthe brakes. On downgrades, it can sometimes bedesirable to roll a bit faster and let speed bereduced instead by engine braking alone. Thedriver can temporarily disengage the Cruise Con-trol braking function. To disengage CC:
–Press the accelerator pedal about halfway down and then release it.
> Cruise Control will automatically disen- gage the automatic brake function and speed will only be reduced using theengine braking function.
How drive mode affects cruise controlThe way the cruise control maintains the vehicle'sspeed can vary depending on the selected drive mode 30
.
29 Cruise Control
30 For more information, see "Drive modes".